|
|
PBP Commentary |
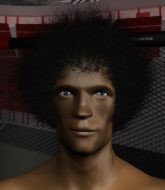
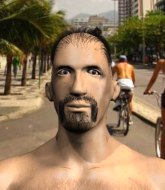
Coming up we have a featherweight MMA rules bout between Ryan Hamilton (ranked 0 p4p, 0 weight class) and Akira Hayashida (ranked 0 p4p, 0 weight class). Akira Hayashida struggled to make weight for this fight. He only made it down to 146.3lbs at the first attempt and had to take the additional two hours to make the official bout weight. Let's see how much it's taken out of him. Akira Hayashida has the power to score a knockout today if he connects clean with Ryan Hamilton's chin.
 |
|
 |
| 170 cm
27
145 lbs
3 - 3 - 0 |
|
180 cm
23
155 lbs
0 - 0 - 0 |
BJJ Blue Belt
Brawler
Experienced |
|
BJJ White Belt
Decent boxing
Solid chin |
|
| |
|
Ladies and gentlemen. This fight is 3 rounds, in the featherweight division.
Introducing the fighter to my left, fighting out of the red corner.
With a record of
3 - 3 - 0, fighting out of Los Angeles, Ryan Hamilton!
And introducing the fighter to my right, fighting out of the blue corner.
With a record of
0 - 0 - 0, fighting out of Los Angeles, Akira Hayashida!
The judges for this bout are , Timothy Bukovac and Jack Bonds.

The bell rings for round one and we are underway!
No luck for Hamilton with that takedown attempt.
Hamilton shoots in for a takedown but doesn't get it.
Hamilton shoots in and drives through. Hayashida sprawls well.
That's three failed takedown attempts in the round for Ryan Hamilton. That's going to take a lot out of him.
Hayashida tries to land a body kick

and Hamilton decides to take the opportunity to score a takedown. He's landed in Hayashida's guard.
Hayashida keeping moving, preventing Hamilton from controlling successfully.
The fighters are pressed up against the cage, both looking to find a bit of space to work.
Hayashida looking for a sweep. Not yet Hayashida, not yet.
Hayashida is persisting with the attempt to improve his position.
Hayashida keeping full guard, as Hamilton tries to pass.

That's one minute gone in the round.
Hamilton missing there with some ground and pound from the guard.
Hayashida pulls Hamilton in to control the position.
Hamilton trying to control the position from guard on top but Hayashida is wriggling around, looking for whatever he can.

Neither fighter is doing enough for the referee's liking and he's decided to stand them back up.
Hamilton will have to do better than that with his takedown attempts.

That's two minutes gone in the round.
The crowd are hurling abuse towards the fighters... You can hardly blame them though because there isn't a lot going on in the fight.
Hayashida misses with a double jab.
Hayashida stuffs the takedown.
Hamilton showing good head movement there, avoiding the strikes from Hayashida.
Hamilton shoots in but no luck this time.
No luck with that takedown attempt from Hamilton.
Hamilton is breathing heavily.
Hayashida throws a hard body shot but it just misses.

That's three minutes gone in the round.
Hayashida fails to land with a series of punches.
A right-left combo lands from Hayashida.
No luck with that takedown attempt from Hamilton.
A telegraphed takedown attempt from Hamilton is defended easily by Hayashida.
Hayashida throws a wild combination but nothing lands.
Sloppy strikes from Hayashida. Those never looked like landing.

That's four minutes gone in the round.
Neither fighter has done anything of merit for a good minute or two here and the crowd are not happy about it.
Hamilton fails to land the takedown.
Hayashida scores to the head and body with a nice combination!
Hayashida misses with a body kick.
Hamilton avoids the head kick by Hayashida.
Hayashida swinging wildly here.
Hayashida tries to bum rush Hamilton with a series of wild strikes but Hamilton uses good footwork to avoid the assault.
Hayashida will need to tighten up his combinations if he doesn't want to gas himself out, swinging at thin air.
And thats the end of the round the fighters go back to their corners.
A close round but Akira Hayashida will probably get the nod.
That's time! Back to the action!

Hamilton shoots for a takedown but Hayashida saw that one coming a mile off and avoided it easily.
Hayashida throws a combination but comes up with nothing but fresh air.
Hamilton shoots in and gets a takedown into half guard. Hamilton showed some decent athleticism there.
Hayashida is trying to get back to full guard.
Both fighters are absolutely exhausted here.
Hamilton not throwing his punches with enough precision this time.
That's one minute gone in the round.
Hayashida is doing well to avoid being mounted. He's controlling the position at the moment.
Hayashida is staying active underneath Hamilton, who seems content to just control the action from this position.
Hayashida trying to control but Hamilton postures up.
That's two minutes gone in the round.
Well. There's a bit of a lull in the action here and the crowd are starting to get restless.
The referee has ruled that neither fighter is active enough on the ground and has stood them back up.
Hamilton tries for a takedown but Hayashida circles away easily
and Hayashida counters with a crisp hook to the side of the head.
Hamilton fails miserably with a takedown attempt.
That's three failed takedown attempts in the round for Ryan Hamilton. That's going to take a lot out of him.
Hayashida closes this distance looking for a takedown but Hamilton circles away.
Hayashida throws a nice looking combination but Hamilton bobs and weaves to avoid any damage.
Hamilton fails with a rather predictable takedown attempt.
Hayashida scores to the head and body with a nice combination!
That's three minutes gone in the round.
Hayashida lands a jab to the nose.
Hayashida misses with a jab, cross combination.
Hayashida stuffs the takedown.
Ryan Hamilton is looking to throw some combinations by the looks of things.
Hayashida wants to land a leg kick but Hamilton is out of range.
Nice sprawl there from Hayashida as Hamilton shoots in.
Hamilton misses with a takedown attempt
and Hayashida cracks him with a counter punch right on the button.
Hayashida jabs away that one connects to the head of his opponent.
That's four minutes gone in the round.
There's not a lot going on here and the crowd are letting the fighters know they're not willing to tolerate a lack of action.
Hayashida scores with a nice one two combo and darts back out of range to avoid anything coming in the opposite direction.
Hamilton tries to shoot in for a takedown. He's got hold of a leg but Hayashida swivels and escapes.
The fighters are starting to perspire pretty heavily.
Hayashida looks to score with a combo but nothing lands.
Hayashida throws a series of punches but Hamilton avoids them all with ease.
Hamilton misses with a takedown attempt
enabling Hayashida to counter with a crisp jab.
A head kick misses from Hayashida.
The crowd thankful this round is nearly over.
Hamilton slips a jab and a cross from Hayashida.
Hamilton closes the distance and clinches up with Hayashida, looking for a takedown. Hamilton pushes Hayashida against the cage but Hayashida circles to the side and manages to break the clinch.
And thats the end of the round the fighters go back to their corners.
Akira Hayashida showed his class in that round. I'd imagine he'll take it on all the scorecards.
The corners get their ten second warning. Both fighters stand from their stools and stare eachother down, ready to get back to the action. This is the final round!

Hayashida throws a head kick but Hamilton moves out of range.
Hamilton tries to shoot in for a takedown. He's got hold of a leg but Hayashida swivels and escapes.
Hayashida slaps away a takedown attempt from Hamilton, before circling back to the center of the mat.
Hayashida's corner calls for a 1, 2 combination and Hayashida duly obliges.
Hamilton shoots in for a double leg but Hayashida sprawls well. That's going to sap some energy.
That's three failed takedown attempts in the round for Ryan Hamilton. That's going to take a lot out of him.
We've had a slow start to the round here - hopefully the action picks up.
Hamilton takes a solid shot to the body. That one hurt him but he's trying not to show it.
Both fighters are breathing heavily.
Hayashida tries a head kick but it misses.
Hayashida fakes low and throws an overhand right that catches Hamilton on the side of the head.
That's one minute gone in the round.
Hayashida throws a couple of head shots and lands with the final one - a decent hook, which struck Hamilton on the side of the head.
Hayashida fakes a head punch and goes low to the body. Nicely done.
Hayashida lands with a kick to the temple. Hamilton shrugs as if to say "is that all you've got?"
Hamilton misses with a takedown
and Hayashida counters with a two punch combo.
Left hook, right uppercut from Hayashida.
Hayashida throws a combination that misses
and Hamilton counters with a shoot takedown. Hayashida fights it but they end up in guard.
Hayashida keeping moving, preventing Hamilton from controlling successfully.
That's two minutes gone in the round.
Hayashida has Hamilton pulled in close to control his posture.
Hamilton wants to control from the top but Hayashida keeps moving.
That's three minutes gone in the round.

The referee decides to stand the fighters back up, due to lack of activity on the part of Ryan Hamilton.
Hayashida throws a combination but it was largely blocked by Hamilton.
Hamilton shoots in for a takedown. "I don't think so" says Hayashida as he avoids it easily.
Hamilton shoots for a double leg takedown but Hayashida sprawls well. He's pushed Hamilton's face into the mat and manages to get back to his feet relatively easily.
Hamilton avoids a punch combination nicely.
Hamilton misses with a takedown attempt. He shot from a bit too far out.
Hayashida scores to the head and body with a nice combination!
That's four minutes gone in the round.
The crowd are getting on the fighters' backs, as the pace has dropped off in the last minute or so.
Hamilton has a takedown stuffed.
Hamilton checks the leg kick nicely there.
Hayashida lands a jab, followed by a cross and another cross, as Hamilton backs up against the cage.
No luck for Hamilton with that takedown attempt.
Left hook, right uppercut from Hayashida.
And that's the end of the fight!
I would just about give that final round to Akira Hayashida.
I've got Hayashida winning every round here. Surely the decision will go his way and he'll pick up a well deserved decision victory. Over to the ring announcer for the scorecards.
Ladies and gentlemen, after 3 rounds of action, we go to the scorecards for a decision.
Judge Suge Night scores the fight for Akira Hayashida!
Judge Timothy Bukovac scores the fight for Akira Hayashida!
Judge Jack Bonds scores the fight for Akira Hayashida!
Akira Hayashida wins by unanimous decision!
|
|
|
|
|
|
|
|
|
|
|
|
|
|
|
|
|
|
|
|
|
|
|
| S |
C
A |
G |
S |
C
B |
G |
|
S |
C |
G |
|
energy
A | B |
|
hype
A | B |
|
pop
A | B |
|
mgr
A | B |
|
FIGHT
RATING
23% |
|
|
|
|
|
|

