|
|
PBP Commentary |
Coming up we have a heavyweight MMA rules bout between Donnie Badge (ranked 0 p4p, 0 weight class) and Seamus McDonald (ranked 0 p4p, 0 weight class). Buckle up people - heeeeeeeeeere we go!
 |
|
 |
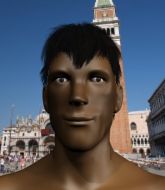
| 194 cm
24
240 lbs
7 - 6 - 0 |
|
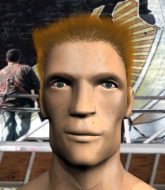
196 cm
22
245 lbs
2 - 2 - 0 |
BJJ Purple Belt
Excellent boxer
Very strong |
|
BJJ Purple Belt
Excellent boxer
Powerful |
|
| |
|
Ladies and gentlemen. This fight is 3 rounds, in the heavyweight division.
Introducing the fighter to my left, fighting out of the red corner.
With a record of
7 - 6 - 0, fighting out of Helsinki, Donnie Badge!
And introducing the fighter to my right, fighting out of the blue corner.
With a record of
2 - 2 - 0, fighting out of Helsinki, Seamus McDonald!
The judges for this bout are Matti Vanhoillinen, Anni Minnemäki and Johanna Lukiainen.

The bell rings for round one and we are underway!
McDonald swings widly with a right hand

and Badge counters with a nice double leg into guard.
Badge trying to pass the guard but can't manage it just yet.
Badge engaging in some classic timewasting tactics.

McDonald is throwing his legs up, looking for submissions. Badge is aware though and is defending well.
McDonald is trying to keep Badge in close.

Badge stands and steps away. McDonald gets to his feet too and we're back to the striking game.
Badge misses the shot to the body.
McDonald thows a body shot but no joy.
Badge connects with a jab.
A punch combination from Badge misses.
McDonald misses with a left hand
and Badge counters with a good right hand that lands right on the jaw.
Badge connects with an inside leg kick.

That's one minute gone in the round.
Badge feints a jab promting McDonald to slip. Badge then demonstrates his capabilities by jabbing again. McDonald slips again and ducks right into an uppercut.

It looks like Seamus McDonald has been cut.
McDonald digs a good body shot into Badge's ribs.
Badge is breathing heavily.
Badge lands a kick to the ribs of his opponent. Nice work there - in and out in a flash.
McDonald misses with a right hand
and Badge counters with a nice uppercut.
McDonald throws a lazy uppercut
and Badge counters with a nice shoot takedown that brings the fighters to the ground.
This is a great period of action - very entertaining stuff!
Badge avoids a guillotine attempt easily.
Badge trying to control but McDonald is working from the bottom.
McDonald is working from a closed guard but he's struggling to control his opponent.
McDonald escapes his hips to the side and looks to be working for an armbar. Badge gives him a little smile and shakes his head. No chance.

That's two minutes gone in the round.
McDonald looking for a guillotine here but Badge defends easily.
McDonald keeping moving, preventing Badge from controlling successfully.
The ref warns both fighters not to hold the cage as they work up against the meshing.
McDonald wants to sweep but no luck.
McDonald had isolated an arm as going for a kimura. Badge defends it easily.

That's three minutes gone in the round.
Badge wants to stand but McDonald has a closed guard, so he can't escape.
McDonald is looking for a guillotine. You can't force these things though and Badge defends well.
Badge looking to pass the guard.
McDonald throwing his legs up looking for a triangle.

McDonald pushes Badge off and gets back to his feet.

That's four minutes gone in the round.
The crowd are showing their displeasure at the lack of action as loud boos ring out around the arena.
McDonald misses with a right hand
and Badge counters with a series of strikes. McDonald will be more careful next time no doubt.
Badge connects with a high kick.
McDonald misses with an uppercut
and Badge counters with a good right hand that lands right on the jaw.
Sloppy strikes from Badge. Those never looked like landing.
McDonald throws a right hand that misses
and Badge counters with a shoot takedown. McDonald fights it but they end up in guard.
Badge trying to control the position from guard on top but McDonald is wriggling around, looking for whatever he can.
Badge won't allow McDonald to sweep him here.
As the round comes to an end the crowd are showing their appreciation for a great round of action.
Badge trying to control the position from guard on top but McDonald is wriggling around, looking for whatever he can.
Badge tries to stand but McDonald is controlling from the bottom.
And thats the end of the round the fighters go back to their corners.
Donnie Badge dominated that round.
The cut man is working on Seamus McDonald's cut.
That's the end of the interval. I'm sure that seemed a lot quicker than a minute for our two fighters! Back to the action.

McDonald lunges in with swinging rights and lefts but Badge circles away quickly and effectively.
Badge slips under a jab from McDonald.
McDonald misses with an uppercut
and Badge counters with a shot to the ribs. That looked like it hurt.
A shot to the body from McDonald misses
and Badge counters with a one-two to the body.
Badge throws a feint and then finishes with a kick to the body.
McDonald swings and misses with a shot to the body

and Badge moves into the clinch.
Badge lands a takedown into guard.
McDonald looking to sweep using the butterfly guard but Badge puts pay to that idea as he passes nicely into half guard.
McDonald trying to control here.
McDonald is refusing to be controlled, as Badge sits in half guard.
McDonald trying to hold on to Badge's head to control him but Badge postures up.
Both fighters are absolutely exhausted here.
That's one minute gone in the round.
McDonald manages to get to full guard.
McDonald tries to land a sweep but no joy.
McDonald working for a triangle but Badge defends it easily.
McDonald is working an open guard here, looking to improve his position. No doubt that will leave him open to counters but at least he's being more offensive.
McDonald throws his legs up looking for a submission but Badge uses it to pass to side control.
That's two minutes gone in the round.
The crowd are starting to boo a lack of action.
McDonald sneaks a leg under to get back to half guard.
Badge content to control rather than advance.
McDonald throws a sloppy strike from the bottom. He's now off balance and Badge manages to pass to side control.
Donnie Badge overall seems to be getting the better of the ground position in the fight so far.
McDonald is trying to control Badge's posture but Badge avoids it.
McDonald tries to slip a leg under to move to half guard but Badge presses down on the leg and jumps into full mount!
That's three minutes gone in the round.

Badge is in full mount, looking to secure a guillotine but McDonald is surviving well by controlling Badge's body position as best he can.
McDonald is looking to get to half guard.
Badge is working for a guillotine from mount but McDonald frees his head quite easily.
McDonald tries to hold on but Badge pushes him away.
McDonald is trying to stand but he's not in a good position to be doing that! Badge has taken his back!
That's four minutes gone in the round.
My god... these two guys really need to pick up the pace or everyone will leave to go get a beer.
Badge is hanging on to McDonald's back as he tries to escape.
Badge is working for the rear naked choke. He has one arm under the chin but McDonald has hold of the other arm. A bit of a stalemate here.
McDonald is trying to break free.
Badge is working hard for the rear naked choke here.
The fighters are pressed up against the cage, both looking to find a bit of space to work.
McDonald tries to escape the position - he's now mounted. Is that better or worse? Hard to tell!
McDonald holds on to Badge around his waist, trying desperately to prevent any attacks.
McDonald is looking to improve his position but Badge isn't that keen on the idea.
And thats the end of the round the fighters go back to their corners.
Donnie Badge dominated that second round.
The cut man is working on Seamus McDonald's cut.
The referee calls time. The cornermen exit stage left and we're back to business. This is the final round!

Badge takes one to the chin there.
Donnie Badge is looking to throw some combinations by the looks of things.
Some wild striking there from McDonald.
McDonald throws a head kick but Badge moves out of range.
Badge lands with a kick to the ribs.
McDonald misses the body punch
and Badge counters with a body kick.
Badge moves into the clinch successfully.
Badge has had enough of the clinch and is looking to separate.

Badge manages to break the clinch.
Donnie Badge is winning the standup battle so far.
McDonald throws a left and a right that both miss
and Badge counters with a shoot takedown into half guard.
Fantastic stuff here - a very entertaining period of action, which has drawn cheers from the crowd.
Badge drops an elbow to the side of McDonald's head.
Badge stands, ready to strike. The ref makes him back up and allows McDonald to get to his feet.
Both fighters are breathing heavily.
McDonald looks to score with a jab to the body but Badge is just out of range.
That's one minute gone in the round.
Badge looking to take his opponent's legs away with the low kicks.
Badge explodes with a nice body kick and back out of range. Nice work.
McDonald on the wrong end of a nice hook.
Badge moves into the clinch.
Badge drops down looking for an ankle pick but McDonald pulls his leg out and moves away.
McDonald lands with a kick to the temple. Badge shrugs as if to say "is that all you've got?"
Badge dances in quickly and lands a nice inside leg kick on McDonald. That did some damage!
McDonald swings for the body but Badge moves out of range.
McDonald has his front leg slapped to the side - a nice low kick landing there from Badge.
McDonald throws an off balance right hand
and Badge counters with a three punch combination, finished off with a leg kick. Nice work.
Badge explodes with a nice body kick and back out of range. Nice work.
Badge stuns McDonald with a nice body shot, before stepping back out of range.
McDonald has developed a nice purple lump on his ribcage, as a result of some heavy body kicks from Badge.
McDonald misses with a lunging right hand
and Badge counters with a three punch combination, finished off with a leg kick. Nice work.
That's two minutes gone in the round.
McDonald lands with a thumping leg kick.
McDonald tries a switch kick but it misses it's target.
Badge punishes McDonald's body with a nice straight punch.
McDonald takes a thudding leg kick, right into the meat of the thigh.
Badge throws a head kick but McDonald moves out of range.
A telegraphed right hand from McDonald misses the target.
McDonald throws an ugly left hook that misses
and Badge counters with a driving takedown into guard. Nice work there by Badge.
This is a great period of action - very entertaining stuff!
McDonald is looking to sinch up a triangle. Badge throws the leg off to one side though and gets in tight to McDonald's body to avoid the submission. McDonald has instead reached around Badge's neck and now has a guillotine! Oh, this is biiiig trouble! McDonald arches his back and squeezes and forces the tap from his hapless opponent.
Ladies and gentlemen, after 2:50 of round 3, we have a winner by way of Submission (Guillotine). Seamus McDonald!
|
|
|
|
|
|
|
|
|
|
|
|
|
|
|
|
|
|
|
|
|
|
|
| S |
C
A |
G |
S |
C
B |
G |
|
S |
C |
G |
|
energy
A | B |
|
hype
A | B |
|
pop
A | B |
|
mgr
A | B |
|
FIGHT
RATING
94% |
|
|
|
|
|
|
