|
|
PBP Commentary |
Coming up we have a lightweight MMA rules bout between Marcus Hawthorn (ranked 0 p4p, 0 weight class) and John Davies (ranked 0 p4p, 0 weight class). Hawthorn comes into the arena with Sam & Dave - Soul Man blaring out of the sound system. Davies is bobbing his head along to his entrance song: Still D.R.E. Over to our ring announcer for the fighter introductions!
 |
|
 |
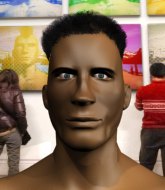
| 175 cm
21
170 lbs
6 - 3 - 1 |
|
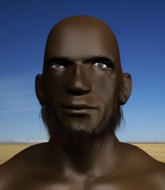
170 cm
25
160 lbs
4 - 0 - 0 |
BJJ Blue Belt
Basic striking
Cardio machine |
|
Good wrestler
Counter striker
Enjoys gardening |
|
| |
|
Ladies and gentlemen. This fight is 3 rounds, in the lightweight division.
Introducing the fighter to my left, fighting out of the red corner.
With a record of
6 - 3 - 1, fighting out of London, Marcus Hawthorn!
And introducing the fighter to my right, fighting out of the blue corner.
With a record of
4 - 0 - 0, fighting out of London, John Davies!
The judges for this bout are Richard Clark, Sam Margolis and Chris Edwards.

The bell rings for round one and we are underway!
Hawthorn misses with a jab, cross combination.
Hawthorn tries to grapple but his opponent circles

and Davies decides to take the opportunity to score a takedown. He's landed in Hawthorn's guard.
Davies is in close to Hawthorn's body, working some short punches and elbows.
Davies tries to free his leg and advance position but Hawthorn is retaining full guard.
A big thud reverberates around the arena there as Davies accidentally thumps the mat. Hopefully he's not broken his hand.
Davies throwing elbows and punches but not connecting, as Hawthorn works some decent striking defense from the bottom.
Davies stops Hawthorn from standing up.

That's one minute gone in the round.
The referee must be thinking about standing these guys back up.
Davies stands up over Hawthorn, holding his feet. He dives back in and lands a decent shot to the head.
Davies trying to control the position from guard on top but Hawthorn is wriggling around, looking for whatever he can.
The fighters are pressed up against the cage, both looking to find a bit of space to work.

Marcus Hawthorn has forced the referee to step in and bring the fight back to the feet.
Excellent takedown into side control there by Davies.
Davies taking a breather here.
Hawthorn pushes Davies away and creates a bit of space to escape. He's almost out here... but no, Davies gets a good hold of his legs and remains firmly in side control.

That's two minutes gone in the round.
Davies tries to land with some ground and pound but misses.
Hawthorn is trying to buck Davies off.

That's three minutes gone in the round.
Davies tries to score with some ground and pound. Hawthorn controls his posture well this time though and the shots don't do any damage.
Hawthorn wants to escape from the position here - easier said than done!
Hawthorn taking a bit of punishment here - Davies scoring with strikes.
Davies in side control, throwing shots but Hawthorn defends.

That's four minutes gone in the round.
The crowd are starting to boo a lack of action.

Davies tries for a kimura. Not really close to a finish though.

Hawthorn explodes and escapes back to his feet! Nice escape there!
Hawthorn throws a combination that misses
and Davies counters with a takedown into full mount! That could mean trouble for Hawthorn!
And thats the end of the round the fighters go back to their corners.
John Davies dominated that round.
OK. That's time! The bell goes and we're back to the action.

Hawthorn looks to land a left hand but Davies moved out of range nicely.
The fight stays on the outside here - Hawthorn looks like he's thinking about clinching though.
Hawthorn lands with a two punch combination before moving back out of range.
Hawthorn fails with an attempt to clinch.
Hawthorn throws a one two combo.
Davies fails with the takedown.
A combination from Hawthorn does no damage.
Hawthorn throws a low kick but it's checked well by Davies.
Davies fails miserably with a takedown attempt.
Hawthorn fails in his attempt to clinch.
Davies fails with a rather predictable takedown attempt.
Marcus Hawthorn has stuffed three takedown attempts in the round now. That's going to take a lot out of John Davies.
That's one minute gone in the round.
Hawthorn throws a nice outside leg kick.
Davies fails miserably with a takedown attempt.
A combination from Hawthorn does no damage.
Davies shoots in looking for a double leg takedown. Hawthorn defends it nicely.

Hawthorn rushes Davies and presses him up against the cage.
A frustrated look appears on Davies's face as he tries to break the clinch.
Hawthorn unloads a knee to the mid-section. Davies lets out a prehistoric sounding urrrrgh.
Hawthorn lands an elbow inside that Davies shrugs off.

Hawthorn breaks from the clinch.
Davies throws the overhand right but ducks down into a quick takedown attempt. Hawthorn was covering up waiting for the punch and Davies finishes the takedown easily into guard.
That's two minutes gone in the round.
Davies is looking to work some ground and pound but Hawthorn has wrist control.
Hawthorn wants to stand but Davies is controlling the position.
Davies is standing up over Hawthorn. Hawthorn looks to escape but Davies dives into side control.
That's three minutes gone in the round.
Davies looking to control but instead Hawthorn has slipped a leg in, to regain half guard.
Davies looks to land a strike but Hawthorn avoids it nicely and regains full guard.
That's four minutes gone in the round.
The crowd are getting on the fighters' backs, as the pace has dropped off in the last minute or so.
Davies stops Hawthorn from standing up.
Davies throwing elbows and punches but not connecting, as Hawthorn works some decent striking defense from the bottom.
Davies trying to control but Hawthorn is working from the bottom.

Davies stands up from guard. Let's bang!
And thats the end of the round the fighters go back to their corners.
Marcus Hawthorn dominated that second round.
That's time! Back to the action! This is the final round!

Hawthorn throws a nice outside leg kick.
Hawthorn defends well against a solid takedown attempt from Davies.
Hawthorn tries a head kick but it misses.
Hawthorn fakes a couple of low kicks, before throwing one on the third attempt. It connects and Davies has to reset his feet before getting ready to engage.
Hawthorn tries to clinch there but Davies circles away.
Hawthorn lands with a nice combination. Davies backs away looking to recover.
Davies blocks the body kick.
Hawthorn fails with an attempt to clinch.
Davies ducks under a wild hook from Hawthorn.
Hawthorn tries a head kick but it misses.
Davies takes a really solid shot there but just smiles back and shrugs his shoulders.
Ouch! a nice leg kick from Hawthorn, right into the meat.
Davies throws a head kick that misses and slips in the process. He scrambles back to his feet and the fighters circle.
That's one minute gone in the round.
Davies fakes high and shoots in for a takedown but Hawthorn avoids it really well and circles away.
A good leg kick by Hawthorn.
Davies on the wrong end of a nice low kick. He's acting like it's no big deal but he doesn't want to take many more of those.
Marcus Hawthorn seems to be the more aggressive standup fighter in this bout.
The fight stays on the outside here - Hawthorn looks like he's thinking about clinching though.
Hawthorn tries to clinch but is not successful on this occasion.
Davies keeps the fight on the outside.
Hawthorn lunges in with swinging rights and lefts but Davies circles away quickly and effectively.
No luck with that takedown attempt from Davies.
Marcus Hawthorn has stuffed three takedown attempts in the round now. That's going to take a lot out of John Davies.
Hawthorn tries to clinch but Davies is having none of it.
Marcus Hawthorn is looking to keep the fight on the feet at all costs.
That's two minutes gone in the round.
Davies checks the leg kick.
Davies tries to check the leg kick but that clearly hurt him.
The fight stays on the outside here - Hawthorn looks like he's thinking about clinching though.
Hawthorn tries to clinch there but Davies circles away.
Davies shoots in for a takedown. "Ole!" shouts Hawthorn as he jumps to the side.
Hawthorn wants to clinch.
Hawthorn doesn't manage to clinch there - Davies circles away.
Davies dodges the punch combination from Hawthorn.
That's three minutes gone in the round.
Hawthorn tries to sprawl but Davies drives through with a takedown into half guard.
Hawthorn is trying to stand back up but Davies is controlling him
Hawthorn is not content to let Davies control the position.
Davies working Hawthorn over with strikes.
That's four minutes gone in the round.
Davies is looking for a kimura here.
Davies thows a huge punch but Hawthorn dodges it nicely.
And that's the end of the fight!
Marcus Hawthorn showed his dominance in that final round.
I think Hawthorn has won this one but let's see what the judges have to say. Over to the ring announcer for the scorecards.
Ladies and gentlemen, after 3 rounds of action, we go to the scorecards for a decision.
Judge Richard Clark scores the fight 29:28
Judge Sam Margolis scores the fight 29:28
Judge Chris Edwards scores the fight 29:28
In favor of your winner, by unanimous decision... Marcus Hawthorn!
|
|
|
|
|
|
|
|
|
|
|
|
|
|
|
|
|
|
|
|
|
|
|
| S |
C
A |
G |
S |
C
B |
G |
|
S |
C |
G |
|
energy
A | B |
|
hype
A | B |
|
pop
A | B |
|
mgr
A | B |
|
FIGHT
RATING
36% |
|
|
|
|
|
|
