|
|
PBP Commentary |
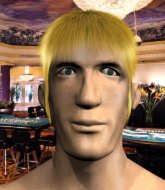
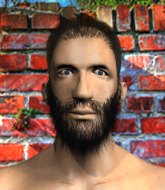
Coming up we have a featherweight MMA rules bout between Rick Slick (ranked 0 p4p, 0 weight class) and Jack Woods (ranked 0 p4p, 0 weight class). Well, I have no idea who's going to take this one!
 |
|
 |
| 166 cm
19
148 lbs
4 - 4 - 0 |
|
155 cm
26
130 lbs
4 - 1 - 0 |
Good wrestling
Basic striking
Experienced |
|
BJJ Brown Belt
Counter striker
Granite chin |
|
| |
|
Ladies and gentlemen. This fight is 3 rounds, in the featherweight division.
Introducing the fighter to my left, fighting out of the red corner.
With a record of
4 - 4 - 0, fighting out of Los Angeles, Rick Slick!
And introducing the fighter to my right, fighting out of the blue corner.
With a record of
4 - 1 - 0, fighting out of Los Angeles, Jack Woods!
The judges for this bout are , Timothy Bukovac and .

The bell rings for round one and we are underway!
A jab from Slick misses.
Slick throws a hook to the side of Woods's head but Woods sees it coming and ducks under it beautifully.
Slick throws a jab when Woods was well out of range.
Woods closes the distance looking to clinch
and Slick counters with a straight punch to the midsection.
Woods tries for a takedown but Slick circles away easily
and Slick counters with a lovely shot to the body.
Rick Slick seems to be the more aggressive standup fighter in this bout.
Slick misses with a body shot.
Slick throws an overhand right that lands on Woods's shoulder, as Woods tries to avoid the shot.
Slick just misses with a punch to the body.
A decent looking cross lands there for Slick.
Woods fails with the takedown
and Slick connects with a straight left hand counter down the middle.

That's one minute gone in the round.
Slick throws a hook to the body but it doesn't connect.
Woods tries for a takedown but Slick circles away easily

and Slick counters with a single leg into guard. Woods didn't expect that.
Rick Slick has stuffed three takedown attempts in the round now. That's going to take a lot out of Jack Woods.
Woods is working an open guard here, looking to improve his position. No doubt that will leave him open to counters but at least he's being more offensive.

Woods had isolated an arm as going for a kimura. Slick defends it easily.
The ref warns both fighters not to hold the cage as they work up against the meshing.
Woods trying to control the position.

That's two minutes gone in the round.
Slick preventing the sweep.
Woods has an active guard here but Slick has managed to pass into half guard.
Wooooo! Give it up for these two warriors! They are putting on a show!
Slick working some ground and pound from close in. He's looking to maintain this position and strike for a while by the looks of things... although he'll probably advance to full mount in a minute now I've said that.
Woods has no desire to be mounted, so is trying to control. Slick is working away from the top position though.
Slick thows a huge punch but Woods dodges it nicely.
Woods wants to control but Slick is keeping busy.

That's three minutes gone in the round.
Woods wants to get back to full guard but Slick has mounted him!
Slick has his opponent pinned against the cage, landing some nasty ground and pound that is really making a bit of a mess out of Woods's face.
Woods is looking to get to half guard.
Woods is persisting with the attempt to improve his position.
Slick lands with some strikes.

That's four minutes gone in the round.
Woods wants to hold on but Slick pushes him away.
Woods tries to reverse the position but Slick maintains control.
Slick throws an elbow from mount that misses. Lucky escape for Woods because Slick loaded up on that one.
Woods is squirming around, avoiding Slick's attempts to control the action.
Woods sneaks a leg back under and regains half guard and is working straight away to try and get back to guard. He hasn't managed just yet though.
The fighters are battling for position here. Woods manages to regain full guard. Nice work.
We've seen a great period of action over the last minute or so - credit to both fighters for going all out!
As the round comes to an end the crowd are showing their appreciation for a great round of action.
Slick would like to get this fight back to the feet but can't get free from the closed guard.
Woods tries to land a sweep but no joy.
And thats the end of the round the fighters go back to their corners.
Rick Slick dominated that round.
OK. That's time! The bell goes and we're back to the action.

Woods uses good head movement to avoid the hook from Slick.
Slick keeps the fight on the outside.
Slick thows a body shot but no joy.
Slick throws a big shot that misses.
Woods shoots in but doesn't get the takedown
letting Slick counter with a right hand.
A looping hook to the body misses from Slick. Woods does a little dance to reset his feet.
Slick throws a hook to the body but it doesn't connect.
Slick misses with a hook. Woods ducked under it nicely.
Woods shoots in looking for a takedown. Slick tries to sprawl out of it but Woods keeps driving through. The fighters are pinned against the cage. Slick manages to get underhooks and after a bit of a struggle, circles away and we're back to standing.
Slick misses with a body shot. Nice footwork from Woods.
That's one minute gone in the round.
Slick misses with a straight left.
Woods is looking to clinch.
Slick throws a looping overhand right but Woods ducks down to avoid it.
Woods slips a straight right by Slick.
Woods ducks under a wild hook from Slick.
Jab, jab by Slick - just one landing.
Slick throws a hook but Woods avoids it easily.
Woods tries to clinch but Slick is having none of it.
Woods fails in his attempt to clinch.
That's two minutes gone in the round.
Slick fakes high and swings low for a body shot but Woods manages to avoid it.
Woods moves out of range as Slick strikes.
Slick fakes high and swings low for a body shot but Woods manages to avoid it.
Slick misses with a looping right.
Woods shoots in looking for a takedown but Slick manages to keep the fight standing, pushing Woods's face into the canvas for good measure before circling away.
Rick Slick has stuffed three takedown attempts in the round now. That's going to take a lot out of Jack Woods.
Slick just misses with a punch to the body.
Slick fakes a jab and then connects with a hook.
Slick connects with a nice looking jab.
Slick swings for the body but Woods moves out of range.
Slick fakes high and swings low for a body shot but Woods manages to avoid it.
Woods tries to close the distance and clinch up but Slick swats him away and circles back towards the center.
That's three minutes gone in the round.
Slick lunges at Woods with a hook that half lands and is half blocked by Woods's hand.
Woods slips under a jab.
Woods doesn't succeed with the takedown
and Slick counters with a nice double leg into side control. Woods won't be happy with that.
Sloppy strikes there by Slick.
The fighters are pressed up against the cage, both looking to find a bit of space to work.
Woods regains half guard.
Woods gets full guard.
Rick Slick overall seems to be getting the better of the ground position in the fight so far.
Woods escapes his hips to the side and looks to be working for an armbar. Slick gives him a little smile and shakes his head. No chance.
Fantastic stuff here - a very entertaining period of action, which has drawn cheers from the crowd.
Woods is working from a closed guard but he's struggling to control his opponent.
That's four minutes gone in the round.
Woods has momentary wrist control but Slick slips an elbow through the middle.
Woods tries to land a sweep but no joy.
Slickis looking to pass into half guard but Woods pushes him away with his feet and jumps on top - now Woods is in guard.
Woods wants to control from the top but Slick keeps moving.
As the round comes to an end the crowd are showing their appreciation for a great round of action.
And thats the end of the round the fighters go back to their corners.
Rick Slick dominated that second round.
OK. That's time! The bell goes and we're back to the action. This is the final round!

Woods tries for a takedown but Slick circles away easily
and Slick decides to take the opportunity to score a takedown. He's landed in Woods's guard.
Slick trying to control the position from guard on top but Woods is wriggling around, looking for whatever he can.
Woods tries to strike from the bottom.
Woods manages to sweep nicely, so he's now on top. Slick manages to get himself to full guard.
Slick is trying to control the position but Woods postures up.
Woods is pushing down on Slick's leg trying to pass to half guard. Slick is fighting to maintain full guard but Woods has managed to sneak the leg through.
Woods is working for a kimura but Slick is defending it quite comfortably.
Woods is working for a submission here. He's got hold of the far side arm and he's looking for a kimura. He's cranking on the arm and he's got it! Slick is tapping out! Ouch, that looked like it hurt!
Ladies and gentlemen, after 1:04 of round 3, we have a winner by way of Submission (Kimura). Jack Woods!
|
|
|
|
|
|
|
|
|
|
|
|
|
|
|
|
|
|
|
|
|
|
|
| S |
C
A |
G |
S |
C
B |
G |
|
S |
C |
G |
|
energy
A | B |
|
hype
A | B |
|
pop
A | B |
|
mgr
A | B |
|
FIGHT
RATING
100% |
|
|
|
|
|
|
