|
|
PBP Commentary |
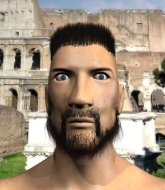
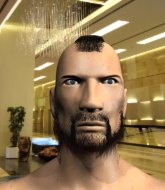
Coming up we have a lightweight MMA rules bout between Alkaline Solo (ranked 0 p4p, 0 weight class) and Noah Ward (ranked 0 p4p, 0 weight class). Solo's entrance music is Radio. A fine choice. Noah Ward will no doubt be trying to keep this one on the feet, where he has a distinct advantage.
 |
|
 |
| 170 cm
18
156 lbs
2 - 2 - 0 |
|
170 cm
22
160 lbs
1 - 0 - 0 |
BJJ Blue Belt
Brawler
KO power |
|
BJJ Blue Belt
Brawler
Very confident |
|
| |
|
Ladies and gentlemen. This fight is 3 rounds, in the lightweight division.
Introducing the fighter to my left, fighting out of the red corner.
With a record of
2 - 2 - 0, fighting out of Las Vegas, Alkaline Solo!
And introducing the fighter to my right, fighting out of the blue corner.
With a record of
1 - 0 - 0, fighting out of Las Vegas, Noah Ward!
The judges for this bout are George Francis, Daniel Franklin and Gwen Towbar.

The bell rings for round one and we are underway!
Solo circles away from the clinch attempt.
Solo looks exhausted already! Oh dear, he should have come in in better shape than this!
Ward wants to clinch.
Solo shoots in but Ward avoids the takedown attempt easily.
Ward fails with an attempt to clinch.
Solo shoots in but no luck this time.

Ward moves into range and clinches up with Solo.

Ward manages to break the clinch.
A good leg kick by Ward.
Ward lands a nice looking body kick.
Ward fakes with an overhand right and moves in to clinch with Solo, pushing him back against the cage.
The crowd cheering loudly, showing their appreciation for the quality fight we're seeing here.
Ward breaks from the clinch.
Noah Ward seems to be the more aggressive standup fighter in this bout.
Solo fails to land the takedown.
That's three failed takedown attempts in the round for Alkaline Solo. That's going to take a lot out of him.
The fight stays on the outside here - Ward looks like he's thinking about clinching though.
Ward pushes Solo up against the cage in a clinch.
Ward breaks from the clinch.

Solo gets caught flat footed, as Ward shoots in with a quick takedown into guard.

That's one minute gone in the round.

Solo is looking for a triangle but Ward pushes his legs off easily.

Ward stands and steps away. Solo gets to his feet too and we're back to the striking game.
Ward forces Solo back against the cage and clinches.
Knees in the clinch landing for Ward.
Ward lands an elbow that stopped Solo in his tracks for a moment.
Ward breaks the clinch and we're back to striking at distance.
Ward moves into the clinch successfully.
Ward breaks the clinch and we're back to striking at distance.
Ward moves into the clinch.
Ward escapes the clinch and we're back to striking.
Ward tries to close the distance and clinch but Solo swats him to one side with an open hand palm strike and circles away.
Ouch! a nice leg kick from Ward, right into the meat.
Ward tries to close the distance and clinch up but Solo swats him away and circles back towards the center.
Solo showing good head movement there, avoiding the strikes from Ward.
Ward clinches with his opponent.
Solo tries to pull guard but Ward won't allow it.

That's two minutes gone in the round.
Ward lands a body punch.
Solo has moved round to his opponent's back and is looking for a suplex! Oh snap! He's tossed Ward clear over his head and slammed him to the mat!
Solo has his opponent's back and is working for the choke.
The fighters are pressed up against the cage, both looking to find a bit of space to work.
Ward is trying to get back to his feet but he's not managed it yet.
Solo missing with punches from the back.
Ward is trying to get back to his feet but Solo has full control of the position and if anything, Ward has just worked his way into a worse spot.
Solo has his opponent's back and is working for the choke.
Ward manages to escape to his feet.

That's three minutes gone in the round.
Solo shoots in but Ward avoids the takedown attempt easily.
Ward drives through and clinches with Solo against the cage.
Ward stops a takedown attempt from Solo.
Ward breaks the clinch and we return to the middle of the mat.
Solo fails with a takedown attempt from distance.
Solo takes a body kick right on the floating rib. Ouchie.
Ward tries to clinch but is not successful on this occasion.
Solo shoots in for a takedown and gets it. Oh and he's advanced to full mount straight away.
Ward is not a happy chappy
he wants out of there.
Ward bucks up and throws Solo to the side - he's got back to his feet. Great escape!
Ward shoots in for a takedown but Solo shows good takedown defense.
The crowd are loving this. Great action here.
Ward tries to clinch but Solo is having none of it.

That's four minutes gone in the round.
Ward fails with an attempt to clinch.
Solo looks to clinch
and Ward counters by clinching up.
Ward manages to break the clinch.
Ward darts in trying to clinch
and Solo counters with a nice double leg into guard.
Ward manages to escape and get back to his feet.
No luck for Ward with that takedown attempt.
Ward takes a punch to the jaw and another one to the bread basket.
Ward wants to clinch.
Ward stuffs the takedown.
The crowd are going absolutely nuts as the round comes to an end - what a fantastic round of action!
Solo shoots in with a takedown attempt and he has Ward pinned against the cage. Ward gets the underhooks and manages to circle away.
Ward scores with a spinning back kick!
And thats the end of the round the fighters go back to their corners.
Noah Ward dominated that round.
The corners get their ten second warning. Both fighters stand from their stools and stare eachother down, ready to get back to the action.

Ward lands a kick to the ribs of his opponent. Nice work there - in and out in a flash.
Ward forces Solo back against the cage and clinches.
Ward managing to block the knees to the body from Solo.
Ward lands a nice elbow from the clinch.

It looks like Alkaline Solo has been cut.
Solo tries to pull guard but can't drag his opponent to the mat. Ward just stands there and leans against the cage.
Ward escapes the clinch and we're back to striking.
Solo takes a body punch but keeps moving.
Ward throws a head kick that half lands.

Solo is rocked!
The crowd cheering loudly, showing their appreciation for the quality fight we're seeing here.
Ward explodes with a nice body kick and back out of range. Nice work.
Ward lets loose with a powerful body kick. Solo will feel that in the morning.
Ward clinches.
Ward lands an elbow inside.
Ward lands a left hand.
Oh Solo is still all over the place! His legs are completely gone! Will he be able to recover?!!
Ward escapes the clinch and we're back to striking.
Solo seems to have got his legs back now.
Ward sees a low kick coming and goes to check it, but it's actually a body kick and it thuds into his unprotected ribs.
Both fighters are absolutely exhausted here.
Ward wants to clinch but Solo slips to the side
and Solo counters with a nice shoot takedown that brings the fighters to the ground.
Ward is looking to stand up but Solo isn't so interested in that idea.
Ward scrambles and gets back to his feet.
That's one minute gone in the round.
No joy there for Ward, who threw a few shots but didn't land.
Ward lands a high kick!
Noah Ward seems to be getting the better of the standup.
Solo shoots in for a takedown but doesn't get it.
Ward tries to clinch but Solo is having none of it.
Solo throws a head kick that misses and slips in the process. He scrambles back to his feet and the fighters circle.
Solo closes the distance and presses his opponent up against the cage.
Ward wants to break free but Solo has control.
Solo jumps guard and drags Ward to the mat. He's obviously going to be looking for submissions off his back.
Ward wants to get up but he can't break Solo's closed guard. He needs to be careful trying to break the legs open, as he's open to submissions here.
Solo manages to sweep nicely, so he's now on top. Ward manages to get himself to full guard.
Ward has his feet on Solo's hips. He pushes off and gets to his feet. Nice work.
Ward wants to clinch
and Solo counters with a takedown into full mount! That could mean trouble for Ward!
Ward bucks up and throws Solo to the side - he's got back to his feet. Great escape!
That's two minutes gone in the round.
Ward tries to close the distance and clinch up but Solo swats him away and circles back towards the center.
Solo swats away the attempt to clinch by Ward.
Solo fails miserably with a takedown attempt.
That's three failed takedown attempts in the round for Alkaline Solo. That's going to take a lot out of him.
The crowd cheering loudly, showing their appreciation for the quality fight we're seeing here.
Solo takes a head kick and keeps coming.
Ward tries to shoot in for a takedown. He's got hold of a leg but Solo swivels and escapes.
Ward gets a clinch.
Ward wants to push off and get back to the center of the mat but Solo has him pressed against the cage.
Solo will no doubt start fighting again in a minute but for now he's just having a little rest, leaning Ward up against the cage.
Ward breaks the clinch.
Ward tries to clinch there but Solo circles away.
Solo gets a takedown into half guard.
Solo is keen to just control but Ward is a slippery customer.
That's three minutes gone in the round.
Ward is trying to stand back up but Solo is controlling him
Ward manages to escape and get back to his feet!
Ward has closed the distance and engaged Solo in a clinch.
Ward manages to break the clinch.
The fight stays on the outside here - Ward looks like he's thinking about clinching though.
Ward moves into the clinch successfully.
Ward breaks the clinch and we're back to striking at distance.
Solo takes a head kick and keeps coming.
Solo avoids the clinch attempt nicely.
Ward lands a right hook to the body.
Ward forces Solo back against the cage and clinches.
Ward breaks from the clinch.
Solo circles away from the clinch attempt.
Ward tries to clinch but Solo moves out of range.
Ward doesn't manage to clinch there - Solo circles away.
That's four minutes gone in the round.
Solo keeps the fight on the outside.
Ward tries for a takedown but Solo circles away easily
and Solo counters with a takedown into side control.
Wooooo! Give it up for these two warriors! They are putting on a show!
Ward is trying to escape and get back to his feet.
Solo creates some space and throws a big elbow, but Ward sees it coming and moves his head just enough to avoid the strike.
Alkaline Solo overall seems to be getting the better of the ground position in the fight so far.
The crowd are going absolutely nuts as the round comes to an end - what a fantastic round of action!
Solo wants to control but Ward is keeping him busy.
Ward tries to get back to his feet but has found himself mounted instead. Damn, that's gotta suck.
And thats the end of the round the fighters go back to their corners.
Noah Ward showed his class in that round. I'd imagine he'll take it on all the scorecards.
The cut man is working on Alkaline Solo's cut.
OK. That's time! The bell goes and we're back to the action. The crowd applaud as we get ready to start the final round!

Ward scores with a kick to the midsection.
Solo looks to clinch
and Ward counters by moving into the clinch.
Ward taking a break, stalling in the clinch.
Ward breaks the clinch and we're back to striking at distance.
Both fighters circling a little - Ward finishes the exchange with a kick to the body.
Ward moves into the clinch.
Solo tries to jump guard but he falls flat on his backside. Ward smiles and moves away.
Solo swats away the attempt to clinch by Ward.
Solo closes this distance looking for a takedown but Ward circles away.
Ward uses decent footwork to sidestep a right hand from Solo.
Solo moves into range and clinches up with Ward.
Ward is trying to stall.
Both fighters are breathing heavily.
Ward wants to push off and get back to the center of the mat but Solo has him pressed against the cage.
Solo fails to pull guard.
That's three failed takedown attempts in the round for Alkaline Solo. That's going to take a lot out of him.
Ward is trying to break the clinch but Solo has him pressed against the cage.
Solo tries to take the fight to the ground by pulling guard but can't manage it.
Solo has hold of a leg and is looking for a trip takedown. Ward avoids it nicely though and we remain in the clinch.
That's one minute gone in the round.
A bit of stalling here from Ward.
Ward lands a hook to the body. It's hard to tell if that hurt Solo or not.
Ward escapes the clinch and we're back to striking.
Ward tries to clinch up
so Solo counters with a double leg into guard. Good agility.
Solo stands up and looks to throw the legs aside to pass to side control. Ward swivels though and keeps the full guard.
Ward wants to stand up but Solo is controlling him.
Ward keeping moving, preventing Solo from controlling successfully.
Ward wants to get back to his feet but Solo passes into half guard.
Solo is tying to control. Ward wants to improve his position but can't escape this time.
That's two minutes gone in the round.
Solo throwing shots but Ward is blocking nicely.
Ward is looking to escape.

Well, the referee has seen enough. Neither fighter is active enough on the ground so he's stood them back up.
Solo shoots in with a takedown attempt and he has Ward pinned against the cage. Ward gets the underhooks and manages to circle away.
Ward fails with an attempt to clinch.
Solo fails with a takedown attempt from distance.
Solo will be looking to protect his midsection after taking some solid kicks to the body.
Ward darts in trying to clinch
and Solo counters by clinching up.
Ward is trying to work out of this bad position, with his back against the cage.
Ward wants to get back to striking at distance but Solo won't allow it.
Solo drops down looking for an ankle pick but Ward pulls his leg out and moves away.
That's three minutes gone in the round.
Solo tries to clinch but fails miserably
and Ward counters with a nice body shot.
Solo tries to clinch but Ward moves out of range.
Ward has closed the distance and engaged Solo in a clinch.
Ward landing some nice looking knees to the body.
Knees in the clinch landing for Ward.
Ward breaks the clinch and we're back to striking at distance.
Ward fails in his attempt to clinch.
Solo shoots in for a takedown but Ward shows good takedown defense.
Ward tries to close the distance and clinch but Solo swats him to one side with an open hand palm strike and circles away.
Alkaline Solo is looking to throw some combinations by the looks of things.
Ward wants to clinch up but Solo keeps it at a distance.
Ward is looking to clinch but Solo is avoiding it.
Ward tries to clinch up.
Ward is looking to clinch.
A slapping body kick lands there for Ward.
Ward connects with a leg kick. He turned his hip over nicely there.
A really sloppy takedown attempt there from Solo.
Solo avoids the clinch attempt nicely.
Solo will have to do better than that with his takedown attempts.
Ward fails with an attempt to clinch.
That's four minutes gone in the round.
A head kick from Solo lands but Ward takes it in his stride.
Ward has taken the fight to the clinch.
Ward escapes the clinch and we're back to striking.
Ward tries to close the distance and clinch up against the cage but Solo paws at him with a jab and circles away.
Ward closes the distance and presses his opponent up against the cage.
Solo drops down for a takedown but doesn't get it.
Ward wants to stall.
Ward using the Thai clinch to land knees to the body.
Ward escapes the clinch and we're back to striking.
Solo throws a predictable looking body shot
and Ward counters with a nice kick to the body.
Solo shoots in for a takedown. "Ole!" shouts Ward as he jumps to the side.
Ward keeps the fight on the outside.
The crowd applaud the fighters efforts here as the round comes to an end.
Solo shoots in but no luck this time.
Ward tries to clinch up but Solo circles away and keeps his distance.
Solo connects with a high kick.
Alkaline Solo has stepped it up - he knows he needs a finish here!
We've seen a great period of action over the last minute or so - credit to both fighters for leaving it all in the cage!
Solo misses with a low kick.
Ward lands with a two punch combination before moving back out of range.
And that's the end of the fight!
Noah Ward comfortably won the final round on my scorecard.
I've got Ward winning every round here. Surely the decision will go his way and he'll pick up a well deserved decision victory. Over to the ring announcer for the scorecards.
Ladies and gentlemen, after 3 rounds of action, we go to the scorecards for a decision.
Judge George Francis scores the fight 27:30
Judge Daniel Franklin scores the fight 27:30
Judge Gwen Towbar scores the fight 27:30
In favor of your winner, by unanimous decision... Noah Ward!
|
|
|
|
|
|
|
|
|
|
|
|
|
|
|
|
|
|
|
|
|
|
|
| S |
C
A |
G |
S |
C
B |
G |
|
S |
C |
G |
|
energy
A | B |
|
hype
A | B |
|
pop
A | B |
|
mgr
A | B |
|
FIGHT
RATING
100% |
|
|
|
|
|
|
