|
|
PBP Commentary |
Coming up we have a lightweight MMA rules bout between Virgil Mays (ranked 0 p4p, 0 weight class) and Shoryu Ken (ranked 0 p4p, 0 weight class). Mays's entrance music is Wretches & Kings. A fine choice. Over to our ring announcer for the fighter introductions!
 |
|
 |
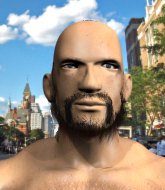
| 174 cm
28
167 lbs
15 - 10 - 0 |
|
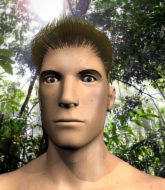
165 cm
28
157 lbs
11 - 10 - 0 |
Good wrestling
Excellent boxer
KO power |
|
Good wrestler
Excellent boxer
Powerful |
|
| |
|
Ladies and gentlemen. This fight is 3 rounds, in the lightweight division.
Introducing the fighter to my left, fighting out of the red corner.
With a record of
15 - 10 - 0, fighting out of Rio de Janeiro, Virgil Mays!
And introducing the fighter to my right, fighting out of the blue corner.
With a record of
11 - 10 - 0, fighting out of Rio de Janeiro, Shoryu Ken!
The judges for this bout are Seu Braga, Paulo Santos and Mauricio Rocha.

The bell rings for round one and we are underway!
Ken throws the left hand but Mays avoids the punch easily.
Mays gets cracked with a nice right hand there by Ken.
Ken shoots in but no luck this time.
Shoryu Ken seems to be the more aggressive standup fighter in this bout.
Ken takes an uppercut right on the jaw but it doesn't phase him.
Mays throws a hard body shot but it just misses.
Mays misses with a few strikes there.
Ken misses with a looping left.
No joy there for Mays, who threw a few shots but didn't land.
Ken ducks down and throws a hook to the body but Mays moves away.
Mays connects with the punch.
Jab by Ken.
A leg kick checked by Mays.
Mays lands a nice shot to the body.
We've seen a great period of action over the last minute or so - credit to both fighters for going all out!
Mays ducks down and throws a hook to the body but Ken moves away.
Mays ducks down and throws a hook to the body but Ken moves away.

That's one minute gone in the round.
Ken takes a body punch but keeps moving.
Ken looks to land a right hand but Mays moved out of range.
Mays throws a hard body shot but it just misses.
Virgil Mays is looking to keep the fight on the feet at all costs.
Ken pushing out the jab but it's not landing.
Ken connects with a lovely right hand, straight down the pipe.
Mays slips under a jab.
A right-left combo lands from Mays.
A looping hook to the body misses from Ken. Mays does a little dance to reset his feet.
Mays misses the shot to the body.
The crowd cheers as Ken lands an impressive looking overhand right. Mays doesn't seem phased though.
Ken uses some good footwork to avoid the body shot by Mays.
Nice uppercut there from Mays.
Mays throws a hook to the body but it doesn't connect.

That's two minutes gone in the round.
Mays swings for the body but Ken moves out of range.
Mays avoids the body shot from Ken.
Ken avoids the body shot from Mays.
Ken misses with a two punch combination.
We've seen a great period of action over the last minute or so - credit to both fighters for going all out!
A looping hook to the body misses from Mays. Ken does a little dance to reset his feet.
Ken misses with a series of wild punches.
Mays is looking to wear down Ken with body shots, infact he's throwing more body shots than head shots at the moment.
Mays steps to the side to avoid the strikes from Ken.
Ken lands with a cross.
Mays misses with a hook. Ken ducked under it nicely.
Ken attempts a leg kick but it's missed by a good margin.
Ken throws out a loose jab but Mays uses good head movement to avoid it.

That's three minutes gone in the round.
Mays staying out of range there.
Ken is the aggressor but that punch slipped nicely by Mays.
Mays throws a hook to the body but it doesn't connect.
Ken scores with a punch to the gut of his opponent.
Mays moves out of range of the strikes.
A looping hook to the body misses from Mays. Ken does a little dance to reset his feet.
Ken throws an overhand right that lands on Mays's shoulder, as Mays tries to avoid the shot.
Ken misses the jab.
Ken listening to his corner there, landing a nice uppercut.
Mays misses with a wild body shot.
Mays pivots, looking for a leg kick but Ken is out of range and Mays settles back down.
Mays looks to land a left hand but Ken moved out of range nicely.
Mays throws out a token jab with nothing on it.

That's four minutes gone in the round.
Ken misses with a hook.
Ken throws the left hand but Mays avoids the punch easily.
Mays throws a two punch combo that lands nicely.
Mays throws a big shot that misses.
Ken fakes high and swings low for a body shot but Mays manages to avoid it.
Jab from Ken.
Mays keeping a good distance there, avoiding the body shot.
Mays scores with a sloppy punch to the body. Not much technique there but it did the business.
We've seen a great period of action over the last minute or so - credit to both fighters for going all out!
Mays lands a nice hook to Ken's body. Ken takes it in his stride and looks to land his own strikes.
As the round comes to an end the crowd are showing their appreciation for a great round of action.
Mays throws an overhand right that lands on Ken's shoulder, as Ken tries to avoid the shot.
Mays ducks low and lands a nice hook to the body of his opponent.
Ken misses with a straight right.
And thats the end of the round the fighters go back to their corners.
That was a close round but I would say that Virgil Mays will probably get the nod.
Well, the break between rounds is over. Let's get back to the scrappin!

Ken misses with a wild body shot.
Mays just misses with a punch to the body.
Mays throws a right and a left that Ken avoids nicely.
A telegraphed right hand from Ken misses the target.
Mays blocks a jab.
Ken throws a combination but comes up with nothing but fresh air.
Mays scores with a sloppy right hand. Ken should have avoided that one.
Ken shoots in for a takedown but doesn't get it.
Ken ducks under a wild hook from Mays.
Ken fakes high and swings low for a body shot but Mays manages to avoid it.
Mays fakes a head shot and lands one to the body.

Ken looking to shoot here. He's gone for it and he's landed a takedown into mount! Oh, that's bad for Mays!
Ken can't quite control the action as he would like just now, as Mays is looking to escape.
That's one minute gone in the round.
Mays slips a leg in and gets back to half guard.
Mays gets back to full guard.
Ken pressing down on his opponent's thigh, looking to pass guard. Mays is keeping the position for now.
Ken throwing elbows and punches but not connecting, as Mays works some decent striking defense from the bottom.
Ken is fighting to break Mays's control of his arms but Mays is doing a good job of controlling the position at the moment.
Mays has controlled the position for a good 20 seconds, which will no doubt be starting to frustrate his opponent.
That's two minutes gone in the round.
Ken working some strikes from top position.
Mays keeping full guard, as Ken tries to pass.
A real slowdown in the pace of the fight for a moment, as Mays holds on and takes a little breather.
Ken scoring with some ground and pound.
Ken trying to control but Mays is working from the bottom.
Kenis looking to pass into half guard but Mays pushes him away with his feet and jumps on top - now Mays is in guard.
We've seen a great period of action over the last minute or so - credit to both fighters for going all out!
Ken wants to sweep but no luck.
Mays is in close to Ken's body, working some short punches and elbows.
That's three minutes gone in the round.
Mays keeps in close for a moment and lands a decent shot to the side of Ken's head.
Mays chips away with some ground and pound.
The fighters are pressed up against the cage, both looking to find a bit of space to work.
Ken trying to keep a closed guard but Mays is proving a slippery customer.
Ken is pulling down on Mays's head. It's preventing any offense from Mays, at least for the moment.
Ken working a defensive guard here.
Ken looking for a sweep. Not yet Ken, not yet.

Ken looks to be working for a triangle here. Oh, it looks like he might have it! Mays has picked Ken up and slammed him! Ken can't keep hold of the triangle and Mays manages to pass to side control!
Ken is looking for a sweep.
That's four minutes gone in the round.
Mays lands a nice forearm strike.
Ken struggling a bit here.
Mays lands a decent elbow from side control.
Ken tries to improve position but can't.
This has been an exciting period of action!
Ken is sneaking out the side here. He's bucked Mays off and has taken his back!
Ken misses with punches from the back.
Mays breaks Ken's hooks off and manages to turn into his guard.
Mays distracts Ken with his right hand and drops a big elbow with his other arm.
As the round comes to an end the crowd are showing their appreciation for a great round of action.
Ken looking to control.
Mays is looking to work some ground and pound but Ken has wrist control.
Virgil Mays overall seems to be getting the better of the ground position in the fight so far.
Ken is working the butterfly guard. He manages to land a nice scissor sweep and is now in half guard on the top. Nice move.
And thats the end of the round the fighters go back to their corners.
That was a close second round but I would say that Virgil Mays will probably get the nod.
That's time! Back to the action! This is the final round!

Mays tries to clinch but Ken moves out of range.
Ken throws a lazy right hand but Mays sees it coming a mile off and sidesteps it easily.
Mays keeping his hands up high there, blocking the jab from Ken.
Ken just misses with a punch to the body.
Mays keeps the fight standing with a nice sprawl.
Ken misses with a body shot.
Ken slips a jab from Mays.
Mays lands a powerful looking uppercut that connected with his opponent's jaw.
Ken uses some good footwork to avoid the body shot by Mays.
Ken avoids the body shot from Mays.
That's one minute gone in the round.
Ken connects with a looping left hand that seems like it dazed Mays momentarily.
A looping hook to the body misses from Ken. Mays does a little dance to reset his feet.
A shot to the liver by Ken. Beautiful body shot.
Mays tries to clinch but Ken is having none of it.
Ken swings and misses with a hook to the body.
Mays lands with an uppercut that bounces Ken off the cage and back into rage.
Mays keeping his hands up high there, blocking the jab from Ken.
Ken throws a looping overhand right but Mays ducks down to avoid it.
Mays lands a really nice looking cross but Ken seems unphased.
Nice cross by Mays.
Ken throws a body punch but Mays moves out of range.
Ken ducks under an overhand right and circles away with a smile on his face.
That's two minutes gone in the round.
Ken throws a nice hook to the body that draws an oooh from the crowd.
Ken looks to score with a jab to the body but Mays is just out of range.
Ken is looking to chop away at Mays's legs.
Ken smiles there as he lands a nice right hand right on the button.
Ken misses with a hook. Mays ducked under it nicely.
The crowd cheering loudly, showing their appreciation for the quality fight we're seeing here.
Ken thuds a left hand into Mays's body.
Mays thows a body shot but no joy.
Ken ducks under an overhand right and circles away with a smile on his face.
Mays ducks low and lands a nice hook to the body of his opponent.
Ken throws a hook to the body but it doesn't connect.
Boom, another hit is landed. "You're gunna get knocked out" taunts Ken, as that shot connected.
Ken slips a jab and a cross from Mays.
That's three minutes gone in the round.
Mays lands a jab. Then a cross. Then finally a nice hook to the body. Good work there by Mays.
Ken slips under a jab.
Mays bobs and weaves well there to avoid the strikes.
Ken slips under a jab.
Ken fakes high and swings low for a body shot but Mays manages to avoid it.
Shoryu Ken has stepped it up - he knows he needs a finish here!
Ken throws a jab but it's blocked by Mays.
Ken shoots in for a takedown but doesn't get it.
A swing and a miss from Mays.
Ken takes a jab on the nose there. A little bit of blood seems to be coming out. Hopefully that won't affect his breathing.
Mays swings wildly with a hook that is half blocked by Ken.
Ken throws a body punch but Mays moves out of range.
That's four minutes gone in the round.
Ken throws a jab but it's blocked by Mays.
Mays dips down and scores with a jab to the body.
Ken ducks under a wild hook from Mays.
Virgil Mays is fighting for a decision here - he's started to take the cautious approach.
Mays tries to clinch up.
Mays takes one on the chin but keeps coming.
Ken swings for the body but Mays moves out of range.
This is a great period of action - very entertaining stuff!
Nice shot lands for Mays.
Mays throws a good cross that connects.
Ken throws out a token jab with nothing on it.
As the round comes to an end the crowd are showing their appreciation for a great round of action.
Mays avoids the body shot from Ken.
A jab from Mays does it's job there.
A big right from Ken misses.
And that's the end of the fight!
That was a close round. You could make an argument for either fighter but I would give it to Virgil Mays.
Well I reckon that's a shut out for Mays, winning every round. Will the judges agree? They are the ones who matter, even if they are often depressingly incompetent. Over to the ring announcer for the scorecards.
Ladies and gentlemen, after 3 rounds of action, we go to the scorecards for a decision.
Judge Seu Braga scores the fight 30:27
Judge Paulo Santos scores the fight 30:27
Judge Mauricio Rocha scores the fight 30:27
In favor of your winner, by unanimous decision... Virgil Mays!
|
|
|
|
|
|
|
|
|
|
|
|
|
|
|
|
|
|
|
|
|
|
|
| S |
C
A |
G |
S |
C
B |
G |
|
S |
C |
G |
|
energy
A | B |
|
hype
A | B |
|
pop
A | B |
|
mgr
A | B |
|
FIGHT
RATING
67% |
|
|
|
|
|
|
