|
|
PBP Commentary |
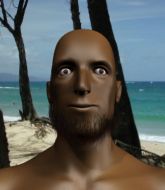
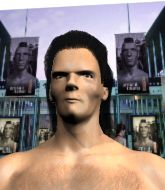
Coming up we have a light heavyweight MMA rules bout between David Aha (ranked 0 p4p, 0 weight class) and James Grey (ranked 0 p4p, 0 weight class). James Grey has the power to score a knockout today if he connects clean with David Aha's chin.
 |
|
 |
| 190 cm
24
212 lbs
3 - 8 - 0 |
|
187 cm
23
205 lbs
2 - 4 - 0 |
BJJ Purple Belt
Excellent MT
Very strong |
|
ADCC Champion
Decent boxing
Powerful |
|
| |
|
Ladies and gentlemen. This fight is 3 rounds, in the light heavyweight division.
Introducing the fighter to my left, fighting out of the red corner.
With a record of
3 - 8 - 0, fighting out of Sydney, David Aha!
And introducing the fighter to my right, fighting out of the blue corner.
With a record of
2 - 4 - 0, fighting out of Sydney, James Grey!
The judges for this bout are Bruno Hogan, Winston Howard and John Mangel.

The bell rings for round one and we are underway!
Aha cracks the inside of Grey's front leg.

Aha takes the fight into the clinch.
Grey being controlled against the cage.
Aha lands a knee to the head there! That was nasty!

It looks like James Grey has been cut.

Aha breaks from the clinch.
Aha gets a clinch.
Some stalling of biblical proportions here from Aha.
Grey wants to push off and get back to the center of the mat but Aha has him pressed against the cage.
Aha breaks the clinch and we're back to striking at distance.
Aha lands with a cross.
Aha closes the distance and clinches.
Grey is trying to stall.
Aha lands an elbow just above Grey 's eye.
Wooooo! Give it up for these two warriors! They are putting on a show!
Aha breaks the clinch.
Grey digs a good hook to Aha's body.
Aha misses with a jab and misses with a cross straight after too.
Aha tries to close the distance and clinch up but Grey swats him away and circles back towards the center.
No luck with that takedown attempt from Grey.

That's one minute gone in the round.
Aha closes the distance and clinches.
Grey is working hard here but doesn't seem to be able to control effectively, up against the cage.
Aha breaks from the clinch.
Nice uppercut there from Grey.
Grey sees a low kick coming and goes to check it, but it's actually a body kick and it thuds into his unprotected ribs.
Grey connects with a lovely right hand, straight down the pipe.
Aha forces Grey back against the cage and clinches.
Aha scores a nice knee to the body.
Aha's corner calls for him to break the clinch, which he does.
Aha rushes forward with a series of wild hooks but Grey moves out of range and avoids them all easily.
Aha is looking to clinch but Grey is avoiding it.
David Aha is looking to keep the fight on the feet at all costs.
The crowd are loving this. Great action here.
A telegraphed takedown attempt from Grey is defended easily by Aha.

Grey closes the distance and pushes Aha back into the cage.
The two fighters are working to gain dominance in the clinch.
Aha scores a nice knee to the body.

That's two minutes gone in the round.
Grey tries a shoulder strike but it doesn't do any damage.
Aha manages to break the clinch.
Grey shoots in for a takedown but doesn't get it.
David Aha has stuffed three takedown attempts in the round now. That's going to take a lot out of James Grey.
Grey closes the distance and clinches.
Aha displaying some good clinch control by pressing Grey up against the cage.
Aha lands with a short shot to the head.
Grey has a couple of punches blocked by Aha.
A head punch on the inside from Grey fails to land.
An uppercut on the inside fails to land for Grey.
Grey throws a punch but it's blocked by Aha.
Aha breaks the clinch.
Aha fakes with a right hand and throws a good leg kick, right into the thigh. That had to hurt Grey.
Aha tries to clinch up but Grey circles away and keeps his distance.
Aha misses with a jab, cross combination.
Wow, both these guys are really going for it!
Aha keeps the fight standing with a nice sprawl.
Grey looks for a takedown but Aha sprawls well.

That's three minutes gone in the round.
Grey misses with an uppercut. Aha saw that one coming.
Aha closes the distance and clinches.
Aha dictating the pace here, as the fighters clinch against the cage.
Aha breaks the clinch and we return to the middle of the mat.
Grey swats away the attempt to clinch by Aha.
Aha misses with a jab and misses with a cross straight after too.
Aha takes the fight into the clinch.
Aha's corner calls for him to break the clinch, which he does.
Grey jabs Aha right on the nose. Aha blinks but takes it well.
The fight moves into the clinch position.
Aha lands a knee to the body.
Grey has had enough of the clinch and is looking to separate.
A head punch on the inside from Grey fails to land.

That's four minutes gone in the round.
Aha escapes the clinch and we're back to striking.
This is a great period of action - very entertaining stuff!
Aha displays good takedown defense there as he swats away a double leg from Grey.
Grey takes a kick to the side of the head.
Aha fakes with an overhand right and moves in to clinch with Grey, pushing him back against the cage.
Aha escapes the clinch and we're back to striking.
Aha tries to close the distance and clinch but Grey swats him to one side with an open hand palm strike and circles away.
Grey is trying hard to land a takedown here. Aha sprawls well and keeps this one on the feet.
Grey fakes with an overhand right and moves in to clinch with Aha, pushing him back against the cage.
A nice left hand lands by Grey.
Aha unloads a knee to the mid-section.
Kneeeeees! The crowd are calling for knees to the body. Aha obliges.
Grey looks gassed!
Aha lands a shoulder strike.
Aha with a knee to the head.
The crowd are going absolutely nuts as the round comes to an end - what a fantastic round of action!
Grey takes a knee to the side of the body.
Aha breaks the clinch and we're back to striking at distance.
Grey misses with a straight left.
Aha connects with a leg kick. He turned his hip over nicely there.
Aha moves into the clinch.
And thats the end of the round the fighters go back to their corners.
David Aha dominated that round.
The cut man is working on James Grey's cut.
OK. That's time! The bell goes and we're back to the action.

Aha swings away but doesn't land with a series of punches.
Grey forces Aha back against the cage and clinches.
A knee to the head by Aha.
Grey taking a breather.
Grey throws a punch but it's blocked by Aha.
Aha lands on the inside with an uppercut.
Aha pushes off and circles away, back to the middle of the mat.
Grey rushes Aha and presses him up against the cage.
Aha connects with a knee to the head.
Aha putting his Muay Thai to good use. He has Grey in a tight clinch and is doing some damage with knees to the body.
Aha lands a knee to the head.
The fighters are starting to get sweaty, which will make takedowns a bit more tricky.
Aha's corner calls for him to break the clinch, which he does.
Grey's jab looks to have found its range, popping Aha under the eye.
Aha darts in and clinches Grey up against the cage.
Wooooo! Give it up for these two warriors! They are putting on a show!
An uppercut on the inside fails to land for Grey.
An uppercut on the inside fails to land for Grey.
Grey misses with a hook from the clinch.
Aha's corner calls for him to break the clinch, which he does.
Grey clinches up against the cage.
That's one minute gone in the round.
A knee to the head by Aha.
Aha connects with a knee to the head.
Grey takes a knee right on the jaw!
David Aha has scored more points in the clinch so far.
Aha pushes off and circles away, back to the middle of the mat.
Aha has taken the fight to the clinch.
Aha landing knees to the head.

Grey is rocked!
Grey being controlled against the cage.
Grey is still on wobbly legs! Can Aha finish him?
Grey tries to break the clinch but Aha is controlling the position.
Grey seems to have recovered his senses.
Aha manages to break the clinch.
David Aha is looking to throw some combinations by the looks of things.
Grey connects with a body shot that sends Aha's belly button to the back.
Both fighters are absolutely exhausted here.
Aha throws a series of punches but Grey moves out of range.
David Aha is winning the standup battle so far.
Aha tries to close the distance and clinch but Grey swats him to one side with an open hand palm strike and circles away.
Grey dives in and grabs Aha's left leg, looking for a takedown. Aha pushes down on Grey's head and hops out.
This has been an exciting period of action!
Grey clinches.
Aha lands a nice knee to the body.
Aha breaks the clinch and we're back to striking at distance.
Aha with poor footwork there. He got himself in a bit of a tangle, enabling Grey to score with a decent uppercut.
James Grey seems to be the more aggressive standup fighter in this bout.
That's two minutes gone in the round.
Aha lands with a head kick! That's gotta hurt.
Aha goes to the watering hole and comes back with a big thumbs up from the judges as he scores a three punch combo.
Grey cracks Aha on the jaw with a powerful right hand and Aha falls backwards against the cage. Grey follows up with more strikes that drop Aha to his knees. Grey keeps the pressure on and the referee jumps in to save Aha! This one is all over!
Ladies and gentlemen, after 2:14 of round 2, we have a winner by way of TKO (Strikes). James Grey!
|
|
|
|
|
|
|
|
|
|
|
|
|
|
|
|
|
|
|
|
|
|
|
| S |
C
A |
G |
S |
C
B |
G |
|
S |
C |
G |
|
energy
A | B |
|
hype
A | B |
|
pop
A | B |
|
mgr
A | B |
|
FIGHT
RATING
100% |
|
|
|
|
|
|
