|
|
PBP Commentary |
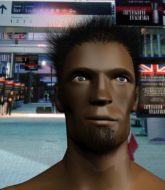
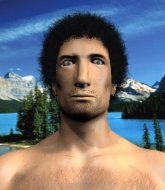
Coming up we have a light heavyweight MMA rules bout between Ryan Ballinger (ranked 0 p4p, 0 weight class) and Bret Hatton (ranked 0 p4p, 0 weight class). Ballinger comes into the arena with A Scottish Soldier by Andy Stewart blaring out of the sound system. The crowd seem to be enjoying Hatton's choice of entrance music: Bret Hart theme. Over to our ring announcer for the fighter introductions!
 |
|
 |
| 191 cm
23
222 lbs
8 - 7 - 0 |
|
186 cm
27
217 lbs
11 - 7 - 1 |
BJJ Purple Belt
Great low kicks
Cardio machine |
|
Powerful takedowns
Decent boxing
Powerful |
|
| |
|
Ladies and gentlemen. This fight is 3 rounds, in the light heavyweight division.
Introducing the fighter to my left, fighting out of the red corner.
With a record of
8 - 7 - 0, fighting out of New York, Ryan Ballinger!
And introducing the fighter to my right, fighting out of the blue corner.
With a record of
11 - 7 - 1, fighting out of Montreal, Bret Hatton!
The judges for this bout are Joseph Jones, Jonathan Paton and Dean Styles.

The bell rings for round one and we are underway!
Hatton closes this distance looking for a takedown but Ballinger circles away.
Ballinger slaps away a takedown attempt from Hatton, before circling back to the center of the mat.
Hatton blocks a head kick by Ballinger.

Hatton drops down and drives through with a powerful takedown into guard.
The referee looks like he's ready to step in and stand the fighters back up.

Hatton thinks about going for a leg but decides against it, in order to maintain the position.
Hatton controlling from the top position.
Ballinger looking to hit a scissor sweep but Hatton is one step ahead there.
Hatton trying to control the position from guard on top but Ballinger is wriggling around, looking for whatever he can.
Ballinger has momentary wrist control but Hatton slips an elbow through the middle.
Hatton drops back looking for a leg! Ballinger is in trouble here! The fighters roll with the hold and Ballinger manages to kick Hatton off! Hatton jumps back into Ballinger's guard.

That's one minute gone in the round.
Hatton passes Ballinger's right leg, so he's now in half guard.
Ballinger is looking to improve his position.
Ballinger is working hard here to advance position.
Hatton is trying to control the action in half guard but Ballinger is working away on the bottom, looking perhaps to get back to full guard.
Ballinger tries to roll over but Hatton keeps him under control.
Ballinger is looking to control Hatton's leg but it's slowly edging free. Can Ballinger avoid being mounted?
Ballinger moves into full guard.
Hatton tries to free his leg and advance position but Ballinger is retaining full guard.
Hatton is holding a leg here, probably looking for an ankle lock - he drops back and goes for it! Ballinger is in trouble! Is it all over??? No! Ballinger has escaped and now he's on top!
Both fighters really going for it on the ground here!

That's two minutes gone in the round.
Hatton is trying to keep Ballinger in close.
Hatton is looking for a guillotine. You can't force these things though and Ballinger defends well.
Hatton has a loose triangle. He'll be looking to tighten that up but Ballinger can see exactly what he's planning and manages to posture up and free himself.
Wooooo! Give it up for these two warriors! They are putting on a show!
Ballinger stands and throws Hatton's legs to the side, diving into side control.
Hatton prevents Ballinger from moving into mount.

Ballinger tries for a kimura. Not really close to a finish though.
Ballinger works a knee to the body and follows up with a nice elbow to the head.

That's three minutes gone in the round.
Hatton is moving his hips around well on the bottom and has managed to get back to half guard.
Hatton slips a foot under and gets full guard. Nice work.
Hatton tries to strike from the bottom.
Ballinger preventing the sweep.

Ballinger decides to stand up and beckons his opponent to follow.
Nice sprawl there from Ballinger as Hatton shoots in.
Ryan Ballinger has stuffed three takedown attempts in the round now. That's going to take a lot out of Bret Hatton.
Hatton shoots in for a takedown but Ballinger shows good takedown defense there and keeps this one on the feet.
Hatton shoots in for a takedown. He's persisting with it as Ballinger sprawls well. Ballinger wins this battle and keeps the fight standing. Hatton gets slowly back to his feet.
Hatton shoots in for a double leg but Ballinger sprawls well. That's going to sap some energy.

That's four minutes gone in the round.
Ballinger uses decent footwork to sidestep a right hand from Hatton.
Hatton misses with a takedown attempt - Ballinger sprawls well and throws a nice strike on the way out which just misses.
Hatton fails miserably with a takedown attempt.
Hatton closes the distance and clinches up with Ballinger, looking for a takedown. Hatton pushes Ballinger against the cage but Ballinger circles to the side and manages to break the clinch.
As the round comes to an end the crowd are showing their appreciation for a great round of action.
Hatton shoots in from a long way out. He's driving through with the takedown attempt and he eventually gets it, landing in Ballinger's guard.
And thats the end of the round the fighters go back to their corners.
Bret Hatton dominated that round.
That's time! Ballinger's corner gives him a slap on the ass as he gets ready to fight.

Hatton fakes high and shoots in for a takedown but Ballinger avoids it really well and circles away.
Hatton shoots in looking for a takedown but Ballinger manages to keep the fight standing, pushing Hatton's face into the canvas for good measure before circling away.
Ballinger avoids a punch combination nicely.
Bret Hatton is looking to throw some combinations by the looks of things.
Ballinger stuffs the takedown attempt from Hatton. Hatton gets slowly back to his feet.
Ryan Ballinger has stuffed three takedown attempts in the round now. That's going to take a lot out of Bret Hatton.
Hatton shoots in and drives through. Ballinger sprawls well.
Hatton fails with a takedown attempt.
That's one minute gone in the round.
Hatton fails with a rather predictable takedown attempt.
A really sloppy takedown attempt there from Hatton.
Hatton scores with a crisp jab that stopped Ballinger in his tracks.
Hatton has his takedown stuffed
and Ballinger counters with a flying knee that drops Hatton! Ballinger dives in and finishes the fight with a flurry of strikes from the mount!
Ladies and gentlemen, after 1:50 of round 2, we have a winner by way of TKO (Strikes). Ryan Ballinger!
|
|
|
|
|
|
|
|
|
|
|
|
|
|
|
|
|
|
|
|
|
|
|
| S |
C
A |
G |
S |
C
B |
G |
|
S |
C |
G |
|
energy
A | B |
|
hype
A | B |
|
pop
A | B |
|
mgr
A | B |
|
FIGHT
RATING
69% |
|
|
|
|
|
|

