|
|
PBP Commentary |
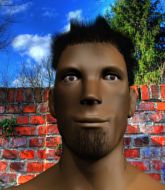
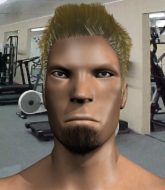
Coming up we have a super heavyweight MMA rules bout between Kyle Rees (ranked 0 p4p, 0 weight class) and Chris Farley (ranked 0 p4p, 0 weight class). Man, I cannot wait for this one!
 |
|
 |
| 180 cm
22
300 lbs
3 - 2 - 0 |
|
225 cm
22
300 lbs
4 - 1 - 0 |
BJJ Blue Belt
Basic striking
Granite chin |
|
BJJ Blue Belt
Brawler
Granite chin |
|
| |
|
Ladies and gentlemen. This fight is 3 rounds, in the super heavyweight division.
Introducing the fighter to my left, fighting out of the red corner.
With a record of
3 - 2 - 0, fighting out of Las Vegas, Kyle Rees!
And introducing the fighter to my right, fighting out of the blue corner.
With a record of
4 - 1 - 0, fighting out of Las Vegas, Chris Farley!
The judges for this bout are Tiny Johnson, Cecil Peabody and Frank Dennis.

The bell rings for round one and we are underway!

Rees scores with a takedown into Farley's guard.

Farley escapes his hips to the side and looks to be working for an armbar. Rees gives him a little smile and shakes his head. No chance.
Both fighters really going for it on the ground here!
Rees lands a couple of elbows.
Rees throws a big right hand that misses.
Rees is stalling in the full guard.
Rees drops back looking for a leg! Farley is in trouble here! The fighters roll with the hold and Farley manages to kick Rees off! Rees jumps back into Farley's guard.
Farley keeping moving, preventing Rees from controlling successfully.
Farley preventing the ground and pound from doing any damage.
Rees could do with loosing a few pounds - he looks very soft around the mid section, to put it politely.
Rees trying to control but Farley is working from the bottom.
Farley wants to sweep but no luck.
The ref warns both fighters not to hold the cage as they work up against the meshing.

The referee decides to stand the fighters back up.
Rees drops down and drives through with a powerful takedown into guard.
Farley has a loose triangle. He'll be looking to tighten that up but Rees can see exactly what he's planning and manages to posture up and free himself.

That's one minute gone in the round.
Farley had isolated an arm as going for an omaplata. Rees is defending the submission well but is in a very vulnerable position. Farley Is leaning forward trying to finish the omaplata but decides to abandon it, and take Rees's back instead.
Rees tries to escape but Farley has the hooks in and won't let him break free.
Farley working for a RNC but it's not happening just yet.
Farley controlling well, preventing Rees from escaping the position.
Rees grimaces as he takes a shot to the body.
Rees tries to escape the position - he's now mounted. Is that better or worse? Hard to tell!
Farley looks like he's working for a submission but he's not found anything just yet.
The fighters are pressed up against the cage, both looking to find a bit of space to work.
Farley looks gassed!
Rees is bucking up trying to escape but Farley cracks him with another couple of good strikes.
Farley with some aggressive grappling here. He's looking for submissions here, rather than waiting for the opportunity to counter.
Rees is looking to get to half guard.

That's two minutes gone in the round.
Rees has been looking to land a fair amount of strikes on the ground. He might be looking to soften his opponent up in order to work for a submission.
BOOM! Farley connects with a massive shot to the dome!
Rees is in all sorts of trouble here.
Rees is working hard here to advance position.
Farley putting on the heat here with some good ground and pound!
Rees tries to get back to half guard but can't.
Farley lands with some strikes.
Rees manages to regain half guard. Good work.
Farley is looking for a kimura but Rees is holding onto that half guard position, so it's hard for Farley to get the leverage.
Rees is looking to control Farley's leg but it's slowly edging free. Can Rees avoid being mounted?
Farley seems very keen to just sit and control from half guard but Rees does not like that idea so much and is remaining active off his back.
Farley seems to be looking for submissions.
Farley frees up his trapped foot and advances to mount.

That's three minutes gone in the round.
Farley moves to the back position.
Farley is working hard for the rear naked choke here.
Rees rolls and manages to get back to half guard. Nicely done.
Rees might be looking to lock onto one of his opponent's long limbs for a submission, whilst we're on the ground.
It looks like Farley is going to stand back up.
Farley is working for a submission of some sort.
Rees landing small, sideways elbows.
Rees slips a foot under and gets full guard. Nice work.
Farley stopping the sweep attempt from Rees.
Rees trying to punch from his back but it's not doing any damage.

That's four minutes gone in the round.
Farley stands up and looks to throw the legs aside to pass to side control. Rees swivels though and keeps the full guard.
Farley passes Rees's left leg - he's now in half guard.
Rees works his way to full guard. Good work.
Rees keeping moving, preventing Farley from controlling successfully.
Farley drops back looking for a leg! Rees is in trouble here! The fighters roll with the hold and Rees manages to kick Farley off! Farley jumps back into Rees's guard.
Rees is trying to control the position but Farley postures up.
Rees had isolated an arm as going for an omaplata. Farley is defending the submission well but is in a very vulnerable position. Rees Is leaning forward trying to finish the omaplata but decides to abandon it, and take Farley's back instead.
Farley wants to escape the position.
Rees scores with some strikes to the side of the head there. Good, points scoring shots.
Rees is staying calm and holding on to the back position, whilst working on a rear naked choke. Farley is defending well though. Rees let's go of the attempt for now.
The crowd applaud the fighters efforts here as the round comes to an end.
Rees is looking to control Farley but Farley is wriggling around and keeping busy.
And thats the end of the round the fighters go back to their corners.
That was a close round but I would say that Kyle Rees will probably get the nod.
That's time! Back to the action!

Rees wants to clinch up but Farley keeps it at a distance.

Farley rushes Rees and presses him up against the cage.
The pace slowing considerably in the clinch, as Farley takes a break from that fighting nonsense to think about the finer things in life.
Rees can't get the takedown.
Farley tries to land knees in the clinch but Rees avoids the damage to the body.
Farley is trying to stall.
Rees tries to pull guard but Farley won't allow it.
Rees trying to stall but Farley improves his position.
A right hand to the body from Farley.
Farley throws an elbow but it misses.
Rees tries to jump guard but he falls flat on his backside. Farley smiles and moves away.
That's three failed takedown attempts in the round for Kyle Rees. That's going to take a lot out of him.
Farley tries to clinch
and Rees counters with a takedown into side control.
Rees working the body and head with strikes.
Rees in side control, trying to ground and pound but not landing this time.
Rees trying to control the position but Farley is working away.
Rees has knee on belly and moves into mount.
Both fighters are absolutely exhausted here.
Rees with some aggressive grappling here. He's looking for submissions here, rather than waiting for the opportunity to counter.
Farley is looking to improve his position but Rees isn't that keen on the idea.
That's one minute gone in the round.
Rees lands a couple of nice shots there from mount.
Farley keeping his composure momentarily, calmly looking to get back to half guard.
Farley is squirming around, avoiding Rees's attempts to control the action.
Rees is going to have to think about doing something other than just controlling because Farley is managing to avoid having the position dictated to him.
Rees punishing his opponent with strikes.
Rees in mount throwing good strikes here, bouncing his opponent's head off the canvas.
Rees forces the positional change into back control.
Rees punishes Farley with strikes from the back mount.
Farley tries to escape the position.
Farley showing good submission defense here.
Farley trying to control the hands but Rees breaks the grip.
That's two minutes gone in the round.
Farley turns into Rees and is now in his guard.
Farley lands a couple of decent looking shots.
Farley wants to control from the top but Rees keeps moving.
Rees trying to keep a closed guard but Farley is proving a slippery customer.
Farley pushes down on Rees's leg and manages to get into half guard.
Rees is trying to control but can't.
Farley working the head and body with strikes.
Farley is trying for a guillotine from the top but the pressure isn't in the right place so Rees is just riding it out for now. Farley eventually gives up the hold.
Farley is looking for an arm triangle, whilst trying to pass to side control. Rees doesn't seem that keen to cooperate though. No luck this time Farley.
Rees throws a strike from the bottom that misses.
That's three minutes gone in the round.
Farley is trying a forearm choke
I don't think that's going to do much at this level of the game.
Farley is looking to stall here but Rees recovers full guard.
Rees is working the butterfly guard. He manages to land a nice scissor sweep and is now in half guard on the top. Nice move.
Rees is looking for a kimura but he's never going to get it from there.
Rees controlling the action here.
Farley has no desire to be mounted, so is trying to control. Rees is working away from the top position though.
Rees is keen to just control but Farley is a slippery customer.
That's four minutes gone in the round.
There's not a lot going on here and the crowd are letting the fighters know they're not willing to tolerate a lack of action.
Farley wants to get back to full guard.
Rees frees up his trapped foot and advances to mount.
Farley working to try and regain half guard.
Farley wants to control but Rees is having none of it.
Farley is looking to improve his position but Rees isn't that keen on the idea.
Farley regains half guard.
Farley looking for submissions off his back.
And thats the end of the round the fighters go back to their corners.
Kyle Rees dominated that second round.
The corners get their ten second warning. Both fighters stand from their stools and stare eachother down, ready to get back to the action. And we move into the final round!

Farley has taken the fight to the clinch.
Farley managing to block the knees to the body from Rees.
Rees avoiding damage as Farley throws knees to the body.
Farley is trying to break the clinch but Rees has him pressed against the cage.
Rees fails to pull guard.
Rees is working for takedown but Farley is calmly controlling the position for now.
A head punch blocked on the inside by Farley.
Rees is trying to work for a single leg takedown but Farley pulls him back up using the underhooks.
That's three failed takedown attempts in the round for Kyle Rees. That's going to take a lot out of him.
Farley unloads a knee to the mid-section. Rees lets out a prehistoric sounding urrrrgh.
Knees to the body from Farley.
A knee to the head by Farley.
Rees is trying to stall.
Farley works for the underhooks and manages to get a trip takedown into guard.
Rees has his foot on Farley's thigh. He's trying to push off and get in position for a triangle, I think. Farley works his way back into a safe position though.
Rees seems keen to control Farley's posture.
Rees thows some rabbit punches from the bottom but they don't do any damage.

Rees pushes Farley off and scrambles back to his feet.
Rees gets a takedown into half guard.
Farley controlling the position well.
Both fighters are breathing heavily.
That's one minute gone in the round.
Farley looking to work for a kimura from the bottom.
Farley wants to improve his position but Rees is controlling well.
Rees wants to free his trapped foot but Farley is holding on for dear life with his legs.
Farley pushes Rees off and gets back to his feet.
Farley scores with a one two! Rees had his feet all tangled up there and couldn't avoid the strikes.
Rees closes the distance and clinches up with Farley, looking for a takedown. Rees pushes Farley against the cage but Farley circles to the side and manages to break the clinch.
Farley drops Rees with a left right combo! Farley follows him down to the ground into side control.

Rees is rocked!
Farley working away diligently from side control. Landing strikes effectively there - that will score him some points on the judges scorecards.
Oh Rees is still in real trouble! Will he be able to recover?!!
The crowd cheering loudly, showing their appreciation for the quality fight we're seeing here.
Rees regains half guard.
Rees seems to have got his legs back now.
Rees trying to control here.
Rees wants to improve his position but Farley is controlling well.
Rees trying to control but Farley postures up.
Farley is looking for a kimura here.
That's two minutes gone in the round.
Rees wants to control but Farley is keeping busy and won't allow it.
Farley is trying to control the action in half guard but Rees is working away on the bottom, looking perhaps to get back to full guard.
Well, the referee has seen enough. Neither fighter is active enough on the ground so he's stood them back up.
Farley moves in looking to clinch but Rees pushes him off.
Wow, both these guys are really going for it!
Rees changes levels and looks for a double leg takedown. Farley tries to avoid it but Rees manages to keep hold of a leg and drag Farley to the ground. Farley escapes though and pops straight back up to his feet.
Farley looks to clinch
and Rees counters with a nice double leg into guard.
Farley wants to sweep but no luck.
Farley is persisting with the attempt to improve his position.
Farley is active off his back here, looking for submissions.
Farley is working an open guard here, looking to improve his position. No doubt that will leave him open to counters but at least he's being more offensive.
Rees postures up.
Farley trying to strike off his back.
Farley being controlled here, momentarily.
It looks like we're going to have a standup here. Neither fight is doing enough on the ground.
Rees fakes an overhand right and shoots for a takedown. Farley sprawls well initially but Rees persists and gets the takedown into half guard.
That's three minutes gone in the round.
Rees is looking for an arm triangle, whilst trying to pass to side control. Farley doesn't seem that keen to cooperate though. No luck this time Rees.
Farley is looking to escape.
Rees wants to control but Farley is keeping him busy.
Farley is looking for a sweep. Rees is wise to his cunning plan and keeps the top position.
Farley gets full guard.
Rees trying to control the position from guard on top but Farley is wriggling around, looking for whatever he can.
Rees pushes down on Farley's leg and manages to get into half guard.
Rees trying to control the action but Farley is working from the bottom.
Farley trying to control but Rees postures up.
Farley is working for an escape here. He's hooked one of Rees's legs and he's managed to sneak out and take Rees's back!
That's four minutes gone in the round.
Well. There's a bit of a lull in the action here and the crowd are starting to get restless.
Rees is trying to break free.
Farley looking for the choke but no joy.
Farley is looking for the choke from the back position but Rees is controlling his hands well.
Rees trying to control the action but Farley just sinks the hooks in.
Rees turns into Farley and is now in his guard.
Rees trying to control the position from guard on top but Farley is wriggling around, looking for whatever he can.
Rees gets to his feet. Farley looking to butt scoot but the ref puts an end to that. On your feet son!
Rees moves into the clinch successfully.
Rees pulls Farley into guard.
Rees is trying to control the position from the bottom.
Chris Farley has stepped it up - he knows he needs a finish here!
As the round comes to an end the crowd are showing their appreciation for a great round of action.
Rees wants to stand but Farley is controlling the position.
Rees had isolated an arm as going for an omaplata. Farley is defending the submission well but is in a very vulnerable position. Rees Is leaning forward trying to finish the omaplata but decides to abandon it, and take Farley's back instead.
Rees trying to control momentarily.
And that's the end of the fight!
I would just about give that final round to Chris Farley.
I think Rees has won this one but let's see what the judges have to say. Over to the ring announcer for the scorecards.
Ladies and gentlemen, after 3 rounds of action, we go to the scorecards for a decision.
Judge Tiny Johnson scores the fight 29:28
Judge Cecil Peabody scores the fight 29:28
Judge Frank Dennis scores the fight 29:28
In favor of your winner, by unanimous decision... Kyle Rees!
|
|
|
|
|
|
|
|
|
|
|
|
|
|
|
|
|
|
|
|
|
|
|
| S |
C
A |
G |
S |
C
B |
G |
|
S |
C |
G |
|
energy
A | B |
|
hype
A | B |
|
pop
A | B |
|
mgr
A | B |
|
FIGHT
RATING
100% |
|
|
|
|
|
|
