|
|
PBP Commentary |
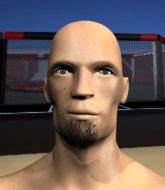
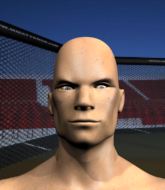
Coming up we have a lightweight MMA rules bout between Gichin Funakoshi (ranked 0 p4p, 0 weight class) and Cassius Slay (ranked 0 p4p, 0 weight class). Funakoshi comes to the cage accompanied by Martial Art Drum Beat. The crowd seem to be enjoying Slay's choice of entrance music: Wu-Tang Clan - Triumph. I can't wait for this one - let's get the fighter introductions out of the way and get this one started!
 |
|
 |
| 168 cm
24
154 lbs
14 - 0 - 0 |
|
180 cm
29
161 lbs
15 - 5 - 2 |
Good wrestling
Excellent boxer
Very quick |
|
BJJ Purple Belt
Excellent MT
Powerful |
|
| |
|
Ladies and gentlemen. This fight is 5 rounds, for the lightweight championship of the world!
Introducing the champion to my left, fighting out of the red corner.
With a record of
14 - 0 - 0, fighting out of Helsinki, Gichin Funakoshi!
And introducing the challenger to my right, fighting out of the blue corner.
With a record of
15 - 5 - 2, fighting out of Montreal, Cassius Slay!
The judges for this bout are Steve Smith, Alec Ball and Ian Loll.

The bell rings for round one and we are underway!
Funakoshi closes this distance looking for a takedown but Slay circles away.
Slay misses with a low kick.
Slay waving his hands out in front of him, looking to distract Funakoshi.
Funakoshi just misses with a punch to the body.
Funakoshi connects with a body shot.
Slay takes a swing at Funakoshi's ribcage but misses.
Funakoshi throws a predictable looking body shot
and Slay makes him pay by landing a nice hook to the body before moving out of range.
Slay throws a hook to the side of Funakoshi's head but Funakoshi sees it coming and ducks under it beautifully.
Funakoshi scores with a body shot.
Slay lands a front kick.
Slay throws a one two combo.
This is a great period of action - very entertaining stuff!
Slay moves his head to the side to avoid a jab but walks straight into a cross.
Funakoshi digs a good body shot into Slay's ribs.
Funakoshi clobbers Slay with an overhand right that has the crowd gasping. That made a horrendous noise.
Funakoshi lands the left hand.
Funakoshi scores with a shot to the body.
Funakoshi lands a slapping body shot.

That's one minute gone in the round.
Funakoshi throws a hook to the body but it doesn't connect.
Funakoshi throws a lazy uppercut
and Slay counters with a lovely shot to the body.
Funakoshi uses some good footwork to avoid the body shot by Slay.
Funakoshi shoots for a double leg takedown but Slay sprawls well. He's pushed Funakoshi's face into the mat and manages to get back to his feet relatively easily.
Funakoshi swings and misses with a hook to the body.
Slay throws an overhand right that lands on Funakoshi's shoulder, as Funakoshi tries to avoid the shot.
Funakoshi staying out of range there.
Funakoshi shoots in for a takedown but doesn't get it.
That's three failed takedown attempts in the round for Gichin Funakoshi. That's going to take a lot out of him.
Funakoshi lands with a shot to the body.
Funakoshi tries for a takedown but Slay sees it coming a mile off and avoids it easily.
Slay uses some good footwork to avoid the body shot by Funakoshi.
Slay misses with a body shot
and Funakoshi counters with a quick right hand to the jaw.
Slay is pinned up against the cage taking some big shots here. The referee is looking closely deciding whether he should stop the fight.
Funakoshi throws a hook to the body but it doesn't connect.

That's two minutes gone in the round.
Slay scores with a straight right hand, right through his opponent's guard.
Slay throws a right hand that misses
and Funakoshi counters with a straight punch to the midsection.
We've seen a great period of action over the last minute or so - credit to both fighters for going all out!
Slay swings for the body but Funakoshi moves out of range.
Funakoshi swings away with a body shot that misses
and Slay counters with a quick right hand to the jaw.
Funakoshi just misses with a punch to the body.
Funakoshi thuds a left hand into Slay's body.
Funakoshi throws a body punch but Slay moves out of range.
Funakoshi tries to close the distance and clinch up but Slay swats him away and circles back towards the center.
Funakoshi swings and misses with a hook to the body.
Funakoshi throws a hook to the body but it doesn't connect.
Funakoshi connects with a nice looking jab.
Funakoshi swings and misses with a hook to the body.

Funakoshi moves into the clinch.
Funakoshi prevents a body shot from Slay.
Funakoshi is working for takedown but Slay is calmly controlling the position for now.

That's three minutes gone in the round.
Funakoshi can't get the takedown.
Funakoshi is looking for a takedown up against the cage. Slay gets underhooks though and prevents the takedown attempt.
Funakoshi blocks a body shot from Slay.
Slay tries a body shot but Funakoshi blocks it.
Slay tried to land a shot to the body but connects with Funakoshi's elbow.
Funakoshi tries for a takedown but Slay manages to get underhooks.
An uppercut on the inside fails to land for Slay.
Funakoshi has Slay pressed up against the cage and is working for takedown. Slay manages to improve position though and keeps the fight standing.
Slay working aggressively here.
Slay fails to land with a short punch on the inside.
Slay swings away with an uppercut that misses.
Slay lands with a light punch inside.
Funakoshi goes for a takedown in the clinch but Slay prevents it.
Slay tries to throw a body punch but Funakoshi avoids it by throwing Slay back against the cage.
A head punch blocked on the inside by Funakoshi.
Slay is pressed up against the cage. Funakoshi has hold of a leg and is looking to drag Slay down to the mat. Slay avoids the attempt though and has circled away. We're back to striking at a distance.
Slay misses with an attempted mid kick.

That's four minutes gone in the round.
Slay misses with an uppercut
and Funakoshi counters with a shot to the ribs. That looked like it hurt.
Slay throws out a leg kick but Funakoshi moves out of range and Slay only half commits.
Funakoshi displays some good footwork, moving neatly out of range as Slay throws out the jab.
Ouch! a nice leg kick from Slay, right into the meat.
A looping hook to the body misses from Funakoshi. Slay does a little dance to reset his feet.
Donk. Slay catches Funakoshi right on the button with a cross.
This has been an exciting period of action!
Funakoshi moves into the clinch successfully.
Slay struggles to land a body shot inside as Funakoshi controls his hands.
Slay scores with a hook to the body.
Funakoshi blocking some punches.
Funakoshi blocks a punch to the side of the head.
Slay gets underhooks to prevent Funakoshi's takedown attempt.
The crowd are going absolutely nuts as the round comes to an end - what a fantastic round of action!
Funakoshi is trying to work for a single leg takedown but Slay pulls him back up using the underhooks.
Funakoshi is breathing heavily.
Slay tries to throw a body punch but Funakoshi avoids it by throwing Slay back against the cage.
Funakoshi tries for a takedown but Slay manages to get underhooks.
Slay misses with a punch on the inside.
And thats the end of the round the fighters go back to their corners.
A close round but Cassius Slay will probably get the nod.
That's the end of the round. The referee orders the cornermen out of the cage so we can get back down to business.

Funakoshi connects with a crisp jab.
A slow jab from Slay misses its intended target.
Slay swings wildly with a right hand that was never going to find it's target.
Funakoshi misses with a body shot. Nice footwork from Slay.
Nice body punch from Funakoshi.
Slay keeping a good distance there, avoiding the body shot.
Funakoshi throws a hook to the body but it doesn't connect.
Slay is looking to clinch but Funakoshi is avoiding it.
Slay misses with a wild body shot.
Funakoshi moves in looking to clinch but Slay pushes him off.
Slay connects with a solid leg kick.
Funakoshi with a body punch. A glancing blow.
Funakoshi dips down and scores with a jab to the body.
Nice shot lands for Funakoshi.
Slay takes a shot to the eye socket. That's gotta hurt.
That's one minute gone in the round.
Slay scores with a crisp jab that stopped Funakoshi in his tracks.
A nice inside leg kick there by Slay. That's going to slow Funakoshi down.
Slay takes an uppercut right on the button but keeps his composure.
Slay uses some good footwork to avoid the body shot by Funakoshi.
Funakoshi fails with a takedown attempt.
Slay takes a body punch but keeps moving.
Funakoshi has his front leg slapped to the side - a nice low kick landing there from Slay.
Funakoshi closes the distance and clinches up with Slay, looking for a takedown. Funakoshi pushes Slay against the cage but Slay circles to the side and manages to break the clinch.
Slay throws a series of punches but Funakoshi avoids them all with ease.
Cassius Slay is looking to keep the fight on the feet at all costs.
Slay jabs at Funakoshi's body.
Slay tries to clinch up.
Slay loads up on a big right hand but Funakoshi slips the punch.
Funakoshi showing good head movement there, avoiding the strikes from Slay.
That's two minutes gone in the round.
Funakoshi lands a nice hook to Slay's body. Slay takes it in his stride and looks to land his own strikes.
Funakoshi misses with a hook
and Slay counters with a good low kick that Funakoshi was not able to check.
The fans in attendance giving it up for the two fighters, who have really let it all hang out in the last minute or so!
Funakoshi pushes Slay up against the cage in a clinch.
Funakoshi drops down for a takedown but doesn't get it.
That's three failed takedown attempts in the round for Gichin Funakoshi. That's going to take a lot out of him.
Slay lands with a left to the head.
Funakoshi wants a takedown but no success here.
A hook to the body from Slay.
Both fighters are absolutely exhausted here.
Funakoshi drops down looking for an ankle pick but Slay pulls his leg out and moves away.
Funakoshi lands with a nice body punch.
A looping hook to the body misses from Slay. Funakoshi does a little dance to reset his feet.
Funakoshi is looking to wear down Slay with body shots, infact he's throwing more body shots than head shots at the moment.
That's three minutes gone in the round.
Slay pulls out of a head kick attempt.
The fighters are starting to get sweaty, which will make takedowns a bit more tricky.
Slay scores with a reasonable looking shot to the body. Funakoshi doesn't seem bothered though.
Slay staying out of range there.
Funakoshi takes one on the chin but seems OK.

Funakoshi looking for a takedown here - he's got it.
The referee must be thinking about standing these guys back up.
Slay wants to control here, rather than go for any submissions from the bottom. At least for now.
Funakoshi chips away with some ground and pound.
Slay is adopting a defensive guard.
Funakoshi trying to control the position from guard on top but Slay is wriggling around, looking for whatever he can.
Funakoshi postures up in Slay's guard and throws a big left but Slay blocks it.
That's four minutes gone in the round.
Slay keeping moving, preventing Funakoshi from controlling successfully.
Slay avoiding any damage from the ground and pound.
We've seen a great period of action over the last minute or so - credit to both fighters for going all out!
Funakoshi throwing strikes from guard but Slay blocks nicely.
Slay wants to sweep here but Funakoshi controlling him for the moment.
The ref warns both fighters not to hold the cage as they work up against the meshing.
As the round comes to an end the crowd are showing their appreciation for a great round of action.
Funakoshi throwing strikes from guard but Slay blocks nicely.
Funakoshi trying to control the position from guard on top but Slay is wriggling around, looking for whatever he can.
And thats the end of the round the fighters go back to their corners.
That was a close second round but I would say that Gichin Funakoshi will probably get the nod.
That's time! Funakoshi's corner gives him a slap on the ass as he gets ready to fight.

Slay throws out a loose jab but Funakoshi uses good head movement to avoid it.
Funakoshi misses with a body shot.
Funakoshi lands a glancing blow to the side of Slay's head.
Slay stuffs the takedown.
Slay just misses with a punch to the body.
Funakoshi misses with a body shot.
Funakoshi clinches with his opponent.
Funakoshi is looking for a takedown up against the cage. Slay gets underhooks though and prevents the takedown attempt.
Funakoshi is trying to work for a single leg takedown but Slay pulls him back up using the underhooks.
That's three failed takedown attempts in the round for Gichin Funakoshi. That's going to take a lot out of him.
Funakoshi prevents a body shot from Slay.
Slay has a couple of punches blocked by Funakoshi.
Funakoshi tries for a takedown. No joy.
Slay lands with a light punch inside.
Both fighters are breathing heavily.
Funakoshi is working for takedown but Slay is calmly controlling the position for now.
Slay tries to throw a body punch but Funakoshi avoids it by throwing Slay back against the cage.
That's one minute gone in the round.
Funakoshi is working for takedown but Slay is calmly controlling the position for now.
Funakoshi drops down for a takedown but doesn't get it.
Slay lands a knee to the head.
Slay lands punches inside but they're not really causing much damage.
Slay struggles to land a body shot inside as Funakoshi controls his hands.
Slay struggles to land a body shot inside as Funakoshi controls his hands.
Cassius Slay seems to be working more effectively in the clinch in the fight so far.
Slay throws a punch but it's blocked by Funakoshi.
Funakoshi tries for a takedown. No joy.
A short left from Slay.
Slay tries to throw a body punch but Funakoshi avoids it by throwing Slay back against the cage.
Slay lands a hook to the side of the head.
Slay working on landing some head shots here - that one got through nicely.
Slay struggles to land a body shot inside as Funakoshi controls his hands.
Slay misses with a hook to the ribs.
Slay pushes Funakoshi back against the cage and unloads with a body punch.
Slay misses with a shot to the kidneys.
That's two minutes gone in the round.
Slay working aggressively here.
Funakoshi is working for takedown but Slay is calmly controlling the position for now.
Funakoshi is working for a takedown up against the cage. He can't get it on this occasion though.
Slay unloads a knee to the mid-section. Funakoshi lets out a prehistoric sounding urrrrgh.
Wooooo! Give it up for these two warriors! They are putting on a show!
Slay can't find room to land a body shot as Funakoshi controls the action.
Slay lands with a short punch from the clinch.
Slay stops a takedown attempt from Funakoshi.
Funakoshi drops down looking for an ankle pick but Slay pulls his leg out and moves away.
Slay keeping a good distance there, avoiding the body shot.
Slay takes a swing at Funakoshi's ribcage but misses.
Slay keeping a good distance there, avoiding the body shot.
Slay lands with a nice low kick. That'll leave a bruise.
Funakoshi takes a punch right to his stomach. That took the wind out of him momentarily.
That's three minutes gone in the round.
Nice cross by Slay.
Funakoshi defending well as Slay loads up on a big left hand.
Funakoshi misses with a hook to the body
letting Slay counter with a right hand.
Funakoshi defending well as Slay loads up on a big left hand.
Slay throws a leg kick
and Funakoshi counters with a straight right hand.
Funakoshi takes a shot right to the liver - Bas would have been proud of that punch.
Slay wants to clinch up but Funakoshi keeps it at a distance.
Funakoshi has his front leg slapped to the side - a nice low kick landing there from Slay.
Slay misses with a body kick.
Slay tries to close the distance and clinch up against the cage but Funakoshi paws at him with a jab and circles away.
Slay looks to land a combination but Funakoshi avoids it well.
Slay throws a leg kick but Funakoshi checks it.
Funakoshi misses with a wild body shot.
Funakoshi connects with a body shot that sends Slay's belly button to the back.
That's four minutes gone in the round.
Funakoshi works his jab well there, keeping his opponent at a distance.
Slay keeping a good distance there, avoiding the body shot.
Cassius Slay seems to be getting the better of the standup.
The fans in attendance giving it up for the two fighters, who have really let it all hang out in the last minute or so!
Funakoshi shoots in for a double leg but Slay sprawls well. That's going to sap some energy.
Funakoshi cracks a nice hook into Slay's ribs.
Slay is looking to take this fight into the clinch.
Funakoshi misses with a right hand
enabling Slay to counter with a crisp jab.
Ooooh, nice body kick lands from Slay. Funakoshi shrugs it off though.
Slay throws a shot from downtown. Funakoshi moves away and avoids it.
Funakoshi misses with a wild body shot.

Slay fakes with an overhand right and moves in to clinch with Funakoshi, pushing him back against the cage.
As the round comes to an end the crowd are showing their appreciation for a great round of action.
Funakoshi blocks a body shot from Slay.
A short body shot lands from Slay as the two fighters clinch.
Slay goes for a body shot but it's blocked.
And thats the end of the round the fighters go back to their corners.
Cassius Slay really dominated that round.
The fighters get back to their feet, the hooter sounds and we're back to the action!

Funakoshi takes one to the chin there.
Funakoshi takes a swing at Slay's ribcage but misses.
Funakoshi looks to score with a jab to the body but Slay is just out of range.
Slay lands a right hook to the body.
Funakoshi displays some good footwork, moving neatly out of range as Slay throws out the jab.
Funakoshi cracks a nice hook into Slay's ribs.
Slay throws an uppercut from half a mile away. Funakoshi sees it coming and avoids it easily.
Funakoshi moves out of range of the strikes.
Funakoshi clinches up with Slay and pushes him back against the cage.
Slay tries to work over Funakoshi's body with a swooping hook but it only glances the target.
Slay throws a blind hook that connects with the side of Funakoshis head.
Slay tries to throw a body punch but Funakoshi avoids it by throwing Slay back against the cage.
Slay tries a shoulder strike but it doesn't do any damage.
An uppercut on the inside fails to land for Slay.
An uppercut on the inside fails to land for Slay.
That's one minute gone in the round.
With the fighters clinched against the cage, Slay creates a bit of distance for himself and scores with a nice uppercut.
Slay misses with a hook to the ribs.
Funakoshi tries for a takedown. No joy.
Slay lands with a good tight uppercut to the head.
Funakoshi can't get the takedown.
Slay tries a knee to the head but he's missed.
Funakoshi drops down for a takedown but doesn't get it.
That's three failed takedown attempts in the round for Gichin Funakoshi. That's going to take a lot out of him.
It's got to the stage where if one of these guys blows hard enough, the other might fall over.
Funakoshi tries to score a body lock takedown but Slay shows good agility there to stay on his feet.
Slay lands a shoulder strike that jolts his opponent's head backwards.
Funakoshi tries for a takedown but Slay manages to get underhooks.
Funakoshi looking for a takedown.
Slay lands a left hand that snaps the head of Funakoshi backwards.
Slay lands a right hand.
Slay pushes Funakoshi back against the cage and unloads with a body punch.
Slay scores with a nice hook to the head.
That's two minutes gone in the round.
Knees in the clinch landing for Slay.
Wooooo! Give it up for these two warriors! They are putting on a show!
A hook to the body from Slay.
Slay misses with a knee to the head.
Slay tries to throw a body punch but Funakoshi avoids it by throwing Slay back against the cage.
Slay tries to work over Funakoshi's body with a swooping hook but it only glances the target.
Funakoshi is trying to work for a single leg takedown but Slay pulls him back up using the underhooks.
Slay misses with the head strike.
Slay misses with a punch on the inside.
Slay can't find room to land a body shot as Funakoshi controls the action.
Slay lands a body punch - he's looking to wear down Funakoshi.
Slay scores with a hook to the body.
Slay is pressed up against the cage. Funakoshi has hold of a leg and is looking to drag Slay down to the mat. Slay avoids the attempt though and has circled away. We're back to striking at a distance.
Nice defenses there by Funakoshi.
Slay uses decent footwork to sidestep a right hand from Funakoshi.
Funakoshi missing with a left hand there. Slay was out of range so wasted energy throwing that one.
That's three minutes gone in the round.
Funakoshi slips under a jab.
Funakoshi slips a straight right by Slay.
Funakoshi moves forwards but Slay connects with a nice, crisp jab.
Funakoshi tries to land with a swinging hook to the body but Slay was well out of range. Poor timing from Funakoshi.
Slay throws a predictable looking body shot
and Funakoshi counters with a right hand to the body.
Slay throws a lazy right hand but Funakoshi sees it coming a mile off and sidesteps it easily.
Funakoshi shoots in looking for a takedown but Slay manages to keep the fight standing, pushing Funakoshi's face into the canvas for good measure before circling away.
A looping hook to the body misses from Funakoshi. Slay does a little dance to reset his feet.
Funakoshi lands with a cross.
Funakoshi defending well as Slay loads up on a big left hand.
Funakoshi just misses with a punch to the body.
Jab from Funakoshi.
Funakoshi swings away with a body shot that misses
and Slay counters with a lovely shot to the body.
That's four minutes gone in the round.
Funakoshi throws a body punch but Slay moves out of range.
Gichin Funakoshi seems to be the more aggressive standup fighter in this bout.
Funakoshi throws a body punch but Slay moves out of range.
Funakoshi stumbles momentarily as he takes a strong leg kick from Slay.
Funakoshi tries to land with a swinging hook to the body but Slay was well out of range. Poor timing from Funakoshi.
A nice combination there by Slay.
A jab from Funakoshi does it's job there.
This is a great period of action - very entertaining stuff!
Funakoshi takes a swing at Slay's ribcage but misses.
Slay throws a right hand that Funakoshi ducks under and follows up with a left that Funakoshi also avoids with ease.
Funakoshi comes forward and lands a shot to the body, then darts back out of range.
Slay throws a low kick but Funakoshi moves out of range easily.
As the round comes to an end the crowd are showing their appreciation for a great round of action.
Slay takes a shot right to the bread basket.
Funakoshi misses the jab.
Funakoshi swings for the body but Slay moves out of range.
And thats the end of the round the fighters go back to their corners.
Cassius Slay dominated that fourth round.
OK. That's time! The bell goes and we're back to the action. This is the final round!

Slay throws a head kick that misses and slips in the process. He scrambles back to his feet and the fighters circle.
Funakoshi shoots in with a takedown attempt and he has Slay pinned against the cage. Slay gets the underhooks and manages to circle away.
Funakoshi throws a hard body shot but it just misses.
Slay throws a hook but Funakoshi blocks it.
Funakoshi swings for the body but Slay moves out of range.
Funakoshi misses with a jab to the body
and Slay counters with a shot to the ribs. That looked like it hurt.
Slay throws a jab when Funakoshi was well out of range.
Funakoshi is the aggressor but that punch slipped nicely by Slay.
Funakoshi moves out of range as Slay strikes.
Funakoshi misses with a body shot. Nice footwork from Slay.
Funakoshi throws a hard body shot but it just misses.
Slay avoids the body shot from Funakoshi.
That's one minute gone in the round.
Funakoshi swings and misses with a hook to the body.
Funakoshi swings for the body but Slay moves out of range.
Funakoshi takes a shot right to the liver - Bas would have been proud of that punch.
Funakoshi misses the shot to the body.
Slay misses with an uppercut. Funakoshi saw that one coming.
Funakoshi gets the takedown into side control.
Both of our modern day gladiators look out of it here - an gruelling 5 rounds of action taking it's toll on them, no doubt.
Funakoshi tries to advance to mount but Slay denies him.
Funakoshi is looking to take a break and control but Slay is keeping him honest, looking to work from the bottom.
Slay is trying to control Funakoshi's posture but Funakoshi avoids it.
That's two minutes gone in the round.
Slay tries to get back to half guard but can't.
Funakoshi throwing shots but missing, from side control.

Funakoshi looking for an arm triangle but it's way too loose to do anything.
You can see the frustration on Slay's face as Funakoshi controls the position.
Funakoshi tries for a kimura. Not really close to a finish though.
Slay tries to bench press Funakoshi off him but Funakoshi keeps the position.
That's three minutes gone in the round.
Funakoshi swings around for an armbar but Slay sees it coming a mile off and turns beautifully into Funakoshi's guard.
Funakoshi controls Slay momentarily but Slay frees himself.
Slay wants to stand but Funakoshi has a closed guard, so he can't escape.
The fighters are pressed up against the cage, both looking to find a bit of space to work.
Funakoshi throws a couple of weedy looking strikes off his back.
Slay is looking to stand up but Funakoshi won't let him.
Gichin Funakoshi has stepped it up - he knows he needs a finish here!
Funakoshi looking to sweep here. No luck so far.
Slay stands up and looks to throw the legs aside to pass to side control. Funakoshi swivels though and keeps the full guard.
Funakoshi throws a couple of weedy looking strikes off his back.
Funakoshi escapes his hips to the side and looks to be working for an armbar. Slay gives him a little smile and shakes his head. No chance.
Slay must be cautious of submissions here, given that his opponent has the superior Jiu Jitsu.
Funakoshi is trying to keep Slay in close.
That's four minutes gone in the round.
Slay wants to stand but Funakoshi has a closed guard, so he can't escape.
Slay trying to control but Funakoshi is working from the bottom.
Funakoshi has been looking to land a fair amount of strikes on the ground. He might be looking to soften his opponent up in order to work for a submission.
Funakoshi strikes from his own guard.
Both fighters really going for it on the ground here!
Slay wanted to stand there but Funakoshi had control of the position.
Funakoshi is looking for a triangle here but Slay uses the submission attempt to pass into side control.
This has been an exciting period of action!
Funakoshi is moving his hips around well on the bottom and has managed to get back to half guard.
Slay tries to stand but can't do so whilst Funakoshi controls his leg.
As the round comes to an end the crowd are showing their appreciation for a great round of action.
Funakoshi slips a foot under and gets full guard. Nice work.
And that's the end of the fight!
Gichin Funakoshi showed his dominance in that final round.
I think Slay has won this one but let's see whether the judges agree with me. Over to the ring announcer for the scorecards.
Ladies and gentlemen, after 5 rounds of action, we go to the scorecards for a decision.
Judge Steve Smith scores the fight 47:48
Judge Alec Ball scores the fight 47:48
Judge Ian Loll scores the fight 47:48
In favor of your winner, by unanimous decision... Cassius Slay!
Cassius Slay is the new lightweight champion!
|
|
|
|
|
|
|
|
|
|
|
|
|
|
|
|
|
|
|
|
|
|
|
| S |
C
A |
G |
S |
C
B |
G |
|
S |
C |
G |
|
energy
A | B |
|
hype
A | B |
|
pop
A | B |
|
mgr
A | B |
|
FIGHT
RATING
100% |
|
|
|
|
|
|
