|
|
PBP Commentary |
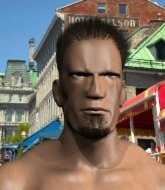
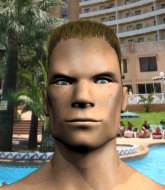
Coming up we have a welterweight MMA rules bout between John Stark (ranked 0 p4p, 0 weight class) and Gibson Rickenbacker v.2 (ranked 0 p4p, 0 weight class). 2. Gibson Rickenbacker v.2 has the better chin. Will he look to stand and bang today?
 |
|
 |
| 175 cm
21
175 lbs
1 - 1 - 0 |
|
175 cm
18
180 lbs
0 - 0 - 0 |
BJJ Blue Belt
Basic striking
Big heart |
|
BJJ Blue Belt
Excellent MT
Determined |
|
| |
|
Ladies and gentlemen. This fight is 3 rounds, in the welterweight division.
Introducing the fighter to my left, fighting out of the red corner.
With a record of
1 - 1 - 0, fighting out of Sydney, John Stark!
And introducing the fighter to my right, fighting out of the blue corner.
With a record of
0 - 0 - 0, fighting out of Sydney, Gibson Rickenbacker v.2!
The judges for this bout are Steve Erwin, Winston Howard and Skip Squint.

The bell rings for round one and we are underway!

Stark looking to shoot here. He's gone for it and he's landed a takedown into mount! Oh, that's bad for Rickenbacker v.2!

Stark gets to his feet and calls his opponent to stand. Here come the fireworks!
A head kick misses from Rickenbacker v.2.
Rickenbacker v.2 gets caught on his heels momentarily as he allows Stark to score an easy takedown into full guard.
Stark stands up and waves to Rickenbacker v.2 to follow him.
Rickenbacker v.2 throws a sloppy head kick and Stark moves out of range easily.
Rickenbacker v.2 tries to land a front kick but Stark steps back. That was a bit too telegraphed.
John Stark seems to be the more aggressive standup fighter in this bout.
Rickenbacker v.2 plants his feet and lands a nice head kick!
The crowd cheering loudly, showing their appreciation for the quality fight we're seeing here.
Rickenbacker v.2 keeping a good distance there, avoiding the body shot.
Rickenbacker v.2 tries to clinch up against the cage, rushing in the close the distance. Stark manages to break the clinch and circles back to the middle of the mat.
Rickenbacker v.2 lands a nice leg kick that just misses Stark's sensitive parts.
Rickenbacker v.2 tries a head kick but it misses.
Stark tries to clinch up but Rickenbacker v.2 circles away and keeps his distance.

That's one minute gone in the round.
A head kick misses from Rickenbacker v.2.
Stark avoids the head kick by Rickenbacker v.2.
Stark shoots in for a takedown and gets it. Let's see what he's got on the mat.

Stark drops back looking for a heel hook - he quickly realises he's not going to get it but Rickenbacker v.2 manages to dive on top of him before he can escape and now Stark has Rickenbacker v.2 in his guard.
Stark is looking for a triangle but Rickenbacker v.2 pushes his legs off easily.
Stark has his feet on Rickenbacker v.2's hips. He pushes off and gets to his feet. Nice work.

That's two minutes gone in the round.
Stark doesn't manage to clinch there - Rickenbacker v.2 circles away.
Rickenbacker v.2 slips a jab from Stark.
Stark looks for a takedown. He's got it. We're now in half guard.
Stark is breathing heavily.
This is a great period of action - very entertaining stuff!
Stark takes a deep breath and rests his weight momentarily on top of his opponent, to control the position.
Rickenbacker v.2 is looking to improve his position.
Stark seems to have lost interest with the ground game and is thinking about standing back up.
Stark decides to stand up.
Rickenbacker v.2 keeping a good distance there, avoiding the body shot.

That's three minutes gone in the round.
Rickenbacker v.2 tries a head kick but it misses.
Rickenbacker v.2 jabbing away but nothing is landing.
Rickenbacker v.2 wants to clinch.
Stark shoots in and gets a takedown into Rickenbacker v.2's guard.

Rickenbacker v.2 escapes his hips to the side and looks to be working for an armbar. Stark gives him a little smile and shakes his head. No chance.
Rickenbacker v.2 is working from a closed guard but he's struggling to control his opponent.
Rickenbacker v.2 might have to switch it up a bit here because his efforts to control Stark kaven't been going to plan, at least at the current moment in time.
Stark gets to his feet and steps away from his opponent.
Stark fails with a rather predictable takedown attempt.

That's four minutes gone in the round.
Stark blocks a head kick by Rickenbacker v.2.
Rickenbacker v.2 lands with a head kick! That's gotta hurt.
Stark wants to clinch.
The fans in attendance giving it up for the two fighters, who have really let it all hang out in the last minute or so!
A head kick misses from Rickenbacker v.2.
Stark throws a looping left and ducks down for a takedown. He's got his arms around Rickenbacker v.2's waist but Rickenbacker v.2 gets an underhook and avoids the takedown by throwing Stark off to one side.
Rickenbacker v.2 throws a head kick that connects with a bit of head and a bit of hand.
Rickenbacker v.2 lands with a slapping head kick.
Stark ducks under a wild hook from Rickenbacker v.2.
Rickenbacker v.2 lands with a thumping leg kick.
The crowd are going absolutely nuts as the round comes to an end - what a fantastic round of action!
Stark gets the takedown into side control.
Rickenbacker v.2 sneaks back into half guard.
Stark prevents Rickenbacker v.2 from improving his position.
And thats the end of the round the fighters go back to their corners.
John Stark dominated that round.
That's time! Back to the action!

Rickenbacker v.2 scores with a head kick.
Stark shoots in and gets a takedown into Rickenbacker v.2's guard.
Stark decides he's had enough of playing guard and decides to stand. Come on Rickenbacker v.2, up you get!
Rickenbacker v.2 throws a head kick that misses.
Stark throws a series of punches but Rickenbacker v.2 avoids them all with ease.
Rickenbacker v.2 lands a leg kick that knocks Stark off balance momentarily.
Stark shoots in and scores a nice double leg takedown into half guard.
We've seen a great period of action over the last minute or so - credit to both fighters for going all out!
Rickenbacker v.2 wants to improve his position but Stark is controlling well.
Stark content to control rather than advance.
Stark is pressing down on Rickenbacker v.2's thigh, looking to free his foot. Rickenbacker v.2 is holding on for now.
Both fighters are absolutely exhausted here.
That's one minute gone in the round.
Rickenbacker v.2 is looking to improve his position.
Stark passes into side control, despite Rickenbacker v.2's attempt to control the position.
The fighters are pressed up against the cage, both looking to find a bit of space to work.
Rickenbacker v.2 is trying to get back to half guard.
Stark working away.
Stark cracks Rickenbacker v.2 with a big elbow.
Stark working hard here to secure a kimura but he's not really in the right position for it.
Stark stands up and beckons Rickenbacker v.2 to his feet.
That's two minutes gone in the round.
Stark looks for a takedown here. Will he get it? Rickenbacker v.2 is fending him off so far but Stark persists. Nope, Rickenbacker v.2 circles away and we're back to standing.

Stark moves into the clinch.
Stark looks to throw an elbow but misses.
Rickenbacker v.2 tries to pull guard but Stark won't allow it.
Rickenbacker v.2 tries to break free but Stark pushes him back against the cage.
A frustrated look appears on Stark's face as he tries to break the clinch.
Rickenbacker v.2 is looking to break free of the clinch but Stark has double underhooks.
Stark goes for a takedown attempt but Rickenbacker v.2 pushes him away and we're back to fighting at a distance.
This has been an exciting period of action!
Stark avoids the head kick by Rickenbacker v.2.
That's three minutes gone in the round.
Rickenbacker v.2 is looking to clinch.
A jab from Rickenbacker v.2 misses.
Rickenbacker v.2 stuffs the takedown.
That's three failed takedown attempts in the round for John Stark. That's going to take a lot out of him.
Rickenbacker v.2 throws a hard body shot but it just misses.
Stark keeping a good distance there, avoiding the body shot.
Rickenbacker v.2 lands a head kick. Stark smiles back at him and beckons him forward.
Rickenbacker v.2 lands a head kick!
A head kick from Rickenbacker v.2 lands but Stark takes it in his stride.
Stark avoids the head kick by Rickenbacker v.2.
Rickenbacker v.2 is looking to clinch but Stark is avoiding it.
Stark avoids the head kick by Rickenbacker v.2.
Stark closes the distance, clinches up and gets a nice trip takedown into side control. Very smooth.
Wooooo! Give it up for these two warriors! They are putting on a show!
Rickenbacker v.2 gets back to half guard.
That's four minutes gone in the round.
Stark is looking to take a break and control but Rickenbacker v.2 is keeping him honest, looking to work from the bottom.
Stark is trying to work for a kimura but Rickenbacker v.2 is defending well.
Rickenbacker v.2 is looking to regain full guard. Not this time though.
Stark controlling the action here.
As the round comes to an end the crowd are showing their appreciation for a great round of action.
Rickenbacker v.2 actively working from the bottom here.
Rickenbacker v.2 is looking to control Stark's leg but it's slowly edging free. Can Rickenbacker v.2 avoid being mounted?
And thats the end of the round the fighters go back to their corners.
That was a close second round but I would say that John Stark will probably get the nod.
Well, the break between rounds is over. Let's get back to the scrappin! Let's get this one finished - here comes the final round!

Rickenbacker v.2 lands a head kick!
Rickenbacker v.2 tries to close the distance and clinch up but Stark swats him away and circles back towards the center.
Stark drives through with a really nice takedown into side control.
Stark decides to stand up, so the ref orders Rickenbacker v.2 to his feet.
Gibson Rickenbacker v.2 seems to be getting the better of the standup.
Rickenbacker v.2 tries a head kick but it misses.
Rickenbacker v.2 connects with a high kick.
Rickenbacker v.2 throws a nice head kick!
Rickenbacker v.2 avoids the clinch attempt nicely.
Rickenbacker v.2 throws a head kick that misses.
Both fighters are breathing heavily.
Stark shoots in for a takedown and gets it. Oh and he's advanced to full mount straight away.
The crowd are loving this. Great action here.
Stark has hold of Rickenbacker v.2's left arm, perhaps looking for a submission. The two fighters tussle over control of the isolated limb and Rickenbacker v.2 manages to get his arm back to his side and away from danger.
That's one minute gone in the round.
Stark controlling from mount.
Rickenbacker v.2 tries to hold on but Stark pushes him away.
Rickenbacker v.2 working to try and regain half guard.
Stark with shots to the head and body - Rickenbacker v.2 looks very uncomfortable down there.
Rickenbacker v.2 working to try and regain half guard.
Rickenbacker v.2 is persisting with the attempt to improve his position.
That's two minutes gone in the round.
Rickenbacker v.2 is writhing around trying to get back to his feet.
Rickenbacker v.2 is wriggling around trying to escape.
Stark takes a little breather and maintains the position. The referee will be looking for him to stay active from such a dominant position though.
Stark avoids the attempt from Rickenbacker v.2 to control.
Stark is standing up, even though he is in mount.
Rickenbacker v.2 tries to keep at a distance but Stark has taken the fight into the clinch.
Stark stalling against the cage.
The fans in attendance giving it up for the two fighters, who have really let it all hang out in the last minute or so!
Rickenbacker v.2 has had enough of the clinch and is looking to separate.
Gibson Rickenbacker v.2 has stepped it up - he knows he needs a finish here!
That's three minutes gone in the round.
Stark taking a breather.
A head punch on the inside from Stark fails to land.
Rickenbacker v.2 fails to pull guard.
Stark wants a takedown.
Stark fails to pull guard.

Rickenbacker v.2 pulls guard effortlessly.
Rickenbacker v.2 is working actively off his back, looking to secure an arm or perhaps work for a triangle.
Rickenbacker v.2 working for a triangle but Stark defends it easily.
Stark in full guard, throwing the ground and pound. No damage this time.
That's four minutes gone in the round.
Stark gets to his feet - Rickenbacker v.2 follows without any prompting.
Rickenbacker v.2 shoots for a double leg takedown but Stark sprawls well. He's pushed Rickenbacker v.2's face into the mat and manages to get back to his feet relatively easily.
Stark looking to shoot here. He's gone for it and he's landed a takedown into mount! Oh, that's bad for Rickenbacker v.2!
John Stark is fighting for a decision here - he's started to take the cautious approach.
The crowd are loving this. Great action here.
Stark goes for an armbar but he's not got it
Rickenbacker v.2 turns into him and now he's in Stark's guard.
Stark is looking to stand up but Rickenbacker v.2 isn't so interested in that idea.
And that's the end of the fight!
John Stark showed his dominance in that final round.
Well I reckon that's a shut out for Stark, winning every round. Will the judges agree? They are the ones who matter, even if they are often depressingly incompetent. Over to the ring announcer for the scorecards.
Ladies and gentlemen, after 3 rounds of action, we go to the scorecards for a decision.
Judge Steve Erwin scores the fight 30:27
Judge Winston Howard scores the fight 30:27
Judge Skip Squint scores the fight 30:27
In favor of your winner, by unanimous decision... John Stark!
|
|
|
|
|
|
|
|
|
|
|
|
|
|
|
|
|
|
|
|
|
|
|
| S |
C
A |
G |
S |
C
B |
G |
|
S |
C |
G |
|
energy
A | B |
|
hype
A | B |
|
pop
A | B |
|
mgr
A | B |
|
FIGHT
RATING
62% |
|
|
|
|
|
|

