|
|
PBP Commentary |
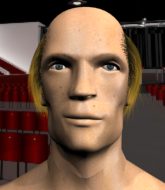
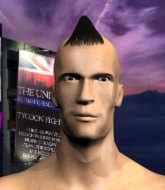
Coming up we have a light heavyweight MMA rules bout between Tommy Hatcher (ranked 0 p4p, 0 weight class) and Peter Piper II (ranked 0 p4p, 0 weight class). Tommy Hatcher has the better chin. Will he look to stand and bang today?
 |
|
 |
| 180 cm
22
212 lbs
10 - 3 - 0 |
|
187 cm
22
220 lbs
5 - 2 - 0 |
Good wrestling
Excellent boxer
Granite chin |
|
Good wrestler
Excellent boxer
Good gas tank |
|
| |
|
Ladies and gentlemen. This fight is 3 rounds, in the light heavyweight division.
Introducing the fighter to my left, fighting out of the red corner.
With a record of
10 - 3 - 0, fighting out of London, Tommy Hatcher!
And introducing the fighter to my right, fighting out of the blue corner.
With a record of
5 - 2 - 0, fighting out of London, Peter Piper II!
The judges for this bout are Andrew Berry, Chris Edwards and Paul Tew.

The bell rings for round one and we are underway!
Hatcher misses with a head kick.
Hatcher connects with a good right hand that stumbles Piper II. Piper II circles away out of range and recomposes himself.

Piper II clinches up against the cage.
Piper II managing to block the knees to the body from Hatcher.
Piper II swings away with an uppercut that misses.
A short right hand to the side of the head by Piper II.
Piper II swings away with an uppercut that misses.
Hatcher missing with knees to the body.
Hatcher misses with a hook to the ribs.
Piper II is trying to drag Hatcher to the mat but Hatcher just about manages to keep his footing. He used the cage to his advantage there.
Hatcher connects with a knee to the head.
Hatcher with an attempt at a knee that misses.
The fighters are pressed against the cage, as the pace of the fight slows.
Hatcher tries a body shot but Piper II blocks it.

That's one minute gone in the round.
Piper II displaying some good clinch control by pressing Hatcher up against the cage.
A short right hand to the side of the head by Piper II.
Hatcher scores a nice knee to the body.
Piper II scores with a shoulder strike.
The referee calls for Hatcher to work.

Piper II drags the fight down to the ground.
We could do with one of the fighters taking the initiative a bit more on the ground - they're both waiting to capitalize on a mistake.
Piper II is trying to control the position from the bottom.
Piper II has Hatcher pulled in close to control his posture.

That's two minutes gone in the round.

Piper II has an active guard here but Hatcher has managed to pass into half guard.
Piper II trying to hold on to Hatcher's head to control him but Hatcher postures up.
The fighters are pressed up against the cage, both looking to find a bit of space to work.
Piper II is not content to let Hatcher control the position.

That's three minutes gone in the round.
Piper II is working for an escape here. He's hooked one of Hatcher's legs and he's managed to sneak out and take Hatcher's back!
Piper II missing with strikes.
So, who will make the next big move? In this position it could be crucial.
Well, with Piper II on his back, surely it's only a matter of time before Hatcher is tapping out... Can he escape the position?
A lull in the action here.
Piper II struggling to land strikes to the head as Hatcher covers up.

That's four minutes gone in the round.
Piper II looking to hold on to the position here but Hatcher rolls and ends up regaining guard.
Piper II passes into half guard.
Piper II with the ground and pound but Hatcher uses the opportunity to regain guard.
Piper II throws a big right hand that misses.
Piper II loading up with the ground and pound but he's missing more than he's landing in this flurry.
Piper II stands up and looks to throw the legs aside to pass to side control. Hatcher swivels though and keeps the full guard.
Piper II advances position into side control!
The crowd applaud the fighters efforts here as the round comes to an end.
Piper II throwing ground and pound but whilst doing so, he forgets to control position and Hatcher works his way back to half guard. Good composure under pressure.
And thats the end of the round the fighters go back to their corners.
Peter Piper II dominated that round.
The fighters get back to their feet, the hooter sounds and we're back to the action!

Piper II with a jab.
Piper II connects with a looping left hand that seems like it dazed Hatcher momentarily.
Hatcher looks to land a body kick but Piper II moved away.
Piper II is looking to clinch.
Hatcher fakes high and swings low for a body shot but Piper II manages to avoid it.
Piper II throws an off balance right hand
and Hatcher counters with a nice leg kick.
Piper II is looking to land body kicks.
A jab from Piper II does it's job there.
Hatcher throws a body kick that misses.

Hatcher moves into the clinch.
Hatcher is trying to slow down the pace in the clinch, to catch his breath.
That's one minute gone in the round.
Hatcher lands a nice shot to the body.
Piper II pressing his opponent against the cage.
Hatcher blocks a couple of punches on the inside.
Piper II letting Hatcher take a breather here.
Piper II misses with the head strike.
Piper II leaning his opponent against the cage.
Hatcher prevents a body shot from Piper II.
A short left from Hatcher.
That's two minutes gone in the round.
Piper II tries a shoulder strike but it doesn't do any damage.
Hatcher tries to throw a body punch but Piper II avoids it by throwing Hatcher back against the cage.
Piper II tries to throw a body punch but Hatcher avoids it by throwing Piper II back against the cage.
Hatcher tries to throw a body punch but Piper II avoids it by throwing Hatcher back against the cage.
Hatcher goes for a body shot but it's blocked.
Piper II lands with a left to the head.
Hatcher tries to throw a body punch but Piper II avoids it by throwing Hatcher back against the cage.
Hatcher wants to stall.
Piper II taking a breather.
A head punch on the inside from Piper II fails to land.
This has been an exciting period of action!
Hatcher looking to stall.
That's three minutes gone in the round.
Piper II makes some space for himself and lands an uppercut.
Hatcher will no doubt start fighting again in a minute but for now he's just having a little rest, leaning Piper II up against the cage.
Hatcher throws a punch but it's blocked by Piper II.
Piper II tries to throw a body punch but Hatcher avoids it by throwing Piper II back against the cage.
Hatcher looking to stall.
Piper II swings away with an uppercut that misses.
Hatcher goes for a body shot but it's blocked.
Tommy Hatcher has scored more points in the clinch so far.
Hatcher misses the knee to the body. Nice hip positioning from Piper II.
Piper II misses with a punch on the inside.
A head punch on the inside from Piper II fails to land.
That's four minutes gone in the round.
Piper II is trying to slow down the pace in the clinch, to catch his breath.
Piper II working aggressively here.
Piper II misses with the head strike.
Piper II swings wildly with an uppercut but Hatcher uses good head movement to avoid it.
Piper II goes for a body shot but it's blocked.
Piper II misses with a punch to the body.
Piper II slows down the pace here.
Piper II throws a punch but it's blocked by Hatcher.
The crowd applaud the fighters efforts here as the round comes to an end.
Piper II drops to a knee looking for a takedown but Hatcher gets the underhooks and prevents it.
Hatcher blocks a couple of punches on the inside.
And thats the end of the round the fighters go back to their corners.
Peter Piper II showed his class in that round. I'd imagine he'll take it on all the scorecards.
The fighters get back to their feet, the hooter sounds and we're back to the action! Ladies and gentlemen, this is the final round!

Hatcher tries to bum rush Piper II with a series of wild strikes but Piper II uses good footwork to avoid the assault.
Piper II fakes with an overhand right and moves in to clinch with Hatcher, pushing him back against the cage.
Hatcher blocks a punch to the side of the head.
Piper II misses the knee to the body. Nice hip positioning from Hatcher.
Hatcher tries to work over Piper II's body with a swooping hook but it only glances the target.
Piper II is stalling here.
Piper II doesn't land with the attempted body shot.
Piper II trying to stall but Hatcher improves his position.
Hatcher goes for a body shot but it's blocked.
Piper II blocks a knee to the body. He'll have a nicely bruised forearm in the morning.
Hatcher blocking some punches.
Piper II pulls Hatcher into guard.
Piper II working a defensive guard here.
Piper II has the superior BJJ but he's also working some ground strikes into his gameplan.
That's one minute gone in the round.
Piper II throwing his legs up looking for a triangle.
Hatcher stopping the sweep attempt from Piper II.
Piper II trying to control the position.
Hatcher trying to pass the guard but can't manage it just yet.
That's two minutes gone in the round.
Piper II wants to improve his position but instead Hatcher has moved into half guard.
Piper II trying to control from the bottom.
Hatcher controlling the action here.
Hatcher has controlled the position for a good 20 seconds, which will no doubt be starting to frustrate his opponent.
Piper II manages to get to full guard.
That's three minutes gone in the round.
Piper II looking to sweep here. No luck so far.
Piper II isolates an arm and boxes in a triangle. Hatcher stacks Piper II on his neck as he steps over and passes to the side. He's now in a much more dominant position where he can look to do some serious damage. Nice move by Hatcher!
Piper II tries to work a leg under to get back to half guard but Hatcher wriggles his own leg back out and remains in side control.
You can see the frustration on Piper II's face, being in this tough position on the bottom.
That's four minutes gone in the round.
Hatcher content to control the pace. The referee will try and keep them active though.
Piper II is looking for a sweep.
Piper II is sneaking out the side here. He's bucked Hatcher off and has taken his back!
Hatcher avoids the strikes from Piper II.
Piper II keeps control of the position as Hatcher tries to break free.
Hatcher is trying to escape under a series of strikes and manages to escape from Piper II 's hooks.
And that's the end of the fight!
Peter Piper II comfortably won the final round on my scorecard.
Well Piper II has outworked and out performed his opponent in all aspects of the game today. He was simply too good and the decision should be no more than a formality. Over to the ring announcer for the scorecards.
Ladies and gentlemen, after 3 rounds of action, we go to the scorecards for a decision.
Judge Andrew Berry scores the fight 27:30
Judge Chris Edwards scores the fight 27:30
Judge Paul Tew scores the fight 27:30
In favor of your winner, by unanimous decision... Peter Piper II!
|
|
|
|
|
|
|
|
|
|
|
|
|
|
|
|
|
|
|
|
|
|
|
| S |
C
A |
G |
S |
C
B |
G |
|
S |
C |
G |
|
energy
A | B |
|
hype
A | B |
|
pop
A | B |
|
mgr
A | B |
|
FIGHT
RATING
46% |
|
|
|
|
|
|
