|
|
PBP Commentary |
Coming up we have a featherweight MMA rules bout between Snord Cranston (ranked 0 p4p, 0 weight class) and James Hardy II (ranked 0 p4p, 0 weight class). Hardy II is bouncing up and down as he enters the arena, backed by Last Resort- Papa Roach. James Hardy II has the better chin. Will he look to stand and bang today?
 |
|
 |
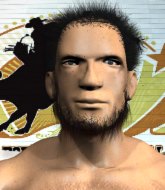
| 170 cm
22
155 lbs
1 - 2 - 1 |
|
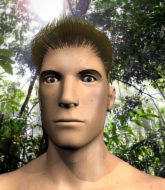
180 cm
26
155 lbs
4 - 4 - 0 |
Good wrestling
Excellent boxer
Very quick |
|
Good takedowns
Solid Muay Thai
Determined |
|
| |
|
Ladies and gentlemen. This fight is 3 rounds, in the featherweight division.
Introducing the fighter to my left, fighting out of the red corner.
With a record of
1 - 2 - 1, fighting out of London, Snord Cranston!
And introducing the fighter to my right, fighting out of the blue corner.
With a record of
4 - 4 - 0, fighting out of London, James Hardy II!
The judges for this bout are Chris Edwards, James Ackerman and James Atkins.

The bell rings for round one and we are underway!
Hardy II lands a jab. Then a cross. Then finally a nice hook to the body. Good work there by Hardy II.

Cranston gets a clinch.
A short uppercut from Hardy II.
Some stalling of biblical proportions here from Cranston.
Cranston makes some space for himself and lands an uppercut.
Cranston works on Hardy II's body with a couple of short punches.
Hardy II blocking some punches.
A shot in the inside from Cranston.
Cranston pushes Hardy II back against the cage and lands a hook to the side of the head.
Cranston lands with a short punch from the clinch.
Cranston struggles to land a body shot inside as Hardy II controls his hands.
Cranston lands with a right to the head.
This is a great period of action - very entertaining stuff!
Cranston working some nice short punches in the clinch.
Hardy II tries to land a knee to the head but misses.
Cranston stalling in the clinch.

That's one minute gone in the round.

Cranston gets the body lock takedown. After a quick scramble, Hardy II regains guard.
Cranston has to be careful here, sitting in the guard of a superior BJJ player.
The referee is pacing around the two fighters - he looks like he's thinking about a standup.

Hardy II is working actively off his back, looking to secure an arm or perhaps work for a triangle.
Cranston trying to pass the guard. He's being very persistent here but Hardy II manages to land a sweep and now he's on top!
Cranston looking to control the pace of the fight rather than finish it.
Hardy II trying to move into half guard but instead Cranston has managed to sweep!
The ref warns both fighters not to hold the cage as they work up against the meshing.

That's two minutes gone in the round.
Hardy II looking for submissions off his back, moving his hips, looking for an opening.
The fighters are pressed up against the cage, both looking to find a bit of space to work.
Cranston throwing strikes from guard but Hardy II blocks nicely.
Cranston throwing shots from guard but he's hitting more mat than opponent.
Cranston trying to pass the guard but can't manage it just yet.
Hardy II keeping moving, preventing Cranston from controlling successfully.
We've seen a great period of action over the last minute or so - credit to both fighters for going all out!
Cranston lands a couple of elbows.
Cranstonis looking to pass into half guard but Hardy II pushes him away with his feet and jumps on top - now Hardy II is in guard.
Hardy II is just sitting in guard, looking to avoid any submissions.
Hardy II trying to control but Cranston is working from the bottom.

That's three minutes gone in the round.
Hardy II trying to pass the guard but can't manage it just yet.
Hardy II has gone for a leg lock! Cranston slips out almost immediately though and dives into Hardy II's guard.
Cranston wants to pass the guard but Hardy II is keeping the position.
Cranston advances to half guard.
Cranston winds up and cracks Hardy II with a swinging punch to the side of the head.
Cranston is pressing down on Hardy II's thigh, looking to free his foot. Hardy II is holding on for now.
Cranston is keen to just control but Hardy II is a slippery customer.
Hardy II moves his hips nicely and gets into full guard.

That's four minutes gone in the round.
Hardy II lands a beautiful switch and he's in full mount! That could spell trouble for Cranston!
Cranston knows he needs to get back to his feet asap. He's simply no match for Hardy II on the ground.
Hardy II looking to secure an arm triangle but Cranston defends it well.
Hardy II trying to control but he's not successful this time.
As the round comes to an end the crowd are showing their appreciation for a great round of action.
Cranston really trying hard to get back to half guard here.
And thats the end of the round the fighters go back to their corners.
Snord Cranston dominated that round.
The minute break is over - no more time for sponges and pep talks - back to the action!

Cranston moves into the clinch successfully.
Cranston scores with a nice hook to the head.
Cranston can't find room to land a body shot as Hardy II controls the action.
Hardy II looking to stall.
Cranston works for underhooks and lands a body shot in the process.
Cranston working some nice short punches in the clinch.
Cranston has Hardy II pressed up against the cage. He's trying to work for a single leg takedown. Cranston pulls back from the cage and twists to the side, sending Hardy II tumbling to the mat - Cranston dives into Hardy II's guard.
Cranston throwing strikes from guard but Hardy II blocks nicely.
Snord Cranston overall seems to be getting the better of the ground position in the fight so far.
Cranston throwing strikes from guard but Hardy II blocks nicely.
That's one minute gone in the round.
Cranston working some strikes from top position.
Hardy II throwing his legs up looking for a triangle.
Cranston stands up and looks to throw the legs aside to pass to side control. Hardy II swivels though and keeps the full guard.
Hardy II working from the bottom, still in full guard. He's managed to get a loose triangle. Cranston doesn't seem to be doing much to defend here, obviously he feels comfortable in the position. Cranston manages to throw the legs off his shoulder and he's back into guard - no problem.
Cranston wants to pass the guard but Hardy II is keeping the position.
Cranston postures up in Hardy II's guard and throws a big left but Hardy II blocks it.
Cranston advances to half guard.
Cranston lands with a punch from half guard.
Hardy II is pressing down on Cranston's left leg trying to get back to full guard. He's managed it.
Cranston lands a nice shot whilst sitting in his opponent's guard.
That's two minutes gone in the round.
The crowd cheering loudly, showing their appreciation for the quality fight we're seeing here.
Cranston wants to control from the top but Hardy II keeps moving.
Cranston is pushing down on Hardy II's leg trying to pass to half guard. Hardy II is fighting to maintain full guard but Cranston has managed to sneak the leg through.
Hardy II tries to get to full guard but Cranston has control of the leg.
Hardy II wants to control but Cranston is keeping busy and won't allow it.
Hardy II gets full guard.
Hardy II is trying to control the position from the bottom.
Hardy II is breathing heavily.
Hardy II looking for submissions off his back, moving his hips, looking for an opening.
Hardy II preventing the ground and pound from doing any damage.
Cranston throwing strikes but missing.
Hardy II is looking for a triangle but Cranston pushes his legs off easily.
Cranston lands a couple of decent looking shots.
That's three minutes gone in the round.
Cranston thows a big elbow that misses.
Hardy II is looking for a triangle but Cranston pushes his legs off easily.
Cranston landing with the ground and pound.
Cranston works a leg free and moves into half guard.
Cranston throwing shots but Hardy II is blocking nicely.
Hardy II wants to get back to full guard.
Cranston wants to free his trapped foot but Hardy II is holding on for dear life with his legs.
Cranston throwing shots but they're hitting the canvas more than the man.

Cranston is working for submissions here but there's nothing on.
Cranston trying to control from Hardy II's half guard. Hardy II has other ideas though and has regained full guard.
Hardy II keeping moving, preventing Cranston from controlling successfully.
That's four minutes gone in the round.
Cranston working some ground and pound from guard but it's not doing any damage.
Hardy II is working actively off his back, looking to secure an arm or perhaps work for a triangle.
Hardy II is working actively off his back, looking to secure an arm or perhaps work for a triangle.
Fantastic stuff here - a very entertaining period of action, which has drawn cheers from the crowd.
Cranston works over Hardy II with some ground and pound from guard.
Cranston with a couple of shots to the head there. Not particularly brutal.
The crowd are going absolutely nuts as the round comes to an end - what a fantastic round of action!
Cranston wants to pass the guard but Hardy II is keeping the position.
Hardy II is looking for a triangle but Cranston pushes his legs off easily.
Hardy II keeping full guard, as Cranston tries to pass.
And thats the end of the round the fighters go back to their corners.
Snord Cranston dominated that second round.
Well, the break between rounds is over. Let's get back to the scrappin! This is the final round!

Cranston tries to close the distance and clinch but Hardy II swats him to one side with an open hand palm strike and circles away.
Cranston looks for a takedown. He's got it. We're now in half guard.
Hardy II trying to control but Cranston postures up.
Cranston looks to score some points with some ground and pound.
Hardy II regains full guard, whilst avoiding punches from Cranston.
Hardy II pulls Cranston in to control the position.
Cranston looking to sit in guard and control but Hardy II gets the butterfly guard and sweeps. He's now in the guard on the top.
Hardy II trying to control the position from guard on top but Cranston is wriggling around, looking for whatever he can.
That's one minute gone in the round.
Hardy II pressing down on his opponent's thigh, looking to pass guard. Cranston is keeping the position for now.
Hardy II trying to control but Cranston is working from the bottom.
It looks like the ref is thinking about a standup.

The ref calls for a clean break and stands the fighters back up. James Hardy II wasn't active enough on the ground.
Cranston is looking to clinch but Hardy II is avoiding it.
The fight stays on the outside here - Cranston looks like he's thinking about clinching though.
That's two minutes gone in the round.
Hardy II throws a nice looking combination but Cranston bobs and weaves to avoid any damage.
Cranston drives through and clinches with Hardy II against the cage.
Hardy II manages to get underhooks and slows down the pace for a moment.
Cranston goes for a body shot but it's blocked.
Cranston softening up his opponent with strikes, against the cage.
Cranston misses with some punches.
Still in the clinch, Cranston scores with a nice short uppercut.
Hardy II tries to pull guard but can't drag his opponent to the mat. Cranston just stands there and leans against the cage.
Both guys are working to get underhooks.
That's three minutes gone in the round.
A quick uppercut on the inside from Cranston.
Cranston lands a shoulder strike.
Cranston makes some space for himself and lands an uppercut.
Cranston lands a body punch.
Hardy II takes a big intake of breath there - he's definitely tired.
Cranston digs a right hand underneath Hardy II's ribcage. Hardy II let out a lung full of air as it connected.
Cranston prevents a body shot from Hardy II.
Cranston misses with a hook to the ribs.
Cranston swings away with an uppercut that misses.
Cranston pushes Hardy II back against the cage and unloads with a body punch.

Cranston breaks the clinch and we return to the middle of the mat.
Cranston darts in trying to clinch
and Hardy II counters with a kick to the head that grazes his opponent. Cranston is lucky that one didn't land flush.
That's four minutes gone in the round.
The fans in attendance giving it up for the two fighters, who have really let it all hang out in the last minute or so!
The fight moves into the clinch position.
Cranston lands a hook that snaps the head of Hardy II backwards.
Cranston doesn't land with the attempted body shot.
Cranston gets a nice trip takedown into half guard.
Nice strikes from Cranston there.
Cranston wants to work for an arm triangle but Hardy II is really keeping half guard well and defending the submission attempt.
Hardy II won't allow Cranston to pass to mount.
As the round comes to an end the crowd are showing their appreciation for a great round of action.
Hardy II looking for submissions off his back.
Cranston wants to pass to mount but Hardy II is defending the position.
And that's the end of the fight!
Snord Cranston showed his dominance in that final round.
Well Cranston has outscored his opponent in every aspect of the fight today. Only a scarily incompetent judge or two will keep him from a well deserved win... Over to the ring announcer for the scorecards.
Ladies and gentlemen, after 3 rounds of action, we go to the scorecards for a decision.
Judge Chris Edwards scores the fight 30:27
Judge James Ackerman scores the fight 30:27
Judge James Atkins scores the fight 30:27
In favor of your winner, by unanimous decision... Snord Cranston!
|
|
|
|
|
|
|
|
|
|
|
|
|
|
|
|
|
|
|
|
|
|
|
| S |
C
A |
G |
S |
C
B |
G |
|
S |
C |
G |
|
energy
A | B |
|
hype
A | B |
|
pop
A | B |
|
mgr
A | B |
|
FIGHT
RATING
74% |
|
|
|
|
|
|
