|
|
PBP Commentary |
Coming up we have a middleweight MMA rules bout between Jack Dawkins (ranked 0 p4p, 0 weight class) and Terry Krom (ranked 0 p4p, 0 weight class). Dawkins's entrance music is Jay-Z - Empire State of Mind. A fine choice. Both these guys have really solid chins. Will we see a standup war or will they both decide that a knockout is unlikely and try to win the fight elsewhere?
 |
|
 |
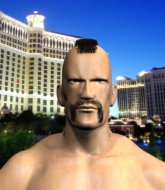
| 186 cm
22
194 lbs
5 - 4 - 1 |
|
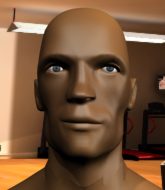
180 cm
25
183 lbs
10 - 4 - 1 |
Abu Dhabi Champ
Excellent boxer
Insanely flexible |
|
Good wrestler
World class boxer
Good gas tank |
|
| |
|
Ladies and gentlemen. This fight is 5 rounds, for the middleweight championship of the world!
Introducing the champion to my left, fighting out of the red corner.
With a record of
5 - 4 - 1, fighting out of Tokyo, Jack Dawkins!
And introducing the challenger to my right, fighting out of the blue corner.
With a record of
10 - 4 - 1, fighting out of Tokyo, Terry Krom!
The judges for this bout are Ren Mimura, Sosuke Kotani and Yasuomi Hirokawa.

The bell rings for round one and we are underway!
Krom moves out of range as Dawkins strikes.
Krom displays some good footwork, moving neatly out of range as Dawkins throws out the jab.
Dawkins fails to land the takedown.
Krom throws a body punch but Dawkins moves out of range.
Dawkins walks into a left hand.
Krom swings wildly with a right hand that was never going to find it's target.
Dawkins closes this distance looking for a takedown but Krom circles away.
Dawkins scores with a shot to the body.
Dawkins throws a hook but Krom avoids it easily.
Dawkins misses with a wild body shot.
A slow jab from Krom misses its intended target.
A decent looking cross lands there for Krom.
Dawkins fails with the takedown.
That's three failed takedown attempts in the round for Jack Dawkins. That's going to take a lot out of him.
Dawkins throws out a token jab with nothing on it.

That's one minute gone in the round.
Krom scores with a jab to the jaw.
Krom misses with a looping right.
Krom avoids a punch combination nicely.
A slow jab from Dawkins misses its intended target.
Krom just misses with a punch to the body.
Krom staying out of range there.
Dawkins fails miserably with a takedown attempt.
Dawkins connects with a jab.
Krom throws an uppercut from half a mile away. Dawkins sees it coming and avoids it easily.
Dawkins avoids the body shot from Krom.
Krom takes a jab right on the kisser.
Krom stuffs the takedown attempt from Dawkins. Dawkins gets slowly back to his feet.
No luck for Dawkins with that takedown attempt.

That's two minutes gone in the round.
Dawkins shoots in for a takedown but doesn't get it.
Krom looks to score with a jab to the body but Dawkins is just out of range.
Dawkins slips a straight right by Krom.
Dawkins uses some good footwork to avoid the body shot by Krom.
Dawkins tries for a takedown but Krom circles away easily
and Krom counters with a lovely shot to the body.
Krom misses with a combination
and Dawkins counters with a good right hand that lands right on the jaw.
Dawkins has his takedown stuffed
and Krom counters with a quick right hand to the jaw.
Fantastic stuff here - a very entertaining period of action, which has drawn cheers from the crowd.
Dawkins misses with a lunging right hand
and Krom counters with a straight right hand.
Dawkins slips a jab from Krom.

That's three minutes gone in the round.
Dawkins looks to score with a jab to the body but Krom is just out of range.

Dawkins gets a takedown into half guard.
The referee wants the fighters to be more active or he's going to reset them on the feet.
Dawkins stops Krom from getting back to his feet.
Krom really doesn't want to stay on the ground with Dawkins. If he can't get it back to his feet, it's only a matter of time before he'll be tapping out.
Dawkins thows a huge punch but Krom dodges it nicely.
Krom slips a foot under and gets full guard. Nice work.
The fighters are pressed up against the cage, both looking to find a bit of space to work.
Dawkins looking to pass the guard.
Krom is looking to get back to his feet but can't, whilst Dawkins is controlling him.
Dawkins with a couple of shots to the head there. Not particularly brutal.
Krom keeping moving, preventing Dawkins from controlling successfully.
Krom is looking to get back to his feet but can't, whilst Dawkins is controlling him.

That's four minutes gone in the round.
Krom keeping moving, preventing Dawkins from controlling successfully.
Dawkins throwing shots from guard but he's hitting more mat than opponent.
Fantastic stuff here - a very entertaining period of action, which has drawn cheers from the crowd.
As the round comes to an end the crowd are showing their appreciation for a great round of action.
Dawkins won't allow Krom to get back to his feet.
Dawkins wants to pass the guard but Krom is keeping the position.

Well, the referee has seen enough. Neither fighter is active enough on the ground so he's stood them back up.
Dawkins throws a nice hook to the body that draws an oooh from the crowd.
And thats the end of the round the fighters go back to their corners.
That was a close round but I would say that Jack Dawkins will probably get the nod.
That's the end of the interval. I'm sure that seemed a lot quicker than a minute for our two fighters! Back to the action.

Dawkins shoots in for a takedown but Krom shows good takedown defense there and keeps this one on the feet.
Dawkins with a lazy takedown attempt
and Krom counters with a stiff right hand.
Krom misses with an uppercut.
Krom ducks under an overhand right and circles away with a smile on his face.
Dawkins misses with a hook. Krom ducked under it nicely.
Dawkins missing with a left hand there. Krom was out of range so wasted energy throwing that one.
Dawkins shoots in but Krom avoids the takedown attempt easily.
That's three failed takedown attempts in the round for Jack Dawkins. That's going to take a lot out of him.
Krom throws a hook but Dawkins avoids it easily.
Krom fakes high and swings low for a body shot but Dawkins manages to avoid it.
Dawkins changes levels and looks for a double leg takedown. Krom tries to avoid it but Dawkins manages to keep hold of a leg and drag Krom to the ground. Krom escapes though and pops straight back up to his feet.
Krom ducks under an overhand right and circles away with a smile on his face.
Jack Dawkins is winning the standup battle so far.
Good shot there by Dawkins.
Krom fakes high and swings low for a body shot but Dawkins manages to avoid it.
That's one minute gone in the round.
Dawkins shoots in for a takedown! He's got it and he's managed to land in full mount! That's better than Dawkins was expecting from the takedown attempt, I'm sure!
Krom is trying to stand.
Krom is trying desperately to improve position.
Krom really wants to buck Dawkins off and get back to his feet.
Dawkins looking to control and managing it successfully.
Dawkins dominating with strikes here.
Krom is trying to get back to his feet but can't.
That's two minutes gone in the round.
Krom is desperately trying to get back to half guard.
Krom is trying to stand.
Wooooo! Give it up for these two warriors! They are putting on a show!
Dawkins trying to control but he's not successful this time.
Dawkins controlling from the full mount.
Dawkins lands with some strikes.
Dawkins unloading with bombs!

Krom bucks up and throws Dawkins to the side - he's got back to his feet. Great escape!
Jack Dawkins seems to be the more aggressive standup fighter in this bout.
Dawkins misses the jab.
Terry Krom is looking to keep the fight on the feet at all costs.
Dawkins misses with a right hand
and Krom counters with a quick right hand to the jaw.
Krom misses with a body shot.
That's three minutes gone in the round.
Dawkins has his head snapped back a nice jab. A little nod from Dawkins there as he acknowledges the shot.
Dawkins closes the distance and clinches up, looking for a takedown. He shifts his weight and gets a nice trip into half guard.
Dawkins not throwing his punches with enough precision this time.
Dawkins sitting in half guard, looking to land shots. Krom defending well though.
Dawkins stops Krom from getting back to his feet.
Krom keeping his head moving to avoid the ground and pound.
Dawkins is figuring out what he wants to do next.
Dawkins thumps the canvas. Not on purpose obviously - he just missed Krom's head.
Krom kicks Dawkins off and gets back to his feet.
A momentary lapse in concentration from Krom enables Dawkins to shoot in and score with a neat double leg. Krom manages to secure a closed guard as the fighters hit the mat.
Dawkins stops Krom from standing up.
This is a great period of action - very entertaining stuff!
Krom is breathing heavily.
Krom keeping full guard, as Dawkins tries to pass.
Dawkins has been looking to land a fair amount of strikes on the ground. He might be looking to soften his opponent up in order to work for a submission.
That's four minutes gone in the round.
Dawkins throwing shots from guard but he's hitting more mat than opponent.
Krom is looking to get back to his feet but can't, whilst Dawkins is controlling him.
Krom keeping moving, preventing Dawkins from controlling successfully.
Dawkins connects with a couple of short punches.
Dawkins thows a big elbow that misses.
Hammerfist, elbow! yells Dawkins's corner. There ya go! There ya go!
As the round comes to an end the crowd are showing their appreciation for a great round of action.
Dawkins postures up and scores with a shot to the body and a follow up elbow to the head.
Dawkins trying to pass the guard but can't manage it just yet.
Dawkins landing some decent shots from guard.
Dawkins throwing strikes but missing.
And thats the end of the round the fighters go back to their corners.
Jack Dawkins dominated that second round.
The fighters get back to their feet, the hooter sounds and we're back to the action!

Dawkins has his takedown stuffed
and Krom counters with a straight right hand.
Krom with a hook.
Krom lands a nice shot to the body.
Dawkins steps to the side to avoid the strikes from Krom.
Dawkins shoots in for a takedown. "I don't think so" says Krom as he avoids it easily.
Krom waving his hands out in front of him, looking to distract Dawkins.
Dawkins tries for a takedown but Krom circles away easily
and Krom cracks him with a counter punch right on the button.
That's three failed takedown attempts in the round for Jack Dawkins. That's going to take a lot out of him.
Krom uses good head movement to avoid the hook from Dawkins.
Krom tests Dawkins's chin there with a solid looking shot.
Krom stuffs the takedown.
That's one minute gone in the round.
Dawkins shoots in for a takedown and gets it. Let's see what he's got on the mat.
Dawkins won't allow Krom to get back to his feet.
Dawkins trying to pass the guard but can't manage it just yet.
Krom keeping moving, preventing Dawkins from controlling successfully.
Krom wants to stand but Dawkins is controlling the position.
Dawkins controlling from the guard. I say controlling but really, he's stalling.
The ref warns both fighters not to hold the cage as they work up against the meshing.
It looks like the ref is thinking about a standup.
Dawkins is sitting in guard, working some ground and pound.
Krom wants to stand up but Dawkins is controlling him.
Dawkins trying to control but Krom is working from the bottom.
That's two minutes gone in the round.
A big thud reverberates around the arena there as Dawkins accidentally thumps the mat. Hopefully he's not broken his hand.
Krom wants to stand but Dawkins is controlling the position.
Dawkins postures up and lands some nice ground and pound.
Dawkins prevents Krom from getting back to his feet.
Dawkins is looking to work some ground and pound but Krom has wrist control.
The fans in attendance giving it up for the two fighters, who have really let it all hang out in the last minute or so!
Krom is trying to stand up but he's not managed so far.
Krom takes a big intake of breath there - he's definitely tired.
Dawkins slips effortlessly into side control - very nice.
Jack Dawkins overall seems to be getting the better of the ground position in the fight so far.
Krom prevents Dawkins from moving into mount.
Dawkins working the head with strikes.
Dawkins is looking to take a break and control but Krom is keeping him honest, looking to work from the bottom.
That's three minutes gone in the round.
Dawkins tries to score with some ground and pound. Krom controls his posture well this time though and the shots don't do any damage.

Dawkins working hard here to secure a kimura but he's not really in the right position for it.
Dawkins looking to punish the body of his opponent here but Krom is avoiding damage well.
Krom is trying to stand back up. He's worked his way up against the cage but Dawkins has just dragged him back down to the mat.
That's four minutes gone in the round.
Dawkins wants to take a breather but Krom manages to regain guard - a lesson learnt for Dawkins.
Krom is trying to stand up but he's not managed so far.
Dawkins showing good wrestling skills to control the position.
Dawkins loading up with the ground and pound but he's missing more than he's landing in this flurry.
Dawkins trying to control but Krom is working from the bottom.
As the round comes to an end the crowd are showing their appreciation for a great round of action.
Dawkins throws a strike but Krom rolls with it and manages to sweep. Now he's in guard on top.
And thats the end of the round the fighters go back to their corners.
Jack Dawkins clearly takes that round.
The corners get their ten second warning. Both fighters stand from their stools and stare eachother down, ready to get back to the action.

Krom cracks Dawkins with a good shot that sees him stumbling back into the cage.
Dawkins doesn't react quick enough there as he takes a shot to the body.
Krom lands a nice shot to the body.
Dawkins is really head hunting here, hardly looking to strike to the body at all.
Dawkins looks to throw the jab but Krom is out of range.
Krom throws a series of punches but Dawkins moves out of range.
Dawkins throws a jab when Krom was well out of range.
Krom's corner calls for a 1-2. Krom obliges with the 1 part as he scores the single shot and moves back out of range.
Dawkins throws a hook to the side of Krom's head but Krom sees it coming and ducks under it beautifully.
Krom ducks under a wild hook from Dawkins.
Krom stuffs the takedown attempt from Dawkins. Dawkins gets slowly back to his feet.
Dawkins will have to do better than that with his takedown attempts.
That's one minute gone in the round.
Krom displays some good footwork, moving neatly out of range as Dawkins throws out the jab.
Krom cracks Dawkins with a right hand to the side of the head.
Dawkins tries for a takedown but Krom circles away easily
enabling Krom to counter with a crisp jab.
That's three failed takedown attempts in the round for Jack Dawkins. That's going to take a lot out of him.
Krom ducks under an overhand right and circles away with a smile on his face.
Dawkins takes a swing at Krom's ribcage but misses.
Krom looks to land a combination but Dawkins avoids it well.
Krom throws a big shot that misses.
Dawkins shoots in for a takedown. "I don't think so" says Krom as he avoids it easily.
Dawkins takes a shot right to the liver - Bas would have been proud of that punch.
Dawkins closes the distance and clinches up with Krom, looking for a takedown. Dawkins pushes Krom against the cage but Krom circles to the side and manages to break the clinch.
Dawkins waving his hands out in front of him, looking to distract Krom.
That's two minutes gone in the round.
Dawkins looks for a takedown here. Will he get it? Krom is fending him off so far but Dawkins persists. Nope, Krom circles away and we're back to standing.
Dawkins steps to the side to avoid the strikes from Krom.
Krom lands a jab to the nose.
Dawkins doesn't succeed with the takedown
and Dawkins takes a counter punch right on the button for his troubles.
Dawkins shoots in but doesn't get the takedown
and Krom counters nicely by changing levels and landing a hook to the body.
It's got to the stage where if one of these guys blows hard enough, the other might fall over.
A slow jab from Dawkins misses its intended target.
Krom lands a lovely overhand right.
Krom's corner calls for a 1-2. Krom obliges with the 1 part as he scores the single shot and moves back out of range.
This has been an exciting period of action!
Dawkins takes a shot to the eye socket. That's gotta hurt.
Dawkins throws a head kick that misses.
That's three minutes gone in the round.
Dawkins displays some good footwork, moving neatly out of range as Krom throws out the jab.
Dawkins misses with a hook. Krom ducked under it nicely.
Dawkins throws a poor cross that misses
and Krom connects with a straight left hand counter down the middle.
Dawkins dives in and grabs Krom's left leg, looking for a takedown. Krom pushes down on Dawkins's head and hops out.
Dawkins slips a jab from Krom.
Krom uses good footwork to avoid the strikes from Dawkins.
A telegraphed right hand from Dawkins misses the target.
Dawkins looks like he's developed a pretty tasty lump over his left eye. He'll need to avoid taking much more damage to that.
Krom slips under a jab.
Krom moves away from the strike by Dawkins.
Krom throws a hook to the body but it doesn't connect.
Dawkins doesn't react quick enough there as he takes a shot to the body.
Dawkins paws at his opponent with the jab and then lunges in with a straight, right on the button.
That's four minutes gone in the round.
Krom thows a left - swing and a miss!
Dawkins drops his hands momentarily and Krom takes advantage with a crisp shot to the head.
Krom fakes and then throws a beautiful body shot. Dawkins looks a bit winded and takes a step backwards to take a breath.
Krom bobs and weaves and unloads with a good uppercut.
Krom throws a hook to the body but it doesn't connect.
Krom throws a series of strikes that have Dawkins backpedaling.
Dawkins shoots for a double leg takedown but Krom sprawls well. He's pushed Dawkins's face into the mat and manages to get back to his feet relatively easily.
Dawkins closes the distance and takes a jab right on the nose as he does so.
The crowd cheering loudly, showing their appreciation for the quality fight we're seeing here.
Krom looks to land a left hand but Dawkins moved out of range nicely.
As the round comes to an end the crowd are showing their appreciation for a great round of action.
Dawkins ducks under a wild hook from Krom.
Krom ducks under a wild hook from Dawkins.
Krom throws a jab but it's blocked by Dawkins.
And thats the end of the round the fighters go back to their corners.
Terry Krom dominated that fourth round.
OK. That's time! The bell goes and we're back to the action. Let's hear some noise people - this is the final round!

Dawkins fails with the takedown
and Krom counters nicely by changing levels and landing a hook to the body.
Krom ducks down and throws a hook to the body but Dawkins moves away.
Dawkins bobs and weaves and throws out a fast jab that snaps Krom's head backwards.
Dawkins scores with a crisp jab that stopped Krom in his tracks.
Krom slips under a jab.
A looping hook to the body misses from Dawkins. Krom does a little dance to reset his feet.
Dawkins with a poor takedown
and Krom counters with a two punch combo.
Dawkins throws a sloppy head kick and Krom moves out of range easily.
Krom misses the jab.
Krom fakes a head shot and lands one to the body.
Krom thows a body shot but no joy.
Krom lands a nice looking body shot.
That's one minute gone in the round.
Krom throws a body punch but Dawkins moves out of range.
Dawkins shoots in for a takedown. "Ole!" shouts Krom as he jumps to the side.
That's three failed takedown attempts in the round for Jack Dawkins. That's going to take a lot out of him.
Dawkins fails with a rather predictable takedown attempt.
Both of our modern day gladiators look out of it here - an gruelling 5 rounds of action taking it's toll on them, no doubt.
A telegraphed takedown attempt from Dawkins is defended easily by Krom.
Dawkins takes a solid shot to the body. That one hurt him but he's trying not to show it.
Dawkins looks to score with a jab to the body but Krom is just out of range.
A decent looking cross lands there for Krom.
Dawkins takes a punch right to his stomach. That took the wind out of him momentarily.
That's two minutes gone in the round.
Dawkins shoots in looking for a single leg takedown. Krom is trying to defend but Dawkins finishes it well and ends up in half guard. Let's see if he can advance position further.
Dawkins performing his best blanket impression for a moment.
Dawkins seems very keen to just sit and control from half guard but Krom does not like that idea so much and is remaining active off his back.
Krom wants to get back to his feet.
Ground and pound from Dawkins.
Dawkins tries to pass to full mount but Krom defends it.
This has been an exciting period of action!
Dawkins is looking for a kimura but he's never going to get it from there.
That's three minutes gone in the round.
Krom is not content to let Dawkins control the position.
Krom is trying to stand back up but Dawkins is controlling him
Dawkins is stalling here. Krom is in no mood to hang around though. He's locked up a kimura from the bottom! Dawkins seems to be keeping calm but he's forced to roll out of the hold and Krom has ended up in side control on the top. Nice work.
Krom passes to full mount! That's big trouble for Dawkins!
Krom tries to control but Dawkins wriggling away.
Dawkins regains half guard.
Dawkins looking for submissions off his back.
Dawkins is looking to regain full guard. Not this time though.
That's four minutes gone in the round.
Krom takes a deep breath and rests his weight momentarily on top of his opponent, to control the position.
Dawkins wants to control but Krom is keeping busy and won't allow it.
Krom wants to stand up but Dawkins has a hold of him and won't allow it.
Dawkins is refusing to be controlled, as Krom sits in half guard.
Terry Krom has stepped it up - he knows he needs a finish here!
Dawkins is trying to maintain the position but Krom is very close to passing his half guard.
As the round comes to an end the crowd are showing their appreciation for a great round of action.

The ref stands the fighters back up, due to lack of action by Terry Krom.
Dawkins looks to land a right hand but Krom moved out of range.
Jack Dawkins is fighting for a decision here - he's started to take the cautious approach.
A swing and a miss from Dawkins.
And that's the end of the fight!
That was a close round. You could make an argument for either fighter but I would give it to Jack Dawkins.
I think Dawkins has won this one but let's see what the judges have to say. Over to the ring announcer for the scorecards.
Ladies and gentlemen, after 5 rounds of action, we go to the scorecards for a decision.
Judge Ren Mimura scores the fight 49:46
Judge Sosuke Kotani scores the fight 49:46
Judge Yasuomi Hirokawa scores the fight 49:47
In favor of your winner, by unanimous decision... Jack Dawkins!
Jack Dawkins retains his middleweight title!
|
|
|
|
|
|
|
|
|
|
|
|
|
|
|
|
|
|
|
|
|
|
|
| S |
C
A |
G |
S |
C
B |
G |
|
S |
C |
G |
|
energy
A | B |
|
hype
A | B |
|
pop
A | B |
|
mgr
A | B |
|
FIGHT
RATING
97% |
|
|
|
|
|
|

