|
|
PBP Commentary |
Coming up we have a middleweight MMA rules bout between Anthony McKenzie (ranked 0 p4p, 0 weight class) and Musashi Miyamoto (ranked 0 p4p, 0 weight class). Musashi Miyamoto is the more experienced fighter, so let's see if that makes a difference tonight.
 |
|
 |
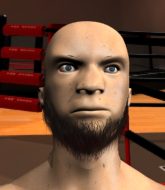
| 184 cm
18
196 lbs
1 - 0 - 0 |
|
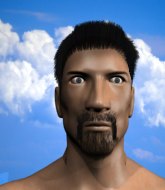
185 cm
25
188 lbs
3 - 4 - 0 |
BJJ White Belt
Excellent boxer
KO power |
|
Decent wrestler
Decent boxing
Granite chin |
|
| |
|
Ladies and gentlemen. This fight is 3 rounds, in the middleweight division.
Introducing the fighter to my left, fighting out of the red corner.
With a record of
1 - 0 - 0, fighting out of Amsterdam, Anthony McKenzie!
And introducing the fighter to my right, fighting out of the blue corner.
With a record of
3 - 4 - 0, fighting out of Helsinki, Musashi Miyamoto!
The judges for this bout are Matti Vanhoillinen, Tarja Halkonen and Anni Minnemäki.

The bell rings for round one and we are underway!
Miyamoto tries to clinch up against the cage, rushing in the close the distance. McKenzie manages to break the clinch and circles back to the middle of the mat.
McKenzie throws a body punch but Miyamoto moves out of range.

Miyamoto drives through and clinches with McKenzie against the cage.
Stalling in the clinch from Miyamoto.
McKenzie is trying to maintain a safe position but Miyamoto gets an underhook and turns McKenzie into the cage.
McKenzie is looking to break free of the clinch but Miyamoto has double underhooks.

Miyamoto jumps guard.
McKenzie has to be careful here, sitting in the guard of a superior BJJ player.
Miyamoto keeping moving, preventing McKenzie from controlling successfully.
Miyamoto wants to get back to his feet but McKenzie is in a dominant position and won't allow it.

The referee decides to stand the fighters back up, due to lack of activity on the part of Anthony McKenzie.
McKenzie misses with an uppercut. Miyamoto saw that one coming.

That's one minute gone in the round.
McKenzie fails to land with the punch combination there - jab, cross, hook, miss, miss, miss.
Miyamoto uses some good footwork to avoid the body shot by McKenzie.
Miyamoto shoots in but no luck this time.
McKenzie misses with a hook to the body
and Miyamoto moves into the clinch.
McKenzie is trying to break free.
Miyamoto tries for a takedown. No joy.
A shot in the inside from Miyamoto.

Miyamoto breaks the clinch and we're back to striking at distance.
McKenzie throws a hook but Miyamoto blocks it.
McKenzie misses with a left hand
and Miyamoto holds on and brings the fighters into a clinch.
McKenzie is trying to break the clinch but Miyamoto is controlling him.
McKenzie tries to break free but Miyamoto pushes him back against the cage.

That's two minutes gone in the round.
Miyamoto tries for a takedown but McKenzie manages to get underhooks.
Anthony McKenzie has stuffed three takedown attempts in the round now. That's going to take a lot out of Musashi Miyamoto.
Miyamoto has McKenzie pressed against the cage, preventing McKenzie from circling away and getting back to striking at range.
McKenzie wants to break free but Miyamoto has control.
Miyamoto lands with a good tight uppercut to the head.
McKenzie wants to strike at distance but he can't break free of the clinch.
Miyamoto lands a body punch.
McKenzie wants to strike at distance but he can't break free of the clinch.
Kneeeeees! The crowd are calling for knees to the body. Miyamoto obliges.
Miyamoto gets through McKenzie's defenses to land a nice punch to the side of the head.
Fantastic stuff here - a very entertaining period of action, which has drawn cheers from the crowd.
McKenzie wants to break free but Miyamoto has control.
McKenzie misses with a short punch on the inside.
McKenzie has had enough of the clinch but Miyamoto keeps him there for the moment.

That's three minutes gone in the round.
McKenzie is pressed up against the cage. Miyamoto has hold of a leg and is looking to drag McKenzie down to the mat. McKenzie avoids the attempt though and has circled away. We're back to striking at a distance.
McKenzie misses with a telegraphed body shot
and Miyamoto counters by moving into the clinch. Good anticipation by Miyamoto.
Miyamoto drops down looking for an ankle pick but McKenzie pulls his leg out and moves away.
A punch lands to the side of Miyamoto 's head but he takes it in his stride.
Miyamoto tries to clinch up but McKenzie circles away and keeps his distance.
McKenzie throws out a loose jab but Miyamoto uses good head movement to avoid it.
McKenzie misses with a wild body shot.
McKenzie misses with a double jab
and Miyamoto counters by clinching up.
Miyamoto pushes McKenzie back against the cage and unloads with a body punch.
A frustrated look appears on McKenzie's face as he tries to break the clinch.

That's four minutes gone in the round.
Miyamoto escapes the clinch and we're back to striking.
McKenzie throws a lazy right hand but Miyamoto sees it coming a mile off and sidesteps it easily.
McKenzie avoids the clinch attempt nicely.
McKenzie looks to score with a jab to the body but Miyamoto is just out of range.
Miyamoto wants to clinch up but McKenzie keeps it at a distance.
McKenzie misses with a wild combination.
Miyamoto wants to clinch up but McKenzie keeps it at a distance.
McKenzie looks to land a left hand but Miyamoto moved out of range nicely.
Miyamoto rushes McKenzie and presses him up against the cage.
The crowd are loving this. Great action here.
As the round comes to an end the crowd are showing their appreciation for a great round of action.
Miyamoto breaks the clinch and we return to the middle of the mat.
Miyamoto closes the distance and clinches.
McKenzie looks like he'd prefer to be striking at range right now.
And thats the end of the round the fighters go back to their corners.
A close round but Musashi Miyamoto will probably get the nod.
The minute break is over - no more time for sponges and pep talks - back to the action!

Miyamoto moves into the clinch.
McKenzie doesn't land with the attempted body shot.
Miyamoto cracks McKenzie with a nice body shot.
McKenzie wants to get back to striking at distance but Miyamoto won't allow it.
Miyamoto keeps the fight in the clinch, despite McKenzie's efforts to push away.
A frustrated look appears on McKenzie's face as he tries to break the clinch.
Miyamoto changes levels and goes for a takedown here. McKenzie fights it off and pushes away nicely.
A punch lands to the side of Miyamoto 's head but he takes it in his stride.

It looks like Musashi Miyamoto has been cut.
Miyamoto steps to the side to avoid the strikes from McKenzie.
Miyamoto is looking to take this fight into the clinch.
That's one minute gone in the round.
Miyamoto shoots in and drives through. McKenzie sprawls well.
Miyamoto tries to clinch but McKenzie is having none of it.
A big left from McKenzie misses.
Miyamoto tries to clinch up against the cage, rushing in the close the distance. McKenzie manages to break the clinch and circles back to the middle of the mat.
McKenzie throws a body punch but Miyamoto moves out of range.
Anthony McKenzie is looking to keep the fight on the feet at all costs.
Miyamoto moves into range and clinches up with McKenzie.
McKenzie is looking to break free of the clinch but Miyamoto has double underhooks.
McKenzie is trying to force a seperation but Miyamoto has the dominant position.
Miyamoto goes for a takedown attempt but McKenzie pushes him away and we're back to fighting at a distance.
Anthony McKenzie has stuffed three takedown attempts in the round now. That's going to take a lot out of Musashi Miyamoto.
McKenzie misses with a double jab.
McKenzie lands a nice hook to Miyamoto's body. Miyamoto takes it in his stride and looks to land his own strikes.
That's two minutes gone in the round.
Nice defenses there by Miyamoto.
Miyamoto tries to close the distance and clinch but McKenzie swats him to one side with an open hand palm strike and circles away.
Miyamoto fails in his attempt to clinch.
Miyamoto uses good footwork to avoid the strikes from McKenzie.
Anthony McKenzie is looking to throw some combinations by the looks of things.
McKenzie throws a low kick but Miyamoto moves out of range easily.
McKenzie misses with a series of wild punches.
Miyamoto wants to clinch.
McKenzie throws a lazy right hand but Miyamoto sees it coming a mile off and sidesteps it easily.
Miyamoto instigates a clinch.
McKenzie wants to get back to striking at distance but Miyamoto won't allow it.
That's three minutes gone in the round.
McKenzie is trying to break the clinch but Miyamoto has him pressed against the cage.
McKenzie wants to push off and get back to the center of the mat but Miyamoto has him pressed against the cage.
A left hand lands to the body for Miyamoto.
Miyamoto tries to score a body lock takedown but McKenzie shows good agility there to stay on his feet.
McKenzie is trying to push Miyamoto away but Miyamoto has him pressed against the cage, so he's going nowhere.
McKenzie wants to get back to striking at distance but Miyamoto won't allow it.
McKenzie is looking to control Miyamoto's arms but Miyamoto gets an underhook and turns him. Now McKenzie has his back to the cage.
McKenzie is trying to break the clinch but Miyamoto has him pressed against the cage.
Miyamoto landing knees to the body.
McKenzie tries to break the clinch but Miyamoto is controlling the position.
Miyamoto digs a right hand underneath McKenzie's ribcage. McKenzie let out a lung full of air as it connected.
That's four minutes gone in the round.
Miyamoto keeps the fight in the clinch, despite McKenzie's efforts to push away.
Come on Miyamoto - let's have some action - none of this stalling nonsense.
McKenzie wants to break the clinch but can't.
A right hook to the body lands for Miyamoto.
Stalling in the clinch from Miyamoto.
An uppercut to the body lands inside from Miyamoto.
Miyamoto struggles to land a body shot inside as McKenzie controls his hands.
The crowd applaud the fighters efforts here as the round comes to an end.
Miyamoto drops down for a takedown but doesn't get it.
The referee is keeping an eye on Miyamoto - much more stalling and he will separate the fighters.
And thats the end of the round the fighters go back to their corners.
That was a close second round but I would say that Anthony McKenzie will probably get the nod.
The cut man is working on Musashi Miyamoto's cut.
The fighters get back to their feet, the hooter sounds and we're back to the action! This is the final round!

A big right from McKenzie misses.
Miyamoto slips under a jab from McKenzie.
McKenzie misses with a few strikes there.
McKenzie throws a one two combo.
McKenzie displays good takedown defense there as he swats away a double leg from Miyamoto.
Miyamoto tries to close the distance and clinch but McKenzie swats him to one side with an open hand palm strike and circles away.
A swing and a miss from McKenzie.
McKenzie looks to score with a jab to the body but Miyamoto is just out of range.
McKenzie uses good footwork to get in and out, landing a nice hook.
McKenzie throws a two punch combo that lands nicely.
This has been an exciting period of action!
McKenzie tries to bum rush Miyamoto with a series of wild strikes but Miyamoto uses good footwork to avoid the assault.
Miyamoto tries to close the distance and clinch up against the cage but McKenzie paws at him with a jab and circles away.
That's one minute gone in the round.
McKenzie thows a body shot but no joy.
Miyamoto clinches with his opponent.
McKenzie wants to break free. God knows he wants to breaaaak freeee.
McKenzie is trying to force a seperation but Miyamoto has the dominant position.
Miyamoto lands a nice elbow from the clinch.

It looks like Anthony McKenzie has been cut.
McKenzie is trying to break free.
McKenzie is trying to break the clinch but Miyamoto is controlling him.
A battle for position here, against the cage.
McKenzie wants to push off and get back to the center of the mat but Miyamoto has him pressed against the cage.
McKenzie is trying to break the clinch but Miyamoto has him pressed against the cage.
That's two minutes gone in the round.
McKenzie is trying to break free.
Nice body punch from Miyamoto - that landed with a thud.
McKenzie is trying to force a seperation but Miyamoto has the dominant position.
Miyamoto is stalling here.
McKenzie looks like he'd prefer to be striking at range right now.
With the two fighters working up against the cage, McKenzie just misses with a elbow thrown towards Miyamoto's brow.
Miyamoto has McKenzie pressed against the cage, preventing McKenzie from circling away and getting back to striking at range.
A short left from Miyamoto.
McKenzie wants to push off and get back to the center of the mat but Miyamoto has him pressed against the cage.
Miyamoto scores with a shot to the side of McKenzie's head.
McKenzie is trying to slow down the pace in the clinch, to catch his breath.
That's three minutes gone in the round.
Miyamoto holding his opponent close, against the cage.
Miyamoto drops down looking for an ankle pick but McKenzie pulls his leg out and moves away.
Miyamoto tries to close the distance and clinch up but McKenzie swats him away and circles back towards the center.
McKenzie avoids the clinch attempt nicely.
McKenzie throws a jab, cross combination which is slipped
and Miyamoto counters into the clinch. Nicely done.
Miyamoto pushes McKenzie back against the cage and lands a hook to the side of the head.
Miyamoto gets a nice trip takedown into half guard.
Miyamoto missing with the ground and pound from half guard.
That's four minutes gone in the round.
Miyamoto throwing shots but McKenzie is blocking nicely.
Miyamoto has the superior BJJ but he's also working some ground strikes into his gameplan.
Miyamoto missing with the ground and pound from half guard.
McKenzie knows he needs to get back to his feet asap. He's simply no match for Miyamoto on the ground.
Miyamoto trying to mount his opponent but McKenzie defends it.
Miyamoto sitting in half guard, looking to land shots. McKenzie defending well though.
As the round comes to an end the crowd are showing their appreciation for a great round of action.
Miyamoto sitting in half guard, looking to land shots. McKenzie defending well though.
McKenzie blocking the ground and pound attempt from Miyamoto.
And that's the end of the fight!
Anthony McKenzie showed his dominance in that final round.
I think McKenzie has won this one but let's see what the judges have to say. Over to the ring announcer for the scorecards.
Ladies and gentlemen, after 3 rounds of action, we go to the scorecards for a decision.
Judge Matti Vanhoillinen scores the fight 29:28
Judge Tarja Halkonen scores the fight 28:29
Judge Anni Minnemäki scores the fight 29:28
In favor of your winner, by split decision... Anthony McKenzie!
An intense looking Anthony McKenzie took to the microphone post fight and gave a little speech: 'It was tough fight, for sure. I want to thank my sponsor - Gilop Clothing, my awesome alliance for support throughout the training camp - MMARocks, my current gym, all my training partners, it was an awesome camp. Thank you Helsinki, I will be back!'.
|
|
|
|
|
|
|
|
|
|
|
|
|
|
|
|
|
|
|
|
|
|
|
| S |
C
A |
G |
S |
C
B |
G |
|
S |
C |
G |
|
energy
A | B |
|
hype
A | B |
|
pop
A | B |
|
mgr
A | B |
|
FIGHT
RATING
52% |
|
|
|
|
|
|

