|
|
PBP Commentary |
Coming up we have a heavyweight MMA rules bout between Donnie Badge (ranked 0 p4p, 0 weight class) and Ahto Paine (ranked 0 p4p, 0 weight class). Paine has chosen Iced Earth - Watching Over Me as his entrance music. On his way into the cage it seems that Donnie Badge has been attacked by a crazed fan! It looks like it might have been the just bleed guy! Luckily Donnie Badge seems to be OK! I thought that lunatic was in prison!?
 |
|
 |
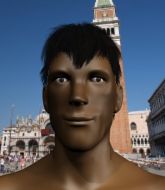
| 194 cm
25
240 lbs
7 - 10 - 0 |
|
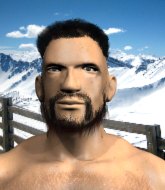
202 cm
21
283 lbs
4 - 4 - 0 |
BJJ Purple Belt
Excellent boxer
Very strong |
|
Good wrestler
Excellent boxer
Good gas tank |
|
| |
|
Ladies and gentlemen. This fight is 3 rounds, in the heavyweight division.
Introducing the fighter to my left, fighting out of the red corner.
With a record of
7 - 10 - 0, fighting out of Helsinki, Donnie Badge!
And introducing the fighter to my right, fighting out of the blue corner.
With a record of
4 - 4 - 0, fighting out of Helsinki, Ahto Paine!
The judges for this bout are Anni Minnemäki, Matti Vanhoillinen and Johanna Lukiainen.

The bell rings for round one and we are underway!
Paine throws a combination but comes up with nothing but fresh air.
Nice body punch from Badge.
Paine fails to land with the punch combination there - jab, cross, hook, miss, miss, miss.
Badge fails to land with a series of punches.
Paine takes a head kick and shrugs it off.
A punch combination from Badge misses.
Badge tries to close the distance and clinch up against the cage but Paine paws at him with a jab and circles away.
Badge displays good takedown defense there as he swats away a double leg from Paine.
Paine throws a right hand that Badge ducks under and follows up with a left that Badge also avoids with ease.
Paine will need to tighten up his combinations if he doesn't want to gas himself out, swinging at thin air.
Some wild striking there from Badge.
This is a great period of action - very entertaining stuff!
Paine rushes forward with a series of wild hooks but Badge moves out of range and avoids them all easily.
Badge explodes with a nice body kick and back out of range. Nice work.
Badge tries a switch kick but it misses it's target.
A telegraphed takedown attempt from Paine is defended easily by Badge.
Paine looks gassed!
Badge misses with a double jab.

That's one minute gone in the round.
Badge shoots in but Paine avoids the takedown attempt easily.
Badge misses with a takedown attempt. He shot from a bit too far out.
Sloppy strikes from Badge. Those never looked like landing.
Badge connects with a leg kick. Paine looked like he was expecting something else and didn't defend it.
Paine swinging wildly here.
Paine misses with a jab and misses with a cross straight after too.
Paine misses with a jab, cross combination.
Badge lands a jab followed by a nice looking cross.
Paine tries to close the distance and clinch but Badge swats him to one side with an open hand palm strike and circles away.
Paine will need to tighten up his combinations if he doesn't want to gas himself out, swinging at thin air.
This is a great period of action - very entertaining stuff!
Badge connects with a single shot there.

That's two minutes gone in the round.
Badge misses with a head kick.
Badge slips a jab and a cross from Paine.
A kick lands to the mid section there for Badge.
Ahto Paine seems to be the more aggressive standup fighter in this bout.
Jab, jab by Badge - just one landing.
Badge fails with a rather predictable takedown attempt.
That's three failed takedown attempts in the round for Donnie Badge. That's going to take a lot out of him.
Badge is looking to land body kicks.
Badge tries to clinch up against the cage, rushing in the close the distance. Paine manages to break the clinch and circles back to the middle of the mat.
Paine throws a right and a left that both miss.
Badge scores with a shot to the body.
Badge stuns Paine with a nice body shot, before stepping back out of range.
Badge throws a combination but comes up with nothing but fresh air.
Badge throws a push kick but Paine slaps the foot to one side.
No joy there for Badge, who threw a few shots but didn't land.
Paine misses with the combination.

That's three minutes gone in the round.
Badge shoots in but no luck this time.
Paine is trying hard to land a takedown here. Badge sprawls well and keeps this one on the feet.
Paine tries to score a power double leg takedown but Badge sees that one coming and sprawls well. That will dishearten Paine somewhat.
Badge throws a nice inside leg kick.

Badge forces Paine back against the cage and clinches.
Paine is working on a leg, looking for a takedown but Badge is defending well.
Badge lands a body shot.
Badge working hard to break the clinch.
Badge looks like he'd prefer to be striking at range right now.
Badge is working on a leg, looking for a takedown but Paine is defending well.

That's four minutes gone in the round.
Paine is working on a leg, looking for a takedown but Badge is defending well.
Badge misses with a punch to the body.

Badge breaks the clinch and we return to the middle of the mat.
Badge throws a series of punches but Paine moves out of range.
A looping hook to the body misses from Badge. Paine does a little dance to reset his feet.
This is a great period of action - very entertaining stuff!
Paine stuffs the takedown attempt from Badge. Badge gets slowly back to his feet.
Badge throws a head kick but Paine moves out of range.
The crowd are going absolutely nuts as the round comes to an end - what a fantastic round of action!
Badge chopping away at his opponent's legs.

The fight moves into the clinch position.
Badge is trying to break the clinch but Paine has him pressed against the cage.
And thats the end of the round the fighters go back to their corners.
Donnie Badge dominated that round.
The referee calls time. The cornermen exit stage left and we're back to business.


Paine scores with a nice takedown into half guard. Let's see what he's got on the ground.
The referee must be thinking about standing these guys back up.
Paine thumps the canvas. Not on purpose obviously - he just missed Badge's head.

Badge has one foot on Paine's thigh - he pushes off and manages to get back to his feet.
Badge misses with a double jab.
Paine moves into the clinch.
Paine is working for takedown but Badge is calmly controlling the position for now.
Badge tries to pull guard but Paine forces him back to his feet, against the cage.
Paine tries for a takedown. No joy.
Badge stops a takedown attempt from Paine.
Donnie Badge has stuffed three takedown attempts in the round now. That's going to take a lot out of Ahto Paine.
Badge wants to break the clinch but can't.
Badge tries to land a knee to the body but he is off balance and Paine avoids it.
That's one minute gone in the round.
Badge wants to strike at distance but he can't break free of the clinch.
Paine goes for a takedown attempt but Badge pushes him away and we're back to fighting at a distance.
Paine shoots in for a takedown but doesn't get it.
Paine is breathing heavily.
Paine changes levels and looks for a double leg takedown. Badge tries to avoid it but Paine manages to keep hold of a leg and drag Badge to the ground. Badge escapes though and pops straight back up to his feet.
Paine blocks a low kick nicely.
Donnie Badge is winning the standup battle so far.
Paine shoots for a double leg takedown but Badge sprawls well. He's pushed Paine's face into the mat and manages to get back to his feet relatively easily.
Badge shoots in looking for a takedown. Paine tries to sprawl out of it but Badge keeps driving through. The fighters are pinned against the cage. Paine manages to get underhooks and after a bit of a struggle, circles away and we're back to standing.
Badge lands three nice shots there - that looked like it hurt!

Badge scores with a nice takedown into half guard. Let's see what he's got on the ground.
The fans in attendance giving it up for the two fighters, who have really let it all hang out in the last minute or so!
Paine is refusing to be controlled, as Badge sits in half guard.
The ref warns both fighters not to hold the cage as they work up against the meshing.
That's two minutes gone in the round.
Badge sitting and controlling from the half guard.
Badge decides to stand and escape the position.
Badge lands a jab followed by a nice looking cross.
It really doesn't seem like the step up in weight is hurting Badge here at all. He's more than holding his own against the bigger man.
Paine fails with a takedown attempt.
No luck for Paine with that takedown attempt.
That's three minutes gone in the round.
Badge throws a nice outside leg kick.
Badge tries to bum rush Paine with a series of wild strikes but Paine uses good footwork to avoid the assault.
Badge walks forward and throws out a flicking leg kick. Paine checks it nicely though, as he moves to the side.
Badge throws a head kick that misses and slips in the process. He scrambles back to his feet and the fighters circle.
Paine shoots and misses
and Badge counters with a nice uppercut.
Badge lands a nice hook to Paine's body. Paine takes it in his stride and looks to land his own strikes.
Badge ducks low and lands a nice hook to the body of his opponent.
Badge lands a nice shot to the body.
This has been an exciting period of action!
Badge throws a series of punches but Paine avoids them all with ease.
Badge throws a body kick that misses.
Badge fails to land with a series of punches.
Badge showing good head movement there, avoiding the strikes from Paine.
That's four minutes gone in the round.
Badge throws a head kick that misses.
Paine tries a switch kick but it misses it's target.
Badge jabs at Paine's body.
Badge throws a head kick but Paine moves out of range.
Paine checks a leg kick.
Paine throws a right and a left that both miss.
A left and a right from Badge both land. Nice combination.
No luck with that takedown attempt from Badge.
Paine gets his takedown attempt stuffed easily
and Badge counters with a nice kick to the body.
The crowd are going absolutely nuts as the round comes to an end - what a fantastic round of action!
Left hook, right uppercut from Badge.
Badge avoids the head kick by Paine.
Badge swinging wildly here.
Paine dodges the punch combination from Badge.
And thats the end of the round the fighters go back to their corners.
Donnie Badge dominated that second round.
Well, the break between rounds is over. Let's get back to the scrappin! This is the final round!

Paine gets a clinch.
Paine is pressed up against the cage. Badge has hold of a leg and is looking to drag Paine down to the mat. Paine avoids the attempt though and has circled away. We're back to striking at a distance.
Paine closes the distance and presses his opponent up against the cage.
Badge is trying to break the clinch but Paine has him pressed against the cage.
Badge wants to break free. God knows he wants to breaaaak freeee.
Paine tries for a takedown. No joy.
Badge is working for takedown but Paine is calmly controlling the position for now.
Paine keeps control of Badge as he tries to wriggle out of the double underhooks.
Badge prevents a takedown attempt there.
Paine takes a big intake of breath there - he's definitely tired.
That's one minute gone in the round.
Paine has double underhooks and is working for a body lock takedown. He's got it. The fighters land in half guard but Badge regains guard immediately.
Badge is looking to stand up but Paine isn't so interested in that idea.
Badge is really dominating this fight. Is there anything that Paine can do to turn this around?
Paine won't allow Badge to sweep him here.
Paine won't allow Badge to get back to his feet.
Badge not looking particularly offensive just at the moment.
Paine postures up in Badge's guard and throws a big left but Badge blocks it.
That's two minutes gone in the round.
Badge working the defensive guard well to avoid strikes from Paine.
Paine tries to free his leg and advance position but Badge is retaining full guard.
Paine working some ground and pound from guard but it's not doing any damage.
Badge is trying to keep Paine in close.
Paine throwing shots from guard but he's hitting more mat than opponent.
Paine in full guard, throwing the ground and pound. No damage this time.

Badge is looking for a guillotine. You can't force these things though and Paine defends well.
Paine slows down the pace of the fight for a moment. He'll need to remain active if he doesn't want to see the fight stood back up.
The crowd cheering loudly, showing their appreciation for the quality fight we're seeing here.
Paine trying to land body shots but he keeps hitting the mat.
Paine really doesn't want to stay on the ground with Badge. If he can't get it back to his feet, it's only a matter of time before he'll be tapping out.
That's three minutes gone in the round.
Paine throwing elbows and punches but not connecting, as Badge works some decent striking defense from the bottom.
Badge wants to sweep but no luck.
Paine wants to control from the top but Badge keeps moving.
The fighters are pressed up against the cage, both looking to find a bit of space to work.
Paine throws a big right hand that misses.
Paine in full guard, throwing the ground and pound. No damage this time.
Paine stops Badge from standing up.
Paine loading up with the ground and pound but he's missing more than he's landing in this flurry.
Paine stops Badge from standing up.
Paine trying to control the position from guard on top but Badge is wriggling around, looking for whatever he can.
Badge working the defensive guard well to avoid strikes from Paine.
Paine wants to control from the top but Badge keeps moving.
That's four minutes gone in the round.
Paine working some ground and pound from guard but it's not doing any damage.
Paine missing there with some ground and pound from the guard.
Paine throwing strikes but missing.
Badge utilising some decent striking defenses from the guard, preventing the ground and pound.
Paine postures up to throw the ground and pound strikes but they don't connect.
Paine throwing strikes from guard but Badge blocks nicely.
Paine throws a big right hand that misses.
The crowd applaud the fighters efforts here as the round comes to an end.
Paine controlling from the top position.
Paine missing there with some ground and pound from the guard.
And that's the end of the fight!
Ahto Paine comfortably won the final round on my scorecard.
I think Badge has won this one but let's see what the judges have to say. Over to the ring announcer for the scorecards.
Ladies and gentlemen, after 3 rounds of action, we go to the scorecards for a decision.
Judge Anni Minnemäki scores the fight 29:28
Judge Matti Vanhoillinen scores the fight 29:28
Judge Johanna Lukiainen scores the fight 29:28
In favor of your winner, by unanimous decision... Donnie Badge!
|
|
|
|
|
|
|
|
|
|
|
|
|
|
|
|
|
|
|
|
|
|
|
| S |
C
A |
G |
S |
C
B |
G |
|
S |
C |
G |
|
energy
A | B |
|
hype
A | B |
|
pop
A | B |
|
mgr
A | B |
|
FIGHT
RATING
83% |
|
|
|
|
|
|

