|
|
PBP Commentary |
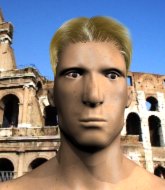
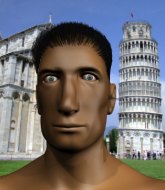
Coming up we have a featherweight MMA rules bout between Mike Rolla (ranked 0 p4p, 0 weight class) and Jack Fadden (ranked 0 p4p, 0 weight class). Fadden has chosen From Hell by Faces Of Mars as his entrance music. Both fighters look pumped up here. Let's hope this is a good fight!
 |
|
 |
| 170 cm
28
144 lbs
4 - 5 - 0 |
|
170 cm
31
156 lbs
16 - 21 - 0 |
BJJ Blue Belt
Brawler
Experienced |
|
BJJ Purple Belt
Counter striker
Powerful |
|
| |
|
Ladies and gentlemen. This fight is 3 rounds, in the featherweight division.
Introducing the fighter to my left, fighting out of the red corner.
With a record of
4 - 5 - 0, fighting out of Los Angeles, Mike Rolla!
And introducing the fighter to my right, fighting out of the blue corner.
With a record of
16 - 21 - 0, fighting out of Los Angeles, Jack Fadden!
The judges for this bout are Frank Antenori, Jack Bonds and Timothy Bukovac.

The bell rings for round one and we are underway!
Rolla lands a nice looking body kick.
Rolla tries to score a power double leg takedown but Fadden sees that one coming and sprawls well. That will dishearten Rolla somewhat.
Rolla fails to land the takedown.
Nice takedown defense from Fadden. No joy for Rolla on that attempt.
That's three failed takedown attempts in the round for Mike Rolla. That's going to take a lot out of him.
Rolla closes this distance looking for a takedown but Fadden circles away.
Rolla throws a head kick that misses.

Rolla gets taken down but at least he's managed to land in guard.
Rolla not looking particularly offensive just at the moment.
Rolla keeping moving, preventing Fadden from controlling successfully.

Fadden stands up and waves to Rolla to follow him.

That's one minute gone in the round.
Rolla doesn't manage to clinch there - Fadden circles away.
Rolla throws a head kick that looked like it stung.
Left hook, right uppercut from Fadden.
Fadden is looking to clinch but Rolla is avoiding it.
Fadden changes levels and drives through with a really nice takedown into side control. Rolla looks really pissed at himself for not defending that better.
Fadden throws a strike aimed at the side of Rolla's head but Rolla avoids it well.
Fadden lands a few punches from side control.
The ref warns both fighters not to hold the cage as they work up against the meshing.
Rolla wants to control but Fadden postures up.
Rolla is looking for a sweep.
Rolla regains half guard there - taking advantage of Fadden's attempt to lay and pray for a moment.

That's two minutes gone in the round.
Fadden scores with a couple of good hammerfists.
The crowd are loving this. Great action here.
Fadden looks to score some points with some ground and pound.
The fighters are pressed up against the cage, both looking to find a bit of space to work.
Fadden seems to be taking a bit of a break to think of his next move. He lands a short punch in the meantime.
Fadden looks to land a strike but Rolla avoids it nicely and regains full guard.

Rolla is throwing his legs up, looking for submissions. Fadden is aware though and is defending well.
Fadden has the superior BJJ but he's also working some ground strikes into his gameplan.
Fadden lands a couple of decent looking shots.
Fadden lands a nice shot whilst sitting in his opponent's guard.
Rolla utilising some decent striking defenses from the guard, preventing the ground and pound.
Fadden lands a couple of digs.
Rolla wants to sweep but no luck.

That's three minutes gone in the round.
Fadden is working the ground and pound from guard. He might want to try advancing position though to get more of an impact.
Fadden throwing shots from guard but he's hitting more mat than opponent.
Rolla not looking particularly offensive just at the moment.
Rolla looking to sweep here. No luck so far.
Rolla wants to stand up but Fadden is controlling him.
Rolla is breathing heavily.
The fighters are going at a pretty good pace and they're both starting to sweat now.
Fadden stands up from guard. Let's bang!
Rolla gets his takedown attempt stuffed easily
and Fadden counters with a shoot takedown into half guard.
Fadden stands up from half guard.
This has been an exciting period of action!
Fadden stuffs the takedown.
Fadden shoots in but no luck this time.

That's four minutes gone in the round.
A telegraphed takedown attempt from Rolla is defended easily by Fadden.

Fadden moves into the clinch.
Fadden has picked Rolla up - he's going for a ride! Fadden dumps his opponent to the mat with a thud and settles into half guard.
Rolla trying to control but Fadden postures up.
Fadden throwing shots but they're hitting the canvas more than the man.
Rolla on the receiving end of some nice ground and pound.
The crowd are going absolutely nuts as the round comes to an end - what a fantastic round of action!
Rolla wants to get back to his feet.
Fadden lands with an elbow from half guard - that looked like it hurt.
Fadden throwing shots but Rolla is blocking nicely.
And thats the end of the round the fighters go back to their corners.
Jack Fadden dominated that round.
Well, the break between rounds is over. Let's get back to the scrappin!

Rolla gets taken down but at least he's managed to land in guard.
Fadden postures up in Rolla's guard and throws a big left but Rolla blocks it.
Jack Fadden has got the better of the ground game so far.
Rolla striking from his own guard.
Rolla utilising some decent striking defenses from the guard, preventing the ground and pound.
Rolla manages to land a sweep and now he's in mount on top!
Rolla looking to control and managing it successfully.
Fadden can't escape the position.
That's one minute gone in the round.
Fadden is trying to stand but he's not in a good position to be doing that! Rolla has taken his back!
Fadden is trying escape back to his feet. He turns into his opponent's guard and eventually finds his way back to his feet.
Rolla tries to clinch but Fadden moves out of range.
Rolla tries to clinch up.
Fadden avoids the head kick by Rolla.
Rolla misses with the body kick
and Fadden counters with a stiff right hand.
Fadden displays good takedown defense there as he swats away a double leg from Rolla.
Fadden looking to shoot here. He's gone for it and he's landed a takedown into mount! Oh, that's bad for Rolla!
That's two minutes gone in the round.
Rolla really trying hard to get back to half guard here.
Fadden working Rolla over with strikes here.
Rolla is trying to escape the mount.
This has been an exciting period of action!
Fadden looking to ground and pound his opponent to a finish here.
Fadden is landing with some decent strikes but Rolla is trying to advance his position so the referee is letting the fight continue.

Rolla is rocked!
Both fighters are absolutely exhausted here.
Fadden with shots to the head and body - Rolla looks very uncomfortable down there.
Oh Rolla is still in real trouble! Will he be able to recover?!!
Fadden dominating with strikes here.
Fadden dominating with strikes here.
Oooooh, big shot lands for Fadden! Rolla is hurt baaadly! Fadden is firing away with more strikes - Rolla is covering up... the ref is warning him to do something. He's just covering up though still and the ref has to step in to end the fight! This one is all over!
Ladies and gentlemen, after 3:18 of round 2, we have a winner by way of TKO (Strikes). Jack Fadden!
|
|
|
|
|
|
|
|
|
|
|
|
|
|
|
|
|
|
|
|
|
|
|
| S |
C
A |
G |
S |
C
B |
G |
|
S |
C |
G |
|
energy
A | B |
|
hype
A | B |
|
pop
A | B |
|
mgr
A | B |
|
FIGHT
RATING
75% |
|
|
|
|
|
|
