|
|
PBP Commentary |
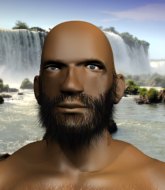
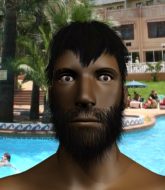
Coming up we have a light heavyweight MMA rules bout between Jim White (ranked 0 p4p, 0 weight class) and Jack Hammer (ranked 0 p4p, 0 weight class). Both fighters look fresh as a daisy as they make their way towards the ring.
 |
|
 |
| 180 cm
20
213 lbs
6 - 6 - 0 |
|
192 cm
20
220 lbs
3 - 1 - 0 |
BJJ Blue Belt
Good kicks
Big right hand |
|
BJJ Purple Belt
Good kicks
Powerful |
|
| |
|
Ladies and gentlemen. This fight is 3 rounds, in the light heavyweight division.
Introducing the fighter to my left, fighting out of the red corner.
With a record of
6 - 6 - 0, fighting out of London, Jim White!
And introducing the fighter to my right, fighting out of the blue corner.
With a record of
3 - 1 - 0, fighting out of London, Jack Hammer!
The judges for this bout are Paul Tew, Chris Edwards and Andrew Berry.

The bell rings for round one and we are underway!
White misses with a jab, cross combination.
White throws a combination that misses
and Hammer counters with a series of strikes. White will be more careful next time no doubt.
Jim White seems to be the more aggressive standup fighter in this bout.
Hammer jabs White to the body, keeping him at a distance.
White throws a jab, cross combination which is slipped
and Hammer counters with a big head kick but White shrugs it off.
The crowd cheering loudly, showing their appreciation for the quality fight we're seeing here.
White looks to land a right hand but Hammer moved out of range.
Hammer scores with a decent looking hook.
White on the wrong end of a decent looking cross there.

White is rocked!

Hammer fakes with an overhand right and moves in to clinch with White, pushing him back against the ropes.
Hammer tries for a takedown but White manages to get underhooks.
Hammer looking to throw knees to the head but White is blocking nicely.
White wants to push off and get back to the center of the mat but Hammer has him pressed against the ropes.
White wants to strike at distance but he can't break free of the clinch.
Hammer misses with a knee to the head.
Hammer landing knees to the head.

It looks like Jim White has been cut.
Hammer keeps control of White as he tries to wriggle out of the double underhooks.

That's one minute gone in the round.
White working hard to break the clinch.
Hammer tries a knee to the head but he's missed.
White looks like he'd prefer to be striking at range right now.
Hammer lands a knee to the body.
Hammer is trying to work for a single leg takedown but White pulls him back up using the underhooks.
Hammer lands a nice uppercut.
White tries to break free but Hammer pushes him back against the ropes.

White breaks the clinch and we're back to striking at distance.
White looks to throw the jab but Hammer is out of range.
White throws a combination but it was largely blocked by Hammer.
White misses with a hook. Hammer ducked under it nicely.
Hammer throws a shot to the body.
White misses with a looping right.

That's two minutes gone in the round.
Hammer lands with a slapping head kick.
The fans in attendance giving it up for the two fighters, who have really let it all hang out in the last minute or so!
White rushes forward with a series of wild hooks but Hammer moves out of range and avoids them all easily.
Hammer throws a head kick that misses.
White looks shocked there as he takes a right hand to the temple.
Hammer keeping a good distance there, avoiding the body shot.
White throws a right and a left that both miss.
Hammer tries a head kick but it misses.
Some wild striking there from Hammer.
White jabbing away but nothing is landing.
Hammer avoids a punch combination nicely.
White throws a series of punches but Hammer avoids them all with ease.

That's three minutes gone in the round.
Hammer throws a head kick but White moves out of range.
White misses with a jab, cross combination.
Hammer slips under a jab.
Hammer blocks a jab.
Jim White is looking to keep the fight on the feet at all costs.

Hammer changes levels and drives through with a really nice takedown into side control. White looks really pissed at himself for not defending that better.
The referee claps his hands together and tells the fighters to work.
Hammer throwing strikes but missing, from side control.
You can see the frustration on White's face as Hammer controls the position.

Hammer is trying to get an arm triangle but White is defending well.
White is not content to let Hammer control the position.

That's four minutes gone in the round.
Hammer laying and praying for a moment but White takes advantage and regains half guard.
Hammer sitting in half guard, looking to land shots. White defending well though.
Hammer is trying to control. White wants to improve his position but can't escape this time.
The crowd are going absolutely nuts as the round comes to an end - what a fantastic round of action!
Hammer drops an elbow to the side of White's head.
We've seen a great period of action over the last minute or so - credit to both fighters for going all out!
Hammer is trying to work for a kimura. This could be trouble! No, White has managed to free his arm - good work.
And thats the end of the round the fighters go back to their corners.
Jack Hammer dominated that round.
The cut man is working on Jim White's cut.
OK. That's time! The bell goes and we're back to the action.

Hammer feints and then dives in with a takedown. That was a long way out but the feint bought him enough time to close the distance and complete the takedown. Now we'll play guard for a bit and see who can get the better of that position.
Hammer wants to control from the top but White keeps moving.
Hammer wants to pass the guard but White is keeping the position.
White knows he needs to get back to his feet asap. He's simply no match for Hammer on the ground.
Hammer stands and throws White's legs to the side, diving into side control.
Hammer scores with a couple of nice shots to the head there. The referee takes a look at White to see if he's OK.
Hammer is trying to land an Americana. He has the arm isolated but White is keeping cool and he's avoided the danger for now.
That's one minute gone in the round.
Hammer advances to full mount.
Hammer unloads with some shots from mount but White bucks and avoids them well.
White tries to lock up and control but Hammer gives him a forearm to the face and pushes him away.
Hammer in mount throwing good strikes here, bouncing his opponent's head off the canvas.
White might be looking to lock onto one of his opponent's long limbs for a submission, whilst we're on the ground.
Hammer working the ground and pound effectively.
Hammer misses with a head shot.
That's two minutes gone in the round.
White is trying to escape the mount.
Hammer is landing with some decent strikes but White is trying to advance his position so the referee is letting the fight continue.
Oh White is still in real trouble! Will he be able to recover?!!
Fantastic stuff here - a very entertaining period of action, which has drawn cheers from the crowd.
White takes a big shot to the head but keeps on trying to improve his position.
Hammer drops a big elbow. That's hurt White! More shots from Hammer and the ref steps in! The fight is over!
Ladies and gentlemen, after 2:47 of round 2, we have a winner by way of TKO (Strikes). Jack Hammer!
|
|
|
|
|
|
|
|
|
|
|
|
|
|
|
|
|
|
|
|
|
|
|
| S |
C
A |
G |
S |
C
B |
G |
|
S |
C |
G |
|
energy
A | B |
|
hype
A | B |
|
pop
A | B |
|
mgr
A | B |
|
FIGHT
RATING
71% |
|
|
|
|
|
|
