|
|
PBP Commentary |
Coming up we have a heavyweight MMA rules bout between Johnny Jerkwater (ranked 0 p4p, 0 weight class) and Dan Bowbish (ranked 0 p4p, 0 weight class). Both these guys have really solid chins. Will we see a standup war or will they both decide that a knockout is unlikely and try to win the fight elsewhere?
 |
|
 |
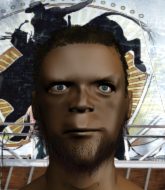
| 194 cm
22
230 lbs
4 - 1 - 0 |
|
190 cm
22
255 lbs
5 - 0 - 0 |
BJJ Purple Belt
Basic striking
Granite chin |
|
BJJ Blue Belt
Basic striking
Granite chin |
|
| |
|
Ladies and gentlemen. This fight is 5 rounds, for the heavyweight championship of the world!
Introducing the champion to my left, fighting out of the red corner.
With a record of
4 - 1 - 0, fighting out of Sydney, Johnny Jerkwater!
And introducing the challenger to my right, fighting out of the blue corner.
With a record of
5 - 0 - 0, fighting out of Sydney, Dan Bowbish!
The judges for this bout are Winston Howard, Damien Edna and Eliza Hachem.

The bell rings for round one and we are underway!
Jerkwater shoots in for a takedown. "Ole!" shouts Bowbish as he jumps to the side.

Jerkwater fakes an overhand right and shoots for a takedown. Bowbish sprawls well initially but Jerkwater persists and gets the takedown into half guard.
The ref warns both fighters not to hold the cage as they work up against the meshing.
Bowbish pushes Jerkwater off looking to stand but Jerkwater dives back in and keeps control.
Bowbish is using up a lot of energy trying to get back to his feet. Perhaps he should improve his position first.

Jerkwater seems to be looking for submissions.
Bowbish looks like he's trying to stand up.
Bowbish wants to get back to full guard.
Jerkwater is looking for a kimura here.
Jerkwater is working for submissions here but there's nothing on.
Bowbish is refusing to be controlled, as Jerkwater sits in half guard.
Jerkwater is looking to advance position but Bowbish won't allow it.
Bowbish moves into full guard.

That's one minute gone in the round.
Bowbish lands a beautiful switch and he's in full mount! That could spell trouble for Jerkwater!
Jerkwater is squirming around, avoiding Bowbish's attempts to control the action.
Jerkwater is trying desperately to improve position.
Bowbish trying to control but Jerkwater is having none of it.
Jerkwater is trying to escape the mount.
Bowbish connects with a couple of good shots from mount.
Bowbish content just to control the position here.
The fighters are pressed up against the cage, both looking to find a bit of space to work.
Jerkwater regains half guard.

That's two minutes gone in the round.

Bowbish stands up from half guard.

Bowbish closes the distance and clinches.
Bowbish lands a body shot in the clinch.
Jerkwater tries to pull guard but Bowbish holds him up against the cage and eventually Jerkwater drops back down to his feet.
Jerkwater tries to score a body lock takedown but Bowbish shows good agility there to stay on his feet.
That's three failed takedown attempts in the round for Johnny Jerkwater. That's going to take a lot out of him.
Jerkwater has a body lock and is looking for a takedown. Bowbish is bouncing around trying to prevent the takedown and somehow he has indeed managed to stay on his feet.
Bowbish keeps control of Jerkwater as he tries to wriggle out of the double underhooks.
Knees to the body from Bowbish.
Jerkwater is working for takedown but Bowbish is calmly controlling the position for now.
A right hand to the body from Bowbish.
Jerkwater wants a takedown but no success here.
Jerkwater is breathing heavily.
Bowbish using the Thai clinch to land knees to the body.
A right hand to the body from Bowbish.
Jerkwater is trying to work for a single leg takedown but Bowbish pulls him back up using the underhooks.
Jerkwater misses with a punch on the inside.
Jerkwater tries for a takedown. No joy.
Jerkwater tries to take the fight to the ground by pulling guard but can't manage it.
Bowbish lands a nice knee to the body.
Bowbish lands a shoulder strike.

That's three minutes gone in the round.
Bowbish lands a nice uppercut.
Bowbish lands a body punch.
Jerkwater is looking for a takedown up against the cage. Bowbish gets underhooks though and prevents the takedown attempt.
Bowbish lands a body shot.
A right handed body shot lands from Bowbish.
Jerkwater has had enough of the clinch but Bowbish keeps him there for the moment.
A short right from Bowbish.
Jerkwater tries to take the fight to the ground by pulling guard but can't manage it.
Bowbish lands a body punch - he's looking to wear down Jerkwater.
Nice body punch from Bowbish.
An uppercut on the inside fails to land for Jerkwater.
Bowbish is pressed up against the cage. Jerkwater has hold of a leg and is looking to drag Bowbish down to the mat. Bowbish avoids the attempt though and has circled away. We're back to striking at a distance.
The fight stays on the outside here - Bowbish looks like he's thinking about clinching though.
Bowbish is looking to clinch.
The fight stays on the outside here - Bowbish looks like he's thinking about clinching though.
Bowbish tries to clinch but is not successful on this occasion.
Jerkwater shoots in for a takedown but Bowbish shows good takedown defense.
Bowbish is looking to clinch but Jerkwater is avoiding it.
Bowbish tries to clinch but Jerkwater moves out of range.
Bowbish moves into the clinch.
Bowbish tries a knee to the head but Jerkwater blocks it.
Bowbish landing some nice looking knees to the body.
Jerkwater tries to throw a body punch but Bowbish avoids it by throwing Jerkwater back against the cage.

That's four minutes gone in the round.
Jerkwater drops down for a takedown but doesn't get it.
Bowbish gets through Jerkwater's defenses to land a nice punch to the side of the head.
Jerkwater fails to pull guard.
Bowbish gets double underhooks to prevent a takedown attempt from Jerkwater.
A shot in the inside from Bowbish.
Bowbish lands a left hand that snaps the head of Jerkwater backwards.
Jerkwater is trying to work for a single leg takedown but Bowbish pulls him back up using the underhooks.
A right hook to the body lands for Bowbish.
Bowbish scores with a shot to the side of Jerkwater's head.
Bowbish connects with a nasty looking knee right to Jerkwater's face.
Bowbish prevents a takedown attempt there.

Bowbish breaks from the clinch.
Bowbish tries to clinch but Jerkwater is having none of it.
The fight stays on the outside here - Bowbish looks like he's thinking about clinching though.
Horrible takedown by Jerkwater or perhaps it was just good defense by Bowbish which made him look bad.
Bowbish feints with a shoulder and throws a nice leg kick to Jerkwater's calf.
A jab-cross combination lands for Bowbish and sends Jerkwater crashing to the mat! Bowbish follows him down to the mat - Jerkwater regains half guard but he's not out of trouble yet!
And thats the end of the round the fighters go back to their corners.
Dan Bowbish dominated that round.
OK. That's time! The bell goes and we're back to the action.

Bowbish takes a punch to the jaw and another one to the bread basket.

Jerkwater is rocked!
A big left from Bowbish misses.
Oh Jerkwater is still all over the place! His legs are completely gone! Will he be able to recover?!!
Bowbish instigates a clinch.
Bowbish misses with the head strike.
A head punch on the inside from Bowbish fails to land.
Bowbish throws a punch but it's blocked by Jerkwater.
Bowbish throws a punch but it's blocked by Jerkwater.
Jerkwater tries for a takedown but Bowbish manages to get underhooks.
Bowbish doesn't land with the attempted body shot.
Good body shot from Bowbish.
Bowbish swings wildly with an uppercut but Jerkwater uses good head movement to avoid it.
Bowbish doesn't land with the attempted body shot.
A head punch on the inside from Bowbish fails to land.
Jerkwater seems to have got his legs back now.
Bowbish working on landing some head shots here - that one got through nicely.
Jerkwater fails to pull guard.
We've had a slow start to the round here - hopefully the action picks up.
Jerkwater tries to pull guard but can't drag his opponent to the mat. Bowbish just stands there and leans against the cage.
That's three failed takedown attempts in the round for Johnny Jerkwater. That's going to take a lot out of him.
Bowbish gets underhooks to prevent Jerkwater's takedown attempt.
Jerkwater fails to pull guard.
Bowbish pushes Jerkwater back against the cage and unloads with a body punch.
Jerkwater wants a takedown but no success here.
Jerkwater tries to score a body lock takedown but Bowbish shows good agility there to stay on his feet.
Bowbish lands a body punch in the clinch.
Jerkwater tries to break the clinch but Bowbish is controlling the position.
That's one minute gone in the round.
Jerkwater tries to pull guard but Bowbish won't allow it.
A hook to the body from Bowbish.
Jerkwater is trying to work for a single leg takedown but Bowbish pulls him back up using the underhooks.
An uppercut on the inside fails to land for Jerkwater.
Bowbish gets double underhooks to prevent a takedown attempt from Jerkwater.
Jerkwater has hold of a leg and is looking for a trip takedown. Bowbish avoids it nicely though and we remain in the clinch.
Jerkwater wants to strike at distance but he can't break free of the clinch.
Bowbish has Jerkwater pushed against the cage.
A short right from Bowbish on the inside.
A short body shot lands from Bowbish as the two fighters clinch.
Jerkwater goes for a takedown attempt but Bowbish pushes him away and we're back to fighting at a distance.
Both fighters are absolutely exhausted here.
Bowbish ducks low and lands a nice hook to the body of his opponent.
Johnny Jerkwater is looking to throw some combinations by the looks of things.
Bowbish instigates a clinch.
Jerkwater drops down for a takedown but doesn't get it.
Jerkwater wants to break free. God knows he wants to breaaaak freeee.
A head punch on the inside from Jerkwater fails to land.
That's two minutes gone in the round.
Jerkwater wants a takedown but no success here.
Jerkwater goes for a takedown attempt but Bowbish pushes him away and we're back to fighting at a distance.
Bowbish fails with an attempt to clinch.
Jerkwater misses with a takedown attempt - Bowbish sprawls well and throws a nice strike on the way out which just misses.
Bowbish moves in looking to clinch but Jerkwater pushes him off.
Bowbish wants to clinch up but Jerkwater keeps it at a distance.
Jerkwater tries to keep at a distance but Bowbish has taken the fight into the clinch.
Bowbish lands a body punch.
Bowbish is working Jerkwater over against the cage.
Jerkwater misses with a short punch on the inside.
Bowbish lands a nice shot to the body.
Bowbish digs a right hand underneath Jerkwater's ribcage. Jerkwater let out a lung full of air as it connected.
Bowbish works on Jerkwater's body with a couple of short punches.
Bowbish is leaning against Jerkwater and scores with a nice uppercut to the body.
Jerkwater is trying to work out of this bad position, with his back against the cage.
Jerkwater is trying to work for a single leg takedown but Bowbish pulls him back up using the underhooks.
A left hand lands to the body for Bowbish.
Bowbish lands with a short punch from the clinch.
Bowbish breaks the clinch and we're back to striking at distance.
Bowbish fails with an attempt to clinch.
Bowbish tries to clinch but Jerkwater moves out of range.
That's three minutes gone in the round.
Jerkwater decides to change it up a bit and drives through with a nice takedown into half guard.
Bowbish makes some distance and scrambles quickly back to his feet. Nice work!
Dan Bowbish is looking to keep the fight on the feet at all costs.
Bowbish is looking to clinch but Jerkwater is avoiding it.
Wow, both these guys are really going for it!
Bowbish moves into the clinch successfully.
Jerkwater fails to pull the fight into his guard.
Bowbish controlling the action here for a moment.
Bowbish lands a body punch in the clinch.
Bowbish prevents a takedown attempt there.
Jerkwater drops to a knee looking for a takedown but Bowbish gets the underhooks and prevents it.
Jerkwater has a body lock and is looking for a takedown. Bowbish is bouncing around trying to prevent the takedown and somehow he has indeed managed to stay on his feet.
Jerkwater tries to pull guard but Bowbish holds him up against the cage and eventually Jerkwater drops back down to his feet.
Jerkwater is trying to work out of this bad position, with his back against the cage.
Bowbish gets double underhooks to prevent a takedown attempt from Jerkwater.
Bowbish digs a right hand into Jerkwater's ribs. Those have got to be taking their toll on Jerkwater's gas tank.
Bowbish stops a takedown attempt from Jerkwater.
That's four minutes gone in the round.
Jerkwater tries to take the fight to the ground by pulling guard but can't manage it.
Jerkwater is trying to break free.
Jerkwater wants to break free. God knows he wants to breaaaak freeee.
Bowbish lands on the inside with an uppercut.
Jerkwater turns his back and goes for a hip toss. It's a bit messy but it gets the job done and Jerkwater manages to end up in side control.
Jerkwater is looking for a kimura. He might have it! No, Bowbish has escaped the position, nice work there.
Jerkwater working away.
Jerkwater is trying to land an Americana. He has the arm isolated but Bowbish is keeping cool and he's avoided the danger for now.
Bowbish wants to control but Jerkwater postures up.
Both fighters really going for it on the ground here!
Bowbish is positioning himself to get back to half guard.
You can see the frustration on Bowbish's face, being in this tough position on the bottom.
Bowbish is positioning himself to get back to half guard.
Jerkwater working hard here to secure a kimura but he's not really in the right position for it.
And thats the end of the round the fighters go back to their corners.
Dan Bowbish showed his class in that round. I'd imagine he'll take it on all the scorecards.
OK. That's time! The bell goes and we're back to the action.

Bowbish drives through and clinches with Jerkwater against the cage.
Jerkwater is trying to break the clinch but Bowbish has him pressed against the cage.
Jerkwater has had enough of the clinch but Bowbish keeps him there for the moment.
Bowbish blocks a couple of punches on the inside.
Bowbish keeps control of Jerkwater as he tries to wriggle out of the double underhooks.
Jerkwater wants a takedown but no success here.
Jerkwater is working for takedown but Bowbish is calmly controlling the position for now.
Bowbish lands with a right to the head.
Bowbish breaks the clinch and we're back to striking at distance.
Jerkwater fakes a head shot and lands one to the body.
Jerkwater shoots in but no luck this time.
That's three failed takedown attempts in the round for Johnny Jerkwater. That's going to take a lot out of him.
Bowbish tries to clinch but Jerkwater moves out of range.
Jerkwater fails with a rather predictable takedown attempt.
Jerkwater closes this distance looking for a takedown but Bowbish circles away.
Bowbish closes the distance and presses his opponent up against the cage.
Jerkwater wants a takedown.
Jerkwater tries to pull guard but Bowbish holds him up against the cage and eventually Jerkwater drops back down to his feet.
Both fighters are breathing heavily.
Jerkwater tries to pull guard but Bowbish won't allow it.
Bowbish pushes Jerkwater back against the cage and unloads with a body punch.
Jerkwater wants a takedown but no success here.
That's one minute gone in the round.
Bowbish prevents a takedown attempt there.
Bowbish scores with a hook to the body.
Jerkwater fails to pull guard.
A right hook to the body lands for Bowbish.
Jerkwater gets a nice trip takedown into half guard.
Jerkwater is trying to work for a kimura but Bowbish is defending well.
Bowbish is trying to get back to full guard.
Jerkwater moves nicely into side control.
Jerkwater is looking for a kimura. He might have it! No, Bowbish has escaped the position, nice work there.
Jerkwater tries for an arm triangle. That looks pretty tight to me. Is this one over!?! Possibly, maybe, no Jerkwater has let go of the choke. Obviously it wasn't as tight as we thought!
Jerkwater thinks about going for a far side armbar but bails out and retains the dominant position instead.
Bowbish can't do much from the bottom here.
That's two minutes gone in the round.
Bowbish wants to escape from the position here - easier said than done!
Jerkwater is trying to move to mount but Bowbish reverses beautifully and ends up in Jerkwater's guard.
There's a bit of a scramble here and now Jerkwater is on top in guard.
Bowbish tries to land a sweep but no joy.
Jerkwater scoring with punches to the head and body.
Bowbish wants to control but Jerkwater passes easily into half guard.
Jerkwater looking to pass the half guard. Not this time.
Bowbish is trying to stand back up but Jerkwater is controlling him
Jerkwater throwing shots but they're hitting the canvas more than the man.
Jerkwater throwing punches and elbows but they're not doing any damage.
That's three minutes gone in the round.
Jerkwater passes to full mount!
Bowbish is working to get back to half guard.
Jerkwater raining down shots from the mount!
Jerkwater jumps to side control looking for an arm triangle but Bowbish manages to avoid the submission attempt.
Jerkwater in the domination position with Bowbish hanging on.
Jerkwater moving around in side mount but really he's just happy to control for now.
Bowbish is looking for a sweep.
Jerkwater wants to control but Bowbish is keeping him busy.
Jerkwater wants to work for a kimura but he's foiled early by Bowbish, who protects the arm well.
Jerkwater tries to move into full mount but can't pass Bowbish's legs.
That's four minutes gone in the round.
Bowbish is not content to let Jerkwater control the position.
Bowbish holding on.
Bowbish is not content to let Jerkwater control the position.
Jerkwater working away.

The referee has ruled that neither fighter is active enough on the ground and has stood them back up.
Bowbish fails to land with the punch combination there - jab, cross, hook, miss, miss, miss.
Bowbish tries to clinch but Jerkwater moves out of range.
Bowbish fails in his attempt to clinch.
Jerkwater throws a looping left and ducks down for a takedown. He's got his arms around Bowbish's waist but Bowbish gets an underhook and avoids the takedown by throwing Jerkwater off to one side.
Jerkwater misses with a wild body shot.
No joy there for Bowbish, who threw a few shots but didn't land.
Bowbish tries to close the distance and clinch but Jerkwater swats him to one side with an open hand palm strike and circles away.
Jerkwater swings away but doesn't land with a series of punches.
Bowbish fakes a jab and then connects with a hook.
Jerkwater shoots in for a takedown - he's clinched up with Bowbish but Bowbish pushes him off and we're back to square one.
Bowbish misses with the combination.
Jerkwater fails to land with a series of punches.
And thats the end of the round the fighters go back to their corners.
That was a close round but Johnny Jerkwater did the better work so I'd imagine he'll take it.
That's the end of the interval. I'm sure that seemed a lot quicker than a minute for our two fighters! Back to the action.

Jerkwater shoots for a double leg takedown but Bowbish sprawls well. He's pushed Jerkwater's face into the mat and manages to get back to his feet relatively easily.
Jerkwater misses with a hook. Bowbish ducked under it nicely.
Bowbish tries to clinch but is not successful on this occasion.
Bowbish gets in close and instigates a clinch.
Bowbish prevents Jerkwater from breaking the clinch.
Jerkwater has Bowbish pressed up against the cage and is working for takedown. Bowbish manages to improve position though and keeps the fight standing.
Bowbish lands a body shot.
A hook to the body from Bowbish.
Jerkwater is trying to break free.
Jerkwater drops down for a takedown but doesn't get it.
That's three failed takedown attempts in the round for Johnny Jerkwater. That's going to take a lot out of him.
Jerkwater tries for a takedown but Bowbish manages to get underhooks.
Nice body punch from Bowbish - that landed with a thud.
A hook to the body from Bowbish.
Jerkwater is trying to work for a single leg takedown but Bowbish pulls him back up using the underhooks.
Knees in the clinch landing for Bowbish.
Jerkwater fails to pull guard.
Bowbish lands with a short shot to the head.
Jerkwater can't break the clinch.
Bowbish lands a short shot on the inside that snaps the head of Jerkwater backwards.
Bowbish gets underhooks to prevent Jerkwater's takedown attempt.
Bowbish digs a right hand underneath Jerkwater's ribcage. Jerkwater let out a lung full of air as it connected.
Bowbish lands a left hand that snaps the head of Jerkwater backwards.
That's one minute gone in the round.
Jerkwater wants to get back to striking at distance but Bowbish won't allow it.
Bowbish makes some space for himself and lands an uppercut.
Dan Bowbish seems to be working more effectively in the clinch in the fight so far.
Jerkwater can't break the clinch.
Bowbish gets double underhooks to prevent a takedown attempt from Jerkwater.
Jerkwater wants to break free. God knows he wants to breaaaak freeee.
Jerkwater is looking for a takedown up against the cage. Bowbish gets underhooks though and prevents the takedown attempt.
Jerkwater can't get the takedown.
Bowbish is clearly stalling here... Pick up the pace son.
Bowbish prevents a takedown attempt there.
Jerkwater has hold of a leg and is looking for a trip takedown. Bowbish avoids it nicely though and we remain in the clinch.
Jerkwater wants to push off and get back to the center of the mat but Bowbish has him pressed against the cage.
Bowbish gets underhooks to prevent Jerkwater's takedown attempt.
Jerkwater drops to a knee looking for a takedown but Bowbish gets the underhooks and prevents it.
It's got to the stage where if one of these guys blows hard enough, the other might fall over.
Jerkwater goes for a takedown attempt but Bowbish pushes him away and we're back to fighting at a distance.
Bowbish wants to clinch up but Jerkwater keeps it at a distance.
That's two minutes gone in the round.
Jerkwater closes the distance and gets a double leg, slamming Bowbish to the mat! Bowbish manages to get full guard.
Bowbish trying to control the position here.
Johnny Jerkwater overall seems to be getting the better of the ground position in the fight so far.
Jerkwater prevents Bowbish from getting back to his feet.
Bowbish has his foot on Jerkwater's thigh. He's trying to push off and get in position for a triangle, I think. Jerkwater works his way back into a safe position though.
Bowbish wants to stand but Jerkwater is controlling the position.
Jerkwater tries to free his leg and advance position but Bowbish is retaining full guard.
Jerkwater prevents Bowbish from getting back to his feet.
Jerkwater works a leg free and moves into half guard.
Jerkwater has hold of the far side arm. He's working for the Kimura, can Bowbish defend it? Jerkwater steps over the head and cranks it - Bowbish is tapping out! That was textbook stuff right there - nice submission victory for Jerkwater!
Ladies and gentlemen, after 2:39 of round 4, we have a winner by way of Submission (Kimura). Johnny Jerkwater!
Johnny Jerkwater is the new heavyweight champion!
|
|
|
|
|
|
|
|
|
|
|
|
|
|
|
|
|
|
|
|
|
|
|
| S |
C
A |
G |
S |
C
B |
G |
|
S |
C |
G |
|
energy
A | B |
|
hype
A | B |
|
pop
A | B |
|
mgr
A | B |
|
FIGHT
RATING
100% |
|
|
|
|
|
|
