|
|
PBP Commentary |
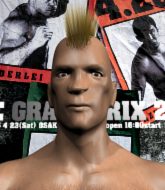
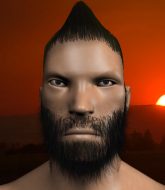
Coming up we have a light heavyweight MMA rules bout between James Woods (ranked 0 p4p, 0 weight class) and Matt Hart (ranked 0 p4p, 0 weight class). Both fighters look fresh as a daisy as they make their way towards the cage.
 |
|
 |
| 188 cm
24
215 lbs
8 - 8 - 0 |
|
188 cm
18
218 lbs
0 - 0 - 0 |
Good wrestling
Excellent boxer
Experienced |
|
Powerful takedowns
Basic striking
Powerful |
|
| |
|
Ladies and gentlemen. This fight is 3 rounds, in the light heavyweight division.
Introducing the fighter to my left, fighting out of the red corner.
With a record of
8 - 8 - 0, fighting out of Las Vegas, James Woods!
And introducing the fighter to my right, fighting out of the blue corner.
With a record of
0 - 0 - 0, fighting out of Las Vegas, Matt Hart!
The judges for this bout are Chris Downing, Gwen Towbar and Wesley Smith.

The bell rings for round one and we are underway!
Hart takes a swing at Woods's ribcage but misses.
Hart ducks down and throws a hook to the body but Woods moves away.
Hart throws a sloppy body shot
and Woods counters with a crisp hook to the side of the head.
James Woods seems to be the more aggressive standup fighter in this bout.
Woods lands a kick to the ribs of his opponent. Nice work there - in and out in a flash.
Woods scores with a hook.
A jab from Hart misses.
Woods pushes forward with a 1-2 combination that forces Hart back to the cage. Woods follows up with a solid lead hook to the liver.

It looks like Matt Hart has been cut.
Wooooo! Give it up for these two warriors! They are putting on a show!
Woods keeping a good distance there, avoiding the body shot.

Hart gets caught napping as Woods dives in and scores a takedown. Hart manages to retain guard.
We've had a lack of effective grappling in the last minute or so, which could well see a referee standup.
A big thud reverberates around the arena there as Woods accidentally thumps the mat. Hopefully he's not broken his hand.

Woods avoids a guillotine attempt easily.
Woods pressing down on his opponent's thigh, looking to pass guard. Hart is keeping the position for now.
Hart wants to sweep but no luck.
Hart keeping full guard, as Woods tries to pass.

Woods stands and steps away. Hart gets to his feet too and we're back to the striking game.

That's one minute gone in the round.
Hart throws a monster uppercut resembling something out of street fighter but it doesn't land.
Woods cracks Hart with a good shot that sees him stumbling back into the cage.
Hart swings and misses with a hook to the body.

Woods has Hart up against the cage in a clinch.

Woods manages to break the clinch.
Woods lands a jab-cross combination.
Woods moves forwards but Hart connects with a nice, crisp jab.
Hart misses the jab.
Hart shoots in for a takedown. "I don't think so" says Woods as he avoids it easily.
Woods scores with a straight right hand, right through his opponent's guard.
Woods misses with a wild body shot.
Hart pushing out the jab but it's not landing.

That's two minutes gone in the round.
Woods scores with a punch to the gut of his opponent.
Fantastic stuff here - a very entertaining period of action, which has drawn cheers from the crowd.
Hart tries to land with a swinging hook to the body but Woods was well out of range. Poor timing from Hart.
Hart stumbles momentarily as he takes a strong leg kick from Woods.
Woods lunges at Hart with a hook that half lands and is half blocked by Hart's hand.
Hart drops his hands momentarily and Woods takes advantage with a crisp shot to the head.
Woods cracks Hart with a right hand to the side of the head.
Hart misses with a takedown attempt
and Woods counters with a left to the body.
Hart looks gassed!
Woods lands with a cross to side of his opponent's head.
A combination from Woods does no damage.
Woods has Hart up against the cage in a clinch.
Hart drops down for a takedown but doesn't get it.
James Woods has stuffed three takedown attempts in the round now. That's going to take a lot out of Matt Hart.
Woods escapes the clinch and we're back to striking.
Woods is really peppering his opponent's head with punches.

That's three minutes gone in the round.
Hart gets tackled into the cage by Woods. Woods maintains the clinch.
Woods has Hart pressed up against the cage. He's trying to work for a single leg takedown. Woods pulls back from the cage and twists to the side, sending Hart tumbling to the mat - Woods dives into Hart's guard.
Woods trying to land body shots but he keeps hitting the mat.
Woods stands up and looks to throw the legs aside to pass to side control. Hart swivels though and keeps the full guard.
Hart is looking for a guillotine. You can't force these things though and Woods defends well.
Woods advances position into side control!

Woods thinks about going for a far side armbar but bails out and retains the dominant position instead.
The fighters are pressed up against the cage, both looking to find a bit of space to work.

That's four minutes gone in the round.
Woods landing with strikes to the head and body from side control.
Woods lands a knee to the body and follows it up with some ground and pound to the head. That will wear Hart down.
We've seen a great period of action over the last minute or so - credit to both fighters for going all out!
Woods stands up and we're back to a striking position.
Hart walks straight into a jab right on the nose. That one stung - he's blinking and trying to clear his head.
Woods tests Hart's chin there with a solid looking shot.
Woods fakes a head punch and goes low to the body. Nicely done.
Woods connects with a good right hand that stumbles Hart. Hart circles away out of range and recomposes himself.
The crowd are going absolutely nuts as the round comes to an end - what a fantastic round of action!
Hart tries to land with a swinging hook to the body but Woods was well out of range. Poor timing from Hart.

Hart shoots in and scores a nice double leg takedown into half guard.
Woods looking to work for a kimura from the bottom.
And thats the end of the round the fighters go back to their corners.
James Woods dominated that round.
The cut man is working on Matt Hart's cut.
OK. That's time! The bell goes and we're back to the action.

Woods gets to the clinch - let's see what his plan is here.
Hart has managed to pull guard. Let's see whether he can work an aggressive guard. It will also be interesting to see what tactics Woods uses from the top position.
James Woods overall seems to be getting the better of the ground position in the fight so far.
Woods trying to pass the guard but can't manage it just yet.
Woods would like to get this fight back to the feet but can't get free from the closed guard.
Hart is working from a closed guard but he's struggling to control his opponent.
Hart looking to hit a scissor sweep but Woods is one step ahead there.
Woods trying to stand up but can't free himself from Hart's guard.
Hart is trying to control the position from the bottom.
Woods has to be careful here, sitting in the guard of a superior BJJ player.
Woods won't allow Hart to sweep him here.
That's one minute gone in the round.
Woods trying to pass the guard but can't manage it just yet.
A big thud reverberates around the arena there as Woods accidentally thumps the mat. Hopefully he's not broken his hand.
Hart preventing the ground and pound from doing any damage.
Woods postures up in Hart's guard and throws a big left but Hart blocks it.
The ref warns both fighters not to hold the cage as they work up against the meshing.
Hart looking for a guillotine here but Woods defends easily.
Woods has decided he wants to stand but the closed guard of Hart is proving hard to escape from.
Woods loading up with the ground and pound but he's missing more than he's landing in this flurry.
Woods landing with the ground and pound.
Hart trying to punch from his back but it's not doing any damage.
Woods in full guard, throwing the ground and pound. No damage this time.
That's two minutes gone in the round.
Woods gets to his feet and steps away from his opponent.
Hart misses with a body shot.
A jab from Woods finds it's way through Hart's defenses.
The crowd are loving this. Great action here.
Woods's jab looks to have found its range, popping Hart under the eye.
Woods gets to the clinch - let's see what his plan is here.
Woods lands a good knee to the midsection. Hart won't want to take too many of those.
Woods escapes the clinch and we're back to striking.
Boom, another hit is landed. "You're gunna get knocked out" taunts Woods, as that shot connected.
Woods ducks low and lands a nice hook to the body of his opponent.
Woods keeping a good distance there, avoiding the body shot.
Woods paws at his opponent with the jab and then lunges in with a straight, right on the button.
Woods feints a jab promting Hart to slip. Woods then demonstrates his capabilities by jabbing again. Hart slips again and ducks right into an uppercut.
Hart's hands are dropping dangerously low here and Woods connects clean with a right hook that sends him down to one knee! Hart scrambles back to his feet.
That's three minutes gone in the round.
Woods misses with a jab and misses with a cross straight after too.
Hart throws a hook but Woods avoids it easily.
Woods lands with a good body shot.
Hart swings for the body but Woods moves out of range.
Woods shoots in for a takedown! He's got it and he's managed to land in full mount! That's better than Woods was expecting from the takedown attempt, I'm sure!
Woods is in the full mount, landing strikes.
Hart is desperately trying to get back to half guard.
Hart is breathing heavily.
Hart in a bad spot here, taking shots to the head.
Woods is still in mount, landing shots to his trapped opponent. Hart can't stay in a position like this for much longer.

Hart is rocked!
This has been an exciting period of action!
Hart tries to hold on but Woods postures up.
Hart is still in real trouble! Can Woods finish him?
Woods lands with some vicious ground and pound - can Hart hang on?
That's four minutes gone in the round.
Woods is still in mount, landing shots to his trapped opponent. Hart can't stay in a position like this for much longer.
Hart regains half guard.
Woods wants to stand up but Hart is controlling the position.
Woods thows a huge punch but Hart dodges it nicely.
Hart seems to have recovered his senses.
Hart has hold of Woods's hands but Woods slips his arm to the side and lands an elbow.
Woods is trying to get back to his feet now but his leg is trapped.
The crowd are going absolutely nuts as the round comes to an end - what a fantastic round of action!
Woods missing with the ground and pound from half guard.
Hart looking for submissions off his back.
Woods decides to stand and escape the position.
And thats the end of the round the fighters go back to their corners.
James Woods dominated that second round.
The cut man is working on Matt Hart's cut.
Well, the break between rounds is over. Let's get back to the scrappin! This is the final round!

Hart misses with a body shot.
Hart misses with a hook to the body
letting Woods counter with a right hand.
Woods scores with a shot to the body.
Hart shoots in looking for a double leg takedown. Woods defends it nicely.
Hart misses with a wild body shot.
Hart just misses with a punch to the body.
Hart with a lazy takedown attempt
and Woods counters with a nice uppercut.
Woods is really dominating this fight. Is there anything that Hart can do to turn this around?
Woods lands with a right hand.
That has opened up Matt Hart's cut even more.
Hart takes a big intake of breath there - he's definitely tired.
Hart blocks a head kick by Woods.
Woods takes the fight into the clinch.
Hart has a pretty nasty looking mouse under his right eye.
Woods manages to break the clinch.
That's one minute gone in the round.
Hart just misses with a punch to the body.
Woods is moving around nicely and scores here with a single head shot.
Hart misses with a shot to the body
and Woods counters nicely by changing levels and landing a hook to the body.
Woods looks to land a combination. Hart sees it coming but can only parry a couple of the shots.
A momentary lapse in concentration from Hart enables Woods to shoot in and score with a neat double leg. Hart manages to secure a closed guard as the fighters hit the mat.
Woods advances position into side control!
Woods lands a decent elbow from side control.
Woods working the ground and pound.
We've seen a great period of action over the last minute or so - credit to both fighters for going all out!
Woods stands up and we're back to a striking position.
Hart takes a kick to the body and keeps moving.
A right-left combo lands from Woods.
Matt Hart has stepped it up - he knows he needs a finish here!
That's two minutes gone in the round.
A really sloppy takedown attempt there from Hart.
James Woods has stuffed three takedown attempts in the round now. That's going to take a lot out of Matt Hart.
Crunch! Woods slams his shin into Hart's torso.
Hart throws out a token jab with nothing on it.
Hart ducks right into an uppercut from Woods.
Hart gets caught napping as Woods dives in and scores a takedown. Hart manages to retain guard.
Hart keeping full guard, as Woods tries to pass.
Woods decides he's had enough of playing guard and decides to stand. Come on Hart, up you get!
Hart fails with the takedown.
Woods lands with a right hand.
Hart swings away with a body shot that misses
and Woods counters with a left to the body.
That's three minutes gone in the round.
Woods cracks Hart with a hook to the jaw. Both fighters smile at eachother and high-five before getting back down to business.
Woods throws a body kick but he was well out of range there.
Woods misses with a jab and misses with a cross straight after too.
Hart misses with a lunging right hand
and Woods counters with a series of strikes. Hart will be more careful next time no doubt.
Woods scores with a takedown into Hart's guard.
Hart has a loose triangle. He'll be looking to tighten that up but Woods can see exactly what he's planning and manages to posture up and free himself.
Woods lands a couple of digs.
Hart is working an open guard so Woods takes the opportunity to get back to his feet.
James Woods is fighting for a decision here - he's started to take the cautious approach.
Woods throws a combination. Hart tries to block but a couple of punches get through.
James Woods is looking to throw some combinations by the looks of things.
Woods stalks Hart and leaps in with a furious combination of punches. Uppercuts and crosses smash into Hart's face. Hart staggers backwards, shaken.
That's four minutes gone in the round.
Wooooo! Give it up for these two warriors! They are putting on a show!
Hart fails miserably with a takedown attempt.
Hart on the receiving end of a decent leg kick there by Woods. Woods obviously looking to wear him down.
Woods throws a series of strikes that have Hart backpedaling.
Woods scores to the head and body with a nice combination!
Hart swings and misses with a shot to the body
and Woods counters with a left to the body.
Woods has managed to clinch.
Hart has double underhooks and is working for a body lock takedown. He's got it. The fighters land in half guard but Woods regains guard immediately.
Woods wants to sweep but no luck.
The crowd are going absolutely nuts as the round comes to an end - what a fantastic round of action!
Hart is trying to tuck his arms in to keep them safe but Woods has managed to isolate one of them and has got a loose triangle. Hart is looking to defend but Woods has done well to lock his legs together - this could be big trouble for Hart! Woods pulls down on the head and a little smile comes across his face - he knows he's got it. Yep, Hart taps out and this one is all over!
Ladies and gentlemen, after 4:59 of round 3, we have a winner by way of Submission (Triangle). James Woods!
|
|
|
|
|
|
|
|
|
|
|
|
|
|
|
|
|
|
|
|
|
|
|
| S |
C
A |
G |
S |
C
B |
G |
|
S |
C |
G |
|
energy
A | B |
|
hype
A | B |
|
pop
A | B |
|
mgr
A | B |
|
FIGHT
RATING
81% |
|
|
|
|
|
|
