|
|
PBP Commentary |
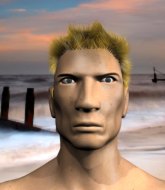
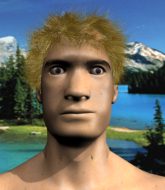
Coming up we have a lightweight MMA rules bout between Maximillion Butler (ranked 0 p4p, 0 weight class) and David Brynwick (ranked 0 p4p, 0 weight class). Butler comes to the cage accompanied by Comeback Kid. Over to our ring announcer for the fighter introductions!
 |
|
 |
| 183 cm
18
158 lbs
0 - 0 - 0 |
|
184 cm
21
155 lbs
0 - 1 - 0 |
BJJ Blue Belt
Basic striking
KO power |
|
BJJ White Belt
Brawler
Granite chin |
|
| |
|
Ladies and gentlemen. This fight is 3 rounds, in the lightweight division.
Introducing the fighter to my left, fighting out of the red corner.
With a record of
0 - 0 - 0, fighting out of Hilo, Maximillion Butler!
And introducing the fighter to my right, fighting out of the blue corner.
With a record of
0 - 1 - 0, fighting out of Hilo, David Brynwick!
The judges for this bout are , and .

The bell rings for round one and we are underway!
Butler throws a leg kick that misses.
Maximillion Butler seems to be the more aggressive standup fighter in this bout.
Butler throws a combination but it was largely blocked by Brynwick.
Brynwick ducks down and throws a hook to the body but Butler moves away.
Butler pulls out of a head kick attempt.
Sloppy strikes from Butler. Those never looked like landing.
Brynwick lands a nice hook to Butler's body. Butler takes it in his stride and looks to land his own strikes.
Butler slips a jab and a cross from Brynwick.
Brynwick is a painfully thin specimen of a man. You do wonder whether a good body kick would snap him clean in two.
Brynwick lands a nice shot that snaps Butler's head back.
Butler misses with a jab, cross combination.
Butler throws a nice looking combination but Brynwick bobs and weaves to avoid any damage.
Butler throws a right and a left that Brynwick avoids nicely.
Butler tries to clinch up but Brynwick circles away and keeps his distance.
Brynwick lunges in with swinging rights and lefts but Butler circles away quickly and effectively.
Butler swinging wildly here.
Brynwick throws a series of punches but Butler moves out of range.
Butler swings away with a leg kick that misses.

Butler shoots in for a takedown! He's got it and he's managed to land in full mount! That's better than Butler was expecting from the takedown attempt, I'm sure!
Butler thowing shots but they're missing.

That's one minute gone in the round.
Brynwick avoids a series of strikes thrown by Butler.
Butler throwing strikes here but Brynwick is writhing around nicely and avoiding any serious damage.
The fighters are pressed up against the cage, both looking to find a bit of space to work.
Butler lands a big shot there that rocks Brynwick but he's holding on and managing to survive for now.
Butler lands a couple of nice shots there from mount.
You get the feeling that Brynwick really doesn't like being in this position too much.
Butler putting on the heat here with some good ground and pound!
Butler is in the full mount, landing strikes.
You get the feeling that Brynwick really doesn't like being in this position too much.
Butler lands with some strikes.
Butler with the ground and pound from mount.
Wooooo! Give it up for these two warriors! They are putting on a show!
Butler won't let Brynwick get back to his feet... He wants to keep the fight where it is for now.
BOOM! Butler connects with a massive shot to the dome!

That's two minutes gone in the round.
Butler with the ground and pound from mount.
Butler working away from the top, dropping strikes.
We get told so often about how wrestlers don't like to be on their backs. Let's see if Brynwick can do anything to dispel that myth.
Brynwick tries to buck Butler off but he can't manage it.
Butler is still in mount, landing shots to his trapped opponent. Brynwick can't stay in a position like this for much longer.
Butler landing shots from mount.
Brynwick looks gassed!
Butler fakes a shot to the body and cracks his opponent in the head. Nice ground and pound there!
Butler landing strikes from the mount and Brynwick is in trouble!
Butler working Brynwick over with strikes here.
Brynwick wants to get back to his feet.
Butler has been looking to land a fair amount of strikes on the ground. He might be looking to soften his opponent up in order to work for a submission.
Butler fakes a shot to the body and cracks his opponent in the head. Nice ground and pound there!
Butler lands a big elbow.
The fighters are going at a pretty good pace and they're both starting to sweat now.
Butler lands a heavy elbow.

That's three minutes gone in the round.
Butler with shots to the head and body - Brynwick looks very uncomfortable down there.
Butler scoring with some good ground and pound from mount here. Will he manage to finish Brynwick?
Brynwick really wants to buck Butler off and get back to his feet.
Butler unloading with bombs!
Butler trying to control but Brynwick is having none of it.
Butler fakes a shot to the body and cracks his opponent in the head. Nice ground and pound there!
Butler looking to finish Brynwick with some ground and pound. This is bad for Brynwick!
Butler unloading with bombs!
Butler working the ground and pound effectively.
This is a great period of action - very entertaining stuff!
Butler landing strikes from the mount and Brynwick is in trouble!

That's four minutes gone in the round.
Butler landing shots from mount.
Butler raining down shots from the mount!
Butler scoring with some good ground and pound from mount here. Will he manage to finish Brynwick?
Brynwick is looking to get back to his feet - it's going to be hard from this position.
Butler lands with some strikes.
Butler fakes a shot to the body and cracks his opponent in the head. Nice ground and pound there!
Butler lands with some strikes.
The crowd growing excited in anticipation of a finish here! Right on cue, Butler cracks his opponent with a massive right hand that draws loud cheers!
Butler scoring with some good ground and pound from mount here. Will he manage to finish Brynwick?

Brynwick is rocked!
The crowd are going absolutely nuts as the round comes to an end - what a fantastic round of action!
Butler landing shots from mount.
Brynwick is still in real trouble! Can Butler finish him?
Brynwick is squirming around, avoiding Butler's attempts to control the action.
Butler raining down hammerfists from mount.
Butler lands with some vicious ground and pound - can Brynwick hang on?
Butler landing shots from mount.
And thats the end of the round the fighters go back to their corners.
Maximillion Butler dominated that round.
That's time! Butler's corner gives him a slap on the ass as he gets ready to fight.

Butler tries a switch kick but it misses it's target.
Butler shoots in for a takedown - he's clinched up with Brynwick but Brynwick pushes him off and we're back to square one.
Brynwick seems to have recovered his senses.
Brynwick paws at his opponent with the jab and then lunges in with a straight, right on the button.
Brynwick keeping at a good range here, avoiding a leg kick.
Butler tries a head kick but it misses.
Some wild striking there from Brynwick.
Butler throws a sloppy head kick and Brynwick moves out of range easily.
Brynwick throws a combination but it was largely blocked by Butler.
Brynwick looks to score with a jab to the body but Butler is just out of range.
Butler shoots in for a takedown. "I don't think so" says Brynwick as he avoids it easily.
Butler misses with the combination.
Jab, cross, leg kick. Nice combination by Brynwick!
Some bone on bone action there as Brynwick checks a low kick. Luckily it wasn't a particularly hard one.
Both fighters are absolutely exhausted here.
Butler looks shocked there as he takes a right hand to the temple.
That's one minute gone in the round.
Brynwick misses with a wild combination.
Brynwick lands a jab to the nose.
Nice uppercut there from Brynwick.
Butler throws a leg kick but Brynwick sees it coming and checks it nicely.
Butler tries to bum rush Brynwick with a series of wild strikes but Brynwick uses good footwork to avoid the assault.
Brynwick throws a right hand that Butler ducks under and follows up with a left that Butler also avoids with ease.
Oooooooooooh, not good. A low kick from Butler lands where it shouldn't have, right in the... well, you know what he did? He kicked him in the penis. He's injured, injured bad. The referee sends both fighters to their corners and Brynwick has 5 minutes to recover. He's OK now though... a thumbs up from Brynwick and we're back underway with a touch of gloves.
Good work by Brynwick as he checks the leg kick.
Butler misses with a combination
and Brynwick connects with a straight left hand counter down the middle.
Butler shoots in looking for a double leg takedown. Brynwick defends it nicely.
That's three failed takedown attempts in the round for Maximillion Butler. That's going to take a lot out of him.
Brynwick throws a jab to the body, straight down the pipe. Boom. That sent Butler stumbling backwards but he manages to regain his composure quickly.
That's two minutes gone in the round.
No joy there for Brynwick, who threw a few shots but didn't land.
Butler looks frustrated there after his takedown attempt is stuffed easily.
Butler shoots in for a takedown but doesn't get it.
Brynwick scores with a jab to the body.
Brynwick lands with a nice combination. Butler backs away looking to recover.
The crowd are loving this. Great action here.
Butler drops his hands and takes a jab to the jaw for his troubles.
Brynwick scores with a nice strike.
A telegraphed takedown attempt from Brynwick is defended easily by Butler.
Butler throws a nice looking combination but Brynwick bobs and weaves to avoid any damage.
Brynwick lands a nice looking body shot.
Butler throws a combination that misses
and Brynwick counters with a left to the body.
David Brynwick seems to be getting the better of the standup.
That's three minutes gone in the round.
Butler takes a punch right to his stomach. That took the wind out of him momentarily.
Butler takes a body punch but keeps moving.
Butler has his head slapped from side to side by a 3 punch combination. That must have hurt him.
Brynwick lands with a nice combination. Butler backs away looking to recover.
Brynwick throws a lazy right hand but Butler sees it coming a mile off and sidesteps it easily.
Brynwick stuffs a takedown. It's all about dictating where the fight takes place and Brynwick wants it to stay on the feet.
Butler misses with a low kick.
Brynwick scores with a one two! Butler had his feet all tangled up there and couldn't avoid the strikes.
Brynwick throws a combination but it was largely blocked by Butler.
Butler is looking to land body kicks.
Maximillion Butler is looking to throw some combinations by the looks of things.
A leg kick checked by Brynwick.
Brynwick lands with a two punch combination before moving back out of range.
Butler throws a right and a left that Brynwick avoids nicely.
Butler takes a shot to the eye socket. That's gotta hurt.
That's four minutes gone in the round.
Butler is looking to clinch.
Brynwick throws a series of punches but Butler moves out of range.
Brynwick sees a low kick coming and goes to check it, but it's actually a body kick and it thuds into his unprotected ribs.
Brynwick looks to land a combination but Butler avoids it well.
Butler throws a hook but Brynwick blocks it.
Brynwick cracks a nice hook into Butler's ribs.
Butler motions for Brynwick to come forward. Butler throws a leg kick but it misses it's target.
Butler closes the distance and gets a trip takedown into side control. Brynwick quickly recovers to half guard.
The fans in attendance giving it up for the two fighters, who have really let it all hang out in the last minute or so!

Butler is thinking about going for an arm triangle but he can't free his leg.
Butler prevents Brynwick from standing back up.
As the round comes to an end the crowd are showing their appreciation for a great round of action.
Brynwick is using up a lot of energy trying to get back to his feet. Perhaps he should improve his position first.
And thats the end of the round the fighters go back to their corners.
David Brynwick showed his class in that round. I'd imagine he'll take it on all the scorecards.
The referee calls time. The cornermen exit stage left and we're back to business. This is the final round!

Butler changes levels and drives through with a really nice takedown into side control. Brynwick looks really pissed at himself for not defending that better.
Brynwick wants to get back to his feet but Butler drags him back down.
Butler looking for an arm triangle but it's way too loose to do anything.
Butler in side control, trying to ground and pound but not landing this time.
Butler scores with a couple of short elbows.
Butler grinds an elbow into Brynwick's temple.
Butler in side control, throwing shots but Brynwick defends.

Butler stands up and beckons Brynwick to his feet.
Butler lands with a nice combination. Brynwick backs away looking to recover.
A combination from Butler does no damage.
We've seen a great period of action over the last minute or so - credit to both fighters for going all out!
Brynwick scores with a nice looking left hook and follows it up with an uppercut!
That's one minute gone in the round.
Brynwick lands with a two punch combination before moving back out of range.
Brynwick scores with a nice head shot.
Both fighters are breathing heavily.
Brynwick throws a series of punches but Butler avoids them all with ease.
Butler throws a sloppy head kick and Brynwick moves out of range easily.
Butler throws a head kick that misses and slips in the process. He scrambles back to his feet and the fighters circle.
Brynwick scores with a punch to the head.
Butler slips a jab and a cross from Brynwick.
Butler looks to score with a jab to the body but Brynwick is just out of range.
Brynwick throws a combination. Butler tries to block but a couple of punches get through.
Butler pivots, looking for a leg kick but Brynwick is out of range and Butler settles back down.
Butler tries to land with a swinging hook to the body but Brynwick was well out of range. Poor timing from Butler.
Butler throws a wild combination but nothing lands.
Brynwick fails to land with the punch combination there - jab, cross, hook, miss, miss, miss.
Brynwick showing good head movement there, avoiding the strikes from Butler.
That's two minutes gone in the round.
Butler throws a shot from downtown. Brynwick moves away and avoids it.
Brynwick looks to land a combination. Butler sees it coming but can only parry a couple of the shots.
Butler motions for Brynwick to come forward. Butler throws a leg kick but it misses it's target.
Butler misses with a double jab.
Brynwick throws a one two combo.
Brynwick thows a body shot but no joy.
Brynwick slips a jab and a cross from Butler.
Butler avoids a punch combination nicely.
Brynwick lands a really nice looking cross but Butler seems unphased.
Butler shoots in for a takedown. "Ole!" shouts Brynwick as he jumps to the side.
We've seen a great period of action over the last minute or so - credit to both fighters for going all out!
Brynwick lunges at Butler with a hook that half lands and is half blocked by Butler's hand.
That's three minutes gone in the round.
Brynwick fakes and then throws a beautiful body shot. Butler looks a bit winded and takes a step backwards to take a breath.
Brynwick throws a hook to the body but it doesn't connect.
Brynwick keeping his hands up high there, blocking the jab from Butler.

The fight moves into the clinch position.

Butler escapes the clinch and we're back to striking.
Brynwick lunges in with swinging rights and lefts but Butler circles away quickly and effectively.
Butler keeping a good distance there, avoiding the body shot.
Butler will need to tighten up his combinations if he doesn't want to gas himself out, swinging at thin air.
Butler looks like he's developed a pretty tasty lump over his left eye. He'll need to avoid taking much more damage to that.
Butler misses with the combination.
Brynwick will need to tighten up his combinations if he doesn't want to gas himself out, swinging at thin air.
That's four minutes gone in the round.
A leg kick checked by Brynwick.
Butler misses with a head kick.
Brynwick lands a jab to Butler's midsection.
Brynwick scores with a jab to the jaw.
Butler wants to slow Brynwick down by chopping away at his legs.
Butler takes a body punch but keeps moving.
Butler throws a poor cross that misses
and Brynwick counters with a quick right hand to the jaw.
Nice shot lands for Brynwick.
Butler is looking to clinch but Brynwick is avoiding it.
As the round comes to an end the crowd are showing their appreciation for a great round of action.
Brynwick throws a combination but comes up with nothing but fresh air.
Nice takedown defense from Brynwick. No joy for Butler on that attempt.
Brynwick misses with a series of wild punches.
Butler swings away but doesn't land with a series of punches.
And that's the end of the fight!
That was a close round. You could make an argument for either fighter but I would give it to Maximillion Butler.
I think Butler has won this one but let's see what the judges have to say. Over to the ring announcer for the scorecards.
Ladies and gentlemen, after 3 rounds of action, we go to the scorecards for a decision.
Judge Andi Peters scores the fight 29:28
Judge Gordon Ramsey scores the fight 29:28
Judge Frank Skinner scores the fight 29:28
In favor of your winner, by unanimous decision... Maximillion Butler!
Maximillion Butler gave a mention to Hilo Nutrition (video proof) in his post fight interview. That will please them (and hopefully generate some sales).
|
|
|
|
|
|
|
|
|
|
|
|
|
|
|
|
|
|
|
|
|
|
|
| S |
C
A |
G |
S |
C
B |
G |
|
S |
C |
G |
|
energy
A | B |
|
hype
A | B |
|
pop
A | B |
|
mgr
A | B |
|
FIGHT
RATING
100% |
|
|
|
|
|
|
