|
|
PBP Commentary |
Coming up we have a welterweight MMA rules bout between Quint Bingham (ranked 0 p4p, 0 weight class) and Architect Pain (ranked 0 p4p, 0 weight class). Bingham comes into the arena with Hatebreed - Live for this blaring out of the sound system. Pain has chosen Skrip Breaks / Enemy Crush as his entrance music. Architect Pain will no doubt be trying to keep this one on the feet, where he has a distinct advantage.
 |
|
 |
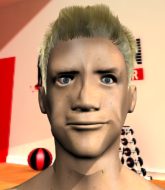
| 180 cm
25
178 lbs
7 - 2 - 0 |
|
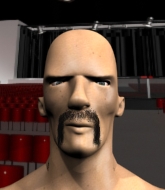
210 cm
20
175 lbs
5 - 0 - 0 |
Good wrestling
Solid boxing
Cardio machine |
|
Decent wrestler
Excellent boxer
Heavy handed |
|
| |
|
Ladies and gentlemen. This fight is 3 rounds, in the welterweight division.
Introducing the fighter to my left, fighting out of the red corner.
With a record of
7 - 2 - 0, fighting out of Helsinki, Quint Bingham!
And introducing the fighter to my right, fighting out of the blue corner.
With a record of
5 - 0 - 0, fighting out of Helsinki, Architect Pain!
The judges for this bout are Johanna Lukiainen, Tarja Halkonen and Marco Blurström.

The bell rings for round one and we are underway!
Pain throws an ugly left hook that misses

and Bingham counters with a nice double leg into side control. Pain won't be happy with that.
The referee must be thinking about standing these guys back up.
Bingham is looking to take a break and control but Pain is keeping him honest, looking to work from the bottom.
Pain is looking to reverse the position.
Bingham lands an elbow.
The strikes coming from Bingham are missing the target in this wave of attacks.
Bingham wants to control but Pain is keeping him busy.
Bingham is really struggling to control Pain but he's trying to hold on to the position.

Bingham swings around for an armbar but Pain sees it coming a mile off and turns beautifully into Bingham's guard.

That's one minute gone in the round.
Pain is looking to stand up but Bingham won't let him.
Bingham is avoiding any damage by keeping wrist control.

The ref stands the fighters back up. Quint Bingham wasn't doing enough on the ground.
Bingham fails with a rather predictable takedown attempt.
Pain displays good takedown defense there as he swats away a double leg from Bingham.
Bingham shoots in looking for a takedown but Pain manages to keep the fight standing, pushing Bingham's face into the canvas for good measure before circling away.
That's three failed takedown attempts in the round for Quint Bingham. That's going to take a lot out of him.

That's two minutes gone in the round.
Pain throws out a token jab with nothing on it.
Bingham looks to land a left hand but Pain moved out of range nicely.
Architect Pain is looking to keep the fight on the feet at all costs.
Bingham misses with a takedown attempt. He shot from a bit too far out.
Pain throws a lazy right hand but Bingham sees it coming a mile off and sidesteps it easily.
A swing and a miss from Bingham.
Bingham ducks under a wild hook from Pain.
Pain showing good head movement there, avoiding the strikes from Bingham.

That's three minutes gone in the round.
Pain swings for the body but Bingham moves out of range.
Pain takes a swing at Bingham's ribcage but misses.
Pain takes a swing at Bingham's ribcage but misses.
Pain looks to score with a jab to the body but Bingham is just out of range.
Quint Bingham seems to be the more aggressive standup fighter in this bout.
Bingham walks straight into an uppercut. Luckily it didn't land flush.
Bingham is trying hard to land a takedown here. Pain sprawls well and keeps this one on the feet.
Good shot there by Pain.

That's four minutes gone in the round.
Pain just misses with a punch to the body.
Pain jabs away that one connects to the head of his opponent.
Bingham throws a nice looking combination but Pain bobs and weaves to avoid any damage.
Bingham takes a shot to the nose. Hopefully that hasn't broken it.
Bingham throws out a token jab with nothing on it.
Bingham steps to the side to avoid the strikes from Pain.
Pain takes one on the chin but keeps coming.
The crowd applaud the fighters efforts here as the round comes to an end.
Bingham closes this distance looking for a takedown but Pain circles away.
The fans in attendance giving it up for the two fighters, who have really let it all hang out in the last minute or so!
Pain just misses with a punch to the body.
And thats the end of the round the fighters go back to their corners.
That was a close round but I would say that Quint Bingham will probably get the nod.
That's time! Bingham's corner gives him a slap on the ass as he gets ready to fight.

Pain tries to land with a swinging hook to the body but Bingham was well out of range. Poor timing from Pain.
Bingham darts in and lands a nice takedown into half guard.
The fighters are trapped in the ropes so we're going to have a reposition here. The ref calls for a break and repositions the fighters in the center of the ring.
Bingham with a momentary lay and pray from half guard.
Pain tries to get to full guard but Bingham has control of the leg.
The fighters are tangled up in the ropes here. We might need a restart if the fighters can't break free themselves.
Bingham content to control rather than advance.
Bingham is trying for a guillotine from the top but the pressure isn't in the right place so Pain is just riding it out for now. Bingham eventually gives up the hold.
That's one minute gone in the round.
Bingham tries to pass to full mount but Pain defends it.
Bingham controlling the action here.
Pain blocking the ground and pound attempt from Bingham.
That's two minutes gone in the round.
Well. There's a bit of a lull in the action here and the crowd are starting to get restless.
Bingham keeping composed on the top, looking to control the action.
Bingham is trying to work for a kimura but Pain is defending well.
Pain is looking to improve his position.
Bingham works his way into full mount!
We get told so often about how wrestlers don't like to be on their backs. Let's see if Pain can do anything to dispel that myth.
Bingham controlling his opponent.
That's three minutes gone in the round.
Bingham wants to control the pace but Pain is squirming around nicely.
Pain is flailing around, obviously not happy about being mounted. Bingham locks hold of one of his arms and spins for an armbar. He's got it! Pain is forced to tap!
Ladies and gentlemen, after 3:37 of round 2, we have a winner by way of Submission (Armbar). Quint Bingham!
Quint Bingham gave a mention to BioPharm Nutrition in his post fight interview. That will please them (and hopefully generate some sales).
|
|
|
|
|
|
|
|
|
|
|
|
|
|
|
|
|
|
|
|
|
|
|
| S |
C
A |
G |
S |
C
B |
G |
|
S |
C |
G |
|
energy
A | B |
|
hype
A | B |
|
pop
A | B |
|
mgr
A | B |
|
FIGHT
RATING
25% |
|
|
|
|
|
|
