|
|
PBP Commentary |
Coming up we have a welterweight MMA rules bout between Bayley James (ranked 0 p4p, 0 weight class) and Rick Killroy (ranked 0 p4p, 0 weight class). We have two fighters making their debuts here, so let's see who comes out of this one with their first professional victory.
 |
|
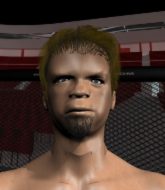 |
| 185 cm
23
175 lbs
0 - 0 - 0 |
|
178 cm
18
170 lbs
0 - 0 - 0 |
BJJ Blue Belt
Solid boxing
Prefers standup |
|
BJJ Blue Belt
Brawler
Granite chin |
|
| |
|
Ladies and gentlemen. This fight is 3 rounds, in the welterweight division.
Introducing the fighter to my left, fighting out of the red corner.
With a record of
0 - 0 - 0, fighting out of London, Bayley James!
And introducing the fighter to my right, fighting out of the blue corner.
With a record of
0 - 0 - 0, fighting out of London, Rick Killroy!
The judges for this bout are Sam Margolis, William Gold and Donald Grub.

The bell rings for round one and we are underway!
James cracks Killroy with an open hand slap.
Killroy misses with a few strikes there.
Some wild striking there from Killroy.
James closes the distance and lands a one-two.
Killroy misses with the combination.
Rick Killroy seems to be the more aggressive standup fighter in this bout.
James pushes forward with a 1-2 combination that forces Killroy back to the cage. James follows up with a solid lead hook to the liver.
James scores with a nice head shot.

James has closed the distance and engaged Killroy in a clinch.
Killroy is looking to break free of the clinch but James has double underhooks.
James wants to push off and get back to the center of the mat but Killroy has him pressed against the cage.
Killroy wants to strike at distance but he can't break free of the clinch.
James wants to break free. God knows he wants to breaaaak freeee.
Killroy keeps control of James as he tries to wriggle out of the double underhooks.
Killroy is trying to push James away but James has him pressed against the cage, so he's going nowhere.
Killroy wants to break the clinch but can't.
James wants to break the clinch but can't.

That's one minute gone in the round.
Killroy is trying to work out of this bad position, with his back against the cage.

James escapes the clinch and we're back to striking.
Killroy throws a wild combination but nothing lands.
James darts in and clinches Killroy up against the cage.
James tries to circle away but Killroy has him pinned against the cage.
James has Killroy pressed against the cage, preventing Killroy from circling away and getting back to striking at range.
James wants to break free. God knows he wants to breaaaak freeee.
James wants to break free but Killroy has control.
James is trying to break the clinch but Killroy is controlling him.
James breaks the clinch and we return to the middle of the mat.
James pushes Killroy up against the cage in a clinch.
Killroy keeps the fight in the clinch, despite James's efforts to push away.
Killroy working hard to break the clinch.

That's two minutes gone in the round.
James wants to break the clinch but can't.
Killroy wants to break the clinch but can't.
James is trying to force a seperation but Killroy has the dominant position.
Killroy is trying to break free.
Killroy tries to circle away but James has him pinned against the cage.
Killroy can't break the clinch.
Killroy keeps control of James as he tries to wriggle out of the double underhooks.
Killroy wants to break free but James has control.
James wants to break free. God knows he wants to breaaaak freeee.
James manages to break the clinch.
James closes the distance and clinches.
The fans in attendance giving it up for the two fighters, who have really let it all hang out in the last minute or so!
Killroy wants to break free but James has control.
Killroy working hard to break the clinch.

That's three minutes gone in the round.
James wants to push off and get back to the center of the mat but Killroy has him pressed against the cage.
James's corner calls for him to break the clinch, which he does.
James dodges the punch combination from Killroy.
Killroy misses with the combination.
James moves into range and throws a combination. A nice jab followed by a hook to the body.
James gets to the clinch - let's see what his plan is here.
James working hard to break the clinch.
James is trying to force a seperation but Killroy has the dominant position.
James wants to strike at distance but he can't break free of the clinch.
James breaks the clinch and we're back to striking at distance.
Killroy tries to bum rush James with a series of wild strikes but James uses good footwork to avoid the assault.
James with a hook.
James swings wildly with a hook that is half blocked by Killroy.

That's four minutes gone in the round.
No joy there for Killroy, who threw a few shots but didn't land.
James has taken the fight to the clinch.
The fans in attendance giving it up for the two fighters, who have really let it all hang out in the last minute or so!
Killroy tries to break free but James pushes him back against the cage.
James wants to break the clinch but can't.
James breaks from the clinch.
Killroy swings wildly with a couple of big hooks
and James makes him pay by landing a nice hook to the body before moving out of range.
James keeps his opponent at a distance with a nice jab.
James misses with the combination.
Some wild striking there from Killroy.
Killroy misses with a combination
and James counters with a straight punch to the midsection.
James gets in close and instigates a clinch.
As the round comes to an end the crowd are showing their appreciation for a great round of action.
Killroy prevents James from breaking the clinch.
Killroy tries to break free but James pushes him back against the cage.
James wants to break free but Killroy has control.
And thats the end of the round the fighters go back to their corners.
Bayley James dominated that round.
Well, the break between rounds is over. Let's get back to the scrappin!

James scores with a nice looking left hook and follows it up with an uppercut!
Killroy swings wildly with a couple of big hooks
and James counters with a two punch combo.
Killroy will need to tighten up his combinations if he doesn't want to gas himself out, swinging at thin air.
Bayley James is looking to throw some combinations by the looks of things.
James lands a vicious shot with the stealth of a sniper and the strength of a viper. Are vipers that strong? I can think of lots of things that are stronger than a viper - not many rhyme with sniper though.
James lands a two punch combo.
James drives through and clinches with Killroy against the cage.
The crowd are loving this. Great action here.
James keeps control of Killroy as he tries to wriggle out of the double underhooks.
James wants to get back to striking at distance but Killroy won't allow it.
James working hard to break the clinch.
James is trying to break the clinch but Killroy is controlling him.
James tries to break the clinch but Killroy is controlling the position.
James is using his height advantage well here, landing a good percentage of his punches.
Killroy is trying to break the clinch but James has him pressed against the cage.
Killroy is trying to break free.
James breaks the clinch and we return to the middle of the mat.
That's one minute gone in the round.
Killroy takes an uppercut right on the button but keeps his composure.
Killroy throws a combination but comes up with nothing but fresh air.
The fighters are going at a pretty good pace and they're both starting to sweat now.
Killroy misses with the combination.
Killroy misses with a combination
and James counters with a stiff right hand.
Killroy rushes forward with a series of wild hooks but James moves out of range and avoids them all easily.
James closes the distance and pushes Killroy back into the cage.
James tries to break free but Killroy pushes him back against the cage.
Killroy is trying to work out of this bad position, with his back against the cage.
James has had enough of the clinch and is looking to separate.
James breaks the clinch and we return to the middle of the mat.
James has taken the fight to the clinch.
James wants to break the clinch but can't.
Killroy keeps the fight in the clinch, despite James's efforts to push away.
James's corner calls for him to break the clinch, which he does.
That's two minutes gone in the round.
James clinches with his opponent.
James tries to circle away but Killroy has him pinned against the cage.
Bayley James has scored more points in the clinch so far.
James working hard to break the clinch.
James pushes off and circles away, back to the middle of the mat.
Killroy throws a combination that misses
and James connects with a straight left hand counter down the middle.
We've seen a great period of action over the last minute or so - credit to both fighters for going all out!
James dodges the punch combination from Killroy.
James works over Killroy's head and body with a nice combination.
Killroy tries to keep at a distance but James has taken the fight into the clinch.
James breaks the clinch and we return to the middle of the mat.
Killroy fails to land with a series of punches.
Killroy swings wildly with a couple of big hooks
enabling James to counter with a crisp jab.
That's three minutes gone in the round.
James dips down and scores with a jab to the body.
James lands a powerful looking uppercut that connected with his opponent's jaw.
Killroy looks to land a combination but James avoids it well.
Killroy throws a nice looking combination but James bobs and weaves to avoid any damage.
Killroy is breathing heavily.
James closes the distance and pushes Killroy back into the cage.
Killroy working hard to break the clinch.
James manages to break the clinch.
James scores with a nice one two combo and darts back out of range to avoid anything coming in the opposite direction.
Killroy gets tackled into the cage by James. James maintains the clinch.
Killroy wants to break free but James has control.
James keeps the fight in the clinch, despite Killroy's efforts to push away.
James has had enough of the clinch but Killroy keeps him there for the moment.
James tries to break free but Killroy pushes him back against the cage.
James breaks the clinch and we're back to striking at distance.
That's four minutes gone in the round.
Killroy misses with a series of wild punches.
James changes levels and scores with a jab to the body.
James looks to land a combination. Killroy sees it coming but can only parry a couple of the shots.
The crowd cheering loudly, showing their appreciation for the quality fight we're seeing here.
James getting the better of the striking in that exchange.
James throws a one two combo.
James works over Killroy's head and body with a nice combination.
James is really dominating this fight. Is there anything that Killroy can do to turn this around?
James gets to the clinch - let's see what his plan is here.
James breaks from the clinch.
James clinches.
James is trying to work out of this bad position, with his back against the cage.
The crowd are going absolutely nuts as the round comes to an end - what a fantastic round of action!
James wants to push off and get back to the center of the mat but Killroy has him pressed against the cage.
A frustrated look appears on James's face as he tries to break the clinch.
James breaks from the clinch.
And thats the end of the round the fighters go back to their corners.
Bayley James dominated that second round.
The minute break is over - no more time for sponges and pep talks - back to the action! Let's hear some noise people - this is the final round!

James doesn't manage to clinch there - Killroy circles away.
Killroy throws a left and a right that both miss
and James connects with a straight left hand counter down the middle.
Killroy is pinned up against the cage taking some big shots here. The referee is looking closely deciding whether he should stop the fight.
Killroy fails to land with a series of punches.
Killroy looks to land a combination but James avoids it well.
James forces Killroy back against the cage and clinches.
Killroy tries to break the clinch but James is controlling the position.
James wants to break free. God knows he wants to breaaaak freeee.
James breaks the clinch and we return to the middle of the mat.
Killroy throws a series of punches but James moves out of range.
Killroy misses with the combination.
Danga de danga de dang - James scores with a four punch combination!
Killroy misses with a combination
and James counters with a lovely straight right hand!
Killroy takes a big intake of breath there - he's definitely tired.
James throws a one two combo.
The crowd cheering loudly, showing their appreciation for the quality fight we're seeing here.
James works Killroy's body with a nice hook.
That's one minute gone in the round.
Killroy lunges in with swinging rights and lefts but James circles away quickly and effectively.
James is working the combinations to good effect here.
James lands three nice shots there - that looked like it hurt!
Killroy looks to score with a combo but nothing lands.
James scores with a nice head shot.
James showing good head movement there, avoiding the strikes from Killroy.
A nice combination there by James.
Killroy falls off balance throwing a combination
enabling James to counter with a crisp jab.
James misses with a low kick.
James with a body punch. A glancing blow.
James clinches up against the cage.
James breaks the clinch and we return to the middle of the mat.
Bayley James is winning the standup battle so far.
James has closed the distance and engaged Killroy in a clinch.
The fans in attendance giving it up for the two fighters, who have really let it all hang out in the last minute or so!
Killroy wants to strike at distance but he can't break free of the clinch.
Killroy prevents James from breaking the clinch.
That's two minutes gone in the round.
James wants to break free. God knows he wants to breaaaak freeee.
James working hard to break the clinch.
James breaks the clinch.
James lands a jab. Then a cross. Then finally a nice hook to the body. Good work there by James.
Killroy has a pretty nasty looking mouse under his right eye.
Killroy throws a left and a right that both miss
letting James counter with a right hand.
Killroy throws a left and a right that both miss
letting James counter with a right hand.
James lunges in with an uppercut that skims his opponent's chin.
James lands a two punch combo.
Killroy walks into a left hand.
Killroy throws a right and a left that James avoids nicely.
James digs a good body shot into Killroy's ribs.
Killroy swinging wildly here.
Killroy has his hands up protecting his head but a hook from James finds it's way round the side to connect with Killroy's head.
That's three minutes gone in the round.
James moves into the clinch.
James tries to circle away but Killroy has him pinned against the cage.
James has had enough of the clinch and is looking to separate.
James wants to break the clinch but can't.
James breaks the clinch and we return to the middle of the mat.
Killroy throws a combination that misses
and James counters with a three punch combination, finished off with a leg kick. Nice work.
James clinches up with Killroy and pushes him back against the cage.
James's corner calls for him to break the clinch, which he does.
James scores to the head and body with a nice combination!
James scores with a three punch combo!
James will need to tighten up his combinations if he doesn't want to gas himself out, swinging at thin air.
Jab, cross, leg kick. Nice combination by James!
Killroy falls off balance throwing a combination
and James cracks him with a counter punch right on the button.
That's four minutes gone in the round.
Killroy throws a wild combination but nothing lands.
Killroy throws a right and a left that James avoids nicely.
The crowd cheering loudly, showing their appreciation for the quality fight we're seeing here.
James takes the fight into the clinch.
James manages to break the clinch.
James gets a clinch.
Killroy wants to break free but James has control.
Killroy working hard to break the clinch.
Bayley James is fighting for a decision here - he's started to take the cautious approach.
James tries to circle away but Killroy has him pinned against the cage.
The crowd are going absolutely nuts as the round comes to an end - what a fantastic round of action!
Killroy keeps the fight in the clinch, despite James's efforts to push away.
Rick Killroy has stepped it up - he knows he needs a finish here!
James is trying to work out of this bad position, with his back against the cage.
And that's the end of the fight!
Bayley James showed his dominance in that final round.
Well James has outscored his opponent in every aspect of the fight today. Only a scarily incompetent judge or two will keep him from a well deserved win... Over to the ring announcer for the scorecards.
Ladies and gentlemen, after 3 rounds of action, we go to the scorecards for a decision.
Judge Sam Margolis scores the fight 30:27
Judge William Gold scores the fight 30:27
Judge Donald Grub scores the fight 30:27
In favor of your winner, by unanimous decision... Bayley James!
Jumping up and down and very excited, Bayley James waved his t-shirt featuring Bloodsport Nutrition's logo in front of the cameras.
|
|
|
|
|
|
|
|
|
|
|
|
|
|
|
|
|
|
|
|
|
|
|
| S |
C
A |
G |
S |
C
B |
G |
|
S |
C |
G |
|
energy
A | B |
|
hype
A | B |
|
pop
A | B |
|
mgr
A | B |
|
FIGHT
RATING
77% |
|
|
|
|
|
|
