|
|
PBP Commentary |
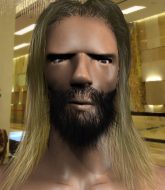
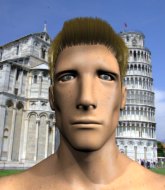
Coming up we have a light heavyweight MMA rules bout between Atilla Da (ranked 0 p4p, 0 weight class) and Evander Hollyfield (ranked 0 p4p, 0 weight class). Both fighters will be looking to make this an exciting fight for the fans, I'm sure!
 |
|
 |
| 190 cm
24
215 lbs
9 - 2 - 0 |
|
196 cm
25
210 lbs
13 - 6 - 0 |
Good wrestling
Excellent MT
Cardio machine |
|
BJJ Purple Belt
Dangerous knees
Determined |
|
| |
|
Ladies and gentlemen. This fight is 5 rounds, for the light heavyweight championship of the world!
Introducing the champion to my left, fighting out of the red corner.
With a record of
9 - 2 - 0, fighting out of Los Angeles, Atilla Da!
And introducing the challenger to my right, fighting out of the blue corner.
With a record of
13 - 6 - 0, fighting out of Los Angeles, Evander Hollyfield!
The judges for this bout are Jack Bonds, Don Winkell and .

The bell rings for round one and we are underway!
Da will have to do better than that with his takedown attempts.
Da will need to close the distance a bit before he attacks - that leg kick was thrown from too far away.
A telegraphed right hand from Da misses the target.
Hollyfield throws a nice looking combination but Da bobs and weaves to avoid any damage.
Da misses with a low kick.
Da with a lazy takedown attempt
and Hollyfield counters with a big head kick but Da shrugs it off.
Da shoots in for a takedown. "Ole!" shouts Hollyfield as he jumps to the side.
That's three failed takedown attempts in the round for Atilla Da. That's going to take a lot out of him.

Da closes the distance and clinches.
Hollyfield jumps guard but Da turns him against the cage and keeps the fight standing.
Da is looking for a takedown up against the cage. Hollyfield gets underhooks though and prevents the takedown attempt.
Da can't get the takedown.
Hollyfield is trying to pull guard but being pressed up against the cage enables Da to keep the fight standing.
Hollyfield tries to land knees in the clinch but Da avoids the damage to the body.
Da has Hollyfield pressed against the cage, preventing Hollyfield from circling away and getting back to striking at range.
Hollyfield misses with a knee to the head.

That's one minute gone in the round.
Hollyfield misses with a knee strike.

Da has moved round to his opponent's back and is looking for a suplex! Oh snap! He's tossed Hollyfield clear over his head and slammed him to the mat!
Da missing with punches from the back.
Hollyfield is trying to stand back up.
Da struggling to keep hold of the position.
Da controlling from the back.

That's two minutes gone in the round.
Hollyfield covers up after that shot from Da.
Da lands a punch that was close to the back of the head but the ref thinks it's OK.
This is a great period of action - very entertaining stuff!
Da has good solid back control here.
Hollyfield trying to get back to his feet but Da is in full control for now.
The fighters are pressed up against the cage, both looking to find a bit of space to work.
Da trying desperately to keep hold of the dominant position.
Hollyfield holding both Da 's hands and preventing any damage.

That's three minutes gone in the round.
Hollyfield avoids the strikes from Da.
Even with his hooks in, Da manages to miss with strikes from the back.
Da is looking to control Hollyfield but Hollyfield is wriggling around and keeping busy.
Da missing with strikes from the back.
The ref warns both fighters not to hold the cage as they work up against the meshing.
Hollyfield is trying to get back to his feet but Da has full control of the position and if anything, Hollyfield has just worked his way into a worse spot.

That's four minutes gone in the round.
Da thows a huge left but connects with the canvas and not his opponent.
Hollyfield controlling the position well but he knows he's in a bad position.
Da connects with a series of strikes and the referee is calling for Hollyfield to escape the position.
Da is riding his opponent, not letting Hollyfield buck him off.
Fantastic stuff here - a very entertaining period of action, which has drawn cheers from the crowd.
Can Hollyfield hold on?! Da is landing more strikes to his hapless foe.
You know, I was talking to some of our celebrities at ringside tonight and they were split right down the middle on who was going to win this fight.

That's five minutes gone in the round.
Da scores with punches to the body.
Hollyfield covers up after taking a massive shot to the side of the head.
Hollyfield prevents Da from getting a body triangle.
Hollyfield takes a big shot to the side of the head.
Da misses with an elbow to the head.

Da is working really hard to secure the rear naked choke. Hollyfield defends successfully for a significant amount of time. Both fighters are looking very determined.
Da controlling the position well here. Hollyfield rolled but Da kept the hooks locked in and stayed in the dominant position.

That's six minutes gone in the round.
This has been an exciting period of action!
Da lands a couple of good shots to his opponent's body and a final shot to the head. Good little attack there by Da.
Da thows a huge left but connects with the canvas and not his opponent.
Da scores with a nice shot to the head of his opponent. Hollyfield is looking for a way out.
Hollyfield staying busy and making it hard for Da to control.
Da throwing strikes from the back - he gets a warning from the referee for striking the back of the head but all these shots are hurting Hollyfield!
Da is punishing Hollyfield with some ground and pound.
Da is throwing strikes from the back here. Oh that last one was to the back of the head. Da gets a warning from the referee. He throws another strike to the back of the head straight away though and the referee has seen enough. He breaks up the two fighters and stands them back up. Da gets a real talking to here and is lucky not to get a point deducted. Da apologises and we restart here on the feet.

That's seven minutes gone in the round.
Da swings wildly with a right hand that was never going to find it's target.
Hollyfield shoots in for a takedown. "Ole!" shouts Da as he jumps to the side.
Da looks for a takedown here. Will he get it? Hollyfield is fending him off so far but Da persists. Nope, Hollyfield circles away and we're back to standing.
Hollyfield stuffs the takedown attempt from Da. Da gets slowly back to his feet.
Hollyfield stuffs the takedown.
Da looking to land some kicks to the body here.
Da wants to land a leg kick but Hollyfield is out of range.
Hollyfield looks to land a combination but Da avoids it well.
Da will have to do better than that with his takedown attempts.
Hollyfield tries a head kick but it misses.

That's eight minutes gone in the round.
Hollyfield shoots in and drives through. Da sprawls well.
Da blocks a head kick by Hollyfield.
Hollyfield gets caught flat footed, as Da shoots in with a quick takedown into guard.
Da throwing strikes from guard but Hollyfield blocks nicely.
Da trying to control the position from guard on top but Hollyfield is wriggling around, looking for whatever he can.
Da with a couple of shots to the head there. Not particularly brutal.
Wooooo! Give it up for these two warriors! They are putting on a show!
Da throws a strike but Hollyfield rolls with it and manages to sweep. Now he's in guard on top.
Hollyfield wants to stand but Da has a closed guard, so he can't escape.

That's nine minutes gone in the round.
Da has control of Hollyfield's left arm, preventing Hollyfield from doing any damage.
Hollyfield trying to control but Da is working from the bottom.
As the round comes to an end the crowd are showing their appreciation for a great round of action.
Da utilising some decent striking defenses from the guard, preventing the ground and pound.
Da working for a triangle but Hollyfield defends it easily.
And thats the end of the round the fighters go back to their corners.
Atilla Da dominated that round.
The fighters' corners scream their final instructions, as the referee calls time. Here we go, back to the action!

Da throws a right high kick that is partially blocked by Hollyfield.
Da closes this distance looking for a takedown but Hollyfield circles away.
Da shoots in for a double leg but Hollyfield sprawls well. That's going to sap some energy.
Da tries for a takedown but Hollyfield circles away easily
and Hollyfield counters with a shot to the ribs. That looked like it hurt.
That's three failed takedown attempts in the round for Atilla Da. That's going to take a lot out of him.
Hollyfield defends well against a solid takedown attempt from Da.
Da thuds a mid kick into his opponent's body. That will wear on Hollyfield if he has to take too many more of those.
Da with a lazy takedown attempt
and Hollyfield counters with a lovely shot to the body.
Hollyfield gets caught flat footed, as Da shoots in with a quick takedown into guard.
Both fighters are absolutely exhausted here.
That's one minute gone in the round.
Da throwing strikes but missing.
Hollyfield is looking to stand up but Da isn't so interested in that idea.
Da is intent on slowing down the pace of the fight, simply looking to control.
Da stops Hollyfield from standing up.
Atilla Da overall seems to be getting the better of the ground position in the fight so far.
Da stands up and looks to throw the legs aside to pass to side control. Hollyfield swivels though and keeps the full guard.
Hollyfield wants to get back to his feet but Da is in a dominant position and won't allow it.
That's two minutes gone in the round.
Da landing some decent shots from guard.
Da trying to control the position from guard on top but Hollyfield is wriggling around, looking for whatever he can.

The ref stands the fighters back up because Atilla Da just wasn't active enough.
Hollyfield tries to bum rush Da with a series of wild strikes but Da uses good footwork to avoid the assault.
That's three minutes gone in the round.
Da throws a head kick that misses and slips in the process. He scrambles back to his feet and the fighters circle.
Hollyfield tries a head kick but it misses.
Hollyfield moves out of range of the leg kick from Da.
A head kick misses from Hollyfield.
Hollyfield tries a switch kick but it misses it's target.
Hollyfield moves out of range of the body kick from Da.
Da shoots for a double leg takedown but Hollyfield sprawls well. He's pushed Da's face into the mat and manages to get back to his feet relatively easily.

Hollyfield closes the distance and scores a nice trip takedown into half guard. Da did well to prevent Hollyfield getting side control.
Da is controlling Hollyfield's trapped leg to prevent Hollyfield from advancing to side control.
That's four minutes gone in the round.
Da is looking to control Hollyfield's leg but it's slowly edging free. Can Da avoid being mounted?
The referee is asking the fighters to pick up the pace.
Atilla Da has forced the referee to step in and bring the fight back to the feet.
Da looks to land a left hand but Hollyfield moved out of range nicely.
Da fails with a takedown attempt.
Hollyfield shapes like he's going to throw a leg kick but settles back down.
Da looks for a takedown here. Will he get it? Hollyfield is fending him off so far but Da persists. Nope, Hollyfield circles away and we're back to standing.
That's five minutes gone in the round.
Da throws a looping left and ducks down for a takedown. He's got his arms around Hollyfield's waist but Hollyfield gets an underhook and avoids the takedown by throwing Da off to one side.
Hollyfield shoots in but Da avoids the takedown attempt easily.
Da wants to clinch up but Hollyfield keeps it at a distance.
Da attempts a leg kick but it's missed by a good margin.
Atilla Da is winning the standup battle so far.
Da throws a low kick but Hollyfield avoids it.
Da misses with a low kick as Hollyfield jumps back.
Da shoots in but Hollyfield avoids the takedown attempt easily.
Da closes the distance and clinches up with Hollyfield, looking for a takedown. Da pushes Hollyfield against the cage but Hollyfield circles to the side and manages to break the clinch.
Da tried to score with a low kick but Hollyfield checks it.
That's six minutes gone in the round.
Da walks forward and throws out a flicking leg kick. Hollyfield checks it nicely though, as he moves to the side.
Horrible takedown by Da or perhaps it was just good defense by Hollyfield which made him look bad.
Hollyfield throws a head kick but Da moves out of range.
Da throws a half hearted mid kick.
Hollyfield dances in quickly and lands a nice inside leg kick on Da. That did some damage!
Hollyfield getting the better of the striking in that exchange.
Hollyfield misses with a head kick.
Hollyfield misses with a head kick.
Hollyfield throws out a token jab with nothing on it.
Da fakes a jab and scores with a low kick.
That's seven minutes gone in the round.
Da clinches.
Da has Hollyfield pressed up against the cage and is working for takedown. Hollyfield manages to improve position though and keeps the fight standing.
Da drops to a knee looking for a takedown but Hollyfield gets the underhooks and prevents it.
Da is really dominating this fight. Is there anything that Hollyfield can do to turn this around?
Da is looking to take this one to the mat.
Hollyfield has had enough of the clinch but Da keeps him there for the moment.
Da avoiding damage as Hollyfield throws knees to the body.
Hollyfield gets underhooks to prevent Da's takedown attempt.
Hollyfield is working for a takedown up against the cage. He can't get it on this occasion though.
Hollyfield is trying to push Da away but Da has him pressed against the cage, so he's going nowhere.
Da has Hollyfield pressed up against the cage and is working for takedown. Hollyfield manages to improve position though and keeps the fight standing.
Da tries for a takedown. No joy.
That's eight minutes gone in the round.
Hollyfield is trying to force a seperation but Da has the dominant position.
Hollyfield is trying to break the clinch but Da has him pressed against the cage.
Hollyfield tries to land a knee to the head but Da blocks with his arms.
Hollyfield gets underhooks to prevent Da's takedown attempt.
Hollyfield drops down for a takedown but doesn't get it.
Hollyfield trying to land knees to the body.
Da is looking for a takedown.
Hollyfield trying to stall but Da improves his position.
Hollyfield is trying to break free.
Hollyfield is looking to break free of the clinch but Da has double underhooks.
Hollyfield tries to break free but Da pushes him back against the cage.
Fantastic stuff here - a very entertaining period of action, which has drawn cheers from the crowd.
Da is trying to trip Hollyfield. He has hold of a leg but Hollyfield is hopping around, keeping his balance for the moment. Da persists though and gets the takedown into guard.
That's nine minutes gone in the round.
Da throwing elbows and punches but not connecting, as Hollyfield works some decent striking defense from the bottom.
Hollyfield is looking to get back to his feet but can't, whilst Da is controlling him.
Da with a couple of shots to the head there. Not particularly brutal.
Da throws an elbow that misses. Hollyfield uses the momentum to reverse the position. He's now in Da's guard. Nice move by Hollyfield!
Hollyfield throwing elbows and punches but not connecting, as Da works some decent striking defense from the bottom.
Da has been looking to land a fair amount of strikes on the ground. He might be looking to soften his opponent up in order to work for a submission.
Da looking to control the pace of the fight rather than finish it.
As the round comes to an end the crowd are showing their appreciation for a great round of action.

Hollyfield gets to his feet - Da follows without any prompting.
And thats the end of the round the fighters go back to their corners.
Atilla Da dominated that second round.
Well, the break between rounds is over. Let's get back to the scrappin!

Hollyfield leaves Da with his face pressed against the mat as he sprawls beautifully, defending against a solid takedown attempt.
Da throws a head kick but Hollyfield moves out of range.
Hollyfield throws a right hand that Da ducks under and follows up with a left that Da also avoids with ease.
Da ducks down and throws a hook to the body but Hollyfield moves away.
Hollyfield avoids a low kick by using good footwork.
A combination from Hollyfield does no damage.
Hollyfield tries a head kick but it misses.
Horrible takedown by Da or perhaps it was just good defense by Hollyfield which made him look bad.
A punch combination from Hollyfield misses.
That's one minute gone in the round.
Da throws a leg kick
enabling Hollyfield to counter with a crisp jab.
Hollyfield stuffs the takedown attempt from Da. Da gets slowly back to his feet.
That's three failed takedown attempts in the round for Atilla Da. That's going to take a lot out of him.
Both fighters are breathing heavily.
Hollyfield misses with a wild combination.
Da throws the kick towards the body but Hollyfield avoids it.
Da misses with a kick to the body.
Hollyfield connects with an inside leg kick.
Da misses with a body kick.
Hollyfield tries a head kick but it misses.
Hollyfield throws a head kick that misses
and Da counters with a body kick that stops Hollyfield in his tracks momentarily.
That's two minutes gone in the round.
Da tries to land a body kick
and Hollyfield counters with a good low kick that Da was not able to check.
Da motions for Hollyfield to come forward. Da throws a leg kick but it misses it's target.
Hollyfield misses with a body kick.
Da connects with an inside leg kick.
Da throws a push kick but Hollyfield slaps the foot to one side.
Hollyfield takes one on the chin but seems OK.
Da goes for a spinning back kick but it misses.
This is a great period of action - very entertaining stuff!
Da pulls out of a head kick attempt.
Hollyfield throws a series of punches but Da moves out of range.
Da avoids the head kick by Hollyfield.
That's three minutes gone in the round.
Hollyfield has his front leg slapped to the side - a nice low kick landing there from Da.
A head kick misses from Hollyfield.
Atilla Da seems to be the more aggressive standup fighter in this bout.
Hollyfield rushes forward with a series of wild hooks but Da moves out of range and avoids them all easily.
Hollyfield leaves Da with his face pressed against the mat as he sprawls beautifully, defending against a solid takedown attempt.
Nice takedown defense from Hollyfield. No joy for Da on that attempt.
Da fails with a rather predictable takedown attempt.
Hollyfield tries to check the leg kick but that clearly hurt him.
Well, he's not going to score with shots like that. A lazy body kick attempt from Hollyfield.
Hollyfield throws a nice hook to the body that draws an oooh from the crowd.
That's four minutes gone in the round.
Da tries to clinch up.
Da tries for a takedown but Hollyfield sees it coming a mile off and avoids it easily.
Da keeping a good distance there, avoiding the body shot.
Da dives in and grabs Hollyfield's left leg, looking for a takedown. Hollyfield pushes down on Da's head and hops out.
Da uses some good footwork to avoid the body shot by Hollyfield.
Hollyfield throws a series of punches but Da avoids them all with ease.
Hollyfield misses with a half-hearted attempt at a head kick.
Some bone on bone action there as Hollyfield checks a low kick. Luckily it wasn't a particularly hard one.
Da misses with a takedown attempt
and Da takes a counter punch right on the button for his troubles.
Da tries to score with a leg kick but it misses it's target.
Hollyfield is throwing a lot of body shots here, looking to wear down Da rather than just go for the knockout.
That's five minutes gone in the round.
Hollyfield pulls out of a head kick attempt.
Hollyfield shoots in for a takedown. "Ole!" shouts Da as he jumps to the side.
Hollyfield thows a body shot but no joy.
Hollyfield misses with a kick to the body.
Da looking to score a takedown here. Hollyfield is defending well but Da drives through and ends up in Hollyfield's guard.
Da prevents Hollyfield from getting back to his feet.
Hollyfield working the defensive guard well to avoid strikes from Da.
Hammerfist, elbow! yells Da's corner. There ya go! There ya go!
Da passes into half guard.
That's six minutes gone in the round.
Hollyfield wants to get back to his feet.
Da throwing shots but Hollyfield is blocking nicely.
Da lands strikes from half guard.
The fans in attendance giving it up for the two fighters, who have really let it all hang out in the last minute or so!
Hollyfield wants to get back to his feet.
Da lands a big shot. The thud that echoes around the arena is like music to the fans' ears.
Hollyfield is not content to let Da control the position.
That's seven minutes gone in the round.
Da working some ground and pound from close in. He's looking to maintain this position and strike for a while by the looks of things... although he'll probably advance to full mount in a minute now I've said that.
Hollyfield is trying to defend against the ground and pound but Da scores with a couple of nice shots.
Da is trying to control. Hollyfield wants to improve his position but can't escape this time.
Hollyfield tries to kick Da off but Da keeps his base steady and stays in half guard.
Hollyfield is not content to let Da control the position.
Da has freed up his trapped foot and advances to mount.
Da working the ground and pound effectively.
That's eight minutes gone in the round.
Da punishing his opponent with strikes.
The crowd cheering loudly, showing their appreciation for the quality fight we're seeing here.
Da looking to control but Hollyfield is working nicely, looking to advance position himself.
Hollyfield is really trying hard to get back to his feet.
Da lands a shot to the body, followed up by a shot to the exposed head of his trapped opponent.
Da connects with a couple of good shots from mount.

Hollyfield is rocked!
Hollyfield wants to use the cage to get back to his feet here.
Hollyfield is still in real trouble! Can Da finish him?
Da drops a big elbow. That's hurt Hollyfield! More shots from Da and the ref steps in! The fight is over!
Ladies and gentlemen, after 9:59 of round 3, we have a winner by way of TKO (Strikes). Atilla Da!
Atilla Da retains his light heavyweight title!
|
|
|
|
|
|
|
|
|
|
|
|
|
|
|
|
|
|
|
|
|
|
|
| S |
C
A |
G |
S |
C
B |
G |
|
S |
C |
G |
|
energy
A | B |
|
hype
A | B |
|
pop
A | B |
|
mgr
A | B |
|
FIGHT
RATING
54% |
|
|
|
|
|
|
