|
|
PBP Commentary |
Coming up we have a lightweight MMA rules bout between Kato Munechika (ranked 0 p4p, 0 weight class) and Masahura Yakisoba (ranked 0 p4p, 0 weight class). Munechika comes into the arena with Requiem for a Dream blaring out of the sound system. This should be fireworks!
 |
|
 |
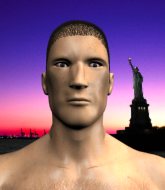
| 173 cm
27
160 lbs
10 - 3 - 0 |
|
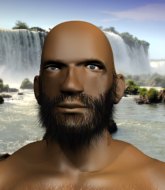
175 cm
31
140 lbs
21 - 20 - 0 |
BJJ Purple Belt
Excellent boxer
KO power |
|
BJJ Purple Belt
Excellent boxer
Heavy handed |
|
| |
|
Ladies and gentlemen. This fight is 3 rounds, in the lightweight division.
Introducing the fighter to my left, fighting out of the red corner.
With a record of
10 - 3 - 0, fighting out of Las Vegas, Kato Munechika!
And introducing the fighter to my right, fighting out of the blue corner.
With a record of
21 - 20 - 0, fighting out of Las Vegas, Masahura Yakisoba!
The judges for this bout are Timothy Bukovac, Jack Bonds and .

The bell rings for round one and we are underway!
Munechika throws a right and a left that both miss.
Munechika shoots in looking for a takedown but Yakisoba manages to keep the fight standing, pushing Munechika's face into the canvas for good measure before circling away.
Munechika looking to take his opponent's legs away with the low kicks.
Yakisoba throws a nice outside leg kick.
A bone on bone clash there as Munechika blocks the leg kick.
Munechika waving his hands out in front of him, looking to distract Yakisoba.
Masahura Yakisoba seems to be the more aggressive standup fighter in this bout.
Munechika listening to his corner there, landing a nice uppercut.
Munechika swinging wildly here.
A head kick from Munechika lands but Yakisoba takes it in his stride.

It looks like Masahura Yakisoba has been cut.
Munechika misses with a looping left.
Yakisoba throws a body punch but Munechika moves out of range.
Munechika tries to close the distance and clinch up but Yakisoba swats him away and circles back towards the center.
Yakisoba takes a shot to the nose. Hopefully that hasn't broken it.
Fantastic stuff here - a very entertaining period of action, which has drawn cheers from the crowd.
Munechika tries to close the distance and clinch up against the cage but Yakisoba paws at him with a jab and circles away.
Munechika moves out of range as Yakisoba strikes.
Munechika jabs Yakisoba to the body, keeping him at a distance.
Yakisoba with a hook.
Munechika throws a looping left and ducks down for a takedown. He's got his arms around Yakisoba's waist but Yakisoba gets an underhook and avoids the takedown by throwing Munechika off to one side.

That's one minute gone in the round.
Munechika dips to his left and cracks Yakisoba with an uppercut!
Munechika defending well as Yakisoba loads up on a big left hand.
Yakisoba slips under a jab.
Yakisoba throws a shot from downtown. Munechika moves away and avoids it.
Munechika throws a low kick but Yakisoba avoids it.
Yakisoba misses with a head kick.
Yakisoba fakes and then throws a beautiful body shot. Munechika looks a bit winded and takes a step backwards to take a breath.
A decent looking cross lands there for Yakisoba.
Yakisoba has his front leg slapped to the side - a nice low kick landing there from Munechika.
Yakisoba throws a leg kick that is checked
and Munechika counters with a straight right hand.
Munechika looking to throw a kick but he's pulled out of it.
Munechika tries for a takedown but Yakisoba circles away easily
and Yakisoba counters with a shot to the ribs. That looked like it hurt.
That's three failed takedown attempts in the round for Kato Munechika. That's going to take a lot out of him.
Yakisoba waving his hands out in front of him, looking to distract Munechika.
Munechika moves away from the strike by Yakisoba.
Munechika is the aggressor but that punch slipped nicely by Yakisoba.

That's two minutes gone in the round.
Yakisoba misses with a hook. Munechika ducked under it nicely.
Munechika fakes a jab and scores with a low kick.
The crowd are loving this. Great action here.
Munechika misses with a body shot.
Munechika fails with the takedown.
Masahura Yakisoba is looking to keep the fight on the feet at all costs.
Munechika uses decent footwork to sidestep a right hand from Yakisoba.
Munechika delivers a nice body kick.
Yakisoba swings wildly with a right hand that was never going to find it's target.
Yakisoba moves away from the strike by Munechika.
Munechika misses with a wild body shot.
Yakisoba misses the jab.
Yakisoba scores with a shot to the body.
Munechika is looking to clinch but Yakisoba is avoiding it.
A telegraphed right hand from Munechika misses the target.
A punch combination from Yakisoba misses.

That's three minutes gone in the round.
Yakisoba steps to the side to avoid the strikes from Munechika.
Yakisoba throws a looping overhand right but Munechika ducks down to avoid it.
Yakisoba displays some good footwork, moving neatly out of range as Munechika throws out the jab.
Yakisoba misses with a hook. Munechika ducked under it nicely.
Munechika feints and then cracks Yakisoba's leading leg with a nice low kick. He's obviously looking to slow Yakisoba down.
Munechika throws a monster uppercut resembling something out of street fighter but it doesn't land.
Munechika slips a straight right by Yakisoba.
Yakisoba staying out of range there.
Yakisoba connects with a nice looking jab.
Munechika defending well as Yakisoba loads up on a big left hand.
Munechika dips down and scores with a jab to the body.
Munechika misses with a body shot
and Yakisoba counters with a quick right hand to the jaw.
Munechika looking to throw a kick but he's pulled out of it.
Yakisoba thows a left - swing and a miss!
Munechika takes a kick to the side of the head.

That's four minutes gone in the round.
Yakisoba works the jab nicely.
Yakisoba loads up on a big right hand but Munechika slips the punch.
Good exchange - Yakisoba coming out on top.
Yakisoba misses with an uppercut.
Yakisoba throws a series of punches but Munechika avoids them all with ease.
Yakisoba lands a nice hook to Munechika's body. Munechika takes it in his stride and looks to land his own strikes.
This is a great period of action - very entertaining stuff!
The fighters circle momentarily. Yakisoba darts into range and connects with a nice straight punch.
Yakisoba ducks under an overhand right and circles away with a smile on his face.
The fighters circle momentarily. Munechika darts into range and connects with a nice straight punch.
Munechika misses with a wild combination.
Yakisoba works his jab well there, keeping his opponent at a distance.
The crowd are going absolutely nuts as the round comes to an end - what a fantastic round of action!
Yakisoba tries to land with a swinging hook to the body but Munechika was well out of range. Poor timing from Yakisoba.
Yakisoba with a hook.
Yakisoba misses with a body shot. Nice footwork from Munechika.
And thats the end of the round the fighters go back to their corners.
Kato Munechika dominated that round.
The cut man is working on Masahura Yakisoba's cut.
That's time! Back to the action!

Munechika looks for the body kick but Yakisoba saw that one coming.
Yakisoba throws a jab when Munechika was well out of range.
Yakisoba misses with an uppercut.
Kato Munechika is winning the standup battle so far.
Munechika lands with a nice body kick.
Munechika scores with a jab to the jaw.
Munechika thows a left - swing and a miss!
Yakisoba misses with a series of wild punches.
Munechika throws a nice inside leg kick.
Yakisoba throws a monster uppercut resembling something out of street fighter but it doesn't land.
A looping hook to the body misses from Yakisoba. Munechika does a little dance to reset his feet.
Munechika looks to score with a combo but nothing lands.
Yakisoba tries a head kick but it misses.
Munechika takes a big uppercut there. He seems a bit wobbly but no, he's OK.
Munechika throws a two punch combo that lands nicely.
Wooooo! Give it up for these two warriors! They are putting on a show!
A jab from Munechika finds it's way through Yakisoba's defenses.
That's one minute gone in the round.
Yakisoba rushes in with a sloppy looking punch

and Munechika counters with a shoot takedown into half guard.
Yakisoba won't allow Munechika to pass to mount.
Munechika seems very keen to just sit and control from half guard but Yakisoba does not like that idea so much and is remaining active off his back.
Munechika takes advantage of the dominant position to land a couple of big hammer fists.
Yakisoba is trying to get back to full guard.
Yakisoba moves his hips nicely and gets into full guard.
Yakisoba is breathing heavily.
Yakisoba can't do much from the bottom at the moment, as Munechika controls the pace.
Munechika trying to control the position from guard on top but Yakisoba is wriggling around, looking for whatever he can.
That's two minutes gone in the round.
Munechika wants to stand but Yakisoba has a closed guard, so he can't escape.
This has been an exciting period of action!
Munechika content to stall in guard here.

The ref stands the fighters back up because Kato Munechika just wasn't active enough.
Yakisoba misses with a body shot.
Yakisoba chopped to the floor by a nice leg kick but he springs right back up before Munechika can pounce on him.
Yakisoba throws a big shot that misses.
Horrible takedown by Munechika or perhaps it was just good defense by Yakisoba which made him look bad.
Yakisoba digs a good body shot into Munechika's ribs.
Yakisoba throws a big shot that misses.
That's three minutes gone in the round.
Yakisoba just misses with a punch to the body.
Munechika with poor footwork there. He got himself in a bit of a tangle, enabling Yakisoba to score with a decent uppercut.
Yakisoba is the aggressor but that punch slipped nicely by Munechika.
Yakisoba misses with a hook. Munechika ducked under it nicely.
Munechika moves forwards but Yakisoba connects with a nice, crisp jab.
Munechika uses good footwork to avoid the strikes from Yakisoba.
Nice cross by Munechika.
Munechika dips down and scores with a jab to the body.
Munechika cracks Yakisoba with a right hand to the side of the head.
Yakisoba scores with a punch to the gut of his opponent.
Yakisoba takes a body kick right on the floating rib. Ouchie.
Munechika scores with a body shot.
The fans in attendance giving it up for the two fighters, who have really let it all hang out in the last minute or so!
Munechika throws a body punch but Yakisoba moves out of range.
Munechika tries to land a front kick but Yakisoba steps back. That was a bit too telegraphed.
That's four minutes gone in the round.
Yakisoba on the receiving end of a decent leg kick there by Munechika. Munechika obviously looking to wear him down.
Munechika scores a takedown into full mount!
Munechika lands with some vicious ground and pound - can Yakisoba hang on?
Munechika sitting in mount, just looking to control for the moment.
Munechika lands a couple of nice shots there from mount.
Munechika controlling the pace for now.
The crowd are going absolutely nuts as the round comes to an end - what a fantastic round of action!
Munechika trying to control but he's not successful this time.
And thats the end of the round the fighters go back to their corners.
Kato Munechika dominated that second round.
The cut man is working on Masahura Yakisoba's cut.
The minute break is over - no more time for sponges and pep talks - back to the action! This is the final round!

A punch combination from Yakisoba misses.
Munechika thows a body kick. Yakisoba tries to catch it but that hurt him.
Yakisoba looks to land a right hand but Munechika moved out of range.
Yakisoba avoids a kick to the body.
A looping hook to the body misses from Yakisoba. Munechika does a little dance to reset his feet.
Yakisoba throws a hard body shot but it just misses.
A telegraphed right hand from Munechika misses the target.
Munechika moves away from the strike by Yakisoba.
Yakisoba lands a nice shot to the body.
Yakisoba throws a body punch but Munechika moves out of range.
Yakisoba clobbers Munechika with an overhand right that has the crowd gasping. That made a horrendous noise.
Yakisoba lands a nice shot to the body.
Yakisoba thuds his right hand into Munechika's forehead from close range. That could be painful for both fighters.
Yakisoba takes an uppercut right on the button but keeps his composure.
Yakisoba moves out of range as Munechika throws a body kick.
That's one minute gone in the round.
Yakisoba thows a leg kick but Munechika checks it
and Munechika counters with a left to the body.
Yakisoba takes a big intake of breath there - he's definitely tired.
Munechika with a nice looking leg kick. You could hear that one land in a back row.
Munechika throws a hard body shot but it just misses.
Yakisoba defends well against a solid takedown attempt from Munechika.
Munechika throws a low kick but Yakisoba avoids it.
A big right from Yakisoba misses.
Munechika tries to close the distance and clinch up but Yakisoba swats him away and circles back towards the center.
Yakisoba misses with a looping left.
Munechika lands a really nice looking cross but Yakisoba seems unphased.
Munechika throws a head kick that misses and slips in the process. He scrambles back to his feet and the fighters circle.
Munechika throws a combination but comes up with nothing but fresh air.
Munechika lunges in with swinging rights and lefts but Yakisoba circles away quickly and effectively.
Munechika takes a body punch but keeps moving.
Munechika slips under a jab.
That's two minutes gone in the round.
Yakisoba works the jab nicely.
A jab from Munechika finds it's way through Yakisoba's defenses.
Yakisoba misses with a straight right.
Munechika jabs Yakisoba to the body, keeping him at a distance.
This is a great period of action - very entertaining stuff!
Yakisoba walks into a straight right hand from Munechika.
Munechika walks into a stiff left hand from Yakisoba.
Good shot there by Yakisoba.
Munechika tries to close the distance and clinch up but Yakisoba swats him away and circles back towards the center.
Munechika ducks under a wild hook from Yakisoba.
Yakisoba moves out of range of the body kick.
Yakisoba jabbing away but nothing is landing.
Munechika moves into range and throws a lovely three punch combination.
Yakisoba connects with a right hand. Munechika shakes it off.
That's three minutes gone in the round.
Yakisoba lands an overhand left. A wild punch that just about connected.
Yakisoba cracks Munechika with a good shot that sees him stumbling back into the cage.
Yakisoba misses with a straight left.
Munechika tries to score with a leg kick but it misses it's target.
Yakisoba thows a body shot but no joy.
Munechika throws a hook but Yakisoba blocks it.
Yakisoba uses good head movement to avoid the hook from Munechika.
Munechika connects with a crisp jab.
Yakisoba throws a nice hook to the body that draws an oooh from the crowd.
Yakisoba throws an off balance right hand
and Munechika counters with a shoot takedown. Yakisoba fights it but they end up in guard.
Munechika looking to pass the guard.
The ref warns both fighters not to hold the cage as they work up against the meshing.
Munechika in full guard, throwing the ground and pound. No damage this time.
That's four minutes gone in the round.
Wooooo! Give it up for these two warriors! They are putting on a show!
Munechika makes a bit of distance and scores with some ground and pound, still in guard.
Munechika postures up.
Munechika landing some decent shots from guard.
Munechika throwing elbows and punches but not connecting, as Yakisoba works some decent striking defense from the bottom.
Munechika throwing elbows and punches but not connecting, as Yakisoba works some decent striking defense from the bottom.
Munechika throws an elbow that misses. Yakisoba uses the momentum to reverse the position. He's now in Munechika's guard. Nice move by Yakisoba!
The crowd are going absolutely nuts as the round comes to an end - what a fantastic round of action!
Yakisoba advances position into side control!
And that's the end of the fight!
Kato Munechika showed his dominance in that final round.
Well Munechika has outscored his opponent in every aspect of the fight today. Only a scarily incompetent judge or two will keep him from a well deserved win... Over to the ring announcer for the scorecards.
Ladies and gentlemen, after 3 rounds of action, we go to the scorecards for a decision.
Judge Timothy Bukovac scores the fight 30:27
Judge Jack Bonds scores the fight 30:27
Judge Percy O'Donnell scores the fight 30:27
In favor of your winner, by unanimous decision... Kato Munechika!
Kato Munechika gave a mention to Hellbent, Inc. in his post fight interview. That will please them (and hopefully generate some sales).
|
|
|
|
|
|
|
|
|
|
|
|
|
|
|
|
|
|
|
|
|
|
|
| S |
C
A |
G |
S |
C
B |
G |
|
S |
C |
G |
|
energy
A | B |
|
hype
A | B |
|
pop
A | B |
|
mgr
A | B |
|
FIGHT
RATING
76% |
|
|
|
|
|
|
