|
|
PBP Commentary |
Coming up we have a bantamweight MMA rules bout between Katsu Higashikuni (ranked 0 p4p, 0 weight class) and Gustaf Lindback (ranked 0 p4p, 0 weight class). Well, I have no idea who's going to take this one!
 |
|
 |
| 162 cm
22
146 lbs
3 - 2 - 0 |
|
170 cm
22
146 lbs
4 - 2 - 0 |
Abu Dhabi Champ
Solid boxing
Cardio machine |
|
Good wrestler
Good low kicks
Granite chin |
|
| |
|
Ladies and gentlemen. This fight is 3 rounds, in the bantamweight division.
Introducing the fighter to my left, fighting out of the red corner.
With a record of
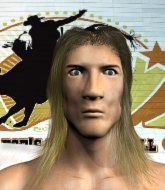
3 - 2 - 0, fighting out of Tokyo, Katsu Higashikuni!
And introducing the fighter to my right, fighting out of the blue corner.
With a record of
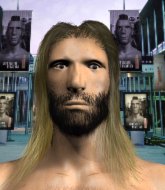
4 - 2 - 0, fighting out of London, Gustaf Lindback!
The judges for this bout are Tatsuya Matsuyama, Shigeki Sano and Yukihiro Shimada.

The bell rings for round one and we are underway!
Lindback misses with a straight right.
Katsu Higashikuni seems to be the more aggressive standup fighter in this bout.
Lindback throws an off balance right hand
and Higashikuni counters with a nice jab to the body that keeps Lindback thinking.
Higashikuni is trying hard to land a takedown here. Lindback sprawls well and keeps this one on the feet.
Higashikuni thows a body shot but no joy.

Higashikuni shoots in and bounces Lindback off the cage to secure the takedown into guard.
We must be close to a standup if these guys don't pick up the pace.
Higashikuni is working the ground and pound from guard. He might want to try advancing position though to get more of an impact.
Higashikuni pressing down on his opponent's thigh, looking to pass guard. Lindback is keeping the position for now.

Lindback looks to be working for a triangle here. Oh, it looks like he might have it! Higashikuni has picked Lindback up and slammed him! Lindback can't keep hold of the triangle and Higashikuni manages to pass to side control!
Lindback throws a couple of punches but he's in a bad position and they don't land.
Lindback parries the strikes from Higashikuni easily there. Higashikuni is wary of posturing up too much because it might enable Lindback to escape.
Lindback tries to bench press Higashikuni off him but Higashikuni keeps the position.
Lindback is not content to let Higashikuni control the position.
Higashikuni has knee on belly and now moves to full mount! Trouble for Lindback!

That's one minute gone in the round.
Higashikuni takes a little breather and maintains the position. The referee will be looking for him to stay active from such a dominant position though.
Lindback is trying to escape the mount.
Higashikuni fakes a shot to the body and cracks his opponent in the head. Nice ground and pound there!
Higashikuni controlling from the full mount.
Higashikuni wants to control the pace but Lindback is squirming around nicely.
Lindback keeping his composure momentarily, calmly looking to get back to half guard.
Higashikuni tries to control but Lindback wriggling away.

That's two minutes gone in the round.
Higashikuni lands an elbow that was bordering on illegal but the referee lets it go with a warning.
Lindback tries to reverse the position but Higashikuni maintains control.
Higashikuni controlling the pace for now.
Lindback really trying hard to get back to half guard here.
This has been an exciting period of action!
Higashikuni trying to control but he's not successful this time.
Higashikuni raining down hammerfists from mount.
Lindback is desperately trying to get back to half guard.
Lindback is persisting with the attempt to improve his position.

That's three minutes gone in the round.
Higashikuni landing strikes, looking to finish!
Higashikuni working the ground and pound effectively.
Higashikuni with good strikes from the mount here!
Both fighters really going for it on the ground here!
Lindback is working to get back to half guard.
Higashikuni trying to control but Lindback is having none of it.
The fighters are pressed up against the cage, both looking to find a bit of space to work.
Higashikuni with good strikes from the mount here!
Lindback is trying to escape the mount.
Higashikuni lands a shot to the body, followed up by a shot to the exposed head of his trapped opponent.

That's four minutes gone in the round.
Higashikuni tries to control but Lindback wriggling away.
We've seen a great period of action over the last minute or so - credit to both fighters for going all out!
Lindback throwing punches from his back but nothing is landing.
Lindback is trying to escape the mount.
Lindback is squirming around, avoiding Higashikuni's attempts to control the action.
Higashikuni takes a little breather and maintains the position. The referee will be looking for him to stay active from such a dominant position though.

That's five minutes gone in the round.
Higashikuni cracks Lindback with a nasty head shot there - the crowd let out an audible gasp there, as the noise reverberated around the arena.
Lindback is desperately trying to get back to half guard.
The ref warns both fighters not to hold the cage as they work up against the meshing.
Higashikuni breaks from Lindback's wrist control and lands an elbow.
Higashikuni is stalling here but it's allowed Lindback to get half guard.
Lindback is staying active underneath Higashikuni, who seems content to just control the action from this position.
Lindback wants to get back to full guard.
Lindback looking to work for a kimura from the bottom.
Lindback tries to strike from the bottom but it doesn't land.
Lindback is looking for a sweep. Higashikuni is wise to his cunning plan and keeps the top position.

That's six minutes gone in the round.
Higashikuni controlling the action here.
Higashikuni wants to take a breather but Lindback is having none of it.
Lindback is looking to sinch up a guillotine here but Higashikuni pulls his head out easily.
Lindback punching from the bottom.
Higashikuni sitting in half guard, looking to land shots. Lindback defending well though.
Fantastic stuff here - a very entertaining period of action, which has drawn cheers from the crowd.
Higashikuni is looking to pass the guard... He's managed it - he's now in full mount!
Higashikuni sitting in mount, just looking to control for the moment.
Lindback is desperately trying to improve his position but Higashikuni has a good base and remains in mount.
Higashikuni landing strikes, looking to finish!
Higashikuni wants to control the pace but Lindback is squirming around nicely.

That's seven minutes gone in the round.
Lindback tries to reverse the position but Higashikuni maintains control.

Higashikuni is working for a guillotine from mount but Lindback frees his head quite easily.
Higashikuni trying to control but Lindback is having none of it.
Higashikuni is really struggling to control Lindback but he's trying to hold on to the position.
Higashikuni takes a little breather and maintains the position. The referee will be looking for him to stay active from such a dominant position though.
Higashikuni with good strikes from the mount here!
Lindback slips a leg in and gets back to half guard.
Lindback tries to get to full guard but Higashikuni has control of the leg.

That's eight minutes gone in the round.
Higashikuni scores with a couple of good hammerfists.
Higashikuni prevents Lindback from improving his position.
Higashikuni frees up his trapped foot and advances to mount.
Higashikuni has been looking to land a fair amount of strikes on the ground. He might be looking to soften his opponent up in order to work for a submission.
The fans in attendance giving it up for the two fighters, who have really let it all hang out in the last minute or so!
Higashikuni can't quite control the action as he would like just now, as Lindback is looking to escape.

That's nine minutes gone in the round.
Lindback tries to get back to half guard but can't.
Lindback sneaks a leg back under and regains half guard and is working straight away to try and get back to guard. He hasn't managed just yet though.
Higashikuni is working for a submission of some sort.
Lindback is refusing to be controlled, as Higashikuni sits in half guard.
Higashikuni tries to pass the half guard into mount. Lindback knows what he's doing though and prevents the attempt.
As the round comes to an end the crowd are showing their appreciation for a great round of action.
Lindback is looking to improve his position.
And thats the end of the round the fighters go back to their corners.
Katsu Higashikuni dominated that round.
The corners get their ten second warning. Both fighters stand from their stools and stare eachother down, ready to get back to the action.

Higashikuni uses good footwork to get in and out and land a nice right hand before Lindback has time to react.
Higashikuni bobs and weaves well there to avoid the strikes.
Lindback pushes Higashikuni away with a front kick.
Lindback scores with a punch to the gut of his opponent.
Lindback throws a looping overhand right but Higashikuni ducks down to avoid it.

Lindback drives through and clinches with Higashikuni against the cage.
Lindback throws a knee to the head but misses.
Lindback tries a knee to the head but he's missed.
Higashikuni lands a body shot in the clinch.
Higashikuni has dropped down and is looking to force the takedown but it's defended by Lindback after a bit of a struggle.
Higashikuni lands with a short shot to the head.
Lindback tries a knee to the head but he's missed.
Lindback tries to land a knee to the head but misses.
Lindback tries a knee to the head but he's missed.
Lindback is breathing heavily.
That's one minute gone in the round.
Higashikuni on the defensive, avoiding the knees to the body.
Higashikuni is trying to stall.
Higashikuni scores with a shot to the side of Lindback's head.
Lindback throws a vicious knee straight up the middle but Higashikuni blocks it with crossed arms.
Lindback gets underhooks to prevent Higashikuni's takedown attempt.
Higashikuni trying to stall but Lindback improves his position.
Lindback throws a knee to the head but misses.
Higashikuni on the defensive, avoiding the knees to the body.
Higashikuni wants a takedown but no success here.
That's three failed takedown attempts in the round for Katsu Higashikuni. That's going to take a lot out of him.
Lindback tries to land a knee to the head but Higashikuni blocks with his arms.
Higashikuni softening up his opponent with strikes, against the cage.
Lindback utilising his Muay Thai to score with a knee to the body.
Higashikuni wants a takedown but no success here.
Higashikuni drops to a knee looking for a takedown but Lindback gets the underhooks and prevents it.
Lindback gets double underhooks to prevent a takedown attempt from Higashikuni.
That's two minutes gone in the round.
Higashikuni just leaning against Lindback, taking a breather.
Lindback misses with a knee to the head.
Higashikuni is looking for a takedown.
Lindback crunches a lovely knee into Higashikuni's ribcage.
Fantastic stuff here - a very entertaining period of action, which has drawn cheers from the crowd.
Lindback misses with a knee to the head.
Higashikuni has hold of a leg and is looking for a trip takedown. Lindback avoids it nicely though and we remain in the clinch.
Lindback scores a nice knee to the body.
Lindback working Higashikuni over with knees to the body.
Lindback connects with a knee to the head.
Lindback throws a knee to the head but misses.
Kneeeeees! The crowd are calling for knees to the body. Lindback obliges.
Lindback is looking to score with knees to the body. Maybe he'll change it up and go body then head. Higashikuni is defending well for now.
Higashikuni tries for a takedown but Lindback manages to get underhooks.
That's three minutes gone in the round.
Lindback throws a knee to the head but misses.
Higashikuni is trying to drag Lindback to the mat but Lindback just about manages to keep his footing. He used the cage to his advantage there.
Lindback misses the knee to the body. Nice hip positioning from Higashikuni.
Lindback prevents a takedown attempt there.
Higashikuni on the defensive, avoiding the knees to the body.
Lindback putting his Muay Thai to good use. He has Higashikuni in a tight clinch and is doing some damage with knees to the body.
Lindback using the Thai plumb to throw knees but Higashikuni has his back arched nicely, preventing the strike.
Lindback gets double underhooks to prevent a takedown attempt from Higashikuni.
Higashikuni can't get the takedown.
Higashikuni on the defensive, avoiding the knees to the body.
That's four minutes gone in the round.
Higashikuni gets a nice trip takedown into half guard.
Higashikuni prevents Lindback from improving his position.
Higashikuni moves into full mount! Lindback won't be happy about that!
Higashikuni tries to control but Lindback wriggling away.
Lindback regains half guard.
Fantastic stuff here - a very entertaining period of action, which has drawn cheers from the crowd.
Lindback regains full guard. Nicely done.
Lindback working for a triangle but Higashikuni defends it easily.
Lindback is looking to sinch up a triangle. Higashikuni throws the leg off to one side though and gets in tight to Lindback's body to avoid the submission. Lindback has instead reached around Higashikuni's neck and now has a guillotine! Oh, this is biiiig trouble! Lindback arches his back and squeezes and forces the tap from his hapless opponent.
Ladies and gentlemen, after 5:05 of round 2, we have a winner by way of Submission (Guillotine). Gustaf Lindback!
After the fight, Gustaf Lindback was humble in paying tribute to his opponent but made it clear he wants to go on to bigger and better things. It seemed to go down well with the crowd who cheered him loudly.
|
|
|
|
|
|
|
|
|
|
|
|
|
|
|
|
|
|
|
|
|
|
|
| S |
C
A |
G |
S |
C
B |
G |
|
S |
C |
G |
|
energy
A | B |
|
hype
A | B |
|
pop
A | B |
|
mgr
A | B |
|
FIGHT
RATING
66% |
|
|
|
|
|
|
