|
|
PBP Commentary |
Coming up we have a welterweight MMA rules bout between Miikka Kumpulainen (ranked 0 p4p, 0 weight class) and Trey Tamura II (ranked 0 p4p, 0 weight class). Miikka Kumpulainen has the edge in experience - let's see if he can make that count tonight.
 |
|
 |
| 177 cm
22
180 lbs
3 - 5 - 1 |
|
178 cm
18
178 lbs
0 - 2 - 0 |
BJJ White Belt
Dangerous knees
KO power |
|
BJJ White Belt
Decent boxing
Determined |
|
| |
|
Ladies and gentlemen. This fight is 3 rounds, in the welterweight division.
Introducing the fighter to my left, fighting out of the red corner.
With a record of
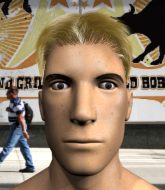
3 - 5 - 1, fighting out of St Petersburg, Miikka Kumpulainen!
And introducing the fighter to my right, fighting out of the blue corner.
With a record of
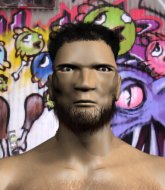
0 - 2 - 0, fighting out of St Petersburg, Trey Tamura II!
The judges for this bout are Viktor Lagutenko, Konstantin Menshow and Vladimir Khabensky.

The bell rings for round one and we are underway!
Kumpulainen connects with a solid leg kick.

Kumpulainen has Tamura II up against the cage in a clinch.
Tamura II misses with a short punch on the inside.
Kumpulainen just leaning against Tamura II, taking a breather.
The pace slowing considerably in the clinch, as Tamura II takes a break from that fighting nonsense to think about the finer things in life.
Tamura II working on landing some head shots here - that one got through nicely.
Tamura II slows down the pace here.

Tamura II breaks the clinch and we return to the middle of the mat.
Tamura II scores with a jab. Kumpulainen acknowledges it with a nod of the head.
A big left from Tamura II misses.
Tamura II looks for a takedown but Kumpulainen sprawls well.
Kumpulainen fails with a takedown attempt.
A swing and a miss from Tamura II.
Kumpulainen looks for a takedown here. Will he get it? Tamura II is fending him off so far but Kumpulainen persists. Nope, Tamura II circles away and we're back to standing.
Kumpulainen shoots in for a takedown. "I don't think so" says Tamura II as he avoids it easily.
That's three failed takedown attempts in the round for Miikka Kumpulainen. That's going to take a lot out of him.
Kumpulainen defending well as Tamura II loads up on a big left hand.
Trey Tamura II seems to be the more aggressive standup fighter in this bout.
Tamura II scores with a jab to the jaw.

That's one minute gone in the round.
Tamura II throws a big shot that misses.
Tamura II throws a looping overhand right but Kumpulainen ducks down to avoid it.
Tamura II throws out a loose jab but Kumpulainen uses good head movement to avoid it.
Tamura II throws an uppercut from half a mile away. Kumpulainen sees it coming and avoids it easily.
Kumpulainen throws a good cross that connects.
A choreographed right hand from Tamura II misses the target.
Tamura II throws out a token jab with nothing on it.
Kumpulainen tries to clinch up but Tamura II circles away and keeps his distance.
Kumpulainen clinches with his opponent.
Kumpulainen breaks from the clinch.

Kumpulainen bobs and weaves into range and then changes levels and scores with a nice takedown into side control.
Kumpulainen just content to control the position.
Kumpulainen has knee on belly and now moves to full mount! Trouble for Tamura II!
Kumpulainen looking to control but Tamura II is working nicely, looking to advance position himself.
The fighters are pressed up against the cage, both looking to find a bit of space to work.
Kumpulainen is breathing heavily.

That's two minutes gone in the round.
Tamura II keeping his composure momentarily, calmly looking to get back to half guard.

Kumpulainen get's back to his feet.
Tamura II takes a kick to the body and keeps moving.
Kumpulainen on the wrong end of a decent looking cross there.
Tamura II throws the left hand but Kumpulainen avoids the punch easily.
Kumpulainen closes the distance and clinches up with Tamura II, looking for a takedown. Kumpulainen pushes Tamura II against the cage but Tamura II circles to the side and manages to break the clinch.
Tamura II catches Kumpulainen with a nice straight right. He seems pissed - ooooh, it's on now! On like donkey kong!
Tamura II scores with a jab to the jaw.

That's three minutes gone in the round.
Kumpulainen connects with a vicious head kick that knocks Tamura II to the floor! Kumpulainen dives in looking for the finish!

Tamura II is rocked!

It looks like Trey Tamura II has been cut.
Tamura II is in trouble now - Kumpulainen has advanced to mount!
Tamura II is still in real trouble! Can Kumpulainen finish him?
Tamura II really trying hard to get back to half guard here.
Kumpulainen controlling from mount.
Tamura II wants to control but Kumpulainen is having none of it.
Tamura II seems to have recovered his senses.
Tamura II working to try and regain half guard.
Kumpulainen landing punches.
Tamura II tries to reverse the position but Kumpulainen maintains control.

That's four minutes gone in the round.
Tamura II wants to improve position but instead he's given up his back.
Tamura II turns into Kumpulainen and is now in his guard.
There's a bit of a scramble here and now Kumpulainen is on top in guard.
Tamura II with a couple of shots from the bottom there - nothing Kumpulainen can't handle though.
The ref warns both fighters not to hold the cage as they work up against the meshing.
Kumpulainen wants to control from the top but Tamura II keeps moving.
Kumpulainen preventing the sweep.

Tamura II looking for a guillotine here but Kumpulainen defends easily.
As the round comes to an end the crowd are showing their appreciation for a great round of action.
Tamura II can't keep his opponent in guard - Kumpulainen advances to half guard, no doubt looking to mount.
And thats the end of the round the fighters go back to their corners.
Miikka Kumpulainen dominated that round.
The cut man is working on Trey Tamura II's cut.
The minute break is over - no more time for sponges and pep talks - back to the action!

Kumpulainen changes levels and drives through with a really nice takedown into side control. Tamura II looks really pissed at himself for not defending that better.
We get told so often about how wrestlers don't like to be on their backs. Let's see if Tamura II can do anything to dispel that myth.
Kumpulainen trying to control the position but Tamura II is working away.
Tamura II tries to get back to half guard but can't.
Tamura II manages to get back to half guard.
Tamura II trying to get back to full guard but Kumpulainen takes advantage of the position and moves to full mount!
Tamura II is trying to escape the mount.
Tamura II wants to hold on but Kumpulainen pushes him away.
Both fighters are absolutely exhausted here.
Kumpulainen can't quite control the action as he would like just now, as Tamura II is looking to escape.
That's one minute gone in the round.
Tamura II working to try and regain half guard.
Tamura II really doesn't want to stay on the ground with Kumpulainen. If he can't get it back to his feet, it's only a matter of time before he'll be tapping out.
Tamura II bucks up and manages to get a nice reversal! He's in guard on the top - nicely done!
That's two minutes gone in the round.
The crowd are starting to boo a lack of action.
Tamura II stops Kumpulainen from standing up.
Tamura II working some strikes from top position.
Kumpulainen wants to sweep but no luck.
Tamura II trying to land body shots but he keeps hitting the mat.
Kumpulainen strikes from his own guard.
Kumpulainen keeping moving, preventing Tamura II from controlling successfully.
Kumpulainen working the defensive guard well to avoid strikes from Tamura II.
Kumpulainen wants to sweep here but Tamura II controlling him for the moment.

It looks like we're going to have a standup here. Neither fight is doing enough on the ground.
Kumpulainen moves in looking to clinch but Tamura II pushes him off.
Tamura II might want to mix his strikes up a bit more. He's just going for head shots at the moment and that can become a bit predictable.
Kumpulainen shoots in but no luck this time.
Kumpulainen moves out of range of the strikes.
That's three minutes gone in the round.
Kumpulainen digs a good hook to Tamura II's body.
Tamura II is the aggressor but that punch slipped nicely by Kumpulainen.
Kumpulainen will have to do better than that with his takedown attempts.
Kumpulainen clinches up against the cage.
A hook to the body from Tamura II.
Tamura II lands with a quick shot inside that doesn't really do much damage.
Kumpulainen can't break the clinch.
Kumpulainen trying to stall but Tamura II improves his position.
Tamura II works on Kumpulainen's body with a couple of short punches.
Kumpulainen breaks the clinch.
Tamura II avoids the clinch attempt nicely.
Kumpulainen tries for a takedown but Tamura II sees it coming a mile off and avoids it easily.
That's three failed takedown attempts in the round for Miikka Kumpulainen. That's going to take a lot out of him.
Tamura II tests Kumpulainen's chin there with a solid looking shot.
Tamura II throws an uppercut from half a mile away. Kumpulainen sees it coming and avoids it easily.
Miikka Kumpulainen is looking to throw some combinations by the looks of things.
Tamura II misses the jab.
Tamura II throws an uppercut from half a mile away. Kumpulainen sees it coming and avoids it easily.
Tamura II misses with a hook. Kumpulainen ducked under it nicely.
That's four minutes gone in the round.
Tamura II throws out a loose jab but Kumpulainen uses good head movement to avoid it.
Tamura II jabbing away but nothing is landing.
Kumpulainen shoots in but no luck this time.
Tamura II throws an uppercut from half a mile away. Kumpulainen sees it coming and avoids it easily.
Kumpulainen wants to clinch up but Tamura II keeps it at a distance.
Kumpulainen drops down and drives through with a powerful takedown into guard.
Tamura II wants to sweep but no luck.
Kumpulainen trying to control the position from guard on top but Tamura II is wriggling around, looking for whatever he can.
Tamura II being controlled here, momentarily.
Kumpulainen trying to control but Tamura II is working from the bottom.
Tamura II tries to land a sweep but no joy.
And thats the end of the round the fighters go back to their corners.
Miikka Kumpulainen dominated that second round.
The cut man is working on Trey Tamura II's cut.
The fighters get back to their feet, the hooter sounds and we're back to the action! This is the final round!

A big left from Tamura II misses.
Tamura II throws the left hand but Kumpulainen avoids the punch easily.
Tamura II looks to land a right hand but Kumpulainen moved out of range.
Tamura II misses with a looping right.
Kumpulainen moves out of range as Tamura II strikes.
Tamura II throws a jab when Kumpulainen was well out of range.
Tamura II misses with a looping right.
Tamura II throws a jab but it's blocked by Kumpulainen.
Kumpulainen throws a series of strikes that have Tamura II backpedaling.
Tamura II shoots in for a takedown. "I don't think so" says Kumpulainen as he avoids it easily.
Kumpulainen clinches.
Kumpulainen tries to stall but Tamura II uses the opportunity to gain a better position.
Tamura II wants to strike at distance but he can't break free of the clinch.
Tamura II tries a knee to the head but Kumpulainen blocks it.
Kumpulainen pulls guard.
Kumpulainen lands a beautiful switch and he's in full mount! That could spell trouble for Tamura II!
A nice elbow there by Kumpulainen.
Both fighters are breathing heavily.
That's one minute gone in the round.
Kumpulainen tries to control but Tamura II wriggling away.
Tamura II really trying hard to get back to half guard here.
Kumpulainen looking for a guillotine from mount but Tamura II is having none of it.
Tamura II keeping his composure momentarily, calmly looking to get back to half guard.
That's two minutes gone in the round.
The crowd are hurling abuse towards the fighters... You can hardly blame them though because there isn't a lot going on in the fight.
Tamura II swinging wildly from the bottom but he's not landing.
Tamura II is desperately trying to improve his position but Kumpulainen has a good base and remains in mount.
Kumpulainen throwing sloppy strikes here. Perhaps if he tightened up his striking from such a dominant position, he'd be able to finish easier.
Kumpulainen postures up and cracks his opponent a couple of times before moving back into close ground control. Tamura II looks a forlorn figure.
Tamura II looking to escape from mount but he's given up his back!
Kumpulainen tightening his grip on Tamura II, looking for the choke.
Tamura II trying to control but he's just got himself in more trouble.
Trey Tamura II has stepped it up - he knows he needs a finish here!
That's three minutes gone in the round.
Kumpulainen is looking to finish with some ground and pound!
Kumpulainen is staying calm and holding on to the back position, whilst working on a rear naked choke. Tamura II is defending well though. Kumpulainen let's go of the attempt for now.
Tamura II trying to control but he's just got himself in more trouble.
Tamura II tries to roll but Kumpulainen sticks to his back.
Tamura II is persisting with the attempt to improve his position.
Kumpulainen scores with punches to the body.
That's four minutes gone in the round.
There's not a lot going on here and the crowd are letting the fighters know they're not willing to tolerate a lack of action.
You can see the frustration on Tamura II's face
He knows he is in trouble unless he improves his position sooner rather than later.
Kumpulainen avoiding Tamura II 's attempts to control his hands.
Kumpulainen lands a punch that was close to the back of the head but the ref thinks it's OK.
Kumpulainen doesn't have the hooks in and Tamura II manages to turn into his guard.
Kumpulainen working the defensive guard well to avoid strikes from Tamura II.
Kumpulainen bucks up whilst keeping hold of a body lock, managing to reverse the position. Now he's in top in Tamura II's guard.
Tamura II keeping full guard, as Kumpulainen tries to pass.
Kumpulainen trying to control the position from guard on top but Tamura II is wriggling around, looking for whatever he can.
And that's the end of the fight!
Miikka Kumpulainen showed his dominance in that final round.
Well Kumpulainen has outscored his opponent in every aspect of the fight today. Only a scarily incompetent judge or two will keep him from a well deserved win... Over to the ring announcer for the scorecards.
Ladies and gentlemen, after 3 rounds of action, we go to the scorecards for a decision.
Judge Viktor Lagutenko scores the fight 30:27
Judge Konstantin Menshow scores the fight 30:27
Judge Vladimir Khabensky scores the fight 30:27
In favor of your winner, by unanimous decision... Miikka Kumpulainen!
|
|
|
|
|
|
|
|
|
|
|
|
|
|
|
|
|
|
|
|
|
|
|
| S |
C
A |
G |
S |
C
B |
G |
|
S |
C |
G |
|
energy
A | B |
|
hype
A | B |
|
pop
A | B |
|
mgr
A | B |
|
FIGHT
RATING
67% |
|
|
|
|
|
|
