|
|
PBP Commentary |
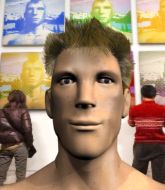
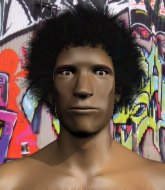
Coming up we have a welterweight MMA rules bout between Gabe Barletta (ranked 0 p4p, 0 weight class) and Sendou Takeshi (ranked 0 p4p, 0 weight class). I'm sure you'll be fascinated to know that I was talking to some pointless Z list celebrity before the fight and he thought that Sendou Takeshi was going to win. Let's see if he was right.
 |
|
 |
| 182 cm
18
180 lbs
0 - 0 - 0 |
|
178 cm
18
178 lbs
1 - 0 - 0 |
BJJ Blue Belt
Brawler
Good in bed |
|
BJJ White Belt
Solid Muay Thai
Solid chin |
|
| |
|
Ladies and gentlemen. This fight is 3 rounds, in the welterweight division.
Introducing the fighter to my left, fighting out of the red corner.
With a record of
0 - 0 - 0, fighting out of New York, Gabe Barletta!
And introducing the fighter to my right, fighting out of the blue corner.
With a record of
1 - 0 - 0, fighting out of New York, Sendou Takeshi!
The judges for this bout are Dean Styles, Russell Pearce and Chad Campbell.

The bell rings for round one and we are underway!
Takeshi defends well against a solid takedown attempt from Barletta.

Barletta shoots in for a takedown and gets it.
It looks like the ref is thinking about a standup.
Barletta throwing shots but Takeshi is blocking nicely.

Barletta escapes and gets back to his feet.
Takeshi tries to clinch up but Barletta circles away and keeps his distance.
Barletta tries a switch kick but it misses it's target.
Barletta with a lazy takedown attempt

and Takeshi counters by moving into the clinch.
Barletta has dropped down and is working for a takedown. Takeshi is trying to keep an underhook but Barletta manages to get the takedown into half guard.
Neither fighter is being very active at the moment, with Barletta in particular looking to stall.
We've seen a great period of action over the last minute or so - credit to both fighters for going all out!
Takeshi blocking the ground and pound attempt from Barletta.

That's one minute gone in the round.
Barletta lands a big shot. The thud that echoes around the arena is like music to the fans' ears.
Barletta is controlling the pace.

That's two minutes gone in the round.

Gabe Barletta has forced the referee to step in and bring the fight back to the feet.
Barletta leaves Takeshi with his face pressed against the mat as he sprawls beautifully, defending against a solid takedown attempt.
Barletta misses with a head kick.

Takeshi gets tackled into the cage by Barletta. Barletta maintains the clinch.
Takeshi looks to throw an elbow but misses.
Barletta blocks a knee to the body. He'll have a nicely bruised forearm in the morning.
Takeshi trying to land knees to the body.
Barletta has had enough of the clinch but Takeshi keeps him there for the moment.
Barletta pulls guard successfully.
Barletta keeping moving, preventing Takeshi from controlling successfully.

That's three minutes gone in the round.
Barletta controlling Takeshi's posture.
Takeshi looks gassed!

The referee has ruled that neither fighter is active enough on the ground and has stood them back up.
Barletta shoots in looking for a takedown. Takeshi tries to sprawl out of it but Barletta keeps driving through. The fighters are pinned against the cage. Takeshi manages to get underhooks and after a bit of a struggle, circles away and we're back to standing.
That's three failed takedown attempts in the round for Gabe Barletta. That's going to take a lot out of him.
Takeshi slaps away a takedown attempt from Barletta, before circling back to the center of the mat.

That's four minutes gone in the round.
Barletta fails miserably with a takedown attempt.
Takeshi tries to close the distance and clinch up against the cage but Barletta paws at him with a jab and circles away.
Barletta shoots in with a takedown attempt and he has Takeshi pinned against the cage. Takeshi gets the underhooks and manages to circle away.
Takeshi gets a clinch.
And thats the end of the round the fighters go back to their corners.
Gabe Barletta dominated that round.
OK. That's time! The bell goes and we're back to the action.

A really sloppy takedown attempt there from Barletta.
Gabe Barletta seems to be the more aggressive standup fighter in this bout.
Barletta shoots and misses
and Takeshi moves into the clinch.
Takeshi using the Thai clinch to land knees to the body.
Barletta is trying to work out of this bad position, with his back against the cage.
Takeshi connects with a nasty looking knee right to Barletta's face.
Takeshi with a knee to the head.
Barletta misses with some punches.
Takeshi landing knees to the body.
Takeshi utilising his Muay Thai to score with a knee to the body.
Takeshi taking a break, stalling in the clinch.
Both fighters are absolutely exhausted here.
Takeshi scores a nice knee to the body.
That's one minute gone in the round.
Takeshi lands a nice elbow from the clinch.
The fighters are pressed against the cage, as the pace of the fight slows.
Takeshi lands a knee to the body.
Takeshi unloads a knee to the mid-section. Barletta lets out a prehistoric sounding urrrrgh.
Takeshi tries a knee to the head but he's missed.
Barletta on the defensive, avoiding the knees to the body.
Barletta swings wildly with an uppercut but Takeshi uses good head movement to avoid it.
Takeshi landing knees to the body.
Barletta blocks a knee to the body. He'll have a nicely bruised forearm in the morning.
That's two minutes gone in the round.
Barletta blocks a knee to the body. He'll have a nicely bruised forearm in the morning.
Takeshi throws a vicious knee straight up the middle but Barletta blocks it with crossed arms.
Takeshi prevents the takedown attempt.
That's three failed takedown attempts in the round for Gabe Barletta. That's going to take a lot out of him.
Barletta takes a knee to the side of the body.
Barletta takes an elbow to the forehead.
Takeshi lands an elbow inside that Barletta shrugs off.
Kneeeeees! The crowd are calling for knees to the body. Takeshi obliges.
Barletta successfully pulls guard.
Barletta looking to control.
The fans in attendance giving it up for the two fighters, who have really let it all hang out in the last minute or so!
That's three minutes gone in the round.
We must be close to a standup if these guys don't pick up the pace.
Barletta is looking to get back to his feet but can't, whilst Takeshi is controlling him.
The ref stands the fighters back up. Gabe Barletta wasn't doing enough on the ground.
Takeshi shoots in looking for a takedown but Barletta manages to keep the fight standing, pushing Takeshi's face into the canvas for good measure before circling away.
No luck for Barletta with that takedown attempt.
Takeshi throws a looping left and ducks down for a takedown. He's got his arms around Barletta's waist but Barletta gets an underhook and avoids the takedown by throwing Takeshi off to one side.
Takeshi misses with a takedown
and Barletta counters with a shoot takedown into half guard.
That's four minutes gone in the round.
Barletta is just sitting in half guard, waiting for something to happen.
Barletta has controlled the position for a good 20 seconds, which will no doubt be starting to frustrate his opponent.
The referee walks around the fighters to get a better view of the action. Barletta lands a nice short elbow.
And thats the end of the round the fighters go back to their corners.
Sendou Takeshi showed his class in that round. I'd imagine he'll take it on all the scorecards.
Well, the break between rounds is over. Let's get back to the scrappin! This is the final round!

Barletta throws a half hearted mid kick.
Barletta looks for a takedown. He's got it. We're now in half guard.
Barletta stands, ready to strike. The ref makes him back up and allows Takeshi to get to his feet.
Barletta fails with a takedown attempt.
Gabe Barletta is looking to throw some combinations by the looks of things.
Barletta fails with the takedown.
Both fighters are breathing heavily.
Barletta tries to shoot in for a takedown. He's got hold of a leg but Takeshi swivels and escapes.
That's three failed takedown attempts in the round for Gabe Barletta. That's going to take a lot out of him.
That's one minute gone in the round.
Takeshi is looking to clinch.
Barletta throws a body kick but he wasn't in range.
Takeshi tries to clinch up.
Takeshi will need to close the distance a bit before he attacks - that leg kick was thrown from too far away.
Barletta shoots in for a takedown. "I don't think so" says Takeshi as he avoids it easily.
Takeshi tries to clinch there but Barletta circles away.
Takeshi gets to the clinch - let's see what his plan is here.
Takeshi misses the knee to the body. Nice hip positioning from Barletta.
Sendou Takeshi seems to be working more effectively in the clinch in the fight so far.
Takeshi trying to land knees to the body.
That's two minutes gone in the round.
Takeshi putting his Muay Thai to good use. He has Barletta in a tight clinch and is doing some damage with knees to the body.
Takeshi unloads a knee to the mid-section. Barletta lets out a prehistoric sounding urrrrgh.
A nice glancing elbow lands by Takeshi.
Takeshi creates a bit of space for himself and sneaks an elbow through Barletta's defenses.
Takeshi landing some nice looking knees to the body.
Takeshi lands a knee to the head.
Takeshi with the Thai clinch, lands a knee to the head.
Barletta goes for a takedown attempt but Takeshi pushes him away and we're back to fighting at a distance.
We've seen a great period of action over the last minute or so - credit to both fighters for going all out!
Barletta looks for a takedown but Takeshi sprawls well.
That's three minutes gone in the round.
Barletta misses with a body kick.
Barletta fakes high and shoots in for a takedown but Takeshi avoids it really well and circles away.
Takeshi tries to clinch up but Barletta circles away and keeps his distance.
Barletta shoots in for a takedown. He's persisting with it as Takeshi sprawls well. Takeshi wins this battle and keeps the fight standing. Barletta gets slowly back to his feet.
Takeshi forces Barletta back against the cage and clinches.
That's four minutes gone in the round.
Takeshi landing knees to the head.
Takeshi putting his Muay Thai to good use. He has Barletta in a tight clinch and is doing some damage with knees to the body.
Takeshi landing knees to the body.
Takeshi landing knees to the body. They look like they could hurt.
Takeshi misses the knee to the body. Nice hip positioning from Barletta.
Takeshi missing with knees to the body.
Takeshi missing with knees to the body.
The crowd applaud the fighters efforts here as the round comes to an end.
Barletta managing to block the knees to the body from Takeshi.
Barletta has hold of a leg and is looking for a trip takedown. Takeshi avoids it nicely though and we remain in the clinch.
Takeshi utilising his Muay Thai to score with a knee to the body.
And that's the end of the fight!
Sendou Takeshi comfortably won the final round on my scorecard.
I think Takeshi has won this one but let's see whether the judges agree with me. Over to the ring announcer for the scorecards.
Ladies and gentlemen, after 3 rounds of action, we go to the scorecards for a decision.
Judge Dean Styles scores the fight 28:29
Judge Russell Pearce scores the fight 28:29
Judge Chad Campbell scores the fight 28:29
In favor of your winner, by unanimous decision... Sendou Takeshi!
|
|
|
|
|
|
|
|
|
|
|
|
|
|
|
|
|
|
|
|
|
|
|
| S |
C
A |
G |
S |
C
B |
G |
|
S |
C |
G |
|
energy
A | B |
|
hype
A | B |
|
pop
A | B |
|
mgr
A | B |
|
FIGHT
RATING
48% |
|
|
|
|
|
|
