|
|
PBP Commentary |
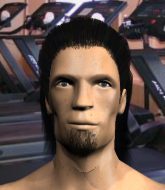
Coming up we have a featherweight MMA rules bout between Toru Ohta (ranked 0 p4p, 0 weight class) and Gary Steel (ranked 0 p4p, 0 weight class). Chooooooooon! I think Ohta might be my favorite fighter, now he's come out to Technopolis. The key to victory for Toru Ohta has got to be keeping the fight on the feet.
 |
|
 |
| 167 cm
27
144 lbs
6 - 5 - 0 |
|
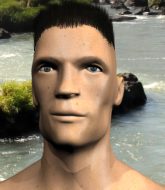
165 cm
27
155 lbs
6 - 5 - 0 |
BJJ Purple Belt
Solid Muay Thai
Insanely flexible |
|
Good takedowns
Basic striking
Knockout power |
|
| |
|
Ladies and gentlemen. This fight is 3 rounds, in the featherweight division.
Introducing the fighter to my left, fighting out of the red corner.
With a record of
6 - 5 - 0, fighting out of Tokyo, Toru Ohta!
And introducing the fighter to my right, fighting out of the blue corner.
With a record of
6 - 5 - 0, fighting out of Tokyo, Gary Steel!
The judges for this bout are Yasuomi Hirokawa, Kenichi Hosakawa and Hirohito Nitta.

The bell rings for round one and we are underway!
Steel tries to shoot in for a takedown. He's got hold of a leg but Ohta swivels and escapes.
Ohta lands a powerful looking uppercut that connected with his opponent's jaw.
Ohta throws a two punch combo that lands nicely.
Steel slips under a jab.
Steel shoots in but doesn't get the takedown
and Ohta connects with a straight left hand counter down the middle.
Ohta fakes a head shot and lands one to the body.
Ohta stuffs the takedown attempt from Steel. Steel gets slowly back to his feet.
Toru Ohta has stuffed three takedown attempts in the round now. That's going to take a lot out of Gary Steel.
Ohta misses the shot to the body.
Steel closes this distance looking for a takedown but Ohta circles away.
Steel circles away from the clinch attempt.
Ohta throws a body punch but Steel moves out of range.
Steel bobs and weaves well there to avoid the strikes.
Ohta swings wildly with a right hand that was never going to find it's target.
A right-left combo lands from Ohta.
Steel shoots in for a takedown. He's persisting with it as Ohta sprawls well. Ohta wins this battle and keeps the fight standing. Steel gets slowly back to his feet.
This is a great period of action - very entertaining stuff!
Ohta scores with a crisp jab that stopped Steel in his tracks.
Steel misses with a straight right.

That's one minute gone in the round.
Steel shoots in for a double leg but Ohta sprawls well. That's going to sap some energy.
Ohta lands a beauty of a right hand that gets the crowd cheering.
Ohta with a hook.
No luck with that takedown attempt from Steel.
Ohta misses with a jab and misses with a cross straight after too.

Ohta darts in and clinches Steel up against the cage.
Steel fails to land with a short punch on the inside.
Ohta pressing his opponent against the cage.
Ohta can't find room to land a body shot as Steel controls the action.
Come on Ohta - let's have some action - none of this stalling nonsense.

That's two minutes gone in the round.
A quick uppercut on the inside from Ohta.
Steel can't get the takedown.
Ohta misses with a hook to the ribs.
Steel tries for a takedown but Ohta manages to get underhooks.
Ohta gets through Steel's defenses to land a nice punch to the side of the head.
Ohta with an attempt at a knee that misses.
The crowd are loving this. Great action here.
Ohta is pressed up against the cage. Steel has hold of a leg and is looking to drag Ohta down to the mat. Ohta avoids the attempt though and has circled away. We're back to striking at a distance.
Ohta leaves Steel with his face pressed against the mat as he sprawls beautifully, defending against a solid takedown attempt.
A telegraphed takedown attempt from Steel is defended easily by Ohta.
Ohta misses with a few strikes there.
Good standup being displayed there by Ohta as he connects with a hook.

That's three minutes gone in the round.
Ohta swings away but doesn't land with a series of punches.
Steel tries to keep at a distance but Ohta has taken the fight into the clinch.
Ohta misses with a body punch.
A right hook to the body lands for Ohta.
Ohta lands punches inside but they're not really causing much damage.
Steel goes for a takedown attempt but Ohta pushes him away and we're back to fighting at a distance.
Steel fails with a rather predictable takedown attempt.
Steel showing good head movement there, avoiding the strikes from Ohta.
Ohta looks to land a combination but Steel avoids it well.
Ohta's corner calls for a 1, 2 combination and Ohta duly obliges.
Ohta misses with a kick to the body.

That's four minutes gone in the round.
Steel is trying hard to land a takedown here. Ohta sprawls well and keeps this one on the feet.
A jab from Ohta misses.

Steel gets a takedown into half guard.
The fans in attendance giving it up for the two fighters, who have really let it all hang out in the last minute or so!

Steel seems to be working for a kimura but Ohta defends the submission attempt.
Ohta is working for an escape here. He's hooked one of Steel's legs and he's managed to sneak out and take Steel's back!
Steel wants to escape the position.
Both fighters really going for it on the ground here!
Ohta wants to control but Steel is keeping busy.
Steel tries to break free.
The crowd are going absolutely nuts as the round comes to an end - what a fantastic round of action!
A lull in the action here.
Steel manages to reverse the position and now he's in Ohta's guard. Nice work there by Steel.
Ohta knows he needs to get back to his feet asap. He's simply no match for Steel on the ground.
Ohta is pulling down on Steel's head. It's preventing any offense from Steel, at least for the moment.
And thats the end of the round the fighters go back to their corners.
Toru Ohta dominated that round.
The referee calls time. The cornermen exit stage left and we're back to business.

Ohta throws out a token jab with nothing on it.
Ohta motions for Steel to come forward. Ohta throws a leg kick but it misses it's target.
Steel shoots in for a takedown but Ohta shows good takedown defense.
The fighters are going at a pretty good pace and they're both starting to sweat now.
Ohta has managed to clinch.
A short right hand to the side of the head by Ohta.
Ohta displaying some good clinch control by pressing Steel up against the cage.
Ohta makes some space for himself and lands an uppercut.
Steel blocks a punch to the side of the head.
Steel is working for takedown but Ohta is calmly controlling the position for now.
Steel letting Ohta take a breather here.
That's one minute gone in the round.
Ohta looking to stall.
Steel tries for a takedown. No joy.
Toru Ohta has stuffed three takedown attempts in the round now. That's going to take a lot out of Gary Steel.
Steel's head jolts backwards as he takes an uppercut right on the button!
Ohta lands a hook that snaps the head of Steel backwards.
Ohta lands a hook that snaps the head of Steel backwards.
Ohta lands with a left to the head.
Ohta lands a right hand.
Ohta is stalling here. The referee will be looking to step in if he doesn't pick up the pace.
That's two minutes gone in the round.
Kneeeeees! The crowd are calling for knees to the body. Ohta obliges.
Ohta softening up his opponent with strikes, against the cage.
Ohta tries a shoulder strike but it doesn't do any damage.
A body shot lands from Ohta.
Steel is working on a leg, looking for a takedown but Ohta is defending well.
Some stalling of biblical proportions here from Ohta.
Steel wants a takedown.
That's three minutes gone in the round.
Ohta slows down the pace here.
Steel is working for a takedown up against the cage. He can't get it on this occasion though.
Ohta tries a body shot but Steel blocks it.
Some stalling of biblical proportions here from Ohta.
The ref breaks the fighters up, due to lack of action by Toru Ohta.
Ohta throws a right hand that Steel ducks under and follows up with a left that Steel also avoids with ease.
Steel shoots in for a takedown but Ohta shows good takedown defense.
Steel fails with a takedown attempt from distance.
Steel stuffs a takedown. It's all about dictating where the fight takes place and Steel wants it to stay on the feet.
Ohta throws a body punch but Steel moves out of range.
Ohta throws a right hand that Steel ducks under and follows up with a left that Steel also avoids with ease.

Ohta feints and as Steel raises his hands in defense, Ohta changes levels and drives through with a takedown into guard.
Ohta wants to control from the top but Steel keeps moving.
That's four minutes gone in the round.
Ohta preventing the sweep.

Ohta drops back looking for a leg! Steel is in trouble here! The fighters roll with the hold and Steel manages to kick Ohta off! Ohta jumps back into Steel's guard.
Ohta wants to pass the guard but Steel is keeping the position.
Steel bucks up whilst keeping hold of a body lock, managing to reverse the position. Now he's in top in Ohta's guard.
Wooooo! Give it up for these two warriors! They are putting on a show!
Steel looking to pass the guard.
Ohta controlling Steel's posture.
Steel wants to pass the guard but Ohta is keeping the position.
As the round comes to an end the crowd are showing their appreciation for a great round of action.
Ohta trying to keep a closed guard but Steel is proving a slippery customer.
And thats the end of the round the fighters go back to their corners.
Toru Ohta dominated that second round.
The fighters get back to their feet, the hooter sounds and we're back to the action! The crowd applaud as we get ready to start the final round!

Steel fails with a rather predictable takedown attempt.
Ohta defends well against a solid takedown attempt from Steel.
Ohta looks to score with a combo but nothing lands.
No luck with that takedown attempt from Steel.
Toru Ohta has stuffed three takedown attempts in the round now. That's going to take a lot out of Gary Steel.
Steel shoots for a double leg takedown but Ohta sprawls well. He's pushed Steel's face into the mat and manages to get back to his feet relatively easily.
Steel fails with a takedown attempt.
Steel looks frustrated there after his takedown attempt is stuffed easily.
Steel gets his takedown attempt stuffed easily
and Ohta counters with a lovely straight right hand!
Ohta lunges in with an uppercut that skims his opponent's chin.
Steel throws a looping left and ducks down for a takedown. He's got his arms around Ohta's waist but Ohta gets an underhook and avoids the takedown by throwing Steel off to one side.
Ohta throws a body kick but he wasn't in range.
Steel takes a big intake of breath there - he's definitely tired.
Steel doesn't react quick enough there as he takes a shot to the body.
That's one minute gone in the round.
Steel shoots for a double leg takedown but Ohta sprawls well. He's pushed Steel's face into the mat and manages to get back to his feet relatively easily.
Steel shoots in but doesn't get the takedown
and Ohta counters with a nice body shot.
Wow, both these guys are really going for it!
Ohta cracks Steel with a nice right hand that draws applause from the crowd.
Steel takes a jab on the nose. He smiles like he loves it and keeps coming.
Ohta moves into range and lands a nice leg kick.
Ohta moves into the clinch successfully.
Ohta lands a right hand that snaps the head of Steel backwards.

Steel is rocked!
A short uppercut from Ohta.
Steel is still on wobbly legs! Can Ohta finish him?
Ohta stalling the fight.
Ohta pushes Steel back against the cage and unloads with a body punch.
Ohta throws a vicious knee straight up the middle but Steel blocks it with crossed arms.
Steel seems to have recovered his senses.
Wooooo! Give it up for these two warriors! They are putting on a show!
Kneeeeees! The crowd are calling for knees to the body. Ohta obliges.
Ohta taking a break, stalling in the clinch.
That's two minutes gone in the round.
Ohta tries to work over Steel's body with a swooping hook but it only glances the target.
Ohta misses with some punches.
The referee calls for Ohta to work.
The ref breaks the fighters up, due to lack of action by Toru Ohta.
Ohta bobbing and weaving, closes the distance and lands a hook to the side of Steel's head.
Steel shoots in for a takedown but Ohta shows good takedown defense.
Steel shoots in with a lovely double leg takedown. Ohta manages to land in full guard to minimise the damage.
The fighters are pressed up against the cage, both looking to find a bit of space to work.
Steel stopping the sweep attempt from Ohta.
Ohta is working actively off his back, looking to secure an arm or perhaps work for a triangle.
That's three minutes gone in the round.
Steel thinks about going for a leg but decides against it, in order to maintain the position.
Ohta controls Steel momentarily but Steel frees himself.
Steel thinks about going for a leg but decides against it, in order to maintain the position.
Steel stands up and looks to throw the legs aside to pass to side control. Ohta swivels though and keeps the full guard.
Ohta is working the butterfly guard. He manages to land a nice scissor sweep and is now in half guard on the top. Nice move.
Toru Ohta overall seems to be getting the better of the ground position in the fight so far.
Steel moves into full guard.
Steel looking to control.
That's four minutes gone in the round.
Ohta pushes down on Steel's leg and manages to get into half guard.
Steel wants to get back to full guard.
Ohta has freed up his trapped foot and advances to mount.
Ohta with shots to the head and body - Steel looks very uncomfortable down there.
Steel is desperately trying to get back to half guard.
Toru Ohta is fighting for a decision here - he's started to take the cautious approach.
Ohta controlling from mount.
We've seen a great period of action over the last minute or so - credit to both fighters for going all out!
Steel is squirming around, avoiding Ohta's attempts to control the action.
As the round comes to an end the crowd are showing their appreciation for a great round of action.
Steel slips a leg in and gets back to half guard.
And that's the end of the fight!
Toru Ohta showed his dominance in that final round.
Well Ohta has outscored his opponent in every aspect of the fight today. Only a scarily incompetent judge or two will keep him from a well deserved win... Over to the ring announcer for the scorecards.
Ladies and gentlemen, after 3 rounds of action, we go to the scorecards for a decision.
Judge Yasuomi Hirokawa scores the fight 30:27
Judge Kenichi Hosakawa scores the fight 30:27
Judge Hirohito Nitta scores the fight 30:27
In favor of your winner, by unanimous decision... Toru Ohta!
Toru Ohta made sure to mention his sponsor, 1337 ANZAC in his post fight interview.
|
|
|
|
|
|
|
|
|
|
|
|
|
|
|
|
|
|
|
|
|
|
|
| S |
C
A |
G |
S |
C
B |
G |
|
S |
C |
G |
|
energy
A | B |
|
hype
A | B |
|
pop
A | B |
|
mgr
A | B |
|
FIGHT
RATING
76% |
|
|
|
|
|
|

