|
|
PBP Commentary |
Coming up we have a featherweight MMA rules bout between Liam Nate (ranked 0 p4p, 0 weight class) and Atshushi Takeda (ranked 0 p4p, 0 weight class). These two fighters really are very evenly matched on the feet - it will be fascinating to see who can assert themselves in that aspect of the fight.
 |
|
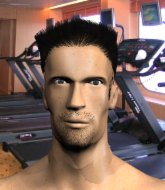 |
| 170 cm
25
147 lbs
0 - 0 - 0 |
|
169 cm
22
146 lbs
0 - 1 - 0 |
BJJ Blue Belt
Brawler
Inexperienced |
|
BJJ Blue Belt
Brawler
Solid chin |
|
| |
|
Ladies and gentlemen. This fight is 3 rounds, in the featherweight division.
Introducing the fighter to my left, fighting out of the red corner.
With a record of
0 - 0 - 0, fighting out of Helsinki, Liam Nate!
And introducing the fighter to my right, fighting out of the blue corner.
With a record of
0 - 1 - 0, fighting out of Helsinki, Atshushi Takeda!
The judges for this bout are Marco Blurström, Anni Minnemäki and Johanna Lukiainen.

The bell rings for round one and we are underway!

Nate shoots in for a takedown and gets it. Oh and he's advanced to full mount straight away.
Nate controlling his opponent.
Nate unloads with some shots from mount but Takeda bucks and avoids them well.
Nate thowing strikes but they're hitting the gloves, not doing any damage.
Nate controlling the pace for now.

Nate looks like he's working for a submission but he's not found anything just yet.
Nate sitting in mount, just looking to control for the moment.
Takeda tries to lock up and control but Nate gives him a forearm to the face and pushes him away.
Takeda blocking the ground and pound.
Takeda wants to control but Nate is having none of it.

That's one minute gone in the round.
Nate controlling the position easily from mount.
Nate looking to finish with strikes here!
Nate controlling the pace for now.
Nate throws a wild left hand from mount and Takeda manages to wriggle his way back to half guard.
Nate slows the pace down in half guard.
Nate's ground tactics aren't going to win him many fans. Let's hope he's got fireworks for us if he gets back to his feet because he's not doing much on the ground.
Nate has been looking to land a fair amount of strikes on the ground. He might be looking to soften his opponent up in order to work for a submission.

Well, the referee has seen enough. Neither fighter is active enough on the ground so he's stood them back up.

Takeda clinches with his opponent.

That's two minutes gone in the round.
Nate can't get the takedown.
Nate has a body lock and is looking for a takedown. Takeda is bouncing around trying to prevent the takedown and somehow he has indeed managed to stay on his feet.
Takeda gets underhooks to prevent Nate's takedown attempt.
That's three failed takedown attempts in the round for Liam Nate. That's going to take a lot out of him.
Nate drops down looking for an ankle pick but Takeda pulls his leg out and moves away.
Nate slaps away a takedown attempt from Takeda, before circling back to the center of the mat.
Takeda misses with a takedown attempt - Nate sprawls well and throws a nice strike on the way out which just misses.
Takeda shoots in with a takedown attempt and he has Nate pinned against the cage. Nate gets the underhooks and manages to circle away.
Nate drives through with a takedown into Takeda's guard. Let's see what he can do from the top position.

That's three minutes gone in the round.
Nate wants to pass the guard but Takeda is keeping the position.
Nate wants to control from the top but Takeda keeps moving.
Nate looking to sit in guard and control but Takeda gets the butterfly guard and sweeps. He's now in the guard on the top.
Takeda sitting in guard here, content to control.
The ref warns both fighters not to hold the cage as they work up against the meshing.

That's four minutes gone in the round.

The referee decides to stand the fighters back up, due to lack of activity on the part of Liam Nate.
Nate shoots in for a double leg but Takeda sprawls well. That's going to sap some energy.
Nate has his takedown stuffed

and Takeda counters with a shoot takedown into half guard.
Nate is breathing heavily.

Nate has one foot on Takeda's thigh - he pushes off and manages to get back to his feet.
The crowd are loving this. Great action here.
Nate shoots in but no luck this time.
Takeda tries to close the distance and clinch up against the cage but Nate paws at him with a jab and circles away.
Nate stuffs a takedown. It's all about dictating where the fight takes place and Nate wants it to stay on the feet.
As the round comes to an end the crowd are showing their appreciation for a great round of action.
Nice sprawl there from Nate as Takeda shoots in.
Nate fails with a takedown attempt from distance.
Takeda fakes high and shoots in for a takedown but Nate avoids it really well and circles away.
And thats the end of the round the fighters go back to their corners.
Liam Nate dominated that round.
That's the end of the interval. I'm sure that seemed a lot quicker than a minute for our two fighters! Back to the action.

Nate fails to land the takedown.
Takeda with a lazy takedown attempt
and Nate counters with a takedown into full mount! That could mean trouble for Takeda!
Nate avoids the attempt from Takeda to control.
Nate working some short elbows here. He postures up to throw some more ground and pound but Takeda slips a leg through to get back to half guard. Nice work.
Takeda regains full guard, whilst avoiding punches from Nate.
Liam Nate overall seems to be getting the better of the ground position in the fight so far.
Nate wants to control from the top but Takeda keeps moving.
A big thud reverberates around the arena there as Nate accidentally thumps the mat. Hopefully he's not broken his hand.
Nate is just sitting in guard, looking to avoid any submissions.
That's one minute gone in the round.
Nate passes easily into side control. Nice work.
Takeda trying to remain calm as Nate controls from the top position.
Nate misses with the ground and pound.
Nate misses with a strike but at least he's keeping busy, looking to cause some damage - that will still help him when it comes to the judges scorecards.
Takeda is looking for a sweep.
Nate taking a breather here.
The fighters are pressed up against the cage, both looking to find a bit of space to work.
Takeda is breathing heavily.
Nate advances to mount.
That's two minutes gone in the round.
Takeda is trying to escape the mount.
Nate controlling from the full mount.
The fans in attendance giving it up for the two fighters, who have really let it all hang out in the last minute or so!
Nate jumps to side control looking for an arm triangle but Takeda manages to avoid the submission attempt.
That's three minutes gone in the round.
Nate wants to control but Takeda is keeping him busy.
Takeda is looking for a sweep.
Nate controlling the position.
You can see the frustration on Takeda's face, being in this tough position on the bottom.
Nate advances nicely into full mount.
Nate punching from mount but Takeda doing a good job of avoiding damage.
Nate takes a little breather and maintains the position. The referee will be looking for him to stay active from such a dominant position though.
Takeda holding onto his opponent's waist for dear life, as Nate tries to land some strikes to get him to release his grip.
That's four minutes gone in the round.
Nate misses with a head shot.
Nate misses with a series of strikes from mount. He'll no doubt be working on his ground and pound when he gets back to the gym.
Nate thowing shots but they're missing.
Nate throwing strikes here but Takeda is writhing around nicely and avoiding any serious damage.
Takeda avoids a series of strikes thrown by Nate.
Takeda is trying to escape the mount.
Nate controlling his opponent.
As the round comes to an end the crowd are showing their appreciation for a great round of action.
And thats the end of the round the fighters go back to their corners.
Liam Nate dominated that second round.
The fighters get back to their feet, the hooter sounds and we're back to the action! This is the final round!

Nate shoots in and gets a takedown into Takeda's guard.
Nate trying to pass the guard but can't manage it just yet.
Nate won't allow Takeda to sweep him here.
Nate trying to control but Takeda is working from the bottom.
Nate looking to control the position here, rather than advance.
We may be looking at a referee standup if the pace doesn't pick up soon.
The ref stands the fighters back up. Liam Nate wasn't doing enough on the ground.
Nate shoots in and drives through. Takeda sprawls well.
That's one minute gone in the round.
Takeda fails with a takedown attempt from distance.
Takeda shoots in for a takedown - he's clinched up with Nate but Nate pushes him off and we're back to square one.
Takeda takes a big intake of breath there - he's definitely tired.
Takeda shoots in for a takedown but Nate shows good takedown defense.
Liam Nate has stuffed three takedown attempts in the round now. That's going to take a lot out of Atshushi Takeda.
Nate shoots in for a takedown but doesn't get it.
Nate gets a takedown into half guard.
Nate content to sit in half guard and control for a moment.
That's two minutes gone in the round.
Nate seems to have a rather negative gameplan on the ground. He seems keen to just score the takedown and hold down Takeda for as long as he can get away with.
The referee decides to stand the fighters back up, due to lack of activity on the part of Liam Nate.
Takeda tries to close the distance and clinch but Nate swats him to one side with an open hand palm strike and circles away.
Nate scores with a nice takedown into half guard. Let's see what he's got on the ground.
This has been an exciting period of action!
Nate thumps the canvas. Not on purpose obviously - he just missed Takeda's head.
Nate is trying a forearm choke
I don't think that's going to do much at this level of the game.
Nate slows the pace down in half guard.
That's three minutes gone in the round.
Takeda wants to get back to his feet.
Nate not landing any meaningful shots this time.
Nate sitting and controlling from the half guard.
Nate not throwing his punches with enough precision this time.
Takeda punching from the bottom.
That's four minutes gone in the round.
Nate passes to side control.
Nate is maintaining the dominant position - no doubt Takeda will start to get frustrated soon if he's not already.
An elbow from Nate crashes against the mat.
Takeda trying to remain calm as Nate controls from the top position.
Nate throws a strike aimed at the side of Takeda's head but Takeda avoids it well.
Nate remains in side control and seems content to stay there. It's a versatile position from which he can work both strikes and submissions, whilst maintaining that control, so maybe he'll sit here for a while.
Nate tries for a kimura. Not really close to a finish though.
As the round comes to an end the crowd are showing their appreciation for a great round of action.
You can see the frustration on Takeda's face, being in this tough position on the bottom.
And that's the end of the fight!
Liam Nate showed his dominance in that final round.
Well I reckon that's a shut out for Nate, winning every round. Will the judges agree? They are the ones who matter, even if they are often depressingly incompetent. Over to the ring announcer for the scorecards.
Ladies and gentlemen, after 3 rounds of action, we go to the scorecards for a decision.
Judge Marco Blurström scores the fight 30:27
Judge Anni Minnemäki scores the fight 30:27
Judge Johanna Lukiainen scores the fight 30:27
In favor of your winner, by unanimous decision... Liam Nate!
|
|
|
|
|
|
|
|
|
|
|
|
|
|
|
|
|
|
|
|
|
|
|
| S |
C
A |
G |
S |
C
B |
G |
|
S |
C |
G |
|
energy
A | B |
|
hype
A | B |
|
pop
A | B |
|
mgr
A | B |
|
FIGHT
RATING
55% |
|
|
|
|
|
|
