|
|
PBP Commentary |
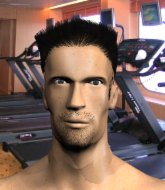
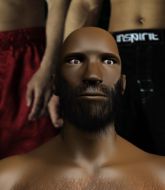
Coming up we have a featherweight MMA rules bout between Atshushi Takeda (ranked 0 p4p, 0 weight class) and Pertti Heinonen (ranked 0 p4p, 0 weight class). Both fighters will be looking to make this an exciting fight for the fans, I'm sure!
 |
|
 |
| 169 cm
22
146 lbs
0 - 2 - 0 |
|
185 cm
20
155 lbs
0 - 0 - 0 |
BJJ Blue Belt
Brawler
Good chin |
|
BJJ White Belt
Good kicks
Tends to cut |
|
| |
|
Ladies and gentlemen. This fight is 3 rounds, in the featherweight division.
Introducing the fighter to my left, fighting out of the red corner.
With a record of
0 - 2 - 0, fighting out of Helsinki, Atshushi Takeda!
And introducing the fighter to my right, fighting out of the blue corner.
With a record of
0 - 0 - 0, fighting out of Helsinki, Pertti Heinonen!
The judges for this bout are Tarja Halkonen, Marco Blurström and Arvi Lind.

The bell rings for round one and we are underway!
Takeda tries a head kick but it misses.
A head kick misses from Takeda.
Heinonen throws a head kick that Takeda semi-blocks.
Takeda avoids the head kick by Heinonen.
Heinonen throws a head kick that misses.
Heinonen is a painfully thin specimen of a man. You do wonder whether a good body kick would snap him clean in two.
Horrible takedown by Takeda or perhaps it was just good defense by Heinonen which made him look bad.
Some wild striking there from Heinonen.
Heinonen throws a sloppy head kick and Takeda moves out of range easily.
Pertti Heinonen seems to be the more aggressive standup fighter in this bout.
A really sloppy takedown attempt there from Takeda.
Heinonen shoots in for a takedown. "Ole!" shouts Takeda as he jumps to the side.
Takeda tries to clinch but is not successful on this occasion.
Takeda misses with a head kick.
Takeda throws a head kick that misses and slips in the process. He scrambles back to his feet and the fighters circle.

Heinonen takes the fight into the clinch.

That's one minute gone in the round.
Heinonen looking to throw knees to the head but Takeda is blocking nicely.
Heinonen managing to block the knees to the body from Takeda.
Heinonen avoiding damage as Takeda throws knees to the body.
Takeda working aggressively here.
Takeda misses with a short punch on the inside.

Takeda jumps guard.
The referee wants the fighters to be more active or he's going to reset them on the feet.

Takeda kicks Heinonen off and gets to his feet.
Heinonen closes this distance looking for a takedown but Takeda circles away.
Takeda throws a head kick but Heinonen moves out of range.
A head kick from Takeda lands but Heinonen takes it in his stride.

It looks like Pertti Heinonen has been cut.
Takeda swinging wildly here.
Heinonen lands a high kick!
Heinonen keeps the fight on the outside.

That's two minutes gone in the round.
Takeda darts in trying to clinch
and Heinonen counters by clinching up.
The fans in attendance giving it up for the two fighters, who have really let it all hang out in the last minute or so!
Heinonen displaying some good clinch control by pressing Takeda up against the cage.
Takeda is stalling here. The referee will be looking to step in if he doesn't pick up the pace.
Heinonen connects with a knee to the head.
Takeda is looking for a takedown.
That's three failed takedown attempts in the round for Atshushi Takeda. That's going to take a lot out of him.
Stalling in the clinch from Heinonen.
Takeda misses with a punch to the body.
Heinonen is trying to stall.

Heinonen's corner calls for him to break the clinch, which he does.

That's three minutes gone in the round.
No luck for Heinonen with that takedown attempt.
Heinonen looks gassed!
Takeda closes the distance and clinches up with Heinonen, looking for a takedown. Takeda pushes Heinonen against the cage but Heinonen circles to the side and manages to break the clinch.
Takeda closes the distance looking to clinch
and Heinonen counters with a head kick.
Takeda keeping a good distance there, avoiding the body shot.
Heinonen displays good takedown defense there as he swats away a double leg from Takeda.
Heinonen moving in and out of range nicely, whilst landing the scoring shot.
Heinonen fails to land the takedown.
Takeda shoots in looking for a takedown but Heinonen manages to keep the fight standing, pushing Takeda's face into the canvas for good measure before circling away.

That's four minutes gone in the round.
Takeda fails in his attempt to clinch.
Takeda looks for a takedown here. Will he get it? Heinonen is fending him off so far but Takeda persists. Nope, Heinonen circles away and we're back to standing.
Heinonen throws a quick head kick that skims the top of Takeda's head.
Heinonen slaps away a takedown attempt from Takeda, before circling back to the center of the mat.
Heinonen closes the distance and presses his opponent up against the cage.
Heinonen tries to land a knee to the head but misses.
Takeda is working for a takedown up against the cage. He can't get it on this occasion though.
Heinonen landing some nice looking knees to the body.
Kneeeeees! The crowd are calling for knees to the body. Heinonen obliges.
As the round comes to an end the crowd are showing their appreciation for a great round of action.
Heinonen lands a knee to the head there! That was nasty!
The crowd are loving this. Great action here.
Heinonen with the Thai clinch. He's looking to land a big knee but he's not managed it this time.
Heinonen on the defensive, avoiding the knees to the body.
Heinonen manages to break the clinch.
And thats the end of the round the fighters go back to their corners.
A close round but Pertti Heinonen will probably get the nod.
The cut man is working on Pertti Heinonen's cut.
The fighters' corners scream their final instructions, as the referee calls time. Here we go, back to the action!

Heinonen looks for a takedown here. Will he get it? Takeda is fending him off so far but Heinonen persists. Nope, Takeda circles away and we're back to standing.
Takeda tries to clinch up.
Takeda throws a leg kick but Heinonen sees it coming and moves out of range.
Takeda tries to score a power double leg takedown but Heinonen sees that one coming and sprawls well. That will dishearten Takeda somewhat.
Heinonen goes for a high kick. It partially lands.
Heinonen swinging wildly here.
Heinonen lands with a head kick! That's gotta hurt.
Takeda scores with a head kick.
Heinonen is breathing heavily.
Heinonen instigates a clinch.
Takeda has dropped down and is working for a takedown. Heinonen is trying to keep an underhook but Takeda manages to get the takedown into half guard.
The crowd cheering loudly, showing their appreciation for the quality fight we're seeing here.
Heinonen blocking the ground and pound attempt from Takeda.
Takeda stands up from half guard.
That's one minute gone in the round.
Heinonen scores with a head kick.
Heinonen takes the fight into the clinch.
Takeda throws an elbow that misses.
Takeda has a couple of punches blocked by Heinonen.
Takeda trying to land knees to the body.
Takeda unloads a knee to the mid-section.
Takeda tries to pull guard but can't drag his opponent to the mat. Heinonen just stands there and leans against the cage.
Heinonen escapes the clinch and we're back to striking.
Takeda tries to close the distance and clinch up but Heinonen swats him away and circles back towards the center.
Takeda wants to clinch.
Takeda shoots in looking for a takedown but Heinonen manages to keep the fight standing, pushing Takeda's face into the canvas for good measure before circling away.
That's three failed takedown attempts in the round for Atshushi Takeda. That's going to take a lot out of him.
That's two minutes gone in the round.
A combination from Heinonen does no damage.
Heinonen circles away from the clinch attempt.
Takeda cracks the inside of Heinonen's front leg.

Takeda rushes Heinonen and presses him up against the cage.
Takeda lands an elbow that stopped Heinonen in his tracks for a moment.
Heinonen breaks the clinch and we're back to striking at distance.
Fantastic stuff here - a very entertaining period of action, which has drawn cheers from the crowd.
Takeda tries to close the distance and clinch up against the cage but Heinonen paws at him with a jab and circles away.
No luck with that takedown attempt from Heinonen.
Takeda wants to clinch up but Heinonen keeps it at a distance.
Takeda shoots in and drives through. Heinonen sprawls well.
Takeda moves in looking to clinch but Heinonen pushes him off.
That's three minutes gone in the round.
Heinonen shoots in with a takedown attempt and he has Takeda pinned against the cage. Takeda gets the underhooks and manages to circle away.
Takeda tries to clinch there but Heinonen circles away.
Takeda tries to close the distance and clinch but Heinonen swats him to one side with an open hand palm strike and circles away.
Atshushi Takeda is looking to throw some combinations by the looks of things.
Takeda looks frustrated there after his takedown attempt is stuffed easily.
Heinonen rushes Takeda and pushes him back against the cage in a clinch.
Takeda is trying to pull guard but being pressed up against the cage enables Heinonen to keep the fight standing.
Takeda looking to throw knees to the head but Heinonen is blocking nicely.
Takeda takes a knee right on the jaw!
Heinonen is looking to score with knees to the body. Maybe he'll change it up and go body then head. Takeda is defending well for now.
Heinonen tries to land a knee to the head but misses.
That's four minutes gone in the round.
Takeda wants a takedown but no success here.
Heinonen breaks from the clinch.
Takeda doesn't manage to clinch there - Heinonen circles away.
Takeda gets his takedown attempt stuffed easily
and Heinonen counters with a big head kick but Takeda shrugs it off.
Heinonen has managed to clinch.
Heinonen slows down the pace here.
Heinonen with an attempt at a knee that misses.
As the round comes to an end the crowd are showing their appreciation for a great round of action.
Takeda is stalling here. The referee will be looking to step in if he doesn't pick up the pace.
Takeda is trying to pull guard but Heinonen turns him against the cage and we stay in the clinch.
Heinonen tries to land a knee to the head but Takeda blocks with his arms.
And thats the end of the round the fighters go back to their corners.
Atshushi Takeda dominated that second round.
The cut man is working on Pertti Heinonen's cut.
The referee calls time. The cornermen exit stage left and we're back to business. This is the final round!

Takeda shoots in for a takedown. He's persisting with it as Heinonen sprawls well. Heinonen wins this battle and keeps the fight standing. Takeda gets slowly back to his feet.
Takeda blocks a head kick by Heinonen.
Heinonen moves into the clinch successfully.
Both guys are working to get underhooks.
Takeda tries to pull guard but Heinonen won't allow it.
Heinonen scores with a knee to the head.
Takeda tries a knee to the head but Heinonen blocks it.
Heinonen breaks from the clinch.
Both fighters are breathing heavily.
Thud! ouch! good body kick from Heinonen - that will leave a mark!
Takeda is looking to take this fight into the clinch.
Takeda tries to clinch up but Heinonen circles away and keeps his distance.
Takeda closes the distance, clinches up and gets a nice trip takedown into side control. Very smooth.
That's one minute gone in the round.
Heinonen is not content to let Takeda control the position.
Takeda creates some space and throws a big elbow, but Heinonen sees it coming and moves his head just enough to avoid the strike.
Heinonen is trying to get back to his feet.
Takeda postures up a little and throws a couple of hammerfists but they don't connect properly.
Heinonen is trying to stand back up. He's worked his way up against the cage but Takeda has just dragged him back down to the mat.
Takeda grinds an elbow into Heinonen's temple.
Takeda moves into full mount!

Takeda has control of Heinonen's right arm, working for a kimura. It's a bit of a token attempt though and Heinonen regains control of the situation pretty easily.
Takeda trying to control but he's not successful this time.
That's two minutes gone in the round.
Takeda postures up and cracks his opponent a couple of times before moving back into close ground control. Heinonen looks a forlorn figure.
Takeda throwing sloppy strikes, which aren't doing any damage.
The ref warns both fighters not to hold the cage as they work up against the meshing.
Takeda working for a submission here. He's tucked his head under his opponent's arm, looking for an arm triangle. He's hopped off into side control, looking to tighten the submission... is it going to work? He's given up a good position looking for it. Heinonen looks OK. Oh, I spoke too soon, he's out! That must have been tighter than I thought! Excellent work there by Takeda! Submission of the night perhaps?
Ladies and gentlemen, after 2:49 of round 3, we have a winner by way of Submission (Arm Triangle). Atshushi Takeda!
|
|
|
|
|
|
|
|
|
|
|
|
|
|
|
|
|
|
|
|
|
|
|
| S |
C
A |
G |
S |
C
B |
G |
|
S |
C |
G |
|
energy
A | B |
|
hype
A | B |
|
pop
A | B |
|
mgr
A | B |
|
FIGHT
RATING
90% |
|
|
|
|
|
|
