|
|
PBP Commentary |
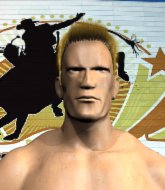
Coming up we have a lightweight MMA rules bout between Adam West (ranked 0 p4p, 0 weight class) and Jim Taker (ranked 0 p4p, 0 weight class). West kept the crowd waiting but all that was forgotten when his ring entrance music started. The incomparable musical genius that is Bat-man. Adam West has the better chin. Will he look to stand and bang today?
 |
|
 |
| 171 cm
19
160 lbs
4 - 0 - 0 |
|
178 cm
19
160 lbs
1 - 0 - 0 |
Good takedowns
Basic striking
Good chin |
|
Good wrestler
Brawler
Powerful |
|
| |
|
Ladies and gentlemen. This fight is 3 rounds, in the lightweight division.
Introducing the fighter to my left, fighting out of the red corner.
With a record of
4 - 0 - 0, fighting out of Hilo, Adam West!
And introducing the fighter to my right, fighting out of the blue corner.
With a record of
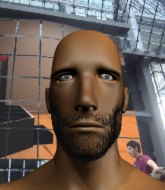
1 - 0 - 0, fighting out of Hilo, Jim Taker!
The judges for this bout are Paul Gruel, Roger Salmon and Ryoma Takatsuka.

The bell rings for round one and we are underway!
A punch combination from Taker misses.
West shoots in for a takedown but Taker shows good takedown defense.

West fakes a strike and closes the distance, dragging Taker to the ground. West is now in Taker's guard.
The referee looks like he's ready to step in and stand the fighters back up.

Taker has his feet on West's hips. He pushes off and gets to his feet. Nice work.
Taker thuds his right hand into West's forehead from close range. That could be painful for both fighters.
West fails in his attempt to clinch.
Wow, both these guys are really going for it!
West shoots in and gets a takedown into half guard. West showed some decent athleticism there.
Taker tries to kick West off but West keeps his base steady and stays in half guard.
This is a great period of action - very entertaining stuff!
West wants to free his trapped foot but Taker is holding on for dear life with his legs.
Taker taking some punishment here, with West in his half guard.

West is sneakily working for an arm triangle but Taker sees it coming and defends easily.
The fighters are pressed up against the cage, both looking to find a bit of space to work.
Taker keeping his head moving to avoid the ground and pound.
West landing with strikes to the body and head, softening up his opponent.
Taker trying to control but West postures up.
Taker really doesn't want to stay on the ground with West. If he can't get it back to his feet, it's only a matter of time before he'll be tapping out.
Taker is trying to get back to full guard.

That's one minute gone in the round.
Taker flails away from the bottom but he's not doing any damage.
West throwing shots but they're hitting the canvas more than the man.
West prevents Taker from standing back up.
West wants to pass the guard but Taker is defending well.
The referee walks around the fighters to get a better view of the action. West lands a nice short elbow.
Taker trying to control from the bottom.
Taker controlling the position well.
Both fighters really going for it on the ground here!
West not throwing his punches with enough precision this time.
West thows a wild elbow that connects with the canvas.
West looks towards his corner to check for any instructions. The corner give him nothing to work with, so he cracks Taker with a short hammerfist. I guess that's as good as any advice he could get in this position.
West has been looking to land a fair amount of strikes on the ground. He might be looking to soften his opponent up in order to work for a submission.
Taker is concentrating on defense, preventing West from advancing position.
West missing with some ground and pound from the half guard.
West working some ground and pound from close in. He's looking to maintain this position and strike for a while by the looks of things... although he'll probably advance to full mount in a minute now I've said that.
West seems to be looking for submissions.
West working Taker over with strikes.

That's two minutes gone in the round.
Nice strikes from West there.
We've seen a great period of action over the last minute or so - credit to both fighters for going all out!
West thumps the canvas. Not on purpose obviously - he just missed Taker's head.
The fighters are starting to perspire pretty heavily.
Taker wants to improve his position but West is controlling well.
Taker looks like he's trying to stand up.
We get told so often about how wrestlers don't like to be on their backs. Let's see if Taker can do anything to dispel that myth.
West is looking to take a break and control but Taker is keeping him honest, looking to work from the bottom.
Taker is trying to get back to full guard.
West thows a wild elbow that connects with the canvas.
Taker is looking to control West's leg but it's slowly edging free. Can Taker avoid being mounted?
Taker is looking to regain full guard. Not this time though.
West is keen to just control but Taker is a slippery customer.
The ref warns both fighters not to hold the cage as they work up against the meshing.

That's three minutes gone in the round.

It looks like we're going to have a standup here. Neither fighter is doing enough on the ground.
West gets the takedown into side control.
Taker throwing some weak shots from the bottom that do no damage.
Taker is not content to let West control the position.
West lands a few punches from side control.
West lands a knee to the body and follows it up with some ground and pound to the head. That will wear Taker down.
West tries to advance to mount but can't.
Taker is not in a great position here, taking some shots.
Taker tries to get back to half guard but can't.
West wants to lay and pray for a moment but Taker keeps working.
Taker is trying to get back to half guard.
Taker wants to control but West postures up.

That's four minutes gone in the round.
West trying to control the position but Taker is working away.
The crowd cheering loudly, showing their appreciation for the quality fight we're seeing here.
Taker wants to control but West postures up.
West is working Taker over with some ground and pound from side control.
West working away.
West controlling the position from side mount.
West lands some shots froms side control.
Taker tries to improve position but can't.
The crowd are going absolutely nuts as the round comes to an end - what a fantastic round of action!
West has knee on belly and now moves to full mount! Trouble for Taker!
West landing strikes from the mount.
West lands with some vicious ground and pound - can Taker hang on?
West punishing his opponent with strikes.
And thats the end of the round the fighters go back to their corners.
Adam West dominated that round.
The referee calls time. The cornermen exit stage left and we're back to business.

Taker's jab looks to have found its range, popping West under the eye.
Taker lands with a nice body kick.
Taker tried to score with a low kick but West checks it.
A momentary lapse in concentration from Taker enables West to shoot in and score with a neat double leg. Taker manages to secure a closed guard as the fighters hit the mat.
Adam West overall seems to be getting the better of the ground position in the fight so far.
Taker working the defensive guard well to avoid strikes from West.
Taker lands a beautiful switch and he's in full mount! That could spell trouble for West!
West is desperately trying to get back to half guard.
Taker lands a nice shot to the head.
Fantastic stuff here - a very entertaining period of action, which has drawn cheers from the crowd.
West working to try and regain half guard.
Taker lands a shot to the body, followed up by a shot to the exposed head of his trapped opponent.
Taker working the ground and pound effectively.
West regains half guard.
That's one minute gone in the round.
West wants to control but Taker is keeping busy and won't allow it.
Taker working the head and body with strikes.
West avoiding damage under a succession of punches from Taker.
West trying to control from the bottom.
Taker slips a nice elbow through West's hands, connecting with West's forehead.
Taker throwing punches and elbows but they're not doing any damage.
West moves into full guard.
Taker scores with a decent looking elbow strike.
West controls Taker momentarily but Taker frees himself.
West wants to sweep but no luck.
Taker wants to control from the top but West keeps moving.
Taker would like to get this fight back to the feet but can't get free from the closed guard.
That's two minutes gone in the round.
West is working from a closed guard but he's struggling to control his opponent.
Taker must be cautious of submissions here, given that his opponent has the superior Jiu Jitsu.
It looks like the ref is thinking about a standup.
Well, the referee has seen enough. Neither fighter is active enough on the ground so he's stood them back up.
Taker throws the left hand but West avoids the punch easily.
Taker lands a vicious shot with the stealth of a sniper and the strength of a viper. Are vipers that strong? I can think of lots of things that are stronger than a viper - not many rhyme with sniper though.
Jim Taker seems to be the more aggressive standup fighter in this bout.
The crowd cheering loudly, showing their appreciation for the quality fight we're seeing here.

Taker clinches up against the cage.

Taker manages to break the clinch.
West stuffs the takedown.
Taker moves into the clinch successfully.
West misses with a knee strike.
West tries a knee to the head but Taker blocks it.
Taker is looking for a takedown up against the cage. West gets underhooks though and prevents the takedown attempt.
West with the Thai clinch. He's looking to land a big knee but he's not managed it this time.
Taker throws a head punch that misses.
Good anti-grappling being displayed by Taker as West tries to tie him up.
Taker breaks the clinch.
That's three minutes gone in the round.
West moves out of range of the body kick from Taker.
West wants to clinch.
Taker fakes with a right hand and throws a good leg kick, right into the thigh. That had to hurt West.
No luck for West with that takedown attempt.
Both fighters are absolutely exhausted here.
West fails with a takedown attempt from distance.
West misses with a takedown
and Taker counters with a big head kick but West shrugs it off.
That's three failed takedown attempts in the round for Adam West. That's going to take a lot out of him.
West avoids the head kick by Taker.
Taker scores with a shot to the body.
Taker closes the distance and clinches.
West has Taker pressed against the cage, preventing Taker from circling away and getting back to striking at range.
West tries to stall but Taker uses the opportunity to gain a better position.
Taker tries a shoulder strike but it doesn't do any damage.
Taker escapes the clinch and we're back to striking.
West tries to clinch but Taker is having none of it.
That's four minutes gone in the round.
West will have to do better than that with his takedown attempts.
Taker ducks down and throws a hook to the body but West moves away.
This is a great period of action - very entertaining stuff!
Taker throws the kick towards the body but West avoids it.
Taker rushes West and pushes him back against the cage in a clinch.
Taker lands a hook to the side of the head.
Taker has hold of a leg and is looking for a trip takedown. West avoids it nicely though and we remain in the clinch.
West is looking to score with knees to the body. Maybe he'll change it up and go body then head. Taker is defending well for now.
Taker wants a takedown but no success here.
Taker wants a takedown.
Taker working hard to break the clinch.
West prevents Taker from breaking the clinch.
West pulls Taker into guard.
West wants to sweep but no luck.
The crowd are going absolutely nuts as the round comes to an end - what a fantastic round of action!
Taker loading up with the ground and pound but he's missing more than he's landing in this flurry.
West looking to control.
Taker cracks West with a solid left hand.
West is working the butterfly guard. He manages to land a nice scissor sweep and is now in half guard on the top. Nice move.
And thats the end of the round the fighters go back to their corners.
Jim Taker showed his class in that round. I'd imagine he'll take it on all the scorecards.
The referee calls time. The cornermen exit stage left and we're back to business. This is the final round!

Taker throws a nice looking combination but West bobs and weaves to avoid any damage.
West shoots in looking for a double leg takedown. Taker defends it nicely.
Taker throws a head kick but West moves out of range.
Nice sprawl there from Taker as West shoots in.
West shoots in with a takedown attempt and he has Taker pinned against the cage. Taker gets the underhooks and manages to circle away.
That's three failed takedown attempts in the round for Adam West. That's going to take a lot out of him.
West shoots in for a takedown but doesn't get it.
Taker looks to land a body kick but West moved away.
Taker fakes high and swings low for a body shot but West manages to avoid it.
West wants to clinch up but Taker keeps it at a distance.
Jim Taker seems to be getting the better of the standup.
West uses good footwork to avoid the strikes from Taker.
Taker is looking to land body kicks.
Taker fakes a head shot and lands one to the body.
Both fighters are breathing heavily.

West closes the distance and clinches.
Good anti-grappling being displayed by Taker as West tries to tie him up.
That's one minute gone in the round.
West stalls.
West is looking to score with knees to the body. Maybe he'll change it up and go body then head. Taker is defending well for now.
Taker goes for a body shot but it's blocked.
West with the Thai clinch. He's looking to land a big knee but he's not managed it this time.
Taker is trying to force a seperation but West has the dominant position.
West looking to stall.
Taker is trying to break free.
Both fighters working to control the clinch.
Taker is trying to push West away but West has him pressed against the cage, so he's going nowhere.
Taker tries a shoulder strike but it doesn't do any damage.
Taker throws a punch but it's blocked by West.
West working aggressively here.
West is working for a takedown up against the cage. He can't get it on this occasion though.
West misses with a knee to the head.
That's two minutes gone in the round.
A left hand lands to the body for Taker.
West is pressed up against the cage. Taker has hold of a leg and is looking to drag West down to the mat. West avoids the attempt though and has circled away. We're back to striking at a distance.
Taker delivers a nice body kick.
Adam West is looking to throw some combinations by the looks of things.
A punch combination from Taker misses.
Taker thows a body shot but no joy.
West is trying hard to land a takedown here. Taker sprawls well and keeps this one on the feet.
Taker throws a head kick that misses.
A punch combination from Taker misses.
This is a great period of action - very entertaining stuff!
West needs to keep his hands up - Taker had a free shot at his head there.
A left lands for Taker.
West doesn't succeed with the takedown
and Taker counters with a nice body shot.
Taker throws a low kick but it's checked well by West.
West checks a leg kick.
West changes levels and looks for a double leg takedown. Taker tries to avoid it but West manages to keep hold of a leg and drag Taker to the ground. Taker escapes though and pops straight back up to his feet.
Taker throws a hard body shot but it just misses.
A good leg kick by Taker.
Taker circles away from the clinch attempt.
That's three minutes gone in the round.
West shoots in for a double leg but Taker sprawls well. That's going to sap some energy.
Taker darts in and clinches West up against the cage.
Taker lands with a light punch inside.
An uppercut to the body lands inside from Taker.
Taker lands a hook to the side of the head.
Taker misses with some punches.

Taker has West pressed up against the cage. He's trying to work for a single leg takedown. Taker pulls back from the cage and twists to the side, sending West tumbling to the mat - Taker dives into West's guard.
Taker landing some decent shots from guard.
Taker is intent on slowing down the pace of the fight, simply looking to control.
West controls Taker momentarily but Taker frees himself.
That's four minutes gone in the round.
Taker is working West over from the guard. He should look to pass the guard and do a little more damage with these strikes.
Wooooo! Give it up for these two warriors! They are putting on a show!
Taker postures up and scores with a shot to the body and a follow up elbow to the head.
A big thud reverberates around the arena there as Taker accidentally thumps the mat. Hopefully he's not broken his hand.
Taker wants to stand but West has a closed guard, so he can't escape.
West tries to land a sweep but no joy.
West is trying to control the position but Taker postures up.
Taker works over West with some ground and pound from guard.
West tries to land a sweep but no joy.
As the round comes to an end the crowd are showing their appreciation for a great round of action.
Taker throws a big right hand that misses.
Taker missing there with some ground and pound from the guard.
Taker pushing down on West's thigh, trying to pass to half guard. He's managed it... Nice work.
The fighters are battling for position here. West manages to regain full guard. Nice work.
And that's the end of the fight!
Jim Taker comfortably won the final round on my scorecard.
I think Taker has won this one but let's see whether the judges agree with me. Over to the ring announcer for the scorecards.
Ladies and gentlemen, after 3 rounds of action, we go to the scorecards for a decision.
Judge Paul Gruel scores the fight 28:29
Judge Roger Salmon scores the fight 28:29
Judge Ryoma Takatsuka scores the fight 28:29
In favor of your winner, by unanimous decision... Jim Taker!
|
|
|
|
|
|
|
|
|
|
|
|
|
|
|
|
|
|
|
|
|
|
|
| S |
C
A |
G |
S |
C
B |
G |
|
S |
C |
G |
|
energy
A | B |
|
hype
A | B |
|
pop
A | B |
|
mgr
A | B |
|
FIGHT
RATING
100% |
|
|
|
|
|
|

