|
|
PBP Commentary |
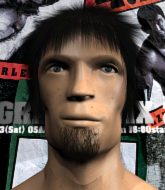
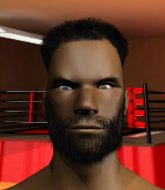
Coming up we have a heavyweight MMA rules bout between Hippo Maimer (ranked 0 p4p, 0 weight class) and TinY Toon (ranked 0 p4p, 0 weight class). Over to our ring announcer for the fighter introductions!
 |
|
 |
| 210 cm
24
277 lbs
3 - 1 - 0 |
|
191 cm
20
225 lbs
2 - 5 - 0 |
BJJ White Belt
Solid boxing
Granite chin |
|
BJJ Blue Belt
Brawler
Solid chin |
|
| |
|
Ladies and gentlemen. This fight is 3 rounds, in the heavyweight division.
Introducing the fighter to my left, fighting out of the red corner.
With a record of
3 - 1 - 0, fighting out of Las Vegas, Hippo Maimer!
And introducing the fighter to my right, fighting out of the blue corner.
With a record of
2 - 5 - 0, fighting out of Las Vegas, TinY Toon!
The judges for this bout are Alan Glass, Wesley Smith and Gwen Towbar.

The bell rings for round one and we are underway!

Maimer has managed to clinch.
Toon jumps guard but Maimer stands there with Toon around his waist. Toon gives up and drops back to his feet. We remain in the clinch.

Maimer pushes off and circles away, back to the middle of the mat.
Toon tries to clinch but Maimer is having none of it.
Maimer throws a hook but Toon blocks it.
Toon misses with a series of wild punches.
Maimer swings widly with a right hand
and Toon counters with a right hand to the body.
Toon avoids the clinch attempt nicely.
Maimer jabs Toon right on the nose. Toon blinks but takes it well.
We've seen a great period of action over the last minute or so - credit to both fighters for going all out!
Toon lets the fists fly and connects with a left straight followed by a right hook.
Toon slips a jab and a cross from Maimer.

Maimer gets tackled into the cage by Toon. Toon maintains the clinch.
Toon wants to break the clinch but can't.
Maimer manages to break the clinch.

That's one minute gone in the round.
Maimer forces Toon back against the cage and clinches.
Toon missing with knees to the body.
Maimer softening up his opponent with strikes, against the cage.
Maimer lands on the inside with an uppercut.
Maimer breaks the clinch and we're back to striking at distance.
Toon moves into range and clinches up with Maimer.
Maimer breaks the clinch and we're back to striking at distance.
Toon wants to clinch up but Maimer keeps it at a distance.
Toon cracks the inside of Maimer's front leg.
Toon swings wildly with a hook that is half blocked by Maimer.
Maimer tries to clinch up.
Toon darts in and clinches Maimer up against the cage.
Toon wants to break free. God knows he wants to breaaaak freeee.
Toon tries to pull guard but can't drag his opponent to the mat. Maimer just stands there and leans against the cage.

That's two minutes gone in the round.
The crowd are loving this. Great action here.
Maimer tries a body shot but Toon blocks it.
Maimer breaks the clinch and we return to the middle of the mat.
Nice sprawl there from Maimer as Toon shoots in.
Hippo Maimer has stuffed three takedown attempts in the round now. That's going to take a lot out of TinY Toon.
Maimer tries to clinch up.
Maimer fakes with an overhand right and moves in to clinch with Toon, pushing him back against the cage.
Maimer breaks the clinch.
Maimer throws a leg kick but Toon checks it.
Maimer moves into the clinch.
A head punch blocked on the inside by Toon.
Maimer lands a hook that snaps the head of Toon backwards.
A head punch blocked on the inside by Toon.
Maimer breaks the clinch and we return to the middle of the mat.
Maimer is looking to clinch but Toon is avoiding it.

That's three minutes gone in the round.
Toon misses with the combination.
Toon looks for a takedown but Maimer sprawls well.
Maimer tries to clinch but is not successful on this occasion.
Toon ducks down and throws a hook to the body but Maimer moves away.
A looping hook to the body misses from Maimer. Toon does a little dance to reset his feet.
The fighters circling - Maimer throws out the jab but it was never going to land.
Maimer moves into range and clinches up with Toon.
A right hook to the body lands for Toon.
Maimer pushes off and circles away, back to the middle of the mat.
Toon feints a jab promting Maimer to slip. Toon then demonstrates his capabilities by jabbing again. Maimer slips again and ducks right into an uppercut.

That's four minutes gone in the round.
Toon slips a jab from Maimer.
Maimer throws a hard body shot but it just misses.
Toon throws a looping left and ducks down for a takedown. He's got his arms around Maimer's waist but Maimer gets an underhook and avoids the takedown by throwing Toon off to one side.
Maimer throws a combination but comes up with nothing but fresh air.
Maimer pushes Toon up against the cage in a clinch.
This is a great period of action - very entertaining stuff!

Toon escapes the clinch and we're back to striking.
A jab from Maimer misses.
Toon shoots for a takedown but Maimer saw that one coming a mile off and avoided it easily.
Toon's corner calls for a 1, 2 combination and Toon duly obliges.

It looks like Hippo Maimer has been cut.
The crowd are going absolutely nuts as the round comes to an end - what a fantastic round of action!
Maimer moves into range and clinches up with Toon.
Maimer manages to break the clinch.

Maimer is looking for a takedown here. He's shot in and has managed to get it, finishing up in Toon's half guard.
And thats the end of the round the fighters go back to their corners.
Hippo Maimer dominated that round.
The cut man is working on Hippo Maimer's cut.
The fighters' corners scream their final instructions, as the referee calls time. Here we go, back to the action!

Toon fakes with an overhand right and moves in to clinch with Maimer, pushing him back against the cage.
Maimer lands an uppercut.
Toon can't break the clinch.
Toon drops down looking for an ankle pick but Maimer pulls his leg out and moves away.
Toon shoots in for a takedown but Maimer shows good takedown defense there and keeps this one on the feet.
Maimer misses with a combination
and Toon cracks him with a counter punch right on the button.
A combination from Toon does no damage.
Toon moves in looking to clinch but Maimer pushes him off.
Toon closes the distance and clinches up with Maimer, looking for a takedown. Toon pushes Maimer against the cage but Maimer circles to the side and manages to break the clinch.
Hippo Maimer has stuffed three takedown attempts in the round now. That's going to take a lot out of TinY Toon.
That's one minute gone in the round.
Toon misses with a half-hearted attempt at a head kick.
Maimer displays good takedown defense there as he swats away a double leg from Toon.
Toon is breathing heavily.
A punch lands to the side of Toon 's head but he takes it in his stride.
Maimer slips a jab and a cross from Toon.
Maimer tries to clinch up against the cage, rushing in the close the distance. Toon manages to break the clinch and circles back to the middle of the mat.
Maimer misses with a hook
and Toon moves into the clinch.
Maimer manages to break the clinch.
Toon misses with a two punch combination.
Toon tries to close the distance and clinch up against the cage but Maimer paws at him with a jab and circles away.
Maimer tries to clinch but Toon moves out of range.
Toon looks for a takedown but Maimer sprawls well.
That's two minutes gone in the round.
Maimer tries to close the distance and clinch but Toon swats him to one side with an open hand palm strike and circles away.
Toon keeping a good distance there, avoiding the body shot.
Maimer rushes Toon and pushes him back against the cage in a clinch.
This is a great period of action - very entertaining stuff!
Toon is trying to work out of this bad position, with his back against the cage.
Maimer breaks the clinch and we're back to striking at distance.
Toon wants to clinch
and Maimer holds on and brings the fighters into a clinch.
Maimer manages to break the clinch.
Hippo Maimer is looking to throw some combinations by the looks of things.
Maimer tries to bum rush Toon with a series of wild strikes but Toon uses good footwork to avoid the assault.
Maimer tries to clinch up but Toon circles away and keeps his distance.
Toon circles away from the clinch attempt.
That's three minutes gone in the round.
Maimer is looking to clinch but Toon is avoiding it.
Maimer avoids the clinch attempt nicely.
Toon tries for a takedown but Maimer circles away easily
and Maimer counters by clinching up.
Maimer breaks the clinch and we return to the middle of the mat.
Maimer closes the distance and pushes Toon back into the cage.
Maimer manages to break the clinch.
Hippo Maimer is winning the standup battle so far.
Maimer bobs and weaves and unloads with a good uppercut.
Maimer throws a sloppy head kick and Toon moves out of range easily.
Maimer fails to land with the punch combination there - jab, cross, hook, miss, miss, miss.
Toon wants to clinch up but Maimer keeps it at a distance.
Toon tries to close the distance and clinch up but Maimer swats him away and circles back towards the center.
That's four minutes gone in the round.
The fighters are going at a pretty good pace and they're both starting to sweat now.
A really sloppy takedown attempt there from Maimer.
Nice takedown defense from Maimer. No joy for Toon on that attempt.
Toon throws a looping left and ducks down for a takedown. He's got his arms around Maimer's waist but Maimer gets an underhook and avoids the takedown by throwing Toon off to one side.
Wooooo! Give it up for these two warriors! They are putting on a show!
Toon shoots in with a takedown attempt and he has Maimer pinned against the cage. Maimer gets the underhooks and manages to circle away.
Maimer circles away from the clinch attempt.
Maimer takes the fight into the clinch.
As the round comes to an end the crowd are showing their appreciation for a great round of action.
Maimer blocks a body shot from Toon.
Toon is trying to break free.
And thats the end of the round the fighters go back to their corners.
Hippo Maimer dominated that second round.
The cut man is working on Hippo Maimer's cut.
That's the end of the interval. I'm sure that seemed a lot quicker than a minute for our two fighters! Back to the action. This is the final round!

Maimer moves into the clinch successfully.
Toon wants to break free but Maimer has control.

Toon successfully pulls guard.
Maimer postures up and lands a big shot to Toon's brow.
Maimer trying to stand up but can't free himself from Toon's guard.

Toon is throwing his legs up, looking for submissions. Maimer is aware though and is defending well.
Toon wants to get back to his feet but Maimer is in a dominant position and won't allow it.
Hammerfist, elbow! yells Maimer's corner. There ya go! There ya go!
Maimer lands a couple of decent looking shots.
The crowd cheering loudly, showing their appreciation for the quality fight we're seeing here.
Maimer working in close now, lands a nice elbow to the side of Toon's head.
Maimer is looking to stand up but Toon won't let him.
That's one minute gone in the round.
Maimer throws an elbow that misses. Toon uses the momentum to reverse the position. He's now in Maimer's guard. Nice move by Toon!

Maimer uses the cage to get back to his feet.
Toon takes a big intake of breath there - he's definitely tired.
Maimer punishes Toon's body with a nice straight punch.
Toon wants to clinch but Maimer slips to the side
and Maimer counters with a nice double leg into side control. Toon won't be happy with that.
Maimer will need to keep those long limbs tucked in whilst he's on the ground, to prevent any submissions.
Maimer decides to stand back up.
We've seen a great period of action over the last minute or so - credit to both fighters for going all out!
Toon fakes high and shoots in for a takedown but Maimer avoids it really well and circles away.
Maimer shuffles to his left behind two crisp jabs. Toon eats them both and turns towards Maimer to reposition himself and eats a stinging right hand-left hook combo.
That's two minutes gone in the round.
Maimer closes the distance and pushes Toon back into the cage.
Maimer breaks the clinch and we return to the middle of the mat.
Toon closes this distance looking for a takedown but Maimer circles away.
Toon misses with a combination
and Maimer moves into the clinch.
Hippo Maimer has scored more points in the clinch so far.
Maimer breaks from the clinch.
The fight moves into the clinch position.
Toon wants to break free but Maimer has control.
Maimer breaks the clinch and we return to the middle of the mat.
Maimer wants to clinch up but Toon keeps it at a distance.
Toon tries to clinch but Maimer is having none of it.
That's three minutes gone in the round.
Toon tries to clinch but Maimer is having none of it.
Maimer throws a poor cross that misses
and Toon counters with a one-two to the body.
Maimer walks straight into an uppercut. Luckily it didn't land flush.
Toon misses with a double jab
and Maimer counters with a crisp hook to the side of the head.
Toon tries to close the distance and clinch but Maimer swats him to one side with an open hand palm strike and circles away.
Maimer tries to close the distance and clinch up against the cage but Toon paws at him with a jab and circles away.
Maimer misses with a left hand
and Toon counters with a three punch combination, finished off with a leg kick. Nice work.
Toon gets to the clinch - let's see what his plan is here.
Toon wants a takedown but no success here.
Hippo Maimer has stuffed three takedown attempts in the round now. That's going to take a lot out of TinY Toon.
Wooooo! Give it up for these two warriors! They are putting on a show!
Maimer's corner calls for him to break the clinch, which he does.
That's four minutes gone in the round.
Maimer tries to clinch
enabling Toon to counter with a crisp jab.
Toon misses with a body kick.
Toon shoots in but doesn't get the takedown
and Maimer counters nicely by changing levels and landing a hook to the body.
Maimer clinches up with Toon and pushes him back against the cage.
Toon pushes off and circles away, back to the middle of the mat.
Maimer gets a clinch.
Maimer pushes off and circles away, back to the middle of the mat.
The crowd are going absolutely nuts as the round comes to an end - what a fantastic round of action!
The fighters circling - Maimer throws out the jab but it was never going to land.
Maimer throws a lazy uppercut
and Toon counters with a left to the body.
TinY Toon has stepped it up - he knows he needs a finish here!
Maimer wants to clinch up but Toon keeps it at a distance.
And that's the end of the fight!
Hippo Maimer showed his dominance in that final round.
Well Maimer has outscored his opponent in every aspect of the fight today. Only a scarily incompetent judge or two will keep him from a well deserved win... Over to the ring announcer for the scorecards.
Ladies and gentlemen, after 3 rounds of action, we go to the scorecards for a decision.
Judge Alan Glass scores the fight for Hippo Maimer!
Judge Wesley Smith scores the fight for Hippo Maimer!
Judge Gwen Towbar scores the fight for Hippo Maimer!
Hippo Maimer wins by unanimous decision!
|
|
|
|
|
|
|
|
|
|
|
|
|
|
|
|
|
|
|
|
|
|
|
| S |
C
A |
G |
S |
C
B |
G |
|
S |
C |
G |
|
energy
A | B |
|
hype
A | B |
|
pop
A | B |
|
mgr
A | B |
|
FIGHT
RATING
67% |
|
|
|
|
|
|

