|
|
PBP Commentary |
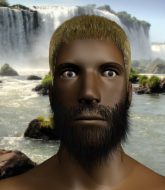
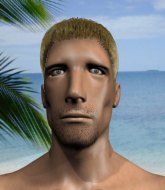
Coming up we have a middleweight MMA rules bout between Kurt The Hurt (ranked 0 p4p, 0 weight class) and Brock Mitchell (ranked 0 p4p, 0 weight class). The Hurt comes to the cage accompanied by Mama Said Knock You Out. Both fighters look pumped up here. Let's hope this is a good fight!
 |
|
 |
| 180 cm
18
195 lbs
1 - 1 - 0 |
|
185 cm
18
185 lbs
1 - 0 - 0 |
BJJ White Belt
Counter striker
Good chin |
|
BJJ Purple Belt
Basic striking
Determined |
|
| |
|
Ladies and gentlemen. This fight is 3 rounds, in the middleweight division.
Introducing the fighter to my left, fighting out of the red corner.
With a record of
1 - 1 - 0, fighting out of Rio de Janeiro, Kurt The Hurt!
And introducing the fighter to my right, fighting out of the blue corner.
With a record of
1 - 0 - 0, fighting out of Rio de Janeiro, Brock Mitchell!
The judges for this bout are Seu Braga, Thiago Cunha and Mauricio Rocha.

The bell rings for round one and we are underway!
The Hurt throws a right hand that Mitchell ducks under and follows up with a left that Mitchell also avoids with ease.
Mitchell looks really tired already! That doesn't bode well for a good, competitive fight!
The Hurt on the wrong end of a nice jab.
Mitchell throws a hard body shot but it just misses.
The Hurt shoots in for a takedown. "Ole!" shouts Mitchell as he jumps to the side.

Mitchell shoots in from a long way out. He's driving through with the takedown attempt and he eventually gets it, landing in The Hurt's guard.
The Hurt is trying to control the position but Mitchell postures up.
The Hurt is really struggling to control Mitchell but he's trying to hold on to the position.
The ref warns both fighters not to hold the cage as they work up against the meshing.
The Hurt wants to stand up but Mitchell is controlling him.
The Hurt keeping moving, preventing Mitchell from controlling successfully.
The Hurt wants to improve his position but instead Mitchell has moved into half guard.
The Hurt wants to get back to his feet.

The referee decides to stand the fighters back up.
The Hurt slips a jab and a cross from Mitchell.

That's one minute gone in the round.
The Hurt throws a series of punches but Mitchell avoids them all with ease.
Mitchell doesn't succeed with the takedown

and The Hurt counters with a series of strikes that sends Mitchell to the canvas! The Hurt follows down into guard, looking to finish the fight!

Mitchell is rocked!

The Hurt stands up and waves to Mitchell to follow him.
Mitchell is still on wobbly legs! Can The Hurt finish him?

Mitchell clinches.
The Hurt gets underhooks to prevent Mitchell's takedown attempt.
Mitchell seems to have recovered his senses.
The Hurt lands an elbow that stopped Mitchell in his tracks for a moment.

Mitchell breaks the clinch.
The Hurt tries to clinch up
and Mitchell decides to take the opportunity to score a takedown. He's landed in The Hurt's guard.
This is a great period of action - very entertaining stuff!
The Hurt thows some rabbit punches from the bottom but they don't do any damage.
The Hurt is wriggling around but Mitchell manages to pass to half guard.
Mitchell stands, ready to strike. The ref makes him back up and allows The Hurt to get to his feet.
Kurt The Hurt is looking to keep the fight on the feet at all costs.

That's two minutes gone in the round.
Mitchell shoots in for a takedown and gets it.
The Hurt is staying active underneath Mitchell, who seems content to just control the action from this position.
The Hurt is pressing down on Mitchell's left leg trying to get back to full guard. He's managed it.
The Hurt wants to sweep but no luck.
The Hurt is trying to control the position but Mitchell postures up.
The Hurt tries to land a sweep but no joy.
The Hurt looking to control.
It looks like we're going to have a standup here. Neither fight is doing enough on the ground.
A low kick from Mitchell misses
and The Hurt counters with a good right hand that lands right on the jaw.
The Hurt stuffs the takedown attempt from Mitchell. Mitchell gets slowly back to his feet.
Kurt The Hurt has stuffed three takedown attempts in the round now. That's going to take a lot out of Brock Mitchell.
The Hurt cracks a nice hook into Mitchell's ribs.
The Hurt fakes and then throws a beautiful body shot. Mitchell looks a bit winded and takes a step backwards to take a breath.

That's three minutes gone in the round.
The Hurt gets a clinch.
The Hurt lands a glancing elbow in the clinch.
The Hurt lands with a right to the head.
The Hurt breaks from the clinch.
Mitchell avoids a punch combination nicely.
The Hurt throws a shot to the body.
Mitchell closes the distance and clinches.
A short right from The Hurt.
The Hurt lands with a left to the head.
Still in the clinch, The Hurt scores with a nice short uppercut.
Mitchell tries to pull guard but The Hurt won't allow it.
The Hurt lands a nice knee to the body.
The Hurt lands an elbow that stopped Mitchell in his tracks for a moment.
Mitchell tries to pull guard but can't drag his opponent to the mat. The Hurt just stands there and leans against the cage.
The Hurt lands a right uppercut that snaps the head of Mitchell backwards.
The Hurt breaks the clinch and we return to the middle of the mat.
The Hurt clinches but Mitchell breaks the clinch
and Mitchell counters with a single leg into guard. The Hurt didn't expect that.
Mitchell is just sitting in guard, looking to avoid any submissions.

That's four minutes gone in the round.
Mitchell decides he's had enough of playing guard and decides to stand. Come on The Hurt, up you get!
This has been an exciting period of action!
Mitchell doesn't succeed with the takedown
and The Hurt counters with a quick right hand to the jaw.
Mitchell showing good head movement there, avoiding the strikes from The Hurt.
Mitchell misses with a takedown
and The Hurt counters into the clinch. Nicely done.
The Hurt lands a nice elbow.
The fighters are going at a pretty good pace and they're both starting to sweat now.
Mitchell takes an elbow to the forehead.
A short uppercut from The Hurt.
A left hand lands to the body for The Hurt.
The Hurt lands a shoulder strike.
The Hurt lands an elbow that stopped Mitchell in his tracks for a moment.
Mitchell fails to pull guard.
The Hurt lands a knee to the body.
The Hurt breaks the clinch and we return to the middle of the mat.
The crowd are going absolutely nuts as the round comes to an end - what a fantastic round of action!
Mitchell fails with the takedown.
Brock Mitchell seems to be the more aggressive standup fighter in this bout.
The Hurt drives through and clinches with Mitchell against the cage.
The Hurt crunches a lovely knee into Mitchell's ribcage.
The Hurt prevents the takedown attempt.
And thats the end of the round the fighters go back to their corners.
Kurt The Hurt dominated that round.
That's time! The Hurt's corner gives him a slap on the ass as he gets ready to fight.

Mitchell keeps the fight on the outside.
Mitchell avoids the body shot from The Hurt.
The Hurt throws a right and a left that Mitchell avoids nicely.
Mitchell shoots in but no luck this time.
Mitchell avoids the clinch attempt nicely.
Mitchell walks straight into a jab right on the nose. That one stung - he's blinking and trying to clear his head.
A combination from The Hurt does no damage.
The Hurt misses with a series of wild punches.
The Hurt clinches but Mitchell breaks the clinch
and Mitchell decides to take the opportunity to score a takedown. He's landed in The Hurt's guard.
The Hurt throwing some rather feeble looking strikes off his back.
Mitchell stands up and looks to throw the legs aside to pass to side control. The Hurt swivels though and keeps the full guard.
The Hurt controls Mitchell momentarily but Mitchell frees himself.
Both fighters are absolutely exhausted here.
That's one minute gone in the round.
The Hurt keeping moving, preventing Mitchell from controlling successfully.
Brock Mitchell has got the better of the ground game so far.
Neither fighter is doing enough for the referee's liking and he's decided to stand them back up.
Mitchell shoots in and bounces The Hurt off the cage to secure the takedown into guard.
Mitchell tries to free his leg and advance position but The Hurt is retaining full guard.
The Hurt is trying to stand up but he's not managed so far.
Mitchell connects with a couple of short punches.
The Hurt wants to get back to his feet but Mitchell is in a dominant position and won't allow it.
There's a bit of a scramble here and now The Hurt is on top in guard.
The Hurt knows he needs to get back to his feet asap. He's simply no match for Mitchell on the ground.
The Hurt trying to control the position from guard on top but Mitchell is wriggling around, looking for whatever he can.
The fighters are pressed up against the cage, both looking to find a bit of space to work.
That's two minutes gone in the round.
The Hurt is going to have to think about doing something other than just controlling because The Hurt is managing to avoid having the position dictated to him.
The Hurt looking to pass the guard.
The Hurt is working hard here to advance position.
Mitchell being controlled here, momentarily.
The Hurt stopping the sweep attempt from Mitchell.
The Hurt trying to control the position from guard on top but Mitchell is wriggling around, looking for whatever he can.
It looks like we're going to have a standup here. Neither fight is doing enough on the ground.
The Hurt tries to clinch
and Mitchell counters by clinching up.
Mitchell manages to pull guard.
Mitchell looking to sweep here. No luck so far.
The Hurt gets to his feet and steps away from his opponent.
That's three minutes gone in the round.
Mitchell walks straight into an uppercut. Luckily it didn't land flush.
Mitchell slips a jab and a cross from The Hurt.
The Hurt takes a shot to the eye socket. That's gotta hurt.
Mitchell has a takedown stuffed.
The Hurt scores with a straight right hand, right through his opponent's guard.
Mitchell fails with a takedown attempt from distance.
Kurt The Hurt has stuffed three takedown attempts in the round now. That's going to take a lot out of Brock Mitchell.
A really sloppy takedown attempt there from Mitchell.
Mitchell will have to do better than that with his takedown attempts.
Mitchell circles away from the clinch attempt.
Mitchell keeps the fight on the outside.
The Hurt tries to clinch there but Mitchell circles away.
Kurt The Hurt is looking to throw some combinations by the looks of things.
Donk. The Hurt catches Mitchell right on the button with a cross.
Mitchell swings away with a body shot that misses
and The Hurt counters with a stiff jab, followed by a cross and an uppercut! That's too much punishment for Mitchell to take - he tumbles to the cavas, blood pouring from his nose, barely conscious. That's the end of the fight! Great knockout by The Hurt!
Ladies and gentlemen, after 3:59 of round 2, we have a winner by way of KO (Strikes). Kurt The Hurt!
|
|
|
|
|
|
|
|
|
|
|
|
|
|
|
|
|
|
|
|
|
|
|
| S |
C
A |
G |
S |
C
B |
G |
|
S |
C |
G |
|
energy
A | B |
|
hype
A | B |
|
pop
A | B |
|
mgr
A | B |
|
FIGHT
RATING
88% |
|
|
|
|
|
|
