|
|
PBP Commentary |
Coming up we have a featherweight MMA rules bout between James Jolley (ranked 0 p4p, 0 weight class) and Haji Muakbar (ranked 0 p4p, 0 weight class). Muakbar has chosen That Punjabi Jay-Z song as his entrance music, which hasn't gone down very well with the crowd. These two fighters really are very evenly matched on the feet - it will be fascinating to see who can assert themselves in that aspect of the fight.
 |
|
 |
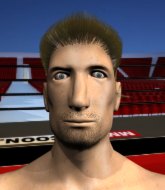
| 170 cm
28
154 lbs
11 - 6 - 0 |
|
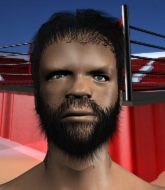
171 cm
24
159 lbs
7 - 3 - 0 |
Abu Dhabi Champ
Counter striker
Granite chin |
|
Good wrestler
Decent boxing
Good gas tank |
|
| |
|
Ladies and gentlemen. This fight is 5 rounds, for the featherweight championship of the world!
Introducing the champion to my left, fighting out of the red corner.
With a record of
11 - 6 - 0, fighting out of Montreal, James Jolley!
And introducing the challenger to my right, fighting out of the blue corner.
With a record of
7 - 3 - 0, fighting out of New York, Haji Muakbar!
The judges for this bout are Bruno Lombardi, Lou da Vinci and Franklyn Lucas.

The bell rings for round one and we are underway!
Muakbar misses with a takedown attempt. He shot from a bit too far out.
Muakbar shoots in but no luck this time.
Jolley throws a hard body shot but it just misses.
Muakbar keeping a good distance there, avoiding the body shot.
Jolley misses the jab.
Muakbar shoots in for a takedown. He's persisting with it as Jolley sprawls well. Jolley wins this battle and keeps the fight standing. Muakbar gets slowly back to his feet.
James Jolley has stuffed three takedown attempts in the round now. That's going to take a lot out of Haji Muakbar.

Muakbar dives in and scores a takedown into Jolley's guard.
Jolley manages to sweep nicely, so he's now on top. Muakbar manages to get himself to full guard.
Jolley wants to control from the top but Muakbar keeps moving.
The ref warns both fighters not to hold the cage as they work up against the meshing.
Muakbar is pulling down on Jolley's head. It's preventing any offense from Jolley, at least for the moment.
Jolley wants to control from the top but Muakbar keeps moving.
Jolley stands up and looks to throw the legs aside to pass to side control. Muakbar swivels though and keeps the full guard.

That's one minute gone in the round.

Jolley drops back, looking for a kneebar! Muakbar looks panicked! The fighters roll across the mat, one looking to finish, one looking to escape. Muakbar looks to have wriggled free... Yes, he's got his leg free and he's dived into side control! Good work there from Muakbar!
Jolley is sneaking out the side here. He's bucked Muakbar off and has taken his back!
Muakbar tries to escape the position.
The fighters are pressed up against the cage, both looking to find a bit of space to work.
Jolley is looking to control Muakbar but Muakbar is wriggling around and keeping busy.
Jolley is looking for the choke from the back position but Muakbar is controlling his hands well.
Jolley is working for the rear naked choke. He has one arm under the chin but Muakbar has hold of the other arm. A bit of a stalemate here.
Jolley has his opponent's back and is working for the choke.
Muakbar fending off the submission attempt from Jolley.

That's two minutes gone in the round.
This has been an exciting period of action!
I really don't envy Muakbar right now.
Muakbar fending off the submission attempt from Jolley.
Muakbar trying to control the hands but Jolley breaks the grip.
Muakbar is in a world of trouble here. He's outmatched on the ground here and he'd better get Jolley off his back sharpish unless he wants to be submitted.
Muakbar fending off the submission attempt from Jolley.
Muakbar tries to break free.
The fighters are going at a pretty good pace and they're both starting to sweat now.
What can Muakbar do to escape this position? He's going to have to figure it out pretty quick if he wants to stay in the fight!
Muakbar really doesn't want to stay on the ground with Jolley. If he can't get it back to his feet, it's only a matter of time before he'll be tapping out.

That's three minutes gone in the round.
Jolley wants to control but Muakbar is keeping busy.
Muakbar looks to control his opponent's hands but he's not mananging it at the moment.
Muakbar tries to break free.
A lull in the action here.
Jolley has his hand under the chin of his opponent looking for the choke. He's nearly got it! This one could be all over! But no, Muakbar has freed his hand and lives to survive another
well, another couple of seconds at least!
Jolley keeps control of the position as Muakbar tries to break free.
Jolley tries to keep control of the position but Muakbar is staying busy.
Jolley is working really hard to secure the rear naked choke. Muakbar defends successfully for a significant amount of time. Both fighters are looking very determined.

That's four minutes gone in the round.
Muakbar is trying to break free.
Jolley working for a choke but Muakbar is defending well.
Fantastic stuff here - a very entertaining period of action, which has drawn cheers from the crowd.
Muakbar is in bad spot here.
Jolley doesn't have the hooks in and Muakbar manages to turn into his guard.
Muakbar connects with a couple of short punches.
As the round comes to an end the crowd are showing their appreciation for a great round of action.
Muakbar scoring with punches to the head and body.
Jolley looking to sweep here. No luck so far.
Jolley working the defensive guard well to avoid strikes from Muakbar.
Muakbar avoids a guillotine attempt easily.
And thats the end of the round the fighters go back to their corners.
James Jolley dominated that round.
The corners get their ten second warning. Both fighters stand from their stools and stare eachother down, ready to get back to the action.

Nice defenses there by Muakbar.
Muakbar looks for a takedown here. Will he get it? Jolley is fending him off so far but Muakbar persists. Nope, Jolley circles away and we're back to standing.
Muakbar shoots in for a takedown - he's clinched up with Jolley but Jolley pushes him off and we're back to square one.
Muakbar misses with a takedown attempt
and Jolley counters with a left and a right that stings Muakbar.
James Jolley has stuffed three takedown attempts in the round now. That's going to take a lot out of Haji Muakbar.
A looping hook to the body misses from Jolley. Muakbar does a little dance to reset his feet.
Muakbar misses with a takedown attempt. He shot from a bit too far out.
Muakbar throws a looping left and ducks down for a takedown. He's got his arms around Jolley's waist but Jolley gets an underhook and avoids the takedown by throwing Muakbar off to one side.
Jolley fails with a takedown attempt from distance.
Jolley misses with a takedown attempt - Muakbar sprawls well and throws a nice strike on the way out which just misses.
Muakbar misses with a takedown attempt
and Jolley counters with a crisp hook to the side of the head.
Horrible takedown by Muakbar or perhaps it was just good defense by Jolley which made him look bad.
Muakbar closes the distance and after a bit of a stuggle, scores a takedown into Jolley's guard.
The crowd are loving this. Great action here.
Jolley had isolated an arm as going for a kimura. Muakbar defends it easily.
That's one minute gone in the round.
Jolley is looking for a guillotine. You can't force these things though and Muakbar defends well.
Jolley avoiding any damage from the ground and pound.
Muakbar trying to control the position from guard on top but Jolley is wriggling around, looking for whatever he can.
Muakbar pressing down on his opponent's thigh, looking to pass guard. Jolley is keeping the position for now.
Jolley looking for submissions from the bottom here. Moving his hips around, possibly looking for an armbar.
Jolley looking for submissions from the bottom here. Moving his hips around, possibly looking for an armbar.
Muakbar controls the pace of the fight for a moment.
That's two minutes gone in the round.
Jolley lands a beautiful switch and he's in full mount! That could spell trouble for Muakbar!
James Jolley overall seems to be getting the better of the ground position in the fight so far.
Jolley trying to control but Muakbar is having none of it.
Muakbar tries to lock up and control but Jolley gives him a forearm to the face and pushes him away.
Muakbar is trying to escape the mount.
Jolley trying to control but he's not successful this time.
This has been an exciting period of action!
Jolley is really struggling to control Muakbar but he's trying to hold on to the position.
Jolley fails to move to back control.
That's three minutes gone in the round.
Muakbar is desperately trying to get back to half guard.
Muakbar has given up his back - I dont know if this is a deliberate ploy to try and escape or if he is just struggling down there.
Muakbar staying busy and making it hard for Jolley to control.
Jolley looking to break Muakbar's wrist control so he can sink in the choke. Muakbar remaining controlled and patient though - he really has to keep calm otherwise Jolley will wrap this one up with the rear naked choke!
Muakbar manages to reverse the position and now he's in Jolley's guard. Nice work there by Muakbar.
Muakbar scores with a decent looking elbow strike.
Jolley is trying to control the position but Muakbar postures up.
Muakbar connects with a couple of short punches.
That's four minutes gone in the round.
Jolley is looking for a guillotine. You can't force these things though and Muakbar defends well.
Jolley keeping moving, preventing Muakbar from controlling successfully.
Jolley working a defensive guard here.
This has been an exciting period of action!
Jolley working from the bottom, still in full guard. He's managed to get a loose triangle. Muakbar doesn't seem to be doing much to defend here, obviously he feels comfortable in the position. Muakbar manages to throw the legs off his shoulder and he's back into guard - no problem.
Jolley working from the bottom, still in full guard. He's managed to get a loose triangle. Muakbar doesn't seem to be doing much to defend here, obviously he feels comfortable in the position. Muakbar manages to throw the legs off his shoulder and he's back into guard - no problem.
As the round comes to an end the crowd are showing their appreciation for a great round of action.
Muakbar lands a nice shot whilst sitting in his opponent's guard.
And thats the end of the round the fighters go back to their corners.
James Jolley dominated that second round.
That's time! Back to the action!

Muakbar fails with the takedown
and Jolley counters with a one-two to the body.
Muakbar moves out of range of the strikes.
No luck for Muakbar with that takedown attempt.
Muakbar shoots in for a takedown but Jolley shows good takedown defense.
James Jolley has stuffed three takedown attempts in the round now. That's going to take a lot out of Haji Muakbar.
Muakbar has a takedown stuffed.
Muakbar tries to shoot in for a takedown. He's got hold of a leg but Jolley swivels and escapes.
Muakbar bobs and weaves well there to avoid the strikes.
Muakbar shoots in for a double leg but Jolley sprawls well. That's going to sap some energy.
Jolley throws a hook but Muakbar blocks it.
Muakbar shoots for a takedown but Jolley saw that one coming a mile off and avoided it easily.
Jolley misses with a hook. Muakbar ducked under it nicely.
Jolley has a takedown stuffed.
Haji Muakbar seems to be the more aggressive standup fighter in this bout.
Muakbar closes this distance looking for a takedown but Jolley circles away.
That's one minute gone in the round.
Muakbar shoots for a double leg takedown but Jolley sprawls well. He's pushed Muakbar's face into the mat and manages to get back to his feet relatively easily.
Muakbar takes a big intake of breath there - he's definitely tired.
Muakbar shoots in for a takedown and gets it.
Jolley looking for submissions from an awkward position here.
Muakbar not landing any meaningful shots this time.
Jolley has no desire to be mounted, so is trying to control. Muakbar is working away from the top position though.
Muakbar sitting and controlling from the half guard.
Jolley looking to work for a kimura from the bottom.
Muakbar takes advantage of the dominant position to land a couple of big hammer fists.
That's two minutes gone in the round.
Muakbar sitting and controlling from the half guard.
Jolley is controlling Muakbar's trapped leg to prevent Muakbar from advancing to side control.
Jolley wants to control the action here but instead Muakbar manages to pass to full mount!
We've seen a great period of action over the last minute or so - credit to both fighters for going all out!
Jolley regains half guard.
Jolley trying to hold on to Muakbar's head to control him but Muakbar postures up.
That's three minutes gone in the round.
Jolley is looking to sinch up a guillotine here but Muakbar pulls his head out easily.
Jolley is looking to regain full guard. Not this time though.
Nice strikes from Muakbar there.
Jolley is looking to control Muakbar's leg but it's slowly edging free. Can Jolley avoid being mounted?
Jolley avoiding damage under a succession of punches from Muakbar.
Jolley gets back to full guard.
Muakbar seems content to control from guard here. He's going to have to remain active though if he doesn't want to get stood back up.
Jolley is looking for a triangle but Muakbar pushes his legs off easily.
That's four minutes gone in the round.
Jolley trying to keep a closed guard but Muakbar is proving a slippery customer.
Jolley is looking for a guillotine. You can't force these things though and Muakbar defends well.
Muakbar with a nice head shot there.
Muakbar content to strike from guard, landing some decent shots.
Muakbar tries to free his leg and advance position but Jolley is retaining full guard.
The crowd cheering loudly, showing their appreciation for the quality fight we're seeing here.
As the round comes to an end the crowd are showing their appreciation for a great round of action.
Jolley keeping moving, preventing Muakbar from controlling successfully.
Muakbar wants to pass the guard but Jolley is keeping the position.
And thats the end of the round the fighters go back to their corners.
A close third round but Haji Muakbar just about did enough to take it.
The minute break is over - no more time for sponges and pep talks - back to the action!

Muakbar doesn't succeed with the takedown

and Jolley decides to take the opportunity to score a takedown. He's landed in Muakbar's guard.
Jolley stands and throws Muakbar's legs to the side, diving into side control.
Jolley is in a dominant position here, looking for a kimura. Muakbar looks calm but he's in trouble here. Jolley gets his leg over his opponent's head and yanks on the arm. Muakbar is tapping like a morse code operator on the titanic! SOS! SOS! Jolley lets go of the hold and Muakbar can pop his arm back in it's socket.
Ladies and gentlemen, after 0:30 of round 4, we have a winner by way of Submission (Kimura). James Jolley!
James Jolley is the new featherweight champion!
|
|
|
|
|
|
|
|
|
|
|
|
|
|
|
|
|
|
|
|
|
|
|
| S |
C
A |
G |
S |
C
B |
G |
|
S |
C |
G |
|
energy
A | B |
|
hype
A | B |
|
pop
A | B |
|
mgr
A | B |
|
FIGHT
RATING
100% |
|
|
|
|
|
|
