|
|
PBP Commentary |
Coming up we have a bantamweight MMA rules bout between Jonathan Hawkins (ranked 0 p4p, 0 weight class) and Gabriel Stark (ranked 0 p4p, 0 weight class). Jonathan Hawkins has the better chin. Will he look to stand and bang today?
 |
|
 |
| 165 cm
29
142 lbs
12 - 5 - 0 |
|
165 cm
23
144 lbs
7 - 1 - 0 |
Great wrestler
Excellent boxer
Cardio machine |
|
Powerful takedowns
Decent boxing
Good gas tank |
|
| |
|
Ladies and gentlemen. This fight is 3 rounds, for the bantamweight championship of the world!
Introducing the champion to my left, fighting out of the red corner.
With a record of
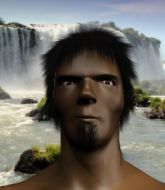
12 - 5 - 0, fighting out of Tokyo, Jonathan Hawkins!
And introducing the challenger to my right, fighting out of the blue corner.
With a record of
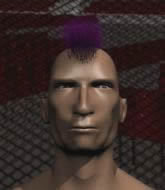
7 - 1 - 0, fighting out of Tokyo, Gabriel Stark!
The judges for this bout are Sosuke Kotani, Yukihiro Shimada and Ren Mimura.

The bell rings for round one and we are underway!
Stark tries for a takedown but Hawkins circles away easily
and Hawkins counters with a nice uppercut.
Hawkins ducks low and lands a nice hook to the body of his opponent.
Hawkins connects with a looping right hand.
A jab from Hawkins misses.
Nice jab there from Hawkins.
Hawkins swings and misses with a hook to the body.

Stark gets taken down but at least he's managed to land in guard.
It looks like the ref is thinking about a standup.
Stark trying to keep a closed guard but Hawkins is proving a slippery customer.
Hawkins trying to control but Stark is working from the bottom.
Hawkins has to be careful here, sitting in the guard of a superior BJJ player.
Stark not looking particularly offensive just at the moment.

Hawkins avoids a guillotine attempt easily.
Fantastic stuff here - a very entertaining period of action, which has drawn cheers from the crowd.
Hawkins wants to pass the guard but Stark is keeping the position.

That's one minute gone in the round.
Stark controlling Hawkins's posture.
Hawkins wants to control from the top but Stark keeps moving.
Hawkins pressing down on his opponent's thigh, looking to pass guard. Stark is keeping the position for now.
Hawkins loading up with the ground and pound but he's missing more than he's landing in this flurry.
Stark is working actively off his back, looking to secure an arm or perhaps work for a triangle.
The fighters are pressed up against the cage, both looking to find a bit of space to work.
Stark looking for submissions off his back, moving his hips, looking for an opening.

That's two minutes gone in the round.
Stark looking for a sweep. Not yet Stark, not yet.
Hawkins pushing down on Stark's thigh, trying to pass to half guard. He's managed it... Nice work.
The two fighters exchange a few words. I couldn't hear what they were saying but maybe it's more fun if you make it up yourself. Hawkins connects with a nice short shot to Stark's temple.
Stark moves his hips nicely and gets into full guard.
Stark keeping moving, preventing Hawkins from controlling successfully.
Hawkins passes easily into side control. Nice work.
The fans in attendance giving it up for the two fighters, who have really let it all hang out in the last minute or so!
Stark is looking to regain half guard here but Hawkins keeps moving and retains side control.
Hawkins wants to lay and pray for a moment but Stark keeps working.
Stark regains half guard.

That's three minutes gone in the round.
Hawkins is trying to control. Stark wants to improve his position but can't escape this time.
Hawkins controlling the action here.
Hawkins landing with strikes to the body and head, softening up his opponent.
Stark moves his hips nicely and gets into full guard.
Hawkins wants to pass the guard but Stark is keeping the position.
Hawkins in full guard, throwing the ground and pound. No damage this time.
Stark has momentary wrist control but Hawkins slips an elbow through the middle.
Hawkins chips away with some ground and pound.
Hawkins throws a big elbow that misses.

That's four minutes gone in the round.
Hawkins is working Stark over from the guard. He should look to pass the guard and do a little more damage with these strikes.
Stark looking for subs off his back but Hawkins has passed one foot through into half guard.
Stark is looking to sinch up a guillotine here but Hawkins pulls his head out easily.
Wooooo! Give it up for these two warriors! They are putting on a show!
Stark is trying to control but can't.
Hawkins seems content to maintain position for now, rather than mounting any offense.
Hawkins wants to control but Stark is keeping him busy.
Hawkins seems to be taking a bit of a break to think of his next move. He lands a short punch in the meantime.
Stark gets full guard.
Stark keeping moving, preventing Hawkins from controlling successfully.

That's five minutes gone in the round.
Stark trying to control the position.
Hawkins won't allow Stark to sweep him here.
The ref warns both fighters not to hold the cage as they work up against the meshing.
Hawkins wants to pass the guard but Stark is keeping the position.
Hawkins is intent on slowing down the pace of the fight, simply looking to control.
Hawkins tries to free his leg and advance position but Stark is retaining full guard.
Stark working a defensive guard here.
Stark keeping moving, preventing Hawkins from controlling successfully.
Stark throwing his legs up looking for a triangle.

That's six minutes gone in the round.
Hawkins trying to pass the guard but can't manage it just yet.
Stark is working an open guard here, looking to improve his position. No doubt that will leave him open to counters but at least he's being more offensive.
Stark keeping moving, preventing Hawkins from controlling successfully.
Stark looking to control.
Hawkins trying to control the position from guard on top but Stark is wriggling around, looking for whatever he can.
Hawkins trying to pass the guard but can't manage it just yet.
Stark is looking for a triangle but Hawkins pushes his legs off easily.

That's seven minutes gone in the round.
Stark has an active guard here but Hawkins has managed to pass into half guard.
Hawkins is nestled in close to Stark, controlling him well. He's worked in a nice elbow to the side of the head as well, for good measure.
Well, if Hawkins is going to just lie there, perhaps we should talk about what we're having for dinner tonight
I'm having a ham and pineapple pizza
Yum. Can't wait.
Hawkins takes advantage of the dominant position to land a couple of big hammer fists.
Hawkins trying to mount his opponent but Stark defends it.
Hawkins thumps the canvas. Not on purpose obviously - he just missed Stark's head.
Stark is looking to get back to full guard here but Hawkins has managed to pass to side control instead.
Hawkins content to control the pace. The referee will try and keep them active though.

That's eight minutes gone in the round.
Stark is not content to let Hawkins control the position.
Stark is looking to regain half guard here but Hawkins keeps moving and retains side control.
Hawkins happy to just control the position for now.
Stark tries to improve position but can't.
You can see the frustration on Stark's face, being in this tough position on the bottom.
This is a great period of action - very entertaining stuff!
Hawkins scores with punches from side control.

That's nine minutes gone in the round.
Hawkins grinds an elbow into Stark's temple.
Stark manages to land a sweep and he's now on top! Lovely Jiu Jitsu!
Hawkins makes his way to full guard. A much better position for Hawkins.
Stark trying to control the position from guard on top but Hawkins is wriggling around, looking for whatever he can.
Hawkins wants to sweep here but Stark controlling him for the moment.
Hawkins trying to keep a closed guard but Stark is proving a slippery customer.
As the round comes to an end the crowd are showing their appreciation for a great round of action.
Hawkins wants to sweep but no luck.
Stark prevents Hawkins from getting back to his feet.
And thats the end of the round the fighters go back to their corners.
Jonathan Hawkins dominated that round.
The fighters' corners scream their final instructions, as the referee calls time. Here we go, back to the action!

Hawkins throws a hard body shot but it just misses.
Hawkins needs to keep his hands up - Stark had a free shot at his head there.
Hawkins looks to score with a jab to the body but Stark is just out of range.
Stark ducks under a wild hook from Hawkins.
Stark misses with a body punch
and Hawkins counters with a stiff right hand.
Hawkins lands a really nice looking cross but Stark seems unphased.
Stark is the aggressor but that punch slipped nicely by Hawkins.
Hawkins connects with a lovely right hand, straight down the pipe.
A jab from Hawkins misses.
Stark keeping a good distance there, avoiding the body shot.
Hawkins closes the distance and after a bit of a stuggle, scores a takedown into Stark's guard.
Stark keeping full guard, as Hawkins tries to pass.
Hawkins postures up to throw the ground and pound strikes but they don't connect.
That's one minute gone in the round.
Stark managing to control the position.
Stark has an active guard here but Hawkins has managed to pass into half guard.
Stark trying to control from the bottom.
Hawkins seems very keen to just sit and control from half guard but Stark does not like that idea so much and is remaining active off his back.
Hawkins is looking to advance position but Stark won't allow it.
Hawkins wants to lay and pray for a moment but Stark keeps working.
Stark avoiding damage under a succession of punches from Hawkins.
Hawkins prevents Stark from improving his position.
That's two minutes gone in the round.
Hawkins tries to pass the half guard into mount. Stark knows what he's doing though and prevents the attempt.
Stark wants to improve his position but Hawkins is controlling well.
The two fighters exchange a few words. I couldn't hear what they were saying but maybe it's more fun if you make it up yourself. Hawkins connects with a nice short shot to Stark's temple.
Stark is looking to regain full guard. Not this time though.
Hawkins wants to free his trapped foot but Stark is holding on for dear life with his legs.
Stark taking some punishment here, with Hawkins in his half guard.
Hawkins is keeping good posture, landing some ground and pound.
Wooooo! Give it up for these two warriors! They are putting on a show!
Hawkins wants to pass the guard but Stark is defending well.
That's three minutes gone in the round.
Stark looking for submissions from an awkward position here.
Neither fighter is being very active at the moment, with Hawkins in particular looking to stall.
Stark wants to get back to full guard.
Hawkins trying to control the action but Stark is working from the bottom.
Ground and pound from Hawkins.
Stark wants to improve his position but Hawkins is controlling well.
Hawkins is keeping good posture, landing some ground and pound.
Hawkins is keen to just control but Stark is a slippery customer.
Stark is trying to control but can't.
That's four minutes gone in the round.
Hawkins winds up and cracks Stark with a swinging punch to the side of the head.
Hawkins is stalling here. Stark is in no mood to hang around though. He's locked up a kimura from the bottom! Hawkins seems to be keeping calm but he's forced to roll out of the hold and Stark has ended up in side control on the top. Nice work.
Jonathan Hawkins overall seems to be getting the better of the ground position in the fight so far.
Stark trying to control the position but Hawkins is working away.
Hawkins is looking for a sweep.
Hawkins is trying to get back to half guard. He's pushing on Stark's leg. He's managed it. Nice work.
The crowd cheering loudly, showing their appreciation for the quality fight we're seeing here.
Hawkins wants to improve his position but Stark is controlling well.
Hawkins is refusing to be controlled, as Stark sits in half guard.
Hawkins is looking to control Stark's leg but it's slowly edging free. Can Hawkins avoid being mounted?
That's five minutes gone in the round.
Hawkins wants to improve his position but Stark is controlling well.
Hawkins is refusing to be controlled, as Stark sits in half guard.
We must be close to a standup if these guys don't pick up the pace.
Stark is trying a forearm choke
I don't think that's going to do much at this level of the game.
Stark is looking for an arm triangle, whilst trying to pass to side control. Hawkins doesn't seem that keen to cooperate though. No luck this time Stark.
Hawkins wants to get back to full guard.
That's six minutes gone in the round.
Hawkins is working hard here to advance position.
Stark frees up his trapped foot and advances to mount.
Hawkins is desperately trying to get back to half guard.
Stark tries to control but Hawkins wriggling away.
That's seven minutes gone in the round.
Stark manages to capitalize on a mistake by Hawkins to take his back!
Hawkins tries to escape the position - he's now mounted. Is that better or worse? Hard to tell!
Hawkins is squirming around, avoiding Stark's attempts to control the action.
Hawkins working to try and regain half guard.
Hawkins is squirming around, avoiding Stark's attempts to control the action.
Stark is in a good position here but he's just trying to control... And he's not even managing to do that successfully.
Hawkins regains half guard.
That's eight minutes gone in the round.
Stark trying to mount his opponent but Hawkins defends it.
Stark prevents Hawkins from improving his position.
Hawkins works his way to full guard. Good work.
Hawkins is trying to control the position but Stark postures up.
Hawkins looking for a sweep. Not yet Hawkins, not yet.
Stark wants to pass the guard but Hawkins is keeping the position.
Hawkins lands a beautiful switch and he's in full mount! That could spell trouble for Stark!
The crowd cheering loudly, showing their appreciation for the quality fight we're seeing here.
A nice elbow there by Hawkins.
That's nine minutes gone in the round.
Hawkins lands a nice shot to the head.
Hawkins looking to control but Stark is working nicely, looking to advance position himself.
Stark sneaks a leg back under and regains half guard and is working straight away to try and get back to guard. He hasn't managed just yet though.
Hawkins thumps the canvas. Not on purpose obviously - he just missed Stark's head.
Hawkins seems very keen to just sit and control from half guard but Stark does not like that idea so much and is remaining active off his back.
Hawkins works his way into full mount!
Hawkins avoids the attempt from Stark to control.
As the round comes to an end the crowd are showing their appreciation for a great round of action.
Stark sneaks a leg under to get to half guard.
And thats the end of the round the fighters go back to their corners.
Jonathan Hawkins dominated that second round.
OK. That's time! The bell goes and we're back to the action. Ladies and gentlemen, this is the final round!

Hawkins displays good takedown defense there as he swats away a double leg from Stark.
Stark throws a body kick but he was well out of range there.
Stark just misses with a punch to the body.
Hawkins throws a jab to the body, straight down the pipe. Boom. That sent Stark stumbling backwards but he manages to regain his composure quickly.
Stark misses with a body shot.
Stark changes levels and looks for a double leg takedown. Hawkins tries to avoid it but Stark manages to keep hold of a leg and drag Hawkins to the ground. Hawkins escapes though and pops straight back up to his feet.
Hawkins lands with a good body shot.
Stark looks for a takedown here. Will he get it? Hawkins is fending him off so far but Stark persists. Nope, Hawkins circles away and we're back to standing.
Jonathan Hawkins has stuffed three takedown attempts in the round now. That's going to take a lot out of Gabriel Stark.
Stark takes a big intake of breath there - he's definitely tired.
Hawkins throws a hook but Stark blocks it.
Stark throws a body punch but Hawkins moves out of range.
Stark tries for a takedown but Hawkins circles away easily
and Hawkins cracks him with a counter punch right on the button.
That's one minute gone in the round.
Hawkins clobbers Stark with an overhand right that has the crowd gasping. That made a horrendous noise.
Jonathan Hawkins is winning the standup battle so far.
Hawkins looks to throw the jab but Stark is out of range.
Stark with a poor takedown
and Hawkins connects with a straight left hand counter down the middle.
Hawkins jabbing away but nothing is landing.
Hawkins misses with a body shot. Nice footwork from Stark.
Hawkins fakes high and swings low for a body shot but Stark manages to avoid it.
Stark swings for the body but Hawkins moves out of range.
Hawkins throws a body punch but Stark moves out of range.
Hawkins lands with a hook. Stark tried to avoid it but it clipped the top of his head.
Gabriel Stark seems to be the more aggressive standup fighter in this bout.
Hawkins misses with a shot to the body
and Stark makes him pay by landing a nice hook to the body before moving out of range.

Stark manages to get an easy takedown there - catching Hawkins on his heels. He'll look to pass Hawkins's guard now, I'm sure.
Hawkins trying to keep a closed guard but Stark is proving a slippery customer.
That's two minutes gone in the round.
Hawkins throws a couple of heel strikes.
Hawkins pulls Stark in close to prevent any damage.
The fans in attendance giving it up for the two fighters, who have really let it all hang out in the last minute or so!
Hawkins manages to land a sweep and now he's in mount on top!
Both fighters really going for it on the ground here!
Hawkins lands a big elbow.
Hawkins scoring with strikes but Stark is staying in there.
Hawkins scoring with strikes but Stark is staying in there.
Hawkins lands with some strikes.
Hawkins wants to control the pace but Stark is squirming around nicely.
That's three minutes gone in the round.
Stark really trying hard to get back to half guard here.
Hawkins wants to control the pace but Stark is squirming around nicely.
Hawkins controlling from mount.
Stark tries to lock up and control but Hawkins gives him a forearm to the face and pushes him away.
It looks like the ref is thinking about a standup.
Hawkins prevents Stark from getting the reversal.
Stark takes a big shot to the head but keeps on trying to improve his position.

Stark is rocked!
That's four minutes gone in the round.
Stark is writhing around trying to get back to his feet.
Hawkins cracks Stark with a nasty head shot there - the crowd let out an audible gasp there, as the noise reverberated around the arena.
Hawkins landing strikes, looking to finish!
Stark is still in real trouble! Can Hawkins finish him?
Hawkins lands a heavy elbow.
The fans in attendance giving it up for the two fighters, who have really let it all hang out in the last minute or so!
Hawkins connects with a couple of good shots from mount.
Hawkins connects with a bit shot that sees Stark covering up! More strikes from Hawkins and the referee jumps in to stop the fight! Hawkins is our winner by TKO!
Ladies and gentlemen, after 4:45 of round 3, we have a winner by way of TKO (Strikes). Jonathan Hawkins!
Jonathan Hawkins retains his bantamweight title!
A very excited looking Jonathan Hawkins made sure he remembered to thank all the fans both in the arena and on the internet. He said all the coolest people spend all day on MMA websites, which got a big reaction.
|
|
|
|
|
|
|
|
|
|
|
|
|
|
|
|
|
|
|
|
|
|
|
| S |
C
A |
G |
S |
C
B |
G |
|
S |
C |
G |
|
energy
A | B |
|
hype
A | B |
|
pop
A | B |
|
mgr
A | B |
|
FIGHT
RATING
100% |
|
|
|
|
|
|

