|
|
PBP Commentary |
Coming up we have a welterweight MMA rules bout between Marcus Baldridge (ranked 0 p4p, 0 weight class) and Tom Bob (ranked 0 p4p, 0 weight class). I can't wait for this one - let's get the fighter introductions out of the way and get this one started!
 |
|
 |
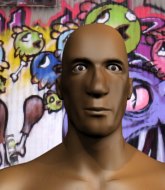
| 182 cm
26
180 lbs
4 - 1 - 0 |
|
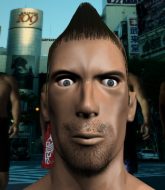
165 cm
26
180 lbs
5 - 1 - 0 |
Good wrestling
Basic striking
KO power |
|
Good takedowns
Counter striker
Solid chin |
|
| |
|
Ladies and gentlemen. This fight is 5 rounds, for the welterweight championship of the world!
Introducing the champion to my left, fighting out of the red corner.
With a record of
4 - 1 - 0, fighting out of Tokyo, Marcus Baldridge!
And introducing the challenger to my right, fighting out of the blue corner.
With a record of
5 - 1 - 0, fighting out of Tokyo, Tom Bob!
The judges for this bout are Shigeki Sano, Kenichi Hosakawa and Tatsuya Matsuyama.

The bell rings for round one and we are underway!
Bob keeping a good distance there, avoiding the body shot.
Baldridge throws a looping overhand right but Bob ducks down to avoid it.
Bob steps to the side to avoid the strikes from Baldridge.
Baldridge throws out a loose jab but Bob uses good head movement to avoid it.
Bob shoots and misses

and Baldridge counters with a driving takedown into guard. Nice work there by Baldridge.
Bob avoiding any damage from the ground and pound.
Baldridge in full guard, throwing the ground and pound. No damage this time.
Baldridge throws a big right hand that misses.
Baldridge stopping the sweep attempt from Bob.
The fighters are pressed up against the cage, both looking to find a bit of space to work.
Bob keeping full guard, as Baldridge tries to pass.
Bob utilising some decent striking defenses from the guard, preventing the ground and pound.

That's one minute gone in the round.
Baldridge connects with a couple of short punches.
Baldridge is looking to work some ground and pound but Bob has wrist control.
Bob utilising some decent striking defenses from the guard, preventing the ground and pound.
Baldridge stopping the sweep attempt from Bob.
Bob looking to control.
Baldridge with a flurry of punches that miss.
Baldridge wants to pass the guard but Bob is keeping the position.
Baldridge missing there with some ground and pound from the guard.
Baldridge is working Bob over from the guard. He should look to pass the guard and do a little more damage with these strikes.

That's two minutes gone in the round.
Bob trying to keep a closed guard but Baldridge is proving a slippery customer.
Baldridge throwing shots from guard but he's hitting more mat than opponent.
Baldridge throwing shots from guard but he's hitting more mat than opponent.
Baldridge will need to keep those long limbs tucked in whilst he's on the ground, to prevent any submissions.
Bob keeping moving, preventing Baldridge from controlling successfully.
The ref warns both fighters not to hold the cage as they work up against the meshing.
Baldridge is looking to work some ground and pound but Bob has wrist control.
Baldridge throws a strike but Bob rolls with it and manages to sweep. Now he's in guard on top.
Baldridge looking to sweep here. No luck so far.
Baldridge preventing the ground and pound from doing any damage.
The crowd are loving this. Great action here.
Bob postures up in Baldridge's guard and throws a big left but Baldridge blocks it.

That's three minutes gone in the round.
A real slowdown in the pace of the fight for a moment, as Baldridge holds on and takes a little breather.
Baldridge wants to stand and escape but Bob is having none of it.
Baldridge looking to control the pace of the fight rather than finish it.

Marcus Baldridge has forced the referee to step in and bring the fight back to the feet.
Bob moves out of range of the strikes.
Bob slips under a jab from Baldridge.
Baldridge swings and misses with a hook to the body.
Baldridge fakes high and swings low for a body shot but Bob manages to avoid it.

That's four minutes gone in the round.
Bob tries for a takedown but Baldridge sees it coming a mile off and avoids it easily.
Bob takes a body punch that cleary hurt but he's trying not to show any weakness.
A cross from Baldridge lands.
Baldridge misses with a body shot. Nice footwork from Bob.
Baldridge throws a hard body shot but it just misses.
Bob takes a jab on the nose there. A little bit of blood seems to be coming out. Hopefully that won't affect his breathing.
Bob uses good footwork to avoid the strikes from Baldridge.
Baldridge swings and misses with a hook to the body.
Marcus Baldridge seems to be the more aggressive standup fighter in this bout.
As the round comes to an end the crowd are showing their appreciation for a great round of action.
Bob uses good head movement to avoid the hook from Baldridge.
Baldridge misses the shot to the body.
And thats the end of the round the fighters go back to their corners.
Marcus Baldridge dominated that round.
That's time! Back to the action!

Baldridge throws a hook to the side of Bob's head but Bob sees it coming and ducks under it beautifully.
Baldridge loads up on a big right hand but Bob slips the punch.
Baldridge swings and misses with a hook to the body.
Baldridge looks to score with a jab to the body but Bob is just out of range.
Bob gets caught napping as Baldridge dives in and scores a takedown. Bob manages to retain guard.
Baldridge postures up to throw the ground and pound strikes but they don't connect.
Baldridge throws a big right hand that misses.
Bob is working an open guard here, looking to improve his position. No doubt that will leave him open to counters but at least he's being more offensive.
Baldridge throwing elbows and punches but not connecting, as Bob works some decent striking defense from the bottom.
Baldridge loading up with the ground and pound but he's missing more than he's landing in this flurry.
Bob can't do much from the bottom at the moment, as Baldridge controls the pace.
That's one minute gone in the round.
Baldridge postures up in Bob's guard and throws a big left but Bob blocks it.
Baldridge postures up in Bob's guard and throws a big left but Bob blocks it.
Baldridge is looking to work some ground and pound but Bob has wrist control.
Baldridge content to strike from guard, landing some decent shots.
Baldridge pressing down on his opponent's thigh, looking to pass guard. Bob is keeping the position for now.
Bob trying to control the position.
Marcus Baldridge overall seems to be getting the better of the ground position in the fight so far.
Baldridge throws a strike but Bob rolls with it and manages to sweep. Now he's in guard on top.
Baldridge looking for a sweep. Not yet Baldridge, not yet.
That's two minutes gone in the round.
Baldridge is pulling down on Bob's head. It's preventing any offense from Bob, at least for the moment.
The ref stands the fighters back up. Marcus Baldridge wasn't doing enough on the ground.
Bob keeping his hands up high there, blocking the jab from Baldridge.
Baldridge throws a hook to the body but it doesn't connect.
Nice defenses there by Bob.
Baldridge throws a hard body shot but it just misses.
That's three minutes gone in the round.
Baldridge throws a hard body shot but it just misses.
Baldridge misses with a wild body shot.
Bob keeping a good distance there, avoiding the body shot.
Bob shoots in but doesn't get the takedown
and Baldridge counters with a stiff right hand.
Baldridge jabbing away but nothing is landing.
Jab by Baldridge.
Baldridge leaves Bob with his face pressed against the mat as he sprawls beautifully, defending against a solid takedown attempt.
Tom Bob is looking to throw some combinations by the looks of things.
A big right from Baldridge misses.
Baldridge scores with a nice takedown into half guard. Let's see what he's got on the ground.
That's four minutes gone in the round.
Baldridge is trying to control the action in half guard but Bob is working away on the bottom, looking perhaps to get back to full guard.
Baldridge with the ground and pound but Bob uses the opportunity to regain guard.
Baldridge trying to land body shots but he keeps hitting the mat.
Baldridge in full guard, throwing the ground and pound. No damage this time.
Baldridge trying to control but Bob is working from the bottom.
This has been an exciting period of action!
Baldridge postures up to throw the ground and pound strikes but they don't connect.
As the round comes to an end the crowd are showing their appreciation for a great round of action.
Bob seems keen to control Baldridge's posture.
Baldridge in full guard, throwing the ground and pound. No damage this time.
And thats the end of the round the fighters go back to their corners.
Marcus Baldridge dominated that second round.
The referee calls time. The cornermen exit stage left and we're back to business.

Bob slips a jab from Baldridge.
Bob keeping his hands up high there, blocking the jab from Baldridge.
Baldridge throws a hook to the body but it doesn't connect.
Baldridge missing with a left hand there. Bob was out of range so wasted energy throwing that one.
A looping hook to the body misses from Baldridge. Bob does a little dance to reset his feet.
Baldridge waving his hands out in front of him, looking to distract Bob.
Baldridge throws the overhand right but ducks down into a quick takedown attempt. Bob was covering up waiting for the punch and Baldridge finishes the takedown easily into guard.
Bob preventing the ground and pound from doing any damage.
Baldridge pressing down on his opponent's thigh, looking to pass guard. Bob is keeping the position for now.
That's one minute gone in the round.
Bob utilising some decent striking defenses from the guard, preventing the ground and pound.
Baldridge trying to control the position from guard on top but Bob is wriggling around, looking for whatever he can.
Baldridge missing there with some ground and pound from the guard.
Baldridge working in close now, lands a nice elbow to the side of Bob's head.
Baldridge postures up in Bob's guard and throws a big left but Bob blocks it.
Baldridge chips away with some ground and pound.
Bob looking for a sweep. Not yet Bob, not yet.
Bob not looking particularly offensive just at the moment.
Baldridge is really dominating this fight. Is there anything that Bob can do to turn this around?
Baldridge connects with a couple of short punches.
That's two minutes gone in the round.
Baldridge working some ground and pound from guard but it's not doing any damage.

Bob looking for submissions off his back, moving his hips, looking for an opening.
Baldridge slows down the pace of the fight, as he sits in guard.
Baldridge trying to land body shots but he keeps hitting the mat.
Bob working the defensive guard well to avoid strikes from Baldridge.
Baldridge tries to free his leg and advance position but Bob is retaining full guard.
This is a great period of action - very entertaining stuff!
Baldridge wants to control from the top but Bob keeps moving.
Baldridge working some ground and pound from guard but it's not doing any damage.
That's three minutes gone in the round.
Baldridge stands up and looks to throw the legs aside to pass to side control. Bob swivels though and keeps the full guard.
Baldridge trying to control the position from guard on top but Bob is wriggling around, looking for whatever he can.
Baldridge with a flurry of punches that miss.
Baldridge stands up and looks to throw the legs aside to pass to side control. Bob swivels though and keeps the full guard.
Bob avoiding any damage from the ground and pound.
Bob avoiding any damage from the ground and pound.
Baldridge is sitting in guard, working some ground and pound.
That's four minutes gone in the round.
Bob not looking particularly offensive just at the moment.
Baldridge wants to stand but Bob is controlling his posture from full guard.
Baldridge postures up and scores with a shot to the body and a follow up elbow to the head.
Baldridge trying to control but Bob is working from the bottom.
Baldridge pushing down on Bob's thigh, trying to pass to half guard. He's managed it... Nice work.
Baldridge is trying to control the action in half guard but Bob is working away on the bottom, looking perhaps to get back to full guard.
The crowd applaud the fighters efforts here as the round comes to an end.
Baldridge passes to side control.
Bob sneaks a leg under to get back to half guard.
And thats the end of the round the fighters go back to their corners.
Marcus Baldridge clearly takes that round.
That's time! Back to the action!

A telegraphed right hand from Baldridge misses the target.
Bob gets his takedown attempt stuffed easily
and Baldridge cracks him with a counter punch right on the button.
Baldridge takes a swing at Bob's ribcage but misses.
Baldridge takes a swing at Bob's ribcage but misses.
Baldridge closes the distance and scores a nice trip takedown into half guard. Bob did well to prevent Baldridge getting side control.
Baldridge sitting in half guard, looking to land shots. Bob defending well though.
Bob wants to improve his position but Baldridge is controlling well.
Nice strikes from Baldridge there.
Baldridge sitting in half guard, looking to land shots. Bob defending well though.
That's one minute gone in the round.
Bob wants to control but Baldridge is keeping busy and won't allow it.
Baldridge is looking to stall here but Bob recovers full guard.
Baldridge throwing strikes but missing.
Baldridge chips away with some ground and pound.
Baldridge with a flurry of punches that miss.
Baldridge pressing down on his opponent's thigh, looking to pass guard. Bob is keeping the position for now.
Baldridge throws a big right hand that misses.
That's two minutes gone in the round.
Baldridge working some ground and pound from guard but it's not doing any damage.
Baldridge working some ground and pound from guard but it's not doing any damage.
Baldridge throws a big right hand that misses.
Bob utilising some decent striking defenses from the guard, preventing the ground and pound.
Baldridge throwing strikes but missing.
Baldridge throwing strikes but missing.
Bob utilising some decent striking defenses from the guard, preventing the ground and pound.
Baldridge postures up to throw the ground and pound strikes but they don't connect.
That's three minutes gone in the round.
Bob working the defensive guard well to avoid strikes from Baldridge.
Baldridge is working Bob over from the guard. He should look to pass the guard and do a little more damage with these strikes.
Baldridge trying to pass the guard but can't manage it just yet.
Bob avoiding any damage from the ground and pound.
Baldridge throwing elbows and punches but not connecting, as Bob works some decent striking defense from the bottom.
Baldridge throwing elbows and punches but not connecting, as Bob works some decent striking defense from the bottom.
Baldridge distracts Bob with his right hand and drops a big elbow with his other arm.
Baldridge trying to land body shots but he keeps hitting the mat.
Baldridge stopping the sweep attempt from Bob.
Baldridge throwing strikes but missing.
That's four minutes gone in the round.
Baldridge pressing down on his opponent's thigh, looking to pass guard. Bob is keeping the position for now.
Bob keeping moving, preventing Baldridge from controlling successfully.
Baldridge postures up.
Baldridge wants to control from the top but Bob keeps moving.
The crowd applaud the fighters efforts here as the round comes to an end.
Baldridge throws an elbow that misses. Bob uses the momentum to reverse the position. He's now in Baldridge's guard. Nice move by Bob!
And thats the end of the round the fighters go back to their corners.
Marcus Baldridge had his way with Tom Bob in that round.
That's time! Back to the action! This is the final round!

Bob moves out of range as Baldridge strikes.
Baldridge shoots in for a takedown from distance. He catches Bob napping and manages to drive through into side control!
Baldridge working the strikes but Bob uses the opportunity to regain half guard.
Baldridge wants to lay and pray for a moment but Bob keeps working.
Baldridge thumps the canvas. Not on purpose obviously - he just missed Bob's head.
Baldridge with the ground and pound but Bob uses the opportunity to regain guard.
Bob has momentary wrist control but Baldridge slips an elbow through the middle.
Baldridge wants to pass the guard but Bob is keeping the position.
Bob is trying to control the position from the bottom.
That's one minute gone in the round.
Baldridge controlling from the top position.
Baldridge postures up in Bob's guard and throws a big left but Bob blocks it.
Baldridge with a nice head shot there.
Baldridge throws a big right hand that misses.
Bob working the defensive guard well to avoid strikes from Baldridge.
Bob manages to sweep nicely, so he's now on top. Baldridge manages to get himself to full guard.
That's two minutes gone in the round.
Bob postures up in Baldridge's guard and throws a big left but Baldridge blocks it.
A big thud reverberates around the arena there as Bob accidentally thumps the mat. Hopefully he's not broken his hand.

Baldridge has his feet on Bob's hips. He pushes off and gets to his feet. Nice work.
Baldridge misses with a body shot. Nice footwork from Bob.
Bob ducks under an overhand right and circles away with a smile on his face.
Baldridge throws a hook to the body but it doesn't connect.
Bob moves forwards but Baldridge connects with a nice, crisp jab.
Baldridge misses with a looping right.
Bob shoots in for a takedown. "Ole!" shouts Baldridge as he jumps to the side.
Marcus Baldridge is fighting for a decision here - he's started to take the cautious approach.
That's three minutes gone in the round.
Bob uses some good footwork to avoid the body shot by Baldridge.
Baldridge looks to score with a jab to the body but Bob is just out of range.
Bob shoots and misses
enabling Baldridge to counter with a crisp jab.
Baldridge throws a big shot that misses.
Baldridge throws the left hand but Bob avoids the punch easily.
Baldridge throws a jab when Bob was well out of range.
Baldridge cracks a nice hook into Bob's ribs.
Baldridge is using his reach advantage well here, landing the more effective single shots from range.
Baldridge looks to land a left hand but Bob moved out of range nicely.
That's four minutes gone in the round.
Baldridge looks to score with a jab to the body but Bob is just out of range.
Bob uses some good footwork to avoid the body shot by Baldridge.
Bob will need to close the distance a bit before he attacks - that leg kick was thrown from too far away.
Baldridge works Bob's body with a nice hook.
Baldridge lands a straight punch to the body, keeping Bob at a distance.
Bob looks for a takedown here. Will he get it? Baldridge is fending him off so far but Bob persists. Nope, Baldridge circles away and we're back to standing.
Marcus Baldridge has stuffed three takedown attempts in the round now. That's going to take a lot out of Tom Bob.
Baldridge throws a hook to the body but it doesn't connect.
The crowd applaud the fighters efforts here as the round comes to an end.

Bob shoots in from a long way out. He's driving through with the takedown attempt and he eventually gets it, landing in Baldridge's guard.
Tom Bob has stepped it up - he knows he needs a finish here!
Baldridge working the defensive guard well to avoid strikes from Bob.
There's a bit of a scramble here and now Baldridge is on top in guard.
And that's the end of the fight!
Marcus Baldridge showed his dominance in that final round.
Well Baldridge has outscored his opponent in every aspect of the fight today. Only a scarily incompetent judge or two will keep him from a well deserved win... Over to the ring announcer for the scorecards.
Ladies and gentlemen, after 5 rounds of action, we go to the scorecards for a decision.
Judge Shigeki Sano scores the fight 50:45
Judge Kenichi Hosakawa scores the fight 50:45
Judge Tatsuya Matsuyama scores the fight 50:45
In favor of your winner, by unanimous decision... Marcus Baldridge!
Marcus Baldridge retains his welterweight title!
An out of breath Marcus Baldridge thanked his loyal fans in his post fight interview, giving them credit for his success over the course of his career.
|
|
|
|
|
|
|
|
|
|
|
|
|
|
|
|
|
|
|
|
|
|
|
| S |
C
A |
G |
S |
C
B |
G |
|
S |
C |
G |
|
energy
A | B |
|
hype
A | B |
|
pop
A | B |
|
mgr
A | B |
|
FIGHT
RATING
68% |
|
|
|
|
|
|

