|
|
PBP Commentary |
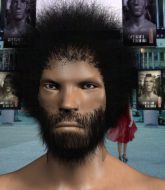
Coming up we have a bantamweight MMA rules bout between Top Dog (ranked 0 p4p, 0 weight class) and Nori Fukyomoma (ranked 0 p4p, 0 weight class). Fukyomoma is bouncing up and down as he enters the arena, backed by Kung Fu Fighting, Carl Douglas. Nori Fukyomoma has the better chin. Will he look to stand and bang today?
 |
|
 |
| 165 cm
19
143 lbs
0 - 0 - 0 |
|
170 cm
22
139 lbs
2 - 4 - 0 |
BJJ Blue Belt
Brawler
Cardio machine |
|
BJJ Blue Belt
Counter striker
Intelligent |
|
| |
|
Ladies and gentlemen. This fight is 3 rounds, in the bantamweight division.
Introducing the fighter to my left, fighting out of the red corner.
With a record of
0 - 0 - 0, fighting out of Tokyo, Top Dog!
And introducing the fighter to my right, fighting out of the blue corner.
With a record of
2 - 4 - 0, fighting out of Tokyo, Nori Fukyomoma!
The judges for this bout are Yuuki Gou, Ren Mimura and Yukihiro Yamamoto.

The bell rings for round one and we are underway!
Dog wants to clinch.
Fukyomoma fails miserably with a takedown attempt.

A momentary lapse in concentration from Fukyomoma enables Dog to shoot in and score with a neat double leg. Fukyomoma manages to secure a closed guard as the fighters hit the mat.
Dog trying to control but Fukyomoma is working from the bottom.
Dog loading up with the ground and pound but he's missing more than he's landing in this flurry.

Fukyomoma has a loose triangle. He'll be looking to tighten that up but Dog can see exactly what he's planning and manages to posture up and free himself.
Fukyomoma is looking for a triangle but Dog pushes his legs off easily.

That's one minute gone in the round.
Fukyomoma working a defensive guard here.
Dog is intent on slowing down the pace of the fight, simply looking to control.
Fukyomoma has his foot on Dog's thigh. He's trying to push off and get in position for a triangle, I think. Dog works his way back into a safe position though.
Dog looking to control the position here, rather than advance.
Dog throws a big right hand that misses.
Dog sitting in guard here, content to control.

Top Dog has forced the referee to step in and bring the fight back to the feet.
Dog shoots in for a takedown but Fukyomoma shows good takedown defense.
Dog misses with a takedown attempt - Fukyomoma sprawls well and throws a nice strike on the way out which just misses.

That's two minutes gone in the round.
Dog has his takedown stuffed
and Fukyomoma counters with a lovely straight right hand!
That's three failed takedown attempts in the round for Top Dog. That's going to take a lot out of him.
Dog gets off balance looking for a body kick
and Fukyomoma counters with a lovely straight right hand!
Dog lands a front kick.
Fukyomoma tries to clinch but Dog is having none of it.
Dog tries a head kick but it misses.
Fukyomoma darts in and out, connecting with a jab.
A punch combination from Dog misses.
Fukyomoma leaves Dog with his face pressed against the mat as he sprawls beautifully, defending against a solid takedown attempt.
Fukyomoma stuffs a takedown. It's all about dictating where the fight takes place and Fukyomoma wants it to stay on the feet.

That's three minutes gone in the round.
Dog shoots in with a takedown attempt and he has Fukyomoma pinned against the cage. Fukyomoma gets the underhooks and manages to circle away.
Dog shoots in for a takedown. "I don't think so" says Fukyomoma as he avoids it easily.
Dog tries to clinch
and Fukyomoma counters with a three punch combo that has Dog backing up. Dog nods at Fukyomoma to acknowledge the strikes.
No luck for Dog with that takedown attempt.
A head kick by Dog misses
and Fukyomoma counters with a two punch combo.
Fukyomoma shoots in looking for a takedown but Dog manages to keep the fight standing, pushing Fukyomoma's face into the canvas for good measure before circling away.
Dog shoots in but doesn't get the takedown
and Fukyomoma counters with a series of strikes. Dog will be more careful next time no doubt.

That's four minutes gone in the round.
Fukyomoma misses with a wild combination.
Dog looks frustrated there after his takedown attempt is stuffed easily.
Dog closes the distance and gets a trip takedown into side control. Fukyomoma quickly recovers to half guard.
Fukyomoma is looking to sinch up a guillotine here but Dog pulls his head out easily.
Dog perhaps working for something from half guard, or maybe not. It looks like he's just sitting there.
Fukyomoma tries to kick Dog off but Dog keeps his base steady and stays in half guard.
As the round comes to an end the crowd are showing their appreciation for a great round of action.
Dog moves into full mount! Fukyomoma won't be happy about that!
This has been an exciting period of action!
Dog throws an elbow from mount that misses. Lucky escape for Fukyomoma because Dog loaded up on that one.
And thats the end of the round the fighters go back to their corners.
Top Dog dominated that round.
The minute break is over - no more time for sponges and pep talks - back to the action!

Dog throws a head kick that misses.
Dog rushes forward with a series of wild hooks but Fukyomoma moves out of range and avoids them all easily.

Dog darts in and clinches Fukyomoma up against the cage.
Fukyomoma is trying to force a seperation but Dog has the dominant position.
Fukyomoma wants to push off and get back to the center of the mat but Dog has him pressed against the cage.

Dog escapes the clinch and we're back to striking.
Dog turns his hip over beautifully as he lands a nice leg kick.
Fukyomoma throws out a leg kick but Dog moves out of range and Fukyomoma only half commits.
Fukyomoma on the wrong end of an overhand right that came out of nowhere.
Dog forces Fukyomoma back against the cage and clinches.
Dog has dropped down and is working for a takedown. Fukyomoma is trying to keep an underhook but Dog manages to get the takedown into half guard.
We've seen a great period of action over the last minute or so - credit to both fighters for going all out!
Fukyomoma is staying active underneath Dog, who seems content to just control the action from this position.
Fukyomoma is trying to defend against the ground and pound but Dog scores with a couple of nice shots.
That's one minute gone in the round.
Fukyomoma is looking to sinch up a guillotine here but Dog pulls his head out easily.
Fukyomoma wants to get back to full guard.
Fukyomoma wants to control but Dog is keeping busy and won't allow it.
The ref warns both fighters not to hold the cage as they work up against the meshing.
Fukyomoma is looking to improve his position.
Top Dog overall seems to be getting the better of the ground position in the fight so far.
Fukyomoma is breathing heavily.
Fukyomoma trying to control from the bottom.
Dog stops Fukyomoma from getting back to his feet.
The referee is asking the fighters to pick up the pace.

Nori Fukyomoma has forced the referee to step in and restart the fight on the feet.
Dog shoots in but no luck this time.
Dog misses with a half-hearted attempt at a head kick.
Dog gets a double leg takedown into Fukyomoma's guard.
That's two minutes gone in the round.
Fukyomoma is trying to control the position from the bottom.

Dog decides to stand up and beckons his opponent to follow.
Top Dog is looking to throw some combinations by the looks of things.
Dog throws a left and a right that both miss

and Fukyomoma counters by clinching up.
The crowd are loving this. Great action here.
Fukyomoma is trying to push Dog away but Dog has him pressed against the cage, so he's going nowhere.
Dog is trying to slow down the pace in the clinch, to catch his breath.
Fukyomoma wants to break free. God knows he wants to breaaaak freeee.
Dog breaks the clinch and we return to the middle of the mat.
Well, he's not going to score with shots like that. A lazy body kick attempt from Dog.
Fukyomoma keeps the fight on the outside.
Fukyomoma has his front leg slapped to the side - a nice low kick landing there from Dog.
That's three minutes gone in the round.
Fukyomoma is looking to clinch but Dog is avoiding it.
Dog clinches up with Fukyomoma and pushes him back against the cage.
Fukyomoma is defending well against a takedown attempt.
Dog breaks the clinch and we return to the middle of the mat.
Fukyomoma swats away the attempt to clinch by Dog.
Dog throws a head kick that misses and slips in the process. He scrambles back to his feet and the fighters circle.
Nice sprawl there from Fukyomoma as Dog shoots in.
That's three failed takedown attempts in the round for Top Dog. That's going to take a lot out of him.
Fukyomoma circles away from the clinch attempt
and Fukyomoma counters with a three punch combo that has Dog backing up. Dog nods at Fukyomoma to acknowledge the strikes.
That's four minutes gone in the round.
Dog fails to land the takedown.
Dog feints and as Fukyomoma raises his hands in defense, Dog changes levels and drives through with a takedown into guard.
Dog trying to control but Fukyomoma is working from the bottom.
Fukyomoma looking for a triangle here. Dog is fighting it but it looks tight! Fukyomoma pulls the arm across and this one won't last much longer! Nope, Dog is tapping out - this one is all over!
Ladies and gentlemen, after 4:55 of round 2, we have a winner by way of Submission (Triangle Choke). Nori Fukyomoma!
Nori Fukyomoma managed to slip a mention for his sponsors, KrakHeaD Nutrition, into his post fight interview.
|
|
|
|
|
|
|
|
|
|
|
|
|
|
|
|
|
|
|
|
|
|
|
| S |
C
A |
G |
S |
C
B |
G |
|
S |
C |
G |
|
energy
A | B |
|
hype
A | B |
|
pop
A | B |
|
mgr
A | B |
|
FIGHT
RATING
27% |
|
|
|
|
|
|
