|
|
PBP Commentary |
Coming up we have a middleweight MMA rules bout between Mark Robbins (ranked 0 p4p, 0 weight class) and Nixon Red (ranked 0 p4p, 0 weight class). The atmosphere really building for this one as we go over to our ring announcer for the fighter introductions!
 |
|
 |
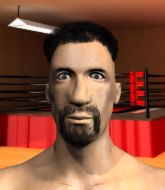
| 200 cm
28
190 lbs
7 - 7 - 0 |
|
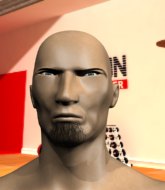
190 cm
25
190 lbs
10 - 8 - 0 |
Good wrestling
World class boxer
Insanely flexible |
|
BJJ Purple Belt
Excellent MT
Granite chin |
|
| |
|
Ladies and gentlemen. This fight is 3 rounds, in the middleweight division.
Introducing the fighter to my left, fighting out of the red corner.
With a record of
7 - 7 - 0, fighting out of Helsinki, Mark Robbins!
And introducing the fighter to my right, fighting out of the blue corner.
With a record of
10 - 8 - 0, fighting out of Amsterdam, Nixon Red!
The judges for this bout are Tarja Halkonen, Johanna Lukiainen and Matti Vanhoillinen.

The bell rings for round one and we are underway!
Robbins lands a right hook to the body.
A slapping leg kick lands for Robbins.
Red keeps Robbins at a distance using the push kick.
Robbins throws a combination but it was largely blocked by Red.
The fighters circling - Red throws out the jab but it was never going to land.

Robbins pushes Red up against the cage in a clinch.
Robbins blocks an elbow strike.
Robbins avoiding damage as Red throws knees to the body.
Robbins lands a body punch - he's looking to wear down Red.
Robbins managing to block the knees to the body from Red.
Robbins working hard to break the clinch.
Robbins really does look like a pencil wearing a pair of gloves. Let's hope he has a gameplan to suit that ridiculous body shape.
Red scores a nice knee to the body.
Red trying to land knees to the body.
Robbins on the defensive, avoiding the knees to the body.
Robbins on the defensive, avoiding the knees to the body.
Red wants to break free. God knows he wants to breaaaak freeee.
Red missing with knees to the body.
Red wants to break the clinch but can't.
The crowd are loving this. Great action here.
Robbins managing to block the knees to the body from Red.

That's one minute gone in the round.
Red is looking to score with knees to the body. Maybe he'll change it up and go body then head. Robbins is defending well for now.
Red trying to control the position but instead, Robbins has worked for underhooks and has pushed Red into the cage.
A hook to the body from Robbins.
Robbins pushes Red back against the cage and lands a hook to the side of the head.
Robbins creates a bit of distance and throws an elbow that only just misses.
Red missing with knees to the body.
Red looking to stall.
Robbins lands with a left to the head.
A battle for position here, against the cage.
A right hook to the body lands for Robbins.
Red creates a bit of distance and throws an elbow that only just misses.
Red throws an elbow but it misses.
Red working hard to break the clinch.

Robbins breaks the clinch.

That's two minutes gone in the round.
The fighters circling - Red throws out the jab but it was never going to land.
Robbins has Red up against the cage in a clinch.
Red prevents a body shot from Robbins.
Robbins breaks from the clinch.
Red scores with a jab to the head.
Red throws a shot from downtown. Robbins moves away and avoids it.
Red shapes like he's going to throw a leg kick but settles back down.
Robbins throws a nice hook to the body that draws an oooh from the crowd.
This is a great period of action - very entertaining stuff!
Robbins ducks down and throws a hook to the body but Red moves away.
Robbins closes the distance and clinches.
Robbins lands a shot to the body.
Red tries to land a knee to the body but he is off balance and Robbins avoids it.
Red wants to push off and get back to the center of the mat but Robbins has him pressed against the cage.
Knees in the clinch landing for Red.
Red keeps control of Robbins as he tries to wriggle out of the double underhooks.
Robbins lands a body punch - he's looking to wear down Red.
Robbins is looking to score with knees to the body. Maybe he'll change it up and go body then head. Red is defending well for now.

That's three minutes gone in the round.
Robbins tried to land a shot to the body but connects with Red's elbow.
Robbins misses the knee to the body. Nice hip positioning from Red.
Robbins landing some nice looking knees to the body.
Robbins makes some space for himself and lands an uppercut.
Robbins tries to land a knee to the body but he is off balance and Red avoids it.
Robbins pushes off and circles away, back to the middle of the mat.
Red loads up on a big right hand but Robbins slips the punch.
Robbins staying out of range there.
Robbins keeping his hands up high there, blocking the jab from Red.
Robbins clinches with his opponent.
Robbins blocks a knee to the body. He'll have a nicely bruised forearm in the morning.
Robbins breaks the clinch and we return to the middle of the mat.
Robbins pushes Red up against the cage in a clinch.
Red misses with an elbow over the top.
Robbins lands a left hand that snaps the head of Red backwards.
Knees in the clinch landing for Robbins.

That's four minutes gone in the round.
Robbins breaks the clinch and we're back to striking at distance.
Robbins forces Red back against the cage and clinches.
The fans in attendance giving it up for the two fighters, who have really let it all hang out in the last minute or so!
Robbins makes some space for himself and lands an uppercut.
Red missing with knees to the body.
Red takes an elbow to the forehead.
Robbins managing to block the knees to the body from Red.
Robbins lands a damaging elbow.
Robbins tries to work over Red's body with a swooping hook but it only glances the target.
Robbins's corner calls for him to break the clinch, which he does.
Robbins moves into the clinch successfully.
Red tries to land knees in the clinch but Robbins avoids the damage to the body.
Red wants to push off and get back to the center of the mat but Robbins has him pressed against the cage.
Robbins goes for a body shot but it's blocked.
The crowd are going absolutely nuts as the round comes to an end - what a fantastic round of action!
Red utilising his Muay Thai to score with a knee to the body.
Robbins pushes off and fires off an elbow that misses, before clinching up again, against the cage.
Robbins tries to work over Red's body with a swooping hook but it only glances the target.
And thats the end of the round the fighters go back to their corners.
Mark Robbins dominated that round.
That's time! Back to the action!

Robbins clinches up with Red and pushes him back against the cage.
Robbins managing to block the knees to the body from Red.
With the fighters up against the cage, Robbins throws an elbow but misses.
Red is really struggling to land any decent head shots against his taller opponent.
Robbins misses with a hook to the ribs.
Robbins avoiding damage as Red throws knees to the body.
Red tries to land knees in the clinch but Robbins avoids the damage to the body.
Red is looking to score with knees to the body. Maybe he'll change it up and go body then head. Robbins is defending well for now.
Robbins keeps control of Red as he tries to wriggle out of the double underhooks.
Robbins pushes off and circles away, back to the middle of the mat.
Red checks a leg kick.
Red misses with a kick to the body
and Robbins makes him pay by landing a nice hook to the body before moving out of range.
Red takes a solid shot to the body. That one hurt him but he's trying not to show it.
Red fails to land with a series of punches.
Robbins fakes a head shot and lands one to the body.
Nixon Red is looking to throw some combinations by the looks of things.
Red misses with a head kick.
Robbins gets a clinch.
Red wants to push off and get back to the center of the mat but Robbins has him pressed against the cage.
Robbins lands on the inside with an uppercut.
That's one minute gone in the round.
A left hand lands to the body for Robbins.
A short left from Robbins.

Red escapes the clinch and we're back to striking.
Nice cross by Red.
Robbins rushes Red and pushes him back against the cage in a clinch.
Robbins's corner calls for him to break the clinch, which he does.
Robbins shuffles to his left behind two crisp jabs. Red eats them both and turns towards Robbins to reposition himself and eats a stinging right hand-left hook combo.
A left lands for Red.
Robbins has taken the fight to the clinch.
Robbins tries to work over Red's body with a swooping hook but it only glances the target.
Robbins misses with a punch to the body.
Red blocks an elbow strike.
Red tries to land a knee to the body but he is off balance and Robbins avoids it.
Both guys are working to get underhooks.
Robbins tries to land knees in the clinch but Red avoids the damage to the body.
Mark Robbins has scored more points in the clinch so far.
Red is trying to wear down his opponent with knees to the body.
That's two minutes gone in the round.
Red trying to land knees to the body.
Red avoids the elbow strike from Robbins, against the cage.
Red breaks the clinch and we return to the middle of the mat.
Wooooo! Give it up for these two warriors! They are putting on a show!
Robbins takes the fight into the clinch.
Robbins tries a shoulder strike but it doesn't do any damage.
Robbins scores with a hook to the body.
Red tries to land a knee to the body but he is off balance and Robbins avoids it.
Red avoids the elbow strike from Robbins, against the cage.
Red avoids a wild elbow strike from Robbins.
Red pushes off and circles away, back to the middle of the mat.
Robbins throws a nice inside leg kick.
Robbins moves into the clinch.
A short right from Robbins on the inside.
Red tries to land knees in the clinch but Robbins avoids the damage to the body.
Robbins keeps control of Red as he tries to wriggle out of the double underhooks.
A right hand to the body from Robbins.
That's three minutes gone in the round.
Red wants to break free. God knows he wants to breaaaak freeee.
Red breaks from the clinch.
Robbins rushes Red and presses him up against the cage.
Robbins avoiding damage as Red throws knees to the body.
Red wants to push off and get back to the center of the mat but Robbins has him pressed against the cage.
Kneeeeees! The crowd are calling for knees to the body. Robbins obliges.
Robbins missing with knees to the body.
Robbins manages to break the clinch.
Robbins moves into the clinch.
Red blocks a knee to the body. He'll have a nicely bruised forearm in the morning.
Robbins looks to throw an elbow but misses.
With the fighters clinched against the cage, Robbins creates a bit of distance for himself and scores with a nice uppercut.
Robbins avoiding damage as Red throws knees to the body.
Robbins escapes the clinch and we're back to striking.
Robbins gets a clinch.
Robbins manages to break the clinch.
Robbins takes an uppercut right on the button but keeps his composure.
That's four minutes gone in the round.
Robbins clinches up with Red and pushes him back against the cage.
We've seen a great period of action over the last minute or so - credit to both fighters for going all out!
Robbins breaks from the clinch.
Red throws a big shot that misses.
The fight moves into the clinch position.
Robbins pushes off and circles away, back to the middle of the mat.
Red scores with the left hand. Robbins knows he should have avoided that one.
Robbins instigates a clinch.
Robbins tries to throw a body punch but Red avoids it by throwing Robbins back against the cage.
Robbins escapes the clinch and we're back to striking.
Red misses with an attempted mid kick.
Red checks a low kick from Robbins.
The crowd are going absolutely nuts as the round comes to an end - what a fantastic round of action!
Robbins fakes high and swings low for a body shot but Red manages to avoid it.
Red throws a looping overhand right but Robbins ducks down to avoid it.
Red throws a hook to the side of Robbins's head but Robbins sees it coming and ducks under it beautifully.
Robbins lands a jab-cross combination.
And thats the end of the round the fighters go back to their corners.
Mark Robbins dominated that second round.
That's time! Robbins's corner gives him a slap on the ass as he gets ready to fight. This is the final round!

Robbins fails to land with a series of punches.
Robbins is looking to wear down Red with body shots, infact he's throwing more body shots than head shots at the moment.
Robbins avoids a kick to the body.
Red throws a right and a left that both miss.
Robbins closes the distance and clinches.
Red missing with knees to the body.
Red is looking to score with knees to the body. Maybe he'll change it up and go body then head. Robbins is defending well for now.
Red is trying to slow down the pace of the fight but Robbins is keeping busy.
Red misses the knee to the body. Nice hip positioning from Robbins.
Red trying to land knees to the body.
Red is trying to break free.
Robbins tries a body shot but Red blocks it.
Robbins looks to throw an elbow but misses.
Robbins wants to push off and get back to the center of the mat but Red has him pressed against the cage.
Robbins breaks from the clinch.
The fight moves into the clinch position.
Robbins can't break the clinch.
That's one minute gone in the round.
Robbins tries to throw a body punch but Red avoids it by throwing Robbins back against the cage.
Red trying to land knees to the body.
Robbins throws an elbow but it misses.
Red blocks a body shot from Robbins.
Red blocks an elbow strike from Robbins.
Red tries to land knees in the clinch but Robbins avoids the damage to the body.
Robbins blocks an elbow strike.
Robbins breaks the clinch and we return to the middle of the mat.
Robbins swats away the attempt to clinch by Red.
A big left from Red misses.
Robbins moves into the clinch.
Red breaks the clinch.
Robbins moves into the clinch.
Red prevents a body shot from Robbins.
Robbins pushes off and fires off an elbow that misses, before clinching up again, against the cage.
That's two minutes gone in the round.
A right hook to the body lands for Robbins.
Robbins throws an elbow but it's blocked.
Red can't break the clinch.
Red missing with knees to the body.
Robbins lands a glancing elbow in the clinch.
Red blocks the elbow strike.
Red wants to push off and get back to the center of the mat but Robbins has him pressed against the cage.
We've seen a great period of action over the last minute or so - credit to both fighters for going all out!
Robbins scores with an uppercut up the middle.
Robbins landing knees to the body. They look like they could hurt.
Robbins on the defensive, avoiding the knees to the body.
Red blocks an elbow strike.
With the two fighters working up against the cage, Red just misses with a elbow thrown towards Robbins's brow.
Robbins on the defensive, avoiding the knees to the body.
Robbins misses with a hook to the ribs.
Robbins tries a body shot but Red blocks it.
A short right hand to the side of the head by Robbins.
That's three minutes gone in the round.
Robbins pushes off and circles away, back to the middle of the mat.
Red doesn't manage to clinch there - Robbins circles away.
Red tries to bum rush Robbins with a series of wild strikes but Robbins uses good footwork to avoid the assault.
Red misses with a combination
and Robbins counters with a lovely shot to the body.
Red takes a big intake of breath there - he's definitely tired.
Robbins gets to the clinch - let's see what his plan is here.
Robbins tries a body shot but Red blocks it.
Red tries to land a knee to the body but he is off balance and Robbins avoids it.
Robbins lands a right hand that snaps the head of Red backwards.
Robbins breaks from the clinch.
Robbins throws a right and a left that both miss.
Robbins lands a head kick. Red smiles back at him and beckons him forward.
Red throws out a powerful jab.
Robbins throws a low kick but it's checked well by Red.
Robbins lands with a kick to the ribs.
Robbins clinches.
Mark Robbins is fighting for a decision here - he's started to take the cautious approach.
That's four minutes gone in the round.
Robbins managing to block the knees to the body from Red.
A hook to the body from Robbins.
Fantastic stuff here - a very entertaining period of action, which has drawn cheers from the crowd.
Red misses with a body punch.
Red tries to land a knee to the body but he is off balance and Robbins avoids it.
Red tries to circle away but Robbins has him pinned against the cage.
Robbins manages to break the clinch.
Mark Robbins is winning the standup battle so far.
Red fails with an attempt to clinch.
Robbins gets a clinch.
Robbins misses with an elbow over the top.
Robbins digs a right hand underneath Red's ribcage. Red let out a lung full of air as it connected.
Robbins avoiding damage as Red throws knees to the body.
As the round comes to an end the crowd are showing their appreciation for a great round of action.
Robbins keeps control of Red as he tries to wriggle out of the double underhooks.
Robbins creates a bit of distance and throws an elbow that only just misses.
Nixon Red has stepped it up - he knows he needs a finish here!
Red manages to break the clinch.
Robbins dips down and scores with a jab to the body.
And that's the end of the fight!
Mark Robbins showed his dominance in that final round.
Well Robbins has outscored his opponent in every aspect of the fight today. Only a scarily incompetent judge or two will keep him from a well deserved win... Over to the ring announcer for the scorecards.
Ladies and gentlemen, after 3 rounds of action, we go to the scorecards for a decision.
Judge Tarja Halkonen scores the fight 30:27
Judge Johanna Lukiainen scores the fight 30:27
Judge Matti Vanhoillinen scores the fight 30:27
In favor of your winner, by unanimous decision... Mark Robbins!
An out of breath and clearly excited Mark Robbins thanked Perkele! for their help and support (and free stuff they sent him).
|
|
|
|
|
|
|
|
|
|
|
|
|
|
|
|
|
|
|
|
|
|
|
| S |
C
A |
G |
S |
C
B |
G |
|
S |
C |
G |
|
energy
A | B |
|
hype
A | B |
|
pop
A | B |
|
mgr
A | B |
|
FIGHT
RATING
91% |
|
|
|
|
|
|

