|
|
PBP Commentary |
Coming up we have a heavyweight MMA rules bout between Hiroko Mayamoto (ranked 0 p4p, 0 weight class) and Eder Jones (ranked 0 p4p, 0 weight class). I can't wait for this one - let's get the fighter introductions out of the way and get this one started!
 |
|
 |
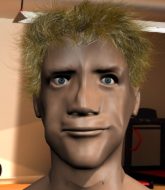
| 180 cm
22
220 lbs
2 - 3 - 0 |
|
198 cm
25
235 lbs
1 - 0 - 0 |
BJJ Blue Belt
Solid Muay Thai
Experienced |
|
BJJ Brown Belt
Counter striker
Determined |
|
| |
|
Ladies and gentlemen. This fight is 3 rounds, in the heavyweight division.
Introducing the fighter to my left, fighting out of the red corner.
With a record of
2 - 3 - 0, fighting out of Tokyo, Hiroko Mayamoto!
And introducing the fighter to my right, fighting out of the blue corner.
With a record of
1 - 0 - 0, fighting out of Tokyo, Eder Jones!
The judges for this bout are Shigeki Sano, Taro Takaoka and Ren Mimura.

The bell rings for round one and we are underway!
Mayamoto doesn't manage to clinch there - Jones circles away.
Mayamoto throws a hard body shot but it just misses.
Mayamoto tries to score a power double leg takedown but Jones sees that one coming and sprawls well. That will dishearten Mayamoto somewhat.
Jones fails with a takedown attempt.
A jab from Mayamoto misses.
Jones shoots in for a takedown but Mayamoto shows good takedown defense there and keeps this one on the feet.
Mayamoto fails with a takedown attempt from distance.
Mayamoto throws a hook to the body but it doesn't connect.
Mayamoto misses with a takedown attempt - Jones sprawls well and throws a nice strike on the way out which just misses.
That's three failed takedown attempts in the round for Hiroko Mayamoto. That's going to take a lot out of him.

That's one minute gone in the round.
Mayamoto tries to close the distance and clinch but Jones swats him to one side with an open hand palm strike and circles away.
Mayamoto shoots in for a takedown. He's persisting with it as Jones sprawls well. Jones wins this battle and keeps the fight standing. Mayamoto gets slowly back to his feet.
Jones shoots in looking for a double leg takedown. Mayamoto defends it nicely.
Hiroko Mayamoto seems to be the more aggressive standup fighter in this bout.
Mayamoto wants to clinch.

Mayamoto closes the distance and presses his opponent up against the cage.

That's two minutes gone in the round.
Jones wants to take the fight to the mat but Mayamoto manages to get underhooks and keep the fight in the clinch.
Jones is trying to work for a single leg takedown but Mayamoto pulls him back up using the underhooks.
Mayamoto stops a takedown attempt from Jones.
Jones blocks a knee to the body. He'll have a nicely bruised forearm in the morning.
Mayamoto putting his Muay Thai to good use. He has Jones in a tight clinch and is doing some damage with knees to the body.
Mayamoto working on landing some head shots here - that one got through nicely.

Mayamoto escapes the clinch and we're back to striking.
Mayamoto darts in trying to clinch

and Jones counters with a takedown into full mount! That could mean trouble for Mayamoto!
Wooooo! Give it up for these two warriors! They are putting on a show!

Jones is in full mount, looking to secure a guillotine but Mayamoto is surviving well by controlling Jones's body position as best he can.
Mayamoto tries to get back to half guard but can't.

That's three minutes gone in the round.
Mayamoto is bucking up trying to escape but Jones cracks him with another couple of good strikes.
Mayamoto tries to lock up and control but Jones gives him a forearm to the face and pushes him away.
Jones jumps to the side looking to secure the arm triangle
. Ooooh, that looks tight
Mayamoto is gargling but he's managed to escape! Nice work there by Mayamoto and Jones has given up the dominant position trying to land that submission.
Mayamoto can't do much from the bottom here.
Jones wants to work for a kimura but he's foiled early by Mayamoto, who protects the arm well.
Jones tries to advance to mount but can't.
Jones goes for an armbar here - this could be all over! But no, Mayamoto has escaped beautifully and is now on top in side control! Oh, that's unlucky for Jones but great work by Mayamoto.
Mayamoto knows he needs to get back to his feet asap. He's simply no match for Jones on the ground.

That's four minutes gone in the round.
The crowd cheering loudly, showing their appreciation for the quality fight we're seeing here.
Jones is pushing Mayamoto's head away, looking to escape. Mayamoto manages to hold on to the position though.
Jones is looking to get back to his feet here but Mayamoto is keeping cool and he's managed to take Jones's back.
Jones wants to get back to his feet.
And thats the end of the round the fighters go back to their corners.
Eder Jones dominated that round.
The corners get their ten second warning. Both fighters stand from their stools and stare eachother down, ready to get back to the action.

Jones shoots in looking for a double leg takedown. Mayamoto defends it nicely.
Mayamoto clinches up with Jones and pushes him back against the cage.
Jones goes for a takedown in the clinch but Mayamoto prevents it.
Jones drops to a knee looking for a takedown but Mayamoto gets the underhooks and prevents it.
Hiroko Mayamoto has stuffed three takedown attempts in the round now. That's going to take a lot out of Eder Jones.
A short right from Mayamoto on the inside.

Mayamoto gets control of Jones's arms and successfully pulls guard. Mayamoto will no doubt be looking for submissions off his back.
Jones postures up as if he's going to throw some strikes but drops back for an ankle! Mayamoto is in big trouble! He looks ready to tap! But no, he's escaped and dives on top of Jones, into his guard.
Mayamoto content to stall in guard here.
That's one minute gone in the round.
Mayamoto prevents Jones from getting back to his feet.
That's two minutes gone in the round.
Well. There's a bit of a lull in the action here and the crowd are starting to get restless.

Jones pushes Mayamoto off and scrambles back to his feet.
Mayamoto throws a combination but it was largely blocked by Jones.
Mayamoto is looking to clinch but Jones is avoiding it.
Hiroko Mayamoto is looking to throw some combinations by the looks of things.
Mayamoto shoots in for a takedown - he's clinched up with Jones but Jones pushes him off and we're back to square one.
Mayamoto looks to clinch
and Jones counters with a takedown into side control.
Jones looking for an arm triangle but it's way too loose to do anything.
Mayamoto might be looking to lock onto one of his opponent's long limbs for a submission, whilst we're on the ground.
Sloppy strikes there by Jones.
That's three minutes gone in the round.
Jones looking for an arm triangle but it's way too loose to do anything.
Jones goes for an armbar here - this could be all over! But no, Mayamoto has escaped beautifully and is now on top in side control! Oh, that's unlucky for Jones but great work by Mayamoto.
Jones is working hard to escape and get back to his feet. After a battle for position, Mayamoto asserts his dominance and retains side control.
Jones is using up a lot of energy trying to get back to his feet. Perhaps he should improve his position first.
That's four minutes gone in the round.
And thats the end of the round the fighters go back to their corners.
Eder Jones showed his class in that round. I'd imagine he'll take it on all the scorecards.
That's the end of the round. The referee orders the cornermen out of the cage so we can get back down to business. So, we enter the final round. Let's see if either fighter can bring us a finish, or whether we're going to the judges scorecards.

Mayamoto closes the distance and clinches up with Jones, looking for a takedown. Mayamoto pushes Jones against the cage but Jones circles to the side and manages to break the clinch.
Jones shoots in for a takedown but Mayamoto shows good takedown defense there and keeps this one on the feet.
Jones circles away from the clinch attempt.
Jones drops his hands and takes a jab to the jaw for his troubles.
No luck for Mayamoto with that takedown attempt.
Jones swats away the attempt to clinch by Mayamoto.
Mayamoto is looking to take this fight into the clinch.
Mayamoto tries to clinch but Jones is having none of it.
That's one minute gone in the round.
Mayamoto tries to clinch up against the cage, rushing in the close the distance. Jones manages to break the clinch and circles back to the middle of the mat.
Mayamoto shoots in for a double leg but Jones sprawls well. That's going to sap some energy.
That's three failed takedown attempts in the round for Hiroko Mayamoto. That's going to take a lot out of him.
Jones leaves Mayamoto with his face pressed against the mat as he sprawls beautifully, defending against a solid takedown attempt.
Both fighters are breathing heavily.
Jones circles away from the clinch attempt.
Mayamoto is looking to clinch but Jones is avoiding it.
Jones looks for a takedown here. Will he get it? Mayamoto is fending him off so far but Jones persists. Nope, Mayamoto circles away and we're back to standing.
Mayamoto throws a head kick that misses.
Jones looks frustrated there after his takedown attempt is stuffed easily.
That's two minutes gone in the round.
Mayamoto shoots in looking for a takedown but Jones manages to keep the fight standing, pushing Mayamoto's face into the canvas for good measure before circling away.
Mayamoto throws a hook but Jones blocks it.
Mayamoto wants to clinch.
Nice sprawl there from Mayamoto as Jones shoots in.
Jones fakes high and shoots in for a takedown but Mayamoto avoids it really well and circles away.
Mayamoto tries to clinch there but Jones circles away.
That's three minutes gone in the round.
Mayamoto throws a looping left and ducks down for a takedown. He's got his arms around Jones's waist but Jones gets an underhook and avoids the takedown by throwing Mayamoto off to one side.
Jones shoots in with a lovely double leg takedown. Mayamoto manages to land in full guard to minimise the damage.
Jones missing there with some ground and pound from the guard.
Jones is pushing down on Mayamoto's leg trying to pass to half guard. Mayamoto is fighting to maintain full guard but Jones has managed to sneak the leg through.
Mayamoto is defending against the submission attempts here by Jones.
Jones is looking for a kimura but he's never going to get it from there.
That's four minutes gone in the round.
Mayamoto is defending against the submission attempts here by Jones.
Jones is trying for a kimura here. Mayamoto looks like he's in a lot of pain... and he's tapping out! Jones wins by kimura!
Ladies and gentlemen, after 4:37 of round 3, we have a winner by way of Submission (Kimura). Eder Jones!
|
|
|
|
|
|
|
|
|
|
|
|
|
|
|
|
|
|
|
|
|
|
|
| S |
C
A |
G |
S |
C
B |
G |
|
S |
C |
G |
|
energy
A | B |
|
hype
A | B |
|
pop
A | B |
|
mgr
A | B |
|
FIGHT
RATING
47% |
|
|
|
|
|
|
