|
|
PBP Commentary |
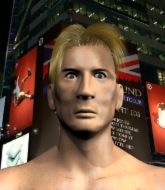
Coming up we have a welterweight MMA rules bout between William Barker (ranked 0 p4p, 0 weight class) and Forever War (ranked 0 p4p, 0 weight class). Barker's ring entrance music is that housewives' favourite, The Way of the Fist - Five Finger Death Punch. War is bobbing his head along to his entrance song: War Ensemble. Both fighters look fresh as a daisy as they make their way towards the cage.
 |
|
 |
| 180 cm
28
182 lbs
16 - 7 - 0 |
|
186 cm
25
178 lbs
19 - 6 - 2 |
Abu Dhabi Champ
World class MT
Insanely flexible |
|
Good wrestler
World class MT
Good gas tank |
|
| |
|
Ladies and gentlemen. This fight is 5 rounds, for the welterweight championship of the world!
Introducing the champion to my left, fighting out of the red corner.
With a record of
16 - 7 - 0, fighting out of New York, William Barker!
And introducing the challenger to my right, fighting out of the blue corner.
With a record of
19 - 6 - 2, fighting out of Las Vegas, Forever War!
The judges for this bout are Daniel Franklin, Frank Dennis and Alan Glass.

The bell rings for round one and we are underway!
Barker throws a sloppy head kick and War moves out of range easily.

War has taken the fight to the clinch.
War lands with a short head shot on the inside.
Barker blocks a punch to the side of the head.
War misses with a punch on the inside.
War fails to land with a short punch on the inside.
A head punch on the inside from Barker fails to land.
War can't find room to land a body shot as Barker controls the action.
Barker tries a shoulder strike but it doesn't do any damage.

Barker escapes the clinch and we're back to striking.
The fighters circling - War throws out the jab but it was never going to land.
War listening to his corner there, landing a nice uppercut.
Barker checks a low kick from War.
Barker takes a body punch but keeps moving.
Barker keeping a good distance there, avoiding the body shot.
Barker misses with a takedown attempt - War sprawls well and throws a nice strike on the way out which just misses.
Barker takes a swing at War's ribcage but misses.
War slips under a jab from Barker.
Barker tries to work over War's front leg with a kick but War checks it.

That's one minute gone in the round.
War drops his hands and takes a jab to the jaw for his troubles.
Barker throws a looping left and ducks down for a takedown. He's got his arms around War's waist but War gets an underhook and avoids the takedown by throwing Barker off to one side.
Barker will need to close the distance a bit before he attacks - that leg kick was thrown from too far away.
War misses with a body shot. Nice footwork from Barker.
Barker checks a low kick from War.
Barker fails to land the takedown.
That's three failed takedown attempts in the round for William Barker. That's going to take a lot out of him.
War scores with a decent looking hook.
War is looking to take this fight into the clinch.
War tries to clinch but Barker is having none of it.
War ducks down and throws a hook to the body but Barker moves away.
War throws a hook to the body but it doesn't connect.
Barker uses some good footwork to avoid the body shot by War.
War lands with an overhand left.
War uses decent footwork to sidestep a right hand from Barker.
Barker misses with a leg kick.

That's two minutes gone in the round.
Barker misses with a wild body shot.
War throws an uppercut from half a mile away. Barker sees it coming and avoids it easily.
War misses with a straight right.
War throws a hook but Barker avoids it easily.
War with poor footwork there. He got himself in a bit of a tangle, enabling Barker to score with a decent uppercut.
Barker is looking to slow War down with leg kicks.
War lets loose with a powerful body kick. Barker will feel that in the morning.
This is a great period of action - very entertaining stuff!
Barker moves out of range of the strikes.
Barker looks for a takedown here. Will he get it? War is fending him off so far but Barker persists. Nope, War circles away and we're back to standing.
War lunges at Barker with a hook that half lands and is half blocked by Barker's hand.
War sees a low kick coming and goes to check it, but it's actually a body kick and it thuds into his unprotected ribs.
War connects with a right hand. Barker shakes it off.
War thows a body kick. Barker tries to catch it but that hurt him.
Forever War is looking to keep the fight on the feet at all costs.
War misses with a few strikes there.
Barker looking to take his opponent's legs away with the low kicks.
Barker blocks the body kick.
Barker ducks under an overhand right and circles away with a smile on his face.

That's three minutes gone in the round.
War throws a front kick aimed at Barker's knee but Barker avoids it well.
War just misses with a punch to the body.
War throws a series of punches but Barker moves out of range.
War throws a hook to the side of Barker's head but Barker sees it coming and ducks under it beautifully.
Barker has his front leg slapped to the side - a nice low kick landing there from War.
War scoring well with a low kick there.
Barker throws a nice inside leg kick.
Barker misses with a low kick.
War scores with a big left there. The judges will like that one.
Barker takes a shot to the eye socket. That's gotta hurt.
War connects with a solid leg kick.
Barker pulls out of a head kick attempt.
Barker throws a leg kick that misses.
Barker chopping away at his opponent's legs.
Barker tries to land a leg kick but War saw it coming and moves away.
Barker looks to land a body kick but War moved away.

That's four minutes gone in the round.
Barker lands with a kick to the ribs.
War lands a kick to the ribs of his opponent. Nice work there - in and out in a flash.
The crowd are loving this. Great action here.
Barker scores with a hook to the body. War takes a step back and tries to catch his breath.
War lands with a good body shot.
War connects with a body shot that sends Barker's belly button to the back.
Barker throws a predictable looking body shot
and War connects with a straight left hand counter down the middle.
Barker missing with a left hand there. War was out of range so wasted energy throwing that one.
War throws a nice hook to the body that draws an oooh from the crowd.
War takes a shot to the eye socket. That's gotta hurt.
War ducks down and throws a hook to the body but Barker moves away.
Barker is looking to slow War down with leg kicks.
Barker fails with a takedown attempt.
The crowd are going absolutely nuts as the round comes to an end - what a fantastic round of action!
Oooooooooooh, not good. A low kick from War lands where it shouldn't have, right in the... well, you know what he did? He kicked him in the penis. He's injured, injured bad. The referee sends both fighters to their corners and Barker has 5 minutes to recover. He's OK now though... a thumbs up from Barker and we're back underway with a touch of gloves.
Barker staying out of range there.
And thats the end of the round the fighters go back to their corners.
Forever War dominated that round.
The minute break is over - no more time for sponges and pep talks - back to the action!

Barker throws a head kick but War moves out of range.
Barker takes a punch right to his stomach. That took the wind out of him momentarily.
Barker chopping away at his opponent's legs.
Forever War seems to be getting the better of the standup.
War avoids a low kick by using good footwork.
Barker has his head snapped back a nice jab. A little nod from Barker there as he acknowledges the shot.
War misses with a hook. Barker ducked under it nicely.
Barker uses some good footwork to avoid the body shot by War.
War lands with an uppercut that bounces Barker off the cage and back into range.
War avoids the head kick by Barker.
A looping hook to the body misses from War. Barker does a little dance to reset his feet.
A lazy left from War finds it's target.
Barker blocks a low kick nicely.
Barker misses with a body shot. Nice footwork from War.
War swings wildly with a right hand that was never going to find it's target.
War throws a right hand that Barker ducks under and follows up with a left that Barker also avoids with ease.
Barker shoots in for a takedown. "I don't think so" says War as he avoids it easily.
War looks to land a combination but Barker avoids it well.
That's one minute gone in the round.
War tries to clinch up but Barker circles away and keeps his distance.
War tries to clinch up against the cage, rushing in the close the distance. Barker manages to break the clinch and circles back to the middle of the mat.
Barker misses with a head kick.
Barker misses with a series of wild punches.
A decent looking body kick lands there for War.
Barker throws a hook but War blocks it.
Barker avoids the clinch attempt nicely.
War throws out a powerful jab.
Nice takedown defense from War. No joy for Barker on that attempt.
Jab by War.
A leg kick checked by War.
Barker ducks under an overhand right and circles away with a smile on his face.
War tries to clinch but is not successful on this occasion.
War scores with a leg kick.
Nice takedown defense from War. No joy for Barker on that attempt.
That's three failed takedown attempts in the round for William Barker. That's going to take a lot out of him.
That's two minutes gone in the round.
Barker wants to land a leg kick but War is out of range.
Barker misses with a body kick.
Barker throws a leg kick but War sees it coming and checks it nicely.
A punch lands to the side of Barker 's head but he takes it in his stride.
This is a great period of action - very entertaining stuff!
War fakes a head punch and goes low to the body. Nicely done.
Barker fails with a takedown attempt.
War bobbing and weaving, closes the distance and lands a hook to the side of Barker's head.
War with a body punch. A glancing blow.
War misses with a leg kick.
Barker wants to slow War down by chopping away at his legs.
War keeping his hands up high there, blocking the jab from Barker.
Barker on the wrong end of a nice low kick. He's acting like it's no big deal but he doesn't want to take many more of those.
War is looking to clinch but Barker is avoiding it.
Nice jab there from War.
That's three minutes gone in the round.
War lands with a straight right. Barker didn't see that one coming.
That kick from Barker tenderised War's leg. War is trying to keep his angry face on.
War gets cracked with a nice right hand there by Barker.
The fighters are starting to perspire pretty heavily.
Barker waving his hands out in front of him, looking to distract War.
An inside leg kick from Barker misses.
Barker throws a head kick but War moves out of range.
War lunges at Barker with a hook that half lands and is half blocked by Barker's hand.
War throws a push kick but Barker slaps the foot to one side.
Barker loads up on a big right hand but War slips the punch.
War throws the left hand but Barker avoids the punch easily.
Barker looks frustrated there after his takedown attempt is stuffed easily.
War pivots as if he's going to throw a leg kick but stops half way.
Good shot there by War.
Barker motions for War to come forward. Barker throws a leg kick but it misses it's target.
That's four minutes gone in the round.
War lands a leg kick and bounces back out of range.
Barker throws a jab when War was well out of range.
Barker misses with a hook.
A big left from War misses.
Barker is looking to land body kicks.
Barker thows a left - swing and a miss!
Barker lands a leg kick that knocks War off balance momentarily.
Fantastic stuff here - a very entertaining period of action, which has drawn cheers from the crowd.
Barker tries a head kick but it misses.
War connects with a looping right hand.
Barker swings away with a leg kick that misses.
Barker keeping at a good range here, avoiding a leg kick.
War thows a body shot but no joy.
As the round comes to an end the crowd are showing their appreciation for a great round of action.
War scoring well with a low kick there.
War fakes a jab and scores with a low kick.
War pushing out the jab but it's not landing.
War fakes a jab and throws a low kick but Barker checks it well.
And thats the end of the round the fighters go back to their corners.
Forever War showed his class in that round. I'd imagine he'll take it on all the scorecards.
That's time! Barker's corner gives him a slap on the ass as he gets ready to fight.

Good standup being displayed there by War as he connects with a hook.
War slips a jab and a cross from Barker.
Barker fails with a takedown attempt.
Barker looks to throw the jab but War is out of range.
Barker staying out of range there.
Barker with poor footwork there. He got himself in a bit of a tangle, enabling War to score with a decent uppercut.
Barker slips under a jab from War.
Barker throws a head kick that misses.
War cracks Barker with a hook to the jaw. Both fighters smile at eachother and high-five before getting back down to business.
Barker blocks the body kick.
War's leg has a nasty welt from taking a succession of leg kicks. That must be slowing him down.
Barker ducks under a wild hook from War.
War takes a nice looking leg kick right on the meat of his thigh there.
Barker looks like he's developed a pretty tasty lump over his left eye. He'll need to avoid taking much more damage to that.
War misses with a straight right.
War misses with a looping right.
That's one minute gone in the round.
War scores with a hook.
War is the aggressor but that punch slipped nicely by Barker.
War fakes with a right hand and throws a good leg kick, right into the thigh. That had to hurt Barker.
War throws a jab but it's blocked by Barker.
War moves to clinch but Barker breaks away
and Barker counters with a good low kick that War was not able to check.
Barker scores with a head kick.
Barker uses some good footwork to avoid the body shot by War.
Nice defenses there by War.
War stuffs the takedown.
Barker fails with the takedown.
That's three failed takedown attempts in the round for William Barker. That's going to take a lot out of him.
War comes forward and lands a shot to the body, then darts back out of range.
This is turning into a torrid day at the office for Barker. He's trying desperately to land a takedown but he's failing miserably and getting slapped silly on the feet to compound his misery.
A jab from War misses.

Barker is looking for a takedown here. He's shot in and has managed to get it, finishing up in War's half guard.
The fighters are pressed up against the cage, both looking to find a bit of space to work.
The referee must be thinking about standing these guys back up.
War is looking to control Barker's leg but it's slowly edging free. Can War avoid being mounted?
That's two minutes gone in the round.
War tries to get to full guard but Barker has control of the leg.
The crowd cheering loudly, showing their appreciation for the quality fight we're seeing here.
Barker tries to pass the half guard into mount. War knows what he's doing though and prevents the attempt.
War controlling the leg, holding on to half guard.
The ref warns both fighters not to hold the cage as they work up against the meshing.
War trying to control here.
War keeping his head moving to avoid the ground and pound.
Barker prevents War from improving his position.
Barker is trying to control the action in half guard but War is working away on the bottom, looking perhaps to get back to full guard.
War moves his hips nicely and gets into full guard.
Barker trying to pass the guard but can't manage it just yet.
That's three minutes gone in the round.
War is trying to keep Barker in close.
Barker lands a couple of digs.
War is doing well to control the posture of his opponent and prevent any damage.
Barker working some ground and pound from guard but it's not doing any damage.
Barker trying to control the position from guard on top but War is wriggling around, looking for whatever he can.
Barker postures up.
Barker missing there with some ground and pound from the guard.
Barker postures up.

The ref stands the fighters back up, due to lack of action by Forever War.
Barker has a takedown stuffed.
Barker moves forwards but War connects with a nice, crisp jab.
War fakes with an overhand right and moves in to clinch with Barker, pushing him back against the cage.
Barker blocks a body shot from War.
That's four minutes gone in the round.
Barker tries to pull guard but War holds him up against the cage and eventually Barker drops back down to his feet.
Barker is trying to break the clinch but War is controlling him.
A short right hand to the side of the head by War.
War tries to land a shot to the body but it's blocked.
War working aggressively here.
Fantastic stuff here - a very entertaining period of action, which has drawn cheers from the crowd.
Barker misses with a punch to the body.
War lands a hook that snaps the head of Barker backwards.
A nice right hand lands inside from War.
War tries to throw a body punch but Barker avoids it by throwing War back against the cage.
Barker struggles to land a body shot inside as War controls his hands.
War makes some space for himself and lands an uppercut.
War tries to throw a body punch but Barker avoids it by throwing War back against the cage.
As the round comes to an end the crowd are showing their appreciation for a great round of action.
War lands with a short punch from the clinch.
War lands a body punch - he's looking to wear down Barker.
War misses with a body punch.
War pushes Barker back against the cage and unloads with a body punch.
A quick uppercut on the inside from Barker.
And thats the end of the round the fighters go back to their corners.
Forever War really dominated that round.
The referee calls time. The cornermen exit stage left and we're back to business.

War lands with a nice body kick.
War throws a body kick that digs right into the meat.
Barker keeps the fight on the outside.
War tries to land with a swinging hook to the body but Barker was well out of range. Poor timing from War.
Barker will be looking to protect his midsection after taking some solid kicks to the body.
War throws the left hand but Barker avoids the punch easily.
War swings and misses with a hook to the body.
A big left from War misses.
A low kick from Barker is predictable there
and War counters with a lovely straight right hand!
Barker shoots in for a takedown but War shows good takedown defense.
War throws a looping overhand right but Barker ducks down to avoid it.
War fakes a head punch and goes low to the body. Nicely done.
Barker with a poor takedown
letting War counter with a right hand.
War feints and then cracks Barker's leading leg with a nice low kick. He's obviously looking to slow Barker down.
War closes the distance and presses his opponent up against the cage.
War gets through Barker's defenses to land a nice punch to the side of the head.
Barker blocks a punch to the side of the head.
That's one minute gone in the round.
War lands with a light punch inside.

It looks like William Barker has been cut.
War tried to land a shot to the body but connects with Barker's elbow.
War lands an uppercut.
War misses with a hook from the clinch.
War misses with a body punch.
Barker tries to land a shot to the body but it's blocked.
War misses with some punches.
A head punch blocked on the inside by Barker.
Barker tries to land a shot to the body but it's blocked.
Barker goes for a body shot but it's blocked.
War working aggressively here.
War struggles to land a body shot inside as Barker controls his hands.
War scores with a shoulder strike.
Forever War seems to be working more effectively in the clinch in the fight so far.
Barker is trying to pull guard but War has him pressed against the cage.
That's three failed takedown attempts in the round for William Barker. That's going to take a lot out of him.
War gets through Barker's defenses to land a nice punch to the side of the head.
Barker tries a body shot but War blocks it.
War tries to throw a body punch but Barker avoids it by throwing War back against the cage.
That's two minutes gone in the round.
War swings away with an uppercut that misses.
Barker misses with a short punch on the inside.
War misses with a shot to the kidneys.
Barker throws an elbow that misses.
A quick uppercut on the inside from War.
This is a great period of action - very entertaining stuff!
Barker manages to break the clinch.
War connects with a body shot that sends Barker's belly button to the back.
War comes forward and lands a shot to the body, then darts back out of range.
War tries to clinch up against the cage, rushing in the close the distance. Barker manages to break the clinch and circles back to the middle of the mat.
War scores with a body shot.
War fakes the leg kick and cracks Barker in the body.
War dances in quickly and lands a nice inside leg kick on Barker. That did some damage!
Barker dances in quickly and lands a nice inside leg kick on War. That did some damage!
Barker throws a hard body shot but it just misses.
War just misses with a punch to the body.
Barker moves out of range of the strikes.
That's three minutes gone in the round.
Barker takes a nice looking leg kick right on the meat of his thigh there.
War connects with a jab.
Barker misses with a body kick.
Barker throws a jab when War was well out of range.
Barker tries to land a front kick but War steps back. That was a bit too telegraphed.
Barker pulls out of a head kick attempt.
War takes a swing at Barker's ribcage but misses.
War fakes low and throws an overhand right that catches Barker on the side of the head.
Barker blocks a head kick by War.
War scores with a slapping inside leg kick.
War blocks a head kick by Barker.
War throws a half hearted mid kick.
Barker closes this distance looking for a takedown but War circles away.
It's got to the stage where if one of these guys blows hard enough, the other might fall over.
Barker misses with a looping left.
That's four minutes gone in the round.
Barker moves forwards but War connects with a nice, crisp jab.
Barker fails with a rather predictable takedown attempt.
A jab from War finds it's way through Barker's defenses.
Barker ducks under a wild hook from War.
Left hook, right uppercut from War.
We've seen a great period of action over the last minute or so - credit to both fighters for going all out!
Barker dodges the punch combination from War.
War fakes a head shot and lands one to the body.
War uses good footwork to get in and out, landing a nice hook.
War thuds a left hand into Barker's body.
As the round comes to an end the crowd are showing their appreciation for a great round of action.
War rushes Barker and pushes him back against the cage in a clinch.
A short right hand to the side of the head by War.
Barker blocks a couple of punches on the inside.
War lands punches inside but they're not really causing much damage.
And thats the end of the round the fighters go back to their corners.
Forever War dominated that fourth round.
The cut man is working on William Barker's cut.
That's time! Back to the action! This is the final round!

Barker bobs and weaves and unloads with a good uppercut.
War fails to land with a series of punches.
War moves into range and clinches up with Barker.
War struggles to land a body shot inside as Barker controls his hands.
A head punch blocked on the inside by Barker.
War fails to land with a short punch on the inside.
War tries to throw a body punch but Barker avoids it by throwing War back against the cage.
A hook to the body from War.
Barker blocking some punches.
War working aggressively here.
Barker goes for a body shot but it's blocked.
War blocks a punch to the side of the head.
War swings wildly with an uppercut but Barker uses good head movement to avoid it.
War has been the more effective fighter overall so far.
Barker looking to throw knees to the head but War is blocking nicely.
War is leaning against Barker and scores with a nice uppercut to the body.
War presses Barker against the cage and delivers a mid-strength body shot.
That's one minute gone in the round.
War throws a punch but it's blocked by Barker.
War gets double underhooks to prevent a takedown attempt from Barker.
Both of our modern day gladiators look out of it here - an gruelling 5 rounds of action taking it's toll on them, no doubt.
A quick uppercut on the inside from War.
War tries a shoulder strike but it doesn't do any damage.
War lands with a quick shot inside that doesn't really do much damage.
War goes for a body shot but it's blocked.
War scores with a nice hook to the head.
Barker scores with an uppercut up the middle.
War throws a punch but it's blocked by Barker.
Barker's head jolts backwards as he takes an uppercut right on the button!
War struggles to land a body shot inside as Barker controls his hands.
War's head jolts backwards as he takes an uppercut right on the button!
A body shot lands from War.
War lands with a left to the head.
Barker lands a hook that snaps the head of War backwards.
That's two minutes gone in the round.
War softening up his opponent with strikes, against the cage.
We've seen a great period of action over the last minute or so - credit to both fighters for going all out!
War tried to land a shot to the body but connects with Barker's elbow.
War throws a blind hook that connects with the side of Barkers head.
War lands a body shot.
Barker lands a body punch.
War can't find room to land a body shot as Barker controls the action.
War lands with a good tight uppercut to the head.
War has a couple of punches blocked by Barker.
War misses with a punch to the body.
War softening up his opponent with strikes, against the cage.
War can't find room to land a body shot as Barker controls the action.
War blocks a couple of punches on the inside.
War fails to land with a short punch on the inside.
War misses with a short punch on the inside.
William Barker has stepped it up - he knows he needs a finish here!
War tries a body shot but Barker blocks it.
Barker lands a nice looking hook to the body, against the cage.
That's three minutes gone in the round.
Barker blocks a couple of punches on the inside.
A short body shot lands from Barker as the two fighters clinch.
Barker pushes War back against the cage and lands a hook to the side of the head.
Barker throws a head punch that misses.
Barker blocks a punch to the side of the head.
War struggles to land a body shot inside as Barker controls his hands.
Barker gets through War's defenses to land a nice punch to the side of the head.

It looks like Forever War has been cut.
Barker pushes off and circles away, back to the middle of the mat.
Barker with a body punch. A glancing blow.
Barker shoots for a takedown but War saw that one coming a mile off and avoided it easily.
Barker shoots in for a takedown. "I don't think so" says War as he avoids it easily.
That's three failed takedown attempts in the round for William Barker. That's going to take a lot out of him.
Fantastic stuff here - a very entertaining period of action, which has drawn cheers from the crowd.
Barker misses with a hook. War ducked under it nicely.
War has his front leg slapped to the side - a nice low kick landing there from Barker.
Barker shoots in for a takedown. He's persisting with it as War sprawls well. War wins this battle and keeps the fight standing. Barker gets slowly back to his feet.
Barker lands with a head kick! That's gotta hurt.
That's four minutes gone in the round.
Barker fails with a rather predictable takedown attempt.
War swings and misses with a hook to the body.
War jabs at Barker's body.
Barker looks to land a body kick but War moved away.
War tries to land with a swinging hook to the body but Barker was well out of range. Poor timing from War.
War tests Barker's chin there with a solid looking shot.
War looks to land a left hand but Barker moved out of range nicely.
The crowd are going absolutely nuts as the round comes to an end - what a fantastic round of action!
War throws a head kick that misses.
War connects with a looping right hand.
A jab from Barker misses.
Forever War is fighting for a decision here - he's started to take the cautious approach.
War lands a nice hook to Barker's body. Barker takes it in his stride and looks to land his own strikes.
And that's the end of the fight!
Forever War comfortably won the final round on my scorecard.
I've got War winning every round here. Surely the decision will go his way and he'll pick up a well deserved decision victory. Over to the ring announcer for the scorecards.
Ladies and gentlemen, after 5 rounds of action, we go to the scorecards for a decision.
Judge Daniel Franklin scores the fight for Forever War!
Judge Frank Dennis scores the fight for Forever War!
Judge Alan Glass scores the fight for Forever War!
Forever War wins by unanimous decision! Forever War retains his welterweight title!
Our winner, Forever War, made sure he spent some time buttering up the crowd during his post fight interview, which will no doubt bring him a few more fans.
|
|
|
|
|
|
|
|
|
|
|
|
|
|
|
|
|
|
|
|
|
|
|
| S |
C
A |
G |
S |
C
B |
G |
|
S |
C |
G |
|
energy
A | B |
|
hype
A | B |
|
pop
A | B |
|
mgr
A | B |
|
FIGHT
RATING
100% |
|
|
|
|
|
|

