|
|
PBP Commentary |
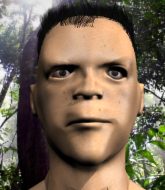
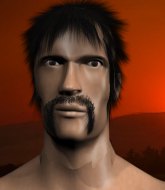
Coming up we have a heavyweight MMA rules bout between John Layfield (ranked 0 p4p, 0 weight class) and Dirk Blaylock (ranked 0 p4p, 0 weight class). Blaylock has chosen Head Like a Hole as his entrance music. Dirk Blaylock acknowledges the crowd's support as he enters the cage.
 |
|
 |
| 187 cm
25
265 lbs
9 - 4 - 0 |
|
192 cm
21
235 lbs
5 - 0 - 0 |
BJJ Blue Belt
World class boxer
Granite chin |
|
Dangerous GnP
Excellent boxer
Granite chin |
|
| |
|
Ladies and gentlemen. This fight is 3 rounds, in the heavyweight division.
Introducing the fighter to my left, fighting out of the red corner.
With a record of
9 - 4 - 0, fighting out of Los Angeles, John Layfield!
And introducing the fighter to my right, fighting out of the blue corner.
With a record of
5 - 0 - 0, fighting out of Las Vegas, Dirk Blaylock!
The judges for this bout are Jack Bonds, and Don Winkell.

The bell rings for round one and we are underway!
Blaylock is looking to take this fight into the clinch.
No joy there for Layfield, who threw a few shots but didn't land.
Layfield misses with a jab and misses with a cross straight after too.
Dirk Blaylock seems to be the more aggressive standup fighter in this bout.
Blaylock's corner calls for a 1, 2 combination and Blaylock duly obliges.

It looks like John Layfield has been cut.
A slow jab from Blaylock misses its intended target.
Blaylock misses with a body shot. Nice footwork from Layfield.
Layfield digs a good hook to Blaylock's body.
Fantastic stuff here - a very entertaining period of action, which has drawn cheers from the crowd.
Layfield swats away the attempt to clinch by Blaylock.
Blaylock is looking to take this fight into the clinch.
Layfield swinging wildly here.
Layfield misses with a combination
and Blaylock counters with a lovely straight right hand!
Blaylock tries to grapple but his opponent circles
and Layfield counters with a nice body shot.

That's one minute gone in the round.
Blaylock showing good head movement there, avoiding the strikes from Layfield.

Blaylock forces Layfield back against the cage and clinches.
Blaylock lands a left hand.
Blaylock keeps the fight in the clinch, despite Layfield's efforts to push away.
Blaylock is looking to score with knees to the body. Maybe he'll change it up and go body then head. Layfield is defending well for now.
Blaylock trying to land knees to the body.
Layfield managing to block the knees to the body from Blaylock.
A quick uppercut on the inside from Blaylock.
Blaylock misses with a short punch on the inside.
Blaylock keeps the fight in the clinch, despite Layfield's efforts to push away.
Blaylock content to slow the pace in the clinch.

That's two minutes gone in the round.
An uppercut on the inside fails to land for Layfield.
Layfield scores with a nice hook to the head.
Blaylock stalling in the clinch but Layfield improves position.
Blaylock wants to get back to striking at distance but Layfield won't allow it.
Blaylock scores with a shot to the side of Layfield's head.
Fantastic stuff here - a very entertaining period of action, which has drawn cheers from the crowd.
A head punch blocked on the inside by Blaylock.
Blaylock controlling the action here for a moment.
Blaylock is looking to score with knees to the body. Maybe he'll change it up and go body then head. Layfield is defending well for now.
Blaylock using the Thai plumb to throw knees but Layfield has his back arched nicely, preventing the strike.
Blaylock with an attempt at a knee that misses.
Layfield looking to stall.
Blaylock lands a nice knee to the body.
Blaylock lands a body punch in the clinch.
Layfield managing to block the knees to the body from Blaylock.
Blaylock lands a body punch - he's looking to wear down Layfield.
Layfield is breathing heavily.

That's three minutes gone in the round.
Layfield managing to block the knees to the body from Blaylock.
Blaylock unloads a knee to the mid-section.
A hook to the body from Layfield.
Blaylock misses with a hook to the ribs.
Layfield holding his opponent close, against the cage.
Layfield looks like he'd prefer to be striking at range right now.
Blaylock lands a nice shot to the body.
Blaylock stalling here - the referee won't stand for too much of that.
Blaylock misses with a punch on the inside.
Layfield blocks a knee to the body. He'll have a nicely bruised forearm in the morning.
Blaylock using the Thai clinch to land knees to the body.
Still in the clinch, Blaylock scores with a nice short uppercut.
The fans in attendance giving it up for the two fighters, who have really let it all hang out in the last minute or so!
Blaylock lands a short shot on the inside that snaps the head of Layfield backwards.
Blaylock throws a vicious knee straight up the middle but Layfield blocks it with crossed arms.
Blaylock misses with an elbow strike.

Layfield breaks the clinch and we return to the middle of the mat.

That's four minutes gone in the round.
Layfield moves out of range as Blaylock strikes.
Layfield tries to land with a swinging hook to the body but Blaylock was well out of range. Poor timing from Layfield.
Blaylock tries to clinch up but Layfield circles away and keeps his distance.
Layfield throws a right hand that Blaylock ducks under and follows up with a left that Blaylock also avoids with ease.
Blaylock wings a very wild body shot but it does the job and lands to the midsection.
Blaylock swinging wildly here.
Blaylock tries to clinch but Layfield is having none of it.
Blaylock misses with a body shot. Nice footwork from Layfield.
The crowd are going absolutely nuts as the round comes to an end - what a fantastic round of action!
Blaylock moves out of range as Layfield strikes.
Layfield ducks down and throws a hook to the body but Blaylock moves away.
Blaylock throws a shot to the body.
Blaylock bobs and weaves and unloads with a good uppercut.
And thats the end of the round the fighters go back to their corners.
Dirk Blaylock dominated that round.
The cut man is working on John Layfield's cut.
The referee calls time. The cornermen exit stage left and we're back to business.

Layfield throws a series of punches but Blaylock avoids them all with ease.
Blaylock takes the fight into the clinch.
Blaylock tries a shoulder strike but it doesn't do any damage.
Blaylock tries a body shot but Layfield blocks it.
Blaylock creates a bit of distance and throws an elbow that only just misses.
Blaylock missing with knees to the body.
Blaylock taking a breather.
Blaylock throws an elbow that misses.
Layfield has had enough of the clinch but Blaylock keeps him there for the moment.
With the fighters up against the cage, Blaylock throws an elbow but misses.
Blaylock has been the more effective fighter overall so far.
Blaylock trying to stall but Layfield improves his position.
Layfield swings away with an uppercut that misses.
Blaylock looking to stall.
Blaylock keeps control of Layfield as he tries to wriggle out of the double underhooks.
Blaylock goes for a body shot but it's blocked.
That's one minute gone in the round.
Layfield breaks the clinch and we're back to striking at distance.
Layfield avoids a punch combination nicely.
Layfield lands with a nice combination. Blaylock backs away looking to recover.
Layfield throws a right hand that Blaylock ducks under and follows up with a left that Blaylock also avoids with ease.
Blaylock keeping a good distance there, avoiding the body shot.
Blaylock slips in close and lands a nice hook before moving back out of range.
Blaylock bobs and weaves and throws out a fast jab that snaps Layfield's head backwards.
Blaylock tries to clinch but is not successful on this occasion.
Donk. Layfield catches Blaylock right on the button with a cross.
We've seen a great period of action over the last minute or so - credit to both fighters for going all out!
Blaylock just misses with a punch to the body.
Some wild striking there from Blaylock.
Blaylock darts in and clinches Layfield up against the cage.
That's two minutes gone in the round.
Blaylock is looking to control Layfield's arms but Layfield gets an underhook and turns him. Now Blaylock has his back to the cage.
Blaylock content to slow the pace in the clinch.
Layfield lands a shoulder strike.
Layfield tries to circle away but Blaylock has him pinned against the cage.
Blaylock throws an elbow but it's blocked.
Blaylock is looking to score with knees to the body. Maybe he'll change it up and go body then head. Layfield is defending well for now.
Layfield can't break the clinch.
With the fighters up against the cage, Blaylock throws an elbow but misses.
Good anti-grappling being displayed by Blaylock as Layfield tries to tie him up.
Blaylock swings wildly with an uppercut but Layfield uses good head movement to avoid it.
Layfield pushes off and circles away, back to the middle of the mat.
Blaylock gets a clinch.
Blaylock misses with a punch to the body.
That's three minutes gone in the round.
Blaylock has Layfield pressed against the cage, preventing Layfield from circling away and getting back to striking at range.
Blaylock looking to throw knees to the head but Layfield is blocking nicely.
Blaylock pushes Layfield back against the cage and lands a hook to the side of the head.
The two fighters are working to gain dominance in the clinch.
An uppercut on the inside fails to land for Blaylock.
Layfield is trying to break the clinch but Blaylock has him pressed against the cage.
Layfield is trying to break the clinch but Blaylock is controlling him.
Blaylock misses with a body punch.
Blaylock using the Thai clinch to land knees to the body.
Both fighters are absolutely exhausted here.
The crowd are loving this. Great action here.
Layfield's head jolts backwards as he takes an uppercut right on the button!
Blaylock keeps the fight in the clinch, despite Layfield's efforts to push away.
Blaylock misses with a short punch on the inside.
Blaylock lands a shoulder strike that jolts his opponent's head backwards.
Blaylock presses Layfield against the cage and delivers a mid-strength body shot.

Blaylock manages to break the clinch.
Blaylock rushes forward with a series of wild hooks but Layfield moves out of range and avoids them all easily.
That's four minutes gone in the round.
Blaylock throws a two punch combo that lands nicely.
Blaylock lands a jab to Layfield's midsection.
Blaylock looks to score with a combo but nothing lands.
Blaylock rushes Layfield and pushes him back against the cage in a clinch.
Blaylock blocks a body shot from Layfield.
With the fighters clinched against the cage, Blaylock creates a bit of distance for himself and scores with a nice uppercut.
Blaylock lands with a short head shot on the inside.
Blaylock throws a knee to the head but misses.
Layfield takes a knee right on the jaw!
Layfield dodges an elbow strike from Blaylock.
Kneeeeees! The crowd are calling for knees to the body. Blaylock obliges.
The crowd are going absolutely nuts as the round comes to an end - what a fantastic round of action!
Blaylock lands with a right to the head.
A short right hand to the side of the head by Blaylock.
Blaylock avoiding damage.
A right handed body shot lands from Blaylock.
And thats the end of the round the fighters go back to their corners.
Dirk Blaylock showed his class in that round. I'd imagine he'll take it on all the scorecards.
The cut man is working on John Layfield's cut.
The referee calls time. The cornermen exit stage left and we're back to business. This is the final round!

Blaylock thows a body shot but no joy.
Layfield will need to tighten up his combinations if he doesn't want to gas himself out, swinging at thin air.
Blaylock has taken the fight to the clinch.
Blaylock tries to land a knee to the head but misses.
Blaylock's corner calls for him to break the clinch, which he does.
Layfield throws a right and a left that both miss.
Blaylock tries to clinch up but Layfield circles away and keeps his distance.
Blaylock fails to land with a series of punches.
Blaylock looks to land a left hand but Layfield moved out of range nicely.
Layfield misses with a lunging right hand
and Blaylock counters nicely by changing levels and landing a hook to the body.
Dirk Blaylock seems to be getting the better of the standup.
Blaylock throws a right and a left that both miss.
Blaylock tries to clinch but is not successful on this occasion.
Both fighters are breathing heavily.
That's one minute gone in the round.
Some wild striking there from Blaylock.
Layfield is looking to wear down Blaylock with body shots, infact he's throwing more body shots than head shots at the moment.
Blaylock lands the left hand.
Layfield misses with a right hand
and Blaylock counters with a right hand to the body.
Blaylock fails in his attempt to clinch.
Layfield on the wrong end of a vicious looking body shot.
A shot to the liver by Blaylock. Beautiful body shot.
The crowd cheering loudly, showing their appreciation for the quality fight we're seeing here.
Blaylock closes the distance and clinches.
Layfield blocks an elbow strike.
Blaylock misses with a knee to the head.
Blaylock pushes off an throws an elbow but Layfield leans to the side and avoids it. We're back to clinching against the cage.
Blaylock lands a body shot.
A right hook to the body lands for Blaylock.
Blaylock is looking to score with knees to the body. Maybe he'll change it up and go body then head. Layfield is defending well for now.
That's two minutes gone in the round.
Blaylock is stalling here. The referee will be looking to step in if he doesn't pick up the pace.
Layfield wants to push off and get back to the center of the mat but Blaylock has him pressed against the cage.
Blaylock stalling.
Blaylock tries to land a knee to the head but Layfield blocks with his arms.
Blaylock has Layfield pressed against the cage, preventing Layfield from circling away and getting back to striking at range.
A nice left hand lands by Blaylock.
Blaylock lands a knee to the head there! That was nasty!
Blaylock lands a glancing elbow in the clinch.
Blaylock crunches a lovely knee into Layfield's ribcage.
The fighters are pressed against the cage, as the pace of the fight slows.
Blaylock scores with an uppercut up the middle.
That's three minutes gone in the round.
Blaylock avoiding damage.
Blaylock lands an uppercut.
Layfield is trying to break the clinch but Blaylock has him pressed against the cage.
Blaylock missing with knees to the body.
Layfield can't find room to land a body shot as Blaylock controls the action.
Blaylock lands a shot to the body.
Blaylock throws an elbow but it misses.
Blaylock misses with a shot to the kidneys.
Layfield has a couple of punches blocked by Blaylock.
Blaylock pushes off and circles away, back to the middle of the mat.
Blaylock fails in his attempt to clinch.
Layfield circles away from the clinch attempt.
That's four minutes gone in the round.
Blaylock wants to clinch up but Layfield keeps it at a distance.
Blaylock moves into the clinch.
This has been an exciting period of action!
Blaylock is pushing Layfield up against the cage, for a bit of lean and pray action. Action being used the in the loosest possible sense of the word.
Layfield tries to work over Blaylock's body with a swooping hook but it only glances the target.
Blaylock tries to land knees in the clinch but Layfield avoids the damage to the body.
Blaylock throws an elbow but it misses.
Layfield manages to break the clinch.
Blaylock misses with a wild body shot.
Dirk Blaylock is fighting for a decision - hopefully he's judged it right and he's actually winning the fight.
The crowd are going absolutely nuts as the round comes to an end - what a fantastic round of action!
Blaylock connects with a body shot that sends Layfield's belly button to the back.
John Layfield has stepped it up - he knows he needs a finish here!
Blaylock lands a nice hook to Layfield's body. Layfield takes it in his stride and looks to land his own strikes.
Layfield misses with a wild combination.
And that's the end of the fight!
Dirk Blaylock comfortably won the final round on my scorecard.
Well Blaylock has outworked and out performed his opponent in all aspects of the game today. He was simply too good and the decision should be no more than a formality. Over to the ring announcer for the scorecards.
Ladies and gentlemen, after 3 rounds of action, we go to the scorecards for a decision.
Judge Jack Bonds scores the fight 26:30
Judge Percy O'Donnell scores the fight 26:30
Judge Don Winkell scores the fight 26:30
In favor of your winner, by unanimous decision... Dirk Blaylock!
Dirk Blaylock seemed lost for words in his post fight interview but he remembered to thank his fans and directed everyone to his website.
|
|
|
|
|
|
|
|
|
|
|
|
|
|
|
|
|
|
|
|
|
|
|
| S |
C
A |
G |
S |
C
B |
G |
|
S |
C |
G |
|
energy
A | B |
|
hype
A | B |
|
pop
A | B |
|
mgr
A | B |
|
FIGHT
RATING
100% |
|
|
|
|
|
|
