|
|
PBP Commentary |
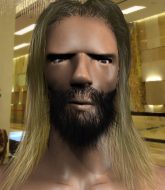
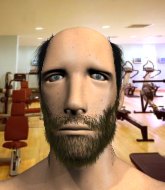
Coming up we have a bantamweight MMA rules bout between Brais Punk (ranked 0 p4p, 0 weight class) and Michael Budgen (ranked 0 p4p, 0 weight class). Brais Punk has the edge in experience - let's see if he can make that count tonight.
 |
|
 |
| 170 cm
22
145 lbs
7 - 7 - 0 |
|
172 cm
18
130 lbs
1 - 1 - 0 |
BJJ Blue Belt
Brawler
Insanely flexible |
|
BJJ Blue Belt
Brawler
Granite chin |
|
| |
|
Ladies and gentlemen. This fight is 3 rounds, in the bantamweight division.
Introducing the fighter to my left, fighting out of the red corner.
With a record of
7 - 7 - 0, fighting out of Amsterdam, Brais Punk!
And introducing the fighter to my right, fighting out of the blue corner.
With a record of
1 - 1 - 0, fighting out of Amsterdam, Michael Budgen!
The judges for this bout are Nard Betker, Saam Ante and Patrick Alders.

The bell rings for round one and we are underway!

Punk shoots in and bounces Budgen off the cage to secure the takedown into guard.
The referee looks like he's ready to step in and stand the fighters back up.
Punk postures up and scores with a shot to the body and a follow up elbow to the head.
Budgen wants to stand up but Punk is controlling him.
Punk controls the pace of the fight for a moment.
Budgen preventing the ground and pound from doing any damage.
Punk's corner is telling him to maintain position.
Punk tries to free his leg and advance position but Budgen is retaining full guard.
Punk stays in close to Budgen's body and controls the position.

The referee decides to stand the fighters back up, due to lack of activity on the part of Brais Punk.
Punk dips down and scores with a jab to the body.
Fantastic stuff here - a very entertaining period of action, which has drawn cheers from the crowd.

Punk rushes Budgen and presses him up against the cage.

Punk breaks the clinch and we return to the middle of the mat.

That's one minute gone in the round.
Punk circles away from the clinch attempt.
Punk lands three nice shots there - that looked like it hurt!
Punk changes levels and drives through with a really nice takedown into side control. Budgen looks really pissed at himself for not defending that better.
Budgen looks gassed!
Budgen bucks up and tries to throw Punk off but instead Punk has got his back!
Punk is controlling his opponent, waiting for an opportunity to finish.
Budgen has the hand control, trying to stop the rear naked choke.
The fighters are pressed up against the cage, both looking to find a bit of space to work.

Budgen defending nicely against the rear naked choke attempt.
We've seen a great period of action over the last minute or so - credit to both fighters for going all out!
Budgen defending nicely against the rear naked choke attempt.

That's two minutes gone in the round.
Budgen is trying to get back to his feet but he's not managed it yet.
I would not like to be Budgen right now.
Punk is remaining active here, looking for the choke. The more discerning members of the crowd will appreciate his efforts.

That's three minutes gone in the round.
Budgen looking to stop the rear naked choke attempt by controlling the hands.
Punk lands with a nice looking elbow that stuns Budgen.
Punk punishes Budgen with strikes from the back mount.
The ref warns both fighters not to hold the cage as they work up against the meshing.
Punk working for the choke.
A bit of a pause in the action here. Punk controlling the positon.

That's four minutes gone in the round.
We've seen a great period of action over the last minute or so - credit to both fighters for going all out!
Punk looking for the choke but no joy.
Punk is riding his opponent, not letting Budgen buck him off.
The crowd are going absolutely nuts as the round comes to an end - what a fantastic round of action!
Budgen is displaying good submission defense - not really looking in danger of submitting to the rear naked choke at the moment. That could change in an instant of course if Punk gets his way!
Punk controlling from the back.
And thats the end of the round the fighters go back to their corners.
Brais Punk dominated that round.
The minute break is over - no more time for sponges and pep talks - back to the action!

Punk shoots in for a takedown and gets it. Let's see what he's got on the mat.
Punk slows down the pace of the fight, as he sits in guard.
Brais Punk overall seems to be getting the better of the ground position in the fight so far.
Budgen wants to stand and escape but Punk is having none of it.
Punk trying to control but Budgen is working from the bottom.
Brais Punk has forced the referee to step in and bring the fight back to the feet.
Punk throws a nice head kick!
Budgen tries to grapple but his opponent circles
and Punk counters with a nice shoot takedown that brings the fighters to the ground.
That's one minute gone in the round.
Punk stands up and looks to throw the legs aside to pass to side control. Budgen swivels though and keeps the full guard.
Budgen is breathing heavily.
Budgen wants to stand and escape but Punk is having none of it.
Punk controls the pace of the fight for a moment.
Punk is really dominating this fight. Is there anything that Budgen can do to turn this around?
Punk scores with a decent looking elbow strike.
Punk controlling from the guard. I say controlling but really, he's stalling.
Punk's ground tactics aren't going to win him many fans. Let's hope he's got fireworks for us if he gets back to his feet because he's not doing much on the ground.
We're going to have a standup here because Brais Punk wasn't active enough for the referee's liking.
Punk throws a loose over hand right and dives in with a double leg takedown. Budgen tries to sprawl but it's too late and the fighters hit the mat. Punk is in Budgen's guard.
Punk sitting in guard here, content to control.
Punk lands a couple of elbows.
That's two minutes gone in the round.
Punk showing good wrestling skills to control the position.
We've seen a great period of action over the last minute or so - credit to both fighters for going all out!

Budgen is working an open guard so Punk takes the opportunity to get back to his feet.
Punk shoots in for a takedown! He's got it and he's managed to land in full mount! That's better than Punk was expecting from the takedown attempt, I'm sure!
Punk looking to control and managing it successfully.
Punk jumps to side control looking for an arm triangle but Budgen manages to avoid the submission attempt.
That's three minutes gone in the round.
Punk tries for a kimura but Budgen is defending well.
Punk decides to stand back up.
Michael Budgen seems to be the more aggressive standup fighter in this bout.
Budgen steps to his left, right into the path of a big body kick from Punk. That one must have hurt.
Punk looks for a takedown. He's got it. We're now in half guard.
Punk performing his best blanket impression for a moment.
That's four minutes gone in the round.
Punk frees up his trapped foot and advances to mount.
Punk sitting in mount, just looking to control for the moment.
This is a great period of action - very entertaining stuff!
You get the feeling that Budgen really doesn't like being in this position too much.
Punk with the ground and pound from mount.
The crowd are going absolutely nuts as the round comes to an end - what a fantastic round of action!
Budgen defends a decent attempt at a guillotine from Punk.
Punk lands a heavy elbow.
And thats the end of the round the fighters go back to their corners.
Brais Punk dominated that second round.
That's the end of the round. The referee orders the cornermen out of the cage so we can get back down to business. This is the final round!

Punk looking to shoot here. He's gone for it and he's landed a takedown into mount! Oh, that's bad for Budgen!
Punk controlling the pace for now.
Budgen is looking to get back to his feet - it's going to be hard from this position.
Punk controlling his opponent.
Punk pausing momentarily but resumes with a couple of decent strikes that do a bit of damage.
Punk controlling from the full mount.
Punk with the ground and pound from mount.
That's one minute gone in the round.
Punk controlling from mount.
Budgen takes a big intake of breath there - he's definitely tired.
Punk has control of Budgen's right arm, working for a kimura. It's a bit of a token attempt though and Budgen regains control of the situation pretty easily.
Budgen is bucking up trying to escape but Punk cracks him with another couple of good strikes.
Punk lands a heavy elbow.

Budgen is rocked!
Punk controlling from mount.
Punk raining down hammerfists from mount.
Budgen is still in real trouble! Can Punk finish him?
That's two minutes gone in the round.
Punk takes a little breather and maintains the position. The referee will be looking for him to stay active from such a dominant position though.
The fans in attendance giving it up for the two fighters, who have really let it all hang out in the last minute or so!
Punk postures up and lands a whopping elbow - oh that's hurt Budgen bigstyle! Two more strikes land for Punk and the fight is over!
Ladies and gentlemen, after 2:45 of round 3, we have a winner by way of TKO (Strikes). Brais Punk!
|
|
|
|
|
|
|
|
|
|
|
|
|
|
|
|
|
|
|
|
|
|
|
| S |
C
A |
G |
S |
C
B |
G |
|
S |
C |
G |
|
energy
A | B |
|
hype
A | B |
|
pop
A | B |
|
mgr
A | B |
|
FIGHT
RATING
100% |
|
|
|
|
|
|
