|
|
PBP Commentary |
Coming up we have a middleweight MMA rules bout between Lance Zelda (ranked 0 p4p, 0 weight class) and Amin Sax (ranked 0 p4p, 0 weight class). Sax has chosen Infected Mushroom - Smashing The Opponent as his entrance music. The fight MMA fans around the world have waited their entire lives for!
 |
|
 |
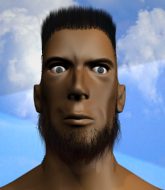
| 194 cm
23
190 lbs
0 - 2 - 0 |
|
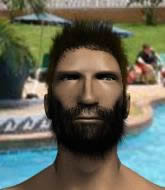
181 cm
31
190 lbs
9 - 11 - 0 |
BJJ Brown Belt
World class boxer
Cardio machine |
|
Good wrestler
Good kicks
Granite chin |
|
| |
|
Ladies and gentlemen. This fight is 3 rounds, in the middleweight division.
Introducing the fighter to my left, fighting out of the red corner.
With a record of
0 - 2 - 0, fighting out of Helsinki, Lance Zelda!
And introducing the fighter to my right, fighting out of the blue corner.
With a record of
9 - 11 - 0, fighting out of Helsinki, Amin Sax!
The judges for this bout are Matti Vanhoillinen, Johanna Lukiainen and Ben Zyskovitsi.

The bell rings for round one and we are underway!

Sax drives through with a really nice takedown into side control.

Sax is looking to finish here, going for an Americana. Zelda knows the correct defense though, so he's OK.
You can see the frustration on Zelda's face, being in this tough position on the bottom.
Zelda is in a bad position, trying to hold on for dear life but he is really struggling to maintain any sort of control.
The ref warns both fighters not to hold the cage as they work up against the meshing.
Sax wants to work for a kimura but he's foiled early by Zelda, who protects the arm well.
Sax working hard here to secure a kimura but he's not really in the right position for it.
Sax trying to control the action but Zelda is working from the bottom.
What's Zelda going to do here then? He's in a bit of a pickle.
Sax tries for a kimura. Not really close to a finish though.

That's one minute gone in the round.
Sax throws a knee to the body but it doesn't do much damage.
Both fighters really going for it on the ground here!
Zelda manages to work his way to half guard, despite Sax's best efforts.
Zelda has no desire to be mounted, so is trying to control. Sax is working away from the top position though.
Sax is looking for a kimura but he's never going to get it from there.
The fighters are battling for position here. Zelda manages to regain full guard. Nice work.
Zelda will need to keep those long limbs tucked in whilst he's on the ground, to prevent any submissions.
Zelda looking to control.

Zelda working from the bottom, still in full guard. He's managed to get a loose triangle. Sax doesn't seem to be doing much to defend here, obviously he feels comfortable in the position. Sax manages to throw the legs off his shoulder and he's back into guard - no problem.
The fighters are starting to get a bit slippery now, which will make submissions a bit more difficult.
Sax trying to control the position from guard on top but Zelda is wriggling around, looking for whatever he can.
Zelda working for a triangle but Sax defends it easily.
Zelda avoiding any damage from the ground and pound.

That's two minutes gone in the round.
Sax trying to control the position from guard on top but Zelda is wriggling around, looking for whatever he can.
Zelda managing to control the position.
Sax drops back looking for a leg! Zelda is in trouble here! The fighters roll with the hold and Zelda manages to kick Sax off! Sax jumps back into Zelda's guard.
Wooooo! Give it up for these two warriors! They are putting on a show!
Zelda is looking for a guillotine. You can't force these things though and Sax defends well.
Zelda trying to control the position.
Zelda is avoiding any damage by keeping wrist control.
Sax slips effortlessly into side control - very nice.

That's three minutes gone in the round.
Sax thinks about going for a far side armbar but bails out and retains the dominant position instead.
Sax is trying to get an arm triangle but Zelda is defending well.
Zelda gets one leg under and gets the fight to half guard.
Zelda actively working from the bottom here.
Zelda wants to get back to full guard.
Sax missing with the ground and pound from half guard.
Zelda actively working from the bottom here.
Zelda looking for submissions off his back.
Zelda moves into full guard.
Zelda looking for submissions off his back, moving his hips, looking for an opening.

That's four minutes gone in the round.
Sax drops back looking for a leg! Zelda is in trouble here! The fighters roll with the hold and Zelda manages to kick Sax off! Sax jumps back into Zelda's guard.
Zelda is working from a closed guard but he's struggling to control his opponent.
The fighters are pressed up against the cage, both looking to find a bit of space to work.
Zelda has a loose triangle. He'll be looking to tighten that up but Sax can see exactly what he's planning and manages to posture up and free himself.
Sax works a leg free and moves into half guard.
The crowd cheering loudly, showing their appreciation for the quality fight we're seeing here.
Sax seems to be working for a kimura but Zelda defends the submission attempt.
Zelda slips a foot under and gets full guard. Nice work.
As the round comes to an end the crowd are showing their appreciation for a great round of action.
Zelda utilising some decent striking defenses from the guard, preventing the ground and pound.
And thats the end of the round the fighters go back to their corners.
That was a close round but I would say that Lance Zelda will probably get the nod.
The referee calls time. The cornermen exit stage left and we're back to business.

Zelda moving in and out of range nicely, whilst landing the scoring shot.
Zelda throws a nice hook to the body that draws an oooh from the crowd.
Sax drives through with a takedown into guard.
Zelda thows some rabbit punches from the bottom but they don't do any damage.
Sax passes Zelda's left leg - he's now in half guard.
Zelda wants to control but Sax is keeping busy.
Zelda gets full guard.
Sax trying to control but Zelda is working from the bottom.
Zelda is working actively off his back, looking to secure an arm or perhaps work for a triangle.
Fantastic stuff here - a very entertaining period of action, which has drawn cheers from the crowd.
Zelda not looking particularly offensive just at the moment.
Sax pushing down on Zelda's thigh, trying to pass to half guard. He's managed it... Nice work.
Zelda is looking to improve his position.
Zelda is trying to control but can't.
That's one minute gone in the round.
Zelda gets full guard.
Sax pushes down on Zelda's leg and manages to get into half guard.
Zelda is defending against the submission attempts here by Sax.
Sax is looking for a kimura but Zelda is holding onto that half guard position, so it's hard for Sax to get the leverage.
Zelda is looking to escape.
Sax is looking for a kimura here.
Zelda looking to work for a kimura from the bottom.
Sax is looking for a kimura. It's going to be difficult to finish that from half guard though and Zelda defends it well.
Sax is breathing heavily.
Zelda has no desire to be mounted, so is trying to control. Sax is working away from the top position though.
That's two minutes gone in the round.
Zelda wants to get back to full guard.
Sax is working for submissions here but there's nothing on.
Zelda flails away from the bottom but he's not doing any damage.
Sax is looking for a kimura but he's never going to get it from there.
Zelda is trying to maintain the position but Sax is very close to passing his half guard.
Sax is trying to work for a kimura but Zelda is defending well.
Sax is trying to work for a kimura. This could be trouble! No, Zelda has managed to free his arm - good work.
Zelda trying to control but Sax postures up.
That's three minutes gone in the round.
Zelda actively working from the bottom here.
Sax is thinking about going for an arm triangle but he can't free his leg.
The fighters are battling for position here. Zelda manages to regain full guard. Nice work.
Zelda working from the bottom, still in full guard. He's managed to get a loose triangle. Sax doesn't seem to be doing much to defend here, obviously he feels comfortable in the position. Sax manages to throw the legs off his shoulder and he's back into guard - no problem.
Sax advances to half guard.
Sax is trying to control. Zelda wants to improve his position but can't escape this time.
Zelda is looking to sinch up a guillotine here but Sax pulls his head out easily.
Sax is looking for a kimura but he's never going to get it from there.
Zelda is trying to get back to full guard.
That's four minutes gone in the round.
Sax wants to work for an arm triangle but Zelda is really keeping half guard well and defending the submission attempt.

Zelda has one foot on Sax's thigh - he pushes off and manages to get back to his feet.
Fantastic stuff here - a very entertaining period of action, which has drawn cheers from the crowd.
Zelda shoots in for a double leg but Sax sprawls well. That's going to sap some energy.
Amin Sax seems to be the more aggressive standup fighter in this bout.
Zelda takes a step towards his opponent and connects with a left hand, before circling away.
Sax with poor footwork there. He got himself in a bit of a tangle, enabling Zelda to score with a decent uppercut.
Sax drives through with a really nice takedown into side control.
You can see the frustration on Zelda's face, being in this tough position on the bottom.
Zelda is looking for a sweep.
The crowd are going absolutely nuts as the round comes to an end - what a fantastic round of action!
You can see the frustration on Zelda's face, being in this tough position on the bottom.
And thats the end of the round the fighters go back to their corners.
That was a close second round but I would say that Lance Zelda will probably get the nod.
The fighters' corners scream their final instructions, as the referee calls time. Here we go, back to the action! This is the final round!

Sax defending well as Zelda loads up on a big left hand.
Zelda punishes Sax's body with a nice straight punch.
Sax will need to tighten up his combinations if he doesn't want to gas himself out, swinging at thin air.
Zelda lands a nice looking body shot.
Sax fakes a strike and closes the distance, dragging Zelda to the ground. Sax is now in Zelda's guard.
Sax missing there with some ground and pound from the guard.
Zelda is throwing his legs up, looking for submissions. Sax is aware though and is defending well.
Sax trying to control but Zelda is working from the bottom.
Zelda looking to sweep here. No luck so far.
The crowd are loving this. Great action here.
Zelda is trying to keep Sax in close.
Sax takes a big intake of breath there - he's definitely tired.
Zelda working the defensive guard well to avoid strikes from Sax.
Zelda is working from a closed guard but he's struggling to control his opponent.
That's one minute gone in the round.
Sax pressing down on his opponent's thigh, looking to pass guard. Zelda is keeping the position for now.
Sax wants to control from the top but Zelda keeps moving.
Zelda has managed to work for a loose triangle. I think Sax should be able to defend this one pretty easily though. Oh, Zelda has tightened it up now! Sax should have reacted faster there - he's in big trouble and yes, he's tapped out! This one is all over!
Ladies and gentlemen, after 1:35 of round 3, we have a winner by way of Submission (Triangle). Lance Zelda!
Lance Zelda thanked the fans post fight for their support.
|
|
|
|
|
|
|
|
|
|
|
|
|
|
|
|
|
|
|
|
|
|
|
| S |
C
A |
G |
S |
C
B |
G |
|
S |
C |
G |
|
energy
A | B |
|
hype
A | B |
|
pop
A | B |
|
mgr
A | B |
|
FIGHT
RATING
100% |
|
|
|
|
|
|

