|
|
PBP Commentary |
Coming up we have a lightweight MMA rules bout between Alejandro Mora (ranked 0 p4p, 0 weight class) and Sam Hain (ranked 0 p4p, 0 weight class). Mora comes to the cage accompanied by Seven Nation Army. Hain is bouncing up and down as he enters the arena, backed by Time Frame by Dom and Roland. These two fighters really are very evenly matched on the feet - it will be fascinating to see who can assert themselves in that aspect of the fight.
 |
|
 |
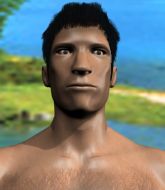
| 185 cm
27
164 lbs
13 - 5 - 0 |
|
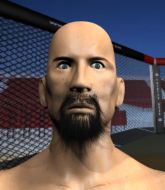
174 cm
32
167 lbs
17 - 9 - 0 |
Abu Dhabi Champ
Excellent boxer
Insanely flexible |
|
Good wrestler
Excellent MT
Good gas tank |
|
| |
|
Ladies and gentlemen. This fight is 3 rounds, in the lightweight division.
Introducing the fighter to my left, fighting out of the red corner.
With a record of
13 - 5 - 0, fighting out of Montreal, Alejandro Mora!
And introducing the fighter to my right, fighting out of the blue corner.
With a record of
17 - 9 - 0, fighting out of Montreal, Sam Hain!
The judges for this bout are Alec Ball, Yves DeLean and Steve Smith.

The bell rings for round one and we are underway!
Mora throws a right hand that Hain ducks under and follows up with a left that Hain also avoids with ease.
Mora is looking to clinch.

Mora fakes with an overhand right and moves in to clinch with Hain, pushing him back against the cage.
Mora's head jolts backwards as he takes an uppercut right on the button!
Hain fails to land with a short punch on the inside.
Hain makes some space for himself and lands an uppercut.
Hain fails to pull guard.

Mora has moved round to his opponent's back and is looking for a suplex! Oh snap! He's tossed Hain clear over his head and slammed him to the mat!
The referee wants the fighters to be more active or he's going to reset them on the feet.
Hain is covering up but some of the strikes from Mora are getting through and doing damage.
Hain tries to escape the position.
Mora will need to keep those long limbs tucked in whilst he's on the ground, to prevent any submissions.
Mora misses with punches from the back.
Hain just trying to survive but Mora is wriggling into a better position, looking to finish.
Mora is hanging on to Hain's back as he tries to escape.
The crowd are loving this. Great action here.
Hain trying to control but he's just got himself in more trouble.
Mora is throwing strikes from the back here. Oh that last one was to the back of the head. Mora gets a warning from the referee. He throws another strike to the back of the head straight away though and the referee has seen enough. He breaks up the two fighters and stands them back up. Mora gets a real talking to here and is lucky not to get a point deducted. Mora apologises and we restart here on the feet.
Mora manages to get an easy takedown there - catching Hain on his heels. He'll look to pass Hain's guard now, I'm sure.
The fighters are pressed up against the cage, both looking to find a bit of space to work.

Hain had isolated an arm as going for a kimura. Mora defends it easily.

That's one minute gone in the round.
Hain working a defensive guard here.
Mora makes a bit of distance and scores with some ground and pound, still in guard.
Hain looking for submissions off his back, moving his hips, looking for an opening.
Mora trying to control the position from guard on top but Hain is wriggling around, looking for whatever he can.
Hain is working actively off his back, looking to secure an arm or perhaps work for a triangle.
Mora throwing strikes but missing.
Mora in full guard, throwing the ground and pound. No damage this time.
Hain keeping full guard, as Mora tries to pass.
Hain working from the bottom, still in full guard. He's managed to get a loose triangle. Mora doesn't seem to be doing much to defend here, obviously he feels comfortable in the position. Mora manages to throw the legs off his shoulder and he's back into guard - no problem.

That's two minutes gone in the round.
Hain working from the bottom, still in full guard. He's managed to get a loose triangle. Mora doesn't seem to be doing much to defend here, obviously he feels comfortable in the position. Mora manages to throw the legs off his shoulder and he's back into guard - no problem.
Mora wants to control from the top but Hain keeps moving.
Hain is looking to sweep but instead, Mora has passed into half guard.
Hain trying to control from the bottom.
We've seen a great period of action over the last minute or so - credit to both fighters for going all out!
Mora seems to be taking a bit of a break to think of his next move. He lands a short punch in the meantime.
Mora lands a big shot. The thud that echoes around the arena is like music to the fans' ears.
Hain is doing well to avoid being mounted. He's controlling the position at the moment.

That's three minutes gone in the round.
Hain works his way to full guard. Good work.
Mora controls the pace of the fight for a moment.
Hain lands a beautiful switch and he's in full mount! That could spell trouble for Mora!
Hain landing punches.
Mora is wriggling around trying to escape.
Mora flailing away with punches but nothing is landing.
Mora tries to lock up and control but Hain gives him a forearm to the face and pushes him away.
Hain with good strikes from the mount here!
Mora can't escape the position.
Hain with shots to the head and body - Mora looks very uncomfortable down there.
Wooooo! Give it up for these two warriors! They are putting on a show!
Hain raining down shots from the mount!
Hain looking for an armbar but decides to keep the dominant position instead.

That's four minutes gone in the round.
Hain lands a nice shot to the head.
Mora is trying desperately to improve position.
Hain looking to finish Mora with some ground and pound. This is bad for Mora!
Mora is looking to get to half guard.
Mora regains half guard.
Mora regains full guard. Nicely done.
Hain sneaks a leg through and gets to half guard. That was like a knife through butter how easily he passed Mora's guard.
The crowd are going absolutely nuts as the round comes to an end - what a fantastic round of action!
Hain working over Mora with some ground and pound. Mora looks like he wants out of this position, which is understandable.
Hain is working for a kimura but Mora is defending it quite comfortably.
Hain wants to pass to mount but Mora is defending the position.
And thats the end of the round the fighters go back to their corners.
A close round but Sam Hain will probably get the nod.
That's time! Back to the action!

Decent striking displayed by Hain there.
Hain misses with a looping right.
Hain connects with a good right hand that stumbles Mora. Mora circles away out of range and recomposes himself.
Mora shoots in for a takedown but doesn't get it.
Mora dodges the punch combination from Hain.
Mora stumbles momentarily as he takes a strong leg kick from Hain.
Hain displaying good standup as he scores with a three punch combination.

Mora is rocked!
Hain swings and misses with a hook to the body.
Oh Mora is still all over the place! His legs are completely gone! Will he be able to recover?!!
Hain cracks Mora with a right hand to the side of the head.
Mora takes one on the button.
This is a great period of action - very entertaining stuff!
Mora keeping a good distance there, avoiding the body shot.
Mora thows a body shot but no joy.
A slow jab from Hain misses its intended target.
Mora tries to shoot in for a takedown. He's got hold of a leg but Hain swivels and escapes.
Mora shoots and misses
and Hain counters with a low kick, right behind Mora 's knee.
Mora seems to have got his legs back now.
That's three failed takedown attempts in the round for Alejandro Mora. That's going to take a lot out of him.
That's one minute gone in the round.
Hain thows a left - swing and a miss!
Mora swings and misses with a hook to the body.
Horrible takedown by Hain or perhaps it was just good defense by Mora which made him look bad.
Hain throws a looping overhand right but Mora ducks down to avoid it.
Hain misses with a straight left.
Mora slips a straight right by Hain.
Hain scores with a sloppy punch to the body. Not much technique there but it did the business.
Alejandro Mora seems to be the more aggressive standup fighter in this bout.
Hain tries for a takedown but Mora sees it coming a mile off and avoids it easily.
Mora fails with a takedown attempt.
Mora checks a leg kick.
Hain thows a left - swing and a miss!
Hain tries for a takedown but Mora sees it coming a mile off and avoids it easily.
Alejandro Mora is looking to throw some combinations by the looks of things.
Mora misses with a looping right.
Mora closes the distance and gets a double leg, slamming Hain to the mat! Hain manages to get full guard.
Mora has been looking to land a fair amount of strikes on the ground. He might be looking to soften his opponent up in order to work for a submission.
Hain throws his legs up looking to secure a triangle. Oh, that looks pretty tight, I gotta say! Mora escapes and throws Hain's legs to the side, diving into side control!
Hain is breathing heavily.
That's two minutes gone in the round.

Mora working hard here to secure a kimura but he's not really in the right position for it.
The crowd are loving this. Great action here.
Mora cracks Hain with a big elbow.
Mora in side control lands a decent elbow.
You can see the frustration on Hain's face, being in this tough position on the bottom.
Hain tries to work a leg under to get back to half guard but Mora wriggles his own leg back out and remains in side control.
Hain manages to work his way to half guard, despite Mora's best efforts.
Mora is keeping good posture, landing some ground and pound.
Mora thows a huge punch but Hain dodges it nicely.
That's three minutes gone in the round.
Mora keeping composed on the top, looking to control the action.
Mora thows a huge punch but Hain dodges it nicely.
Hain wants to get back to full guard.
The ref warns both fighters not to hold the cage as they work up against the meshing.
Mora not throwing his punches with enough precision this time.
Mora working Hain over with strikes.
Hain wants to get back to full guard.
Mora working the head and body with strikes.
The referee walks around the fighters to get a better view of the action. Mora lands a nice short elbow.
Hain regains full guard. Nicely done.
Alejandro Mora overall seems to be getting the better of the ground position in the fight so far.
Mora working some ground and pound from guard but it's not doing any damage.
Mora is pushing down on Hain's leg trying to pass to half guard. Hain is fighting to maintain full guard but Mora has managed to sneak the leg through.
Mora looks towards his corner to check for any instructions. The corner give him nothing to work with, so he cracks Hain with a short hammerfist. I guess that's as good as any advice he could get in this position.
Hain looking for submissions from an awkward position here.
Mora wants to work for an arm triangle but Hain is really keeping half guard well and defending the submission attempt.
This has been an exciting period of action!
Mora wants to work for an arm triangle but Hain is really keeping half guard well and defending the submission attempt.
That's four minutes gone in the round.
Mora is controlling the pace.
Mora lands strikes from half guard.
Mora missing with some ground and pound from the half guard.
Mora is keeping good posture, landing some ground and pound.
Mora missing with the ground and pound from half guard.
Hain keeping his head moving to avoid the ground and pound.
Mora slips a nice elbow through Hain's hands, connecting with Hain's forehead.
The crowd are going absolutely nuts as the round comes to an end - what a fantastic round of action!
The fighters are battling for position here. Hain manages to regain full guard. Nice work.
Mora throwing strikes but missing.
Hain has momentary wrist control but Mora slips an elbow through the middle.
And thats the end of the round the fighters go back to their corners.
That was a close second round but I would say that Alejandro Mora will probably get the nod.
That's time! Mora's corner gives him a slap on the ass as he gets ready to fight. Ladies and gentlemen, this is the final round!

Mora fails with an attempt to clinch.
Hain throws a nice hook to the body that draws an oooh from the crowd.
Mora tries to clinch but Hain moves out of range.
Hain on the wrong end of a nice hook.

Mora gets taken down but at least he's managed to land in guard.
Hain looking to pass the guard.
Mora looking for submissions from the bottom here. Moving his hips around, possibly looking for an armbar.
Mora pulls Hain in to control the position.
Hain is in close to Mora's body, working some short punches and elbows.
Hain sneaks a leg through and gets to half guard. That was like a knife through butter how easily he passed Mora's guard.
Wooooo! Give it up for these two warriors! They are putting on a show!
Mora slips a foot under and gets full guard. Nice work.
Mora keeping moving, preventing Hain from controlling successfully.
That's one minute gone in the round.
Hain missing there with some ground and pound from the guard.
Mora is active off his back here, looking for submissions.
Hain tries to free his leg and advance position but Mora is retaining full guard.
Mora manages to sweep nicely, so he's now on top. Hain manages to get himself to full guard.
Hain not looking particularly offensive just at the moment.
Mora preventing the sweep.
Hain working a defensive guard here.
Mora trying to land body shots but he keeps hitting the mat.
Mora postures up.
Mora loading up with the ground and pound but he's missing more than he's landing in this flurry.
Hain has his foot on Mora's thigh. He's trying to push off and get in position for a triangle, I think. Mora works his way back into a safe position though.
Hain takes a big intake of breath there - he's definitely tired.
Hain is looking for a guillotine. You can't force these things though and Mora defends well.
That's two minutes gone in the round.
Mora working some ground and pound from guard but it's not doing any damage.
Hain trying to keep a closed guard but Mora is proving a slippery customer.
Mora scoring with punches to the head and body.
The crowd cheering loudly, showing their appreciation for the quality fight we're seeing here.
Mora postures up and lands a big shot to Hain's brow.
Mora stands up over Hain, holding his feet. He dives back in and lands a decent shot to the head.
Hain is working from a closed guard but he's struggling to control his opponent.
Mora is working the ground and pound from guard. He might want to try advancing position though to get more of an impact.
Mora got a little sloppy there for a moment and Hain has worked his way into a loose triangle - can he finish it?! No, Mora has managed to get both his arms back between Hain's legs - danger averted.
Mora throwing elbows and punches but not connecting, as Hain works some decent striking defense from the bottom.
Hain is looking for a triangle here but Mora uses the submission attempt to pass into side control.
That's three minutes gone in the round.
Mora lands a few punches from side control.
Mora is working Hain over with some ground and pound from side control.
Hain is looking to reverse the position.
Mora scores with a couple of nice shots to the head there. The referee takes a look at Hain to see if he's OK.
Mora works a knee to the body and follows up with a nice elbow to the head.
Both fighters really going for it on the ground here!
Mora lands a few punches from side control.

Hain is rocked!
Mora working the ground and pound from side control.
Hain is still in real trouble! Can Mora finish him?
Mora working the head with strikes.
Hain takes a nasty elbow to the side of the head.
Wooooo! Give it up for these two warriors! They are putting on a show!
Mora throwing strikes but missing, from side control.
Hain takes an elbow right on the bridge of the nose and winces in pain.
Mora cracks Hain with a big right hand but Hain just smiles back at him and invites him to have another go.
That's four minutes gone in the round.
Mora working the ground and pound from side control.
Mora lands a nice forearm strike.
Mora working the ground and pound.
Mora in side control, trying to ground and pound but not landing this time.
Mora lands a strong strike to the head of Hain. That's dazed him! Mora looking to finish here. Hain is waving his arms around trying to block but he's hurt badly - Mora lands more strikes and the referee steps in to end the fight!
Ladies and gentlemen, after 4:39 of round 3, we have a winner by way of TKO (Strikes). Alejandro Mora!
An out of breath Alejandro Mora thanked his loyal fans in his post fight interview, giving them credit for his success over the course of his career.
|
|
|
|
|
|
|
|
|
|
|
|
|
|
|
|
|
|
|
|
|
|
|
| S |
C
A |
G |
S |
C
B |
G |
|
S |
C |
G |
|
energy
A | B |
|
hype
A | B |
|
pop
A | B |
|
mgr
A | B |
|
FIGHT
RATING
100% |
|
|
|
|
|
|

