|
|
PBP Commentary |
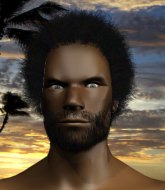
Coming up we have a welterweight MMA rules bout between Busy Signal (ranked 0 p4p, 0 weight class) and Tragen Hyabusa (ranked 0 p4p, 0 weight class). Signal comes to the cage accompanied by Busy Signal - Smoke Some High Grade. Over to our ring announcer for the fighter introductions!
 |
|
 |
| 180 cm
21
179 lbs
8 - 4 - 0 |
|
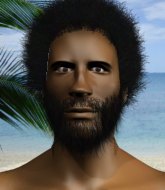
183 cm
22
170 lbs
5 - 5 - 1 |
Good wrestling
Counter striker
Cardio machine |
|
BJJ Purple Belt
Excellent MT
Granite chin |
|
| |
|
Ladies and gentlemen. This fight is 3 rounds, in the welterweight division.
Introducing the fighter to my left, fighting out of the red corner.
With a record of
8 - 4 - 0, fighting out of Los Angeles, Busy Signal!
And introducing the fighter to my right, fighting out of the blue corner.
With a record of
5 - 5 - 1, fighting out of Los Angeles, Tragen Hyabusa!
The judges for this bout are Jack Bonds, Don Winkell and Timothy Bukovac.

The bell rings for round one and we are underway!
Hyabusa misses with a jab, cross combination.
Hyabusa scores with a one two! Signal had his feet all tangled up there and couldn't avoid the strikes.
Nice body punch from Hyabusa.
Signal gets his head snapped back by a nice shot there.
Signal looks frustrated there after his takedown attempt is stuffed easily.
Hyabusa misses with a straight right.
Hyabusa just misses with a punch to the body.
Hyabusa scores with a nice looking left hook and follows it up with an uppercut!
Hyabusa bobs and weaves well there to avoid the strikes.
The fighters circling - Hyabusa throws out the jab but it was never going to land.
Hyabusa punishes Signal's body with a nice straight punch.

That's one minute gone in the round.
Signal avoids the body shot from Hyabusa.
Hyabusa throws a head kick that misses and slips in the process. He scrambles back to his feet and the fighters circle.
Hyabusa throws a hook but Signal blocks it.
No luck with that takedown attempt from Signal.
Hyabusa tries to bum rush Signal with a series of wild strikes but Signal uses good footwork to avoid the assault.
Hyabusa feints with a shoulder and throws a nice leg kick to Signal's calf.
Signal tries for a takedown but Hyabusa circles away easily
and Hyabusa counters with a one-two to the body.
That's three failed takedown attempts in the round for Busy Signal. That's going to take a lot out of him.
Hyabusa throws a right and a left that Signal avoids nicely.
Hyabusa lands three nice shots there - that looked like it hurt!

That's two minutes gone in the round.
Hyabusa fails to land with a series of punches.
Good shot there by Hyabusa.
Hyabusa scores to the head and body with a nice combination!
Hyabusa connects with the punch.
A slapping leg kick lands for Hyabusa.
Hyabusa displays good takedown defense there as he swats away a double leg from Signal.
Hyabusa will need to tighten up his combinations if he doesn't want to gas himself out, swinging at thin air.
Signal shoots for a double leg takedown but Hyabusa sprawls well. He's pushed Signal's face into the mat and manages to get back to his feet relatively easily.
Tragen Hyabusa seems to be the more aggressive standup fighter in this bout.

Signal looking to score a takedown here. Hyabusa is defending well but Signal drives through and ends up in Hyabusa's guard.

That's three minutes gone in the round.
Signal prevents Hyabusa from getting back to his feet.
Signal working some ground and pound from guard but it's not doing any damage.
Signal wants to pass the guard but Hyabusa is keeping the position.
Hyabusa is trying to stand up but he's not managed so far.
Signal is just sitting in guard, looking to avoid any submissions.
Signal stands up and looks to throw the legs aside to pass to side control. Hyabusa swivels though and keeps the full guard.

That's four minutes gone in the round.
Signal passes Hyabusa's right leg, so he's now in half guard.
Hyabusa is refusing to be controlled, as Signal sits in half guard.
Signal not landing any meaningful shots this time.

Signal wants to work for an arm triangle but Hyabusa is really keeping half guard well and defending the submission attempt.
Signal not throwing his punches with enough precision this time.
The crowd applaud the fighters efforts here as the round comes to an end.
Hyabusa is looking to regain full guard. Not this time though.
Signal looking for a kimura but he'll have to free his other leg if he wants to finish that. Perhaps he's just using it as a distraction technique.
And thats the end of the round the fighters go back to their corners.
A close round but Tragen Hyabusa will probably get the nod.
The fighters' corners scream their final instructions, as the referee calls time. Here we go, back to the action!

Hyabusa throws a right high kick that is partially blocked by Signal.
Hyabusa throws a wild combination but nothing lands.
We've had a slow start to the round here - hopefully the action picks up.
Signal gets his takedown attempt stuffed easily
and Hyabusa counters with a series of strikes. Signal will be more careful next time no doubt.
Hyabusa pivots, looking for a leg kick but Signal is out of range and Hyabusa settles back down.
Signal slips a jab and a cross from Hyabusa.
That's one minute gone in the round.
Hyabusa is looking to chop away at Signal's legs.
Hyabusa moves into range and connects with a jab.
Hyabusa misses with a body shot.
Hyabusa misses with a jab, cross combination.
Signal shoots in looking for a takedown. Hyabusa tries to sprawl out of it but Signal keeps driving through. The fighters are pinned against the cage. Hyabusa manages to get underhooks and after a bit of a struggle, circles away and we're back to standing.
Hyabusa misses with a series of wild punches.
A slapping leg kick lands for Hyabusa.
Tragen Hyabusa seems to be getting the better of the standup.
Signal closes the distance, clinches up and gets a nice trip takedown into side control. Very smooth.
That's two minutes gone in the round.
Hyabusa struggling a bit here.
Signal slows the pace down.
The ref warns both fighters not to hold the cage as they work up against the meshing.
Signal advances to full mount.
Hyabusa trying desperately to get to his feet.
Signal looking to finish Hyabusa with some ground and pound. This is bad for Hyabusa!
Signal has been looking to land a fair amount of strikes on the ground. He might be looking to soften his opponent up in order to work for a submission.
The crowd cheering loudly, showing their appreciation for the quality fight we're seeing here.
Signal trying to control but he's not successful this time.
Signal controlling the pace for now.
Signal unloading with bombs!
That's three minutes gone in the round.
Hyabusa is trying to get to the cage to help him get back to his feet.
Signal raining down hammerfists from mount.
Signal landing punches.
The referee warns Hyabusa that he has to improve his position here as he takes two more clean shots to the head.
Signal unloading with bombs!
We've seen a great period of action over the last minute or so - credit to both fighters for going all out!
Hyabusa wants to hold on but Signal pushes him away.
Hyabusa is in all sorts of trouble here.
Signal sitting in mount, just looking to control for the moment.
Hyabusa is desperately trying to improve his position but Signal has a good base and remains in mount.
That's four minutes gone in the round.
Signal jumps to the side looking to secure the arm triangle
. Ooooh, that looks tight
Hyabusa is gargling but he's managed to escape! Nice work there by Hyabusa and Signal has given up the dominant position trying to land that submission.
Signal trying to control the position but Hyabusa is working away.
Signal looking for an arm triangle but it's way too loose to do anything.
Signal wants to lay and pray for a moment but Hyabusa keeps working.
As the round comes to an end the crowd are showing their appreciation for a great round of action.
Hyabusa is trying to get back to half guard.
And thats the end of the round the fighters go back to their corners.
Busy Signal dominated that second round.
Well, the break between rounds is over. Let's get back to the scrappin! This is the final round!

Signal shoots in for a takedown and gets it.
Signal throwing punches and elbows but they're not doing any damage.
Signal has freed up his trapped foot and advances to mount.
Signal punishing his opponent with strikes.
Signal landing punches.
Signal looking to control but Hyabusa is working nicely, looking to advance position himself.
Signal unloading with bombs!
Hyabusa really doesn't want to stay on the ground with Signal. If he can't get it back to his feet, it's only a matter of time before he'll be tapping out.
That's one minute gone in the round.
Signal tries to control but Hyabusa wriggling away.
Signal throwing shots from mount but they're not landing.
Signal takes a little breather and maintains the position. The referee will be looking for him to stay active from such a dominant position though.
Signal connects with a couple of good shots from mount.
Hyabusa defends a decent attempt at a guillotine from Signal.
Signal with the ground and pound from mount.
This has been an exciting period of action!
Signal lands a heavy elbow.
That's two minutes gone in the round.
Signal lands a couple of nice shots there from mount.
Signal with the ground and pound from mount.
Signal tries to control but Hyabusa wriggling away.
Signal is going oldschool here, as he tries to force Hyabusa to tap using a forearm choke. This isn't 1993 though, so Hyabusa shrugs it off.
Signal trying to control but Hyabusa is having none of it.
Hyabusa defends a decent attempt at a guillotine from Signal.
Signal tucks in and makes sure he doesn't lose the dominant position.
That's three minutes gone in the round.
Signal working for a guillotine from mount but Hyabusa is in no mood to give up.
Busy Signal overall seems to be getting the better of the ground position in the fight so far.
Signal looks like he's working for a submission but he's not found anything just yet.
Signal lands with some strikes.
Signal trying to control but Hyabusa is having none of it.
That's four minutes gone in the round.
Signal lands an elbow that was bordering on illegal but the referee lets it go with a warning.
Tragen Hyabusa has stepped it up - he knows he needs a finish here!
Signal working away from the top, dropping strikes.
The referee warns Hyabusa that he has to improve his position here as he takes two more clean shots to the head.
The fans in attendance giving it up for the two fighters, who have really let it all hang out in the last minute or so!
Signal scoring with some good ground and pound from mount here. Will he manage to finish Hyabusa?
Signal trying to control but he's not successful this time.
Signal tucks in and makes sure he doesn't lose the dominant position.
The crowd are going absolutely nuts as the round comes to an end - what a fantastic round of action!
Signal lands a heavy elbow.
Signal landing strikes from the mount.
And that's the end of the fight!
Busy Signal showed his dominance in that final round.
I think Signal has won this one but let's see what the judges have to say. Over to the ring announcer for the scorecards.
Ladies and gentlemen, after 3 rounds of action, we go to the scorecards for a decision.
Judge Jack Bonds scores the fight for Busy Signal!
Judge Don Winkell scores the fight for Busy Signal!
Judge Timothy Bukovac scores the fight for Busy Signal!
Busy Signal wins by unanimous decision!
A victorious Busy Signal thanked his army of followers in his post fight interview, telling people to make sure they follow him on Twitter.
|
|
|
|
|
|
|
|
|
|
|
|
|
|
|
|
|
|
|
|
|
|
|
| S |
C
A |
G |
S |
C
B |
G |
|
S |
C |
G |
|
energy
A | B |
|
hype
A | B |
|
pop
A | B |
|
mgr
A | B |
|
FIGHT
RATING
50% |
|
|
|
|
|
|

