|
|
PBP Commentary |
Coming up we have a bantamweight MMA rules bout between Hano Bilkerken (ranked 0 p4p, 0 weight class) and Michael Budgen (ranked 0 p4p, 0 weight class). Hano Bilkerken has a significant reach advantage - let's see if he can make it count.
 |
|
 |
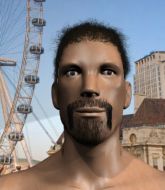
| 225 cm
26
130 lbs
1 - 12 - 0 |
|
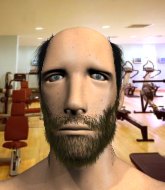
172 cm
18
130 lbs
1 - 2 - 0 |
BJJ Blue Belt
Solid Muay Thai
Experienced |
|
BJJ Blue Belt
Brawler
Granite chin |
|
| |
|
Ladies and gentlemen. This fight is 3 rounds, in the bantamweight division.
Introducing the fighter to my left, fighting out of the red corner.
With a record of
1 - 12 - 0, fighting out of Amsterdam, Hano Bilkerken!
And introducing the fighter to my right, fighting out of the blue corner.
With a record of
1 - 2 - 0, fighting out of Amsterdam, Michael Budgen!
The judges for this bout are Radbod Blank, Saam Ante and Paulsen Ambrosius.

The bell rings for round one and we are underway!
Budgen misses with a two punch combination.
Budgen does a little shimmy and throws a leg kick. The leg kick missed by a considerable margin though, making him look a little bit silly for doing the shimmy.

Budgen shoots in and bounces Bilkerken off the cage to secure the takedown into guard.
Budgen must be cautious of submissions here, given that his opponent has the superior Jiu Jitsu.
Budgen wants to stand and escape but instead Bilkerken has hit a sweep and he's now on top in guard.

Budgen is working an open guard so Bilkerken takes the opportunity to get back to his feet.
A really sloppy takedown attempt there from Budgen.

Budgen forces Bilkerken back against the cage and clinches.
Budgen takes an elbow to the temple.
Bilkerken trying to land knees to the body.
Bilkerken really does look like a pencil wearing a pair of gloves. Let's hope he has a gameplan to suit that ridiculous body shape.

That's one minute gone in the round.
Bilkerken landing knees to the body.
Bilkerken is trying to wear down his opponent with knees to the body.
Bilkerken putting his Muay Thai to good use. He has Budgen in a tight clinch and is doing some damage with knees to the body.
Budgen looks gassed!
Bilkerken tries to land a knee to the body but he is off balance and Budgen avoids it.
Bilkerken trying to land knees to the body.
Bilkerken prevents Budgen from breaking the clinch.
Budgen on the defensive, avoiding the knees to the body.
Bilkerken trying to land knees to the body.
Budgen managing to block the knees to the body from Bilkerken.
Bilkerken is trying to wear down his opponent with knees to the body.
Bilkerken putting his Muay Thai to good use. He has Budgen in a tight clinch and is doing some damage with knees to the body.
This is a great period of action - very entertaining stuff!
Budgen managing to block the knees to the body from Bilkerken.
Budgen is trying to break the clinch but Bilkerken is controlling him.
Budgen wants to push off and get back to the center of the mat but Bilkerken has him pressed against the cage.
Bilkerken lands a nice elbow from the clinch.
Budgen wants to strike at distance but he can't break free of the clinch.
Budgen is trying to slow down the pace in the clinch, to catch his breath.
Bilkerken is trying to wear down his opponent with knees to the body.

That's two minutes gone in the round.
Budgen takes an elbow to the forehead.
Kneeeeees! The crowd are calling for knees to the body. Bilkerken obliges.
Bilkerken landing knees to the body.
Bilkerken lands a knee to the body.
Kneeeeees! The crowd are calling for knees to the body. Bilkerken obliges.
Bilkerken working Budgen over with knees to the body.
Bilkerken landing knees to the body.
Bilkerken lands a knee to the body.
Bilkerken lands a knee to the body.
Budgen misses with a hook from the clinch.
Bilkerken putting his Muay Thai to good use. He has Budgen in a tight clinch and is doing some damage with knees to the body.
Kneeeeees! The crowd are calling for knees to the body. Bilkerken obliges.
Bilkerken is trying to wear down his opponent with knees to the body.
Bilkerken unloads a knee to the mid-section.
Bilkerken landing some nice looking knees to the body.
Bilkerken putting his Muay Thai to good use. He has Budgen in a tight clinch and is doing some damage with knees to the body.
Bilkerken crunches a lovely knee into Budgen's ribcage.

That's three minutes gone in the round.
Bilkerken is looking to score with knees to the body. Maybe he'll change it up and go body then head. Budgen is defending well for now.
Budgen is trying to push Bilkerken away but Bilkerken has him pressed against the cage, so he's going nowhere.
Bilkerken unloads a knee to the mid-section. Budgen lets out a prehistoric sounding urrrrgh.
Bilkerken lands an elbow just above Budgen 's eye.
Bilkerken lands a glancing elbow in the clinch.
Budgen is trying to slow down the pace in the clinch, to catch his breath.
Bilkerken crunches a lovely knee into Budgen's ribcage.
Budgen takes a knee to the side of the body.
Bilkerken trying to land knees to the body.
Bilkerken crunches a lovely knee into Budgen's ribcage.
Bilkerken unloads a knee to the mid-section. Budgen lets out a prehistoric sounding urrrrgh.
Budgen wants to push off and get back to the center of the mat but Bilkerken has him pressed against the cage.
Bilkerken has Budgen pressed against the cage, preventing Budgen from circling away and getting back to striking at range.
Bilkerken lands a good knee to the midsection. Budgen won't want to take too many of those.
Budgen on the defensive, avoiding the knees to the body.

That's four minutes gone in the round.
Bilkerken tries to land a knee to the body but he is off balance and Budgen avoids it.
Bilkerken is looking to score with knees to the body. Maybe he'll change it up and go body then head. Budgen is defending well for now.
Budgen displaying some good clinch control by pressing Bilkerken up against the cage.
Budgen wants to strike at distance but he can't break free of the clinch.
Budgen is trying to force a seperation but Bilkerken has the dominant position.
Bilkerken scores a nice knee to the body.
Knees in the clinch landing for Bilkerken.
Fantastic stuff here - a very entertaining period of action, which has drawn cheers from the crowd.
Budgen trying to control the position but instead, Bilkerken has worked for underhooks and has pushed Budgen into the cage.
Knees in the clinch landing for Bilkerken.
The crowd are going absolutely nuts as the round comes to an end - what a fantastic round of action!
Knees in the clinch landing for Bilkerken.
Budgen takes a knee to the side of the body.
Budgen misses with an elbow strike.
Knees in the clinch landing for Bilkerken.
And thats the end of the round the fighters go back to their corners.
Hano Bilkerken dominated that round.
OK. That's time! The bell goes and we're back to the action.

Bilkerken wants to clinch up but Budgen keeps it at a distance.
Bilkerken blocks a head kick by Budgen.
Bilkerken doesn't manage to clinch there - Budgen circles away.
Budgen misses with a half-hearted attempt at a head kick.
Budgen shoots in from a long way out. He's driving through with the takedown attempt and he eventually gets it, landing in Bilkerken's guard.
Bilkerken has a closed guard, preventing Budgen from standing up.
Budgen preventing the sweep.
The ref warns both fighters not to hold the cage as they work up against the meshing.
Budgen is breathing heavily.
That's one minute gone in the round.
Budgen wants to stand and escape but instead Bilkerken has hit a sweep and he's now on top in guard.
Budgen is working an open guard so Bilkerken takes the opportunity to get back to his feet.
Bilkerken tries to clinch up.
Michael Budgen seems to be the more aggressive standup fighter in this bout.

Bilkerken closes the distance and clinches.
Knees in the clinch landing for Bilkerken.
Kneeeeees! The crowd are calling for knees to the body. Bilkerken obliges.
Bilkerken lands a nice knee to the body.
Bilkerken crunches a lovely knee into Budgen's ribcage.
This has been an exciting period of action!
Bilkerken working Budgen over with knees to the body.
Bilkerken putting his Muay Thai to good use. He has Budgen in a tight clinch and is doing some damage with knees to the body.
Knees in the clinch landing for Bilkerken.
That's two minutes gone in the round.
Bilkerken landing some nice looking knees to the body.
Bilkerken unloads a knee to the mid-section.
Knees in the clinch landing for Bilkerken.
Budgen takes an elbow to the forehead.
Budgen wants to break free. God knows he wants to breaaaak freeee.
Budgen takes an elbow to the temple.
Knees in the clinch landing for Bilkerken.
Budgen takes a knee to the side of the body.
Bilkerken keeps the fight in the clinch, despite Budgen's efforts to push away.
Bilkerken utilising his Muay Thai to score with a knee to the body.
Bilkerken scores a nice knee to the body.
Bilkerken scores a nice knee to the body.
A nice glancing elbow lands by Bilkerken.
Kneeeeees! The crowd are calling for knees to the body. Bilkerken obliges.
That's three minutes gone in the round.
Bilkerken landing knees to the body. They look like they could hurt.
Budgen is trying to break free.
Bilkerken unloads a knee to the mid-section. Budgen lets out a prehistoric sounding urrrrgh.
Budgen blocks a knee to the body. He'll have a nicely bruised forearm in the morning.
Both fighters working to control the clinch.
Bilkerken working Budgen over with knees to the body.
Bilkerken landing some nice looking knees to the body.
Budgen on the defensive, avoiding the knees to the body.

Budgen breaks the clinch and we're back to striking at distance.
Budgen misses with a double jab.
Bilkerken is looking to clinch but Budgen is avoiding it.
Bilkerken is looking to take this fight into the clinch.
Budgen shoots in for a takedown. "Ole!" shouts Bilkerken as he jumps to the side.
That's four minutes gone in the round.
Budgen swats away the attempt to clinch by Bilkerken.
Budgen tries a low kick but Bilkerken avoids it.
Budgen misses with a double jab
and Bilkerken holds on and brings the fighters into a clinch.
As the round comes to an end the crowd are showing their appreciation for a great round of action.
Budgen is trying to force a seperation but Bilkerken has the dominant position.
Budgen is looking to break free of the clinch but Bilkerken has double underhooks.
And thats the end of the round the fighters go back to their corners.
Hano Bilkerken dominated that second round.
That's time! Back to the action! The crowd applaud as we get ready to start the final round!

Budgen misses with a combination
and Bilkerken counters into the clinch. Nicely done.
Bilkerken using the Thai clinch to land knees to the body.
Budgen takes a knee to the side of the body.
Budgen has had enough of the clinch and is looking to separate.
Bilkerken landing some nice looking knees to the body.
Bilkerken working Budgen over with knees to the body.
Bilkerken landing knees to the body.
This is a great period of action - very entertaining stuff!
Bilkerken lands a good knee to the midsection. Budgen won't want to take too many of those.
Hano Bilkerken has scored more points in the clinch so far.
Bilkerken unloads a knee to the mid-section. Budgen lets out a prehistoric sounding urrrrgh.
Bilkerken is trying to wear down his opponent with knees to the body.
Bilkerken unloads a knee to the mid-section. Budgen lets out a prehistoric sounding urrrrgh.
Bilkerken lands a nice knee to the body.
Bilkerken is trying to wear down his opponent with knees to the body.
Knees in the clinch landing for Bilkerken.
Both fighters are breathing heavily.
Bilkerken lands a nice knee to the body.
That's one minute gone in the round.
Bilkerken tries to land a knee to the body but he is off balance and Budgen avoids it.
Bilkerken working Budgen over with knees to the body.
Bilkerken landing knees to the head.
Bilkerken trying to land knees to the body.
Budgen pushes off and fires off an elbow that misses, before clinching up again, against the cage.
Budgen is trying to break the clinch but Bilkerken has him pressed against the cage.
Bilkerken putting his Muay Thai to good use. He has Budgen in a tight clinch and is doing some damage with knees to the body.
Budgen is trying to break free.
Budgen working hard to break the clinch.
Budgen takes a knee to the side of the body.
Bilkerken misses the knee to the body. Nice hip positioning from Budgen.
Budgen wants to strike at distance but he can't break free of the clinch.
Knees to the body from Bilkerken.
Bilkerken is really dominating this fight. Is there anything that Budgen can do to turn this around?
Budgen is trying to break the clinch but Bilkerken is controlling him.
Budgen wants to strike at distance but he can't break free of the clinch.
Budgen takes a knee to the side of the body.
That's two minutes gone in the round.
Bilkerken working Budgen over with knees to the body.
Budgen is trying to break free.
Bilkerken creates a bit of space for himself and sneaks an elbow through Budgen's defenses.
Bilkerken landing knees to the body. They look like they could hurt.
Bilkerken missing with knees to the body.
Bilkerken tries to land knees in the clinch but Budgen avoids the damage to the body.
Bilkerken tries to land knees in the clinch but Budgen avoids the damage to the body.
Budgen looks like he'd prefer to be striking at range right now.
Budgen has had enough of the clinch but Bilkerken keeps him there for the moment.
Bilkerken putting his Muay Thai to good use. He has Budgen in a tight clinch and is doing some damage with knees to the body.
Bilkerken tries to land knees in the clinch but Budgen avoids the damage to the body.
Bilkerken is looking to score with knees to the body. Maybe he'll change it up and go body then head. Budgen is defending well for now.
We've seen a great period of action over the last minute or so - credit to both fighters for going all out!
Budgen looks like he'd prefer to be striking at range right now.
Budgen tries to circle away but Bilkerken has him pinned against the cage.
Bilkerken putting his Muay Thai to good use. He has Budgen in a tight clinch and is doing some damage with knees to the body.
Budgen has had enough of the clinch and is looking to separate.
That's three minutes gone in the round.
Budgen is trying to break the clinch but Bilkerken is controlling him.
Budgen is trying to break the clinch but Bilkerken is controlling him.
Kneeeeees! The crowd are calling for knees to the body. Bilkerken obliges.
Budgen managing to block the knees to the body from Bilkerken.
Budgen is trying to push Bilkerken away but Bilkerken has him pressed against the cage, so he's going nowhere.
Bilkerken tries to land a knee to the body but he is off balance and Budgen avoids it.
Bilkerken trying to land knees to the body.
Budgen managing to block the knees to the body from Bilkerken.
Bilkerken tries to land a knee to the body but he is off balance and Budgen avoids it.
Bilkerken tries to land a knee to the body but he is off balance and Budgen avoids it.
Budgen tries to break free but Bilkerken pushes him back against the cage.
Budgen taking a breather.
Knees in the clinch landing for Bilkerken.
Budgen is trying to break the clinch but Bilkerken has him pressed against the cage.
Bilkerken keeps control of Budgen as he tries to wriggle out of the double underhooks.
Bilkerken utilising his Muay Thai to score with a knee to the body.
That's four minutes gone in the round.
Bilkerken landing knees to the body.
Michael Budgen has stepped it up - he knows he needs a finish here!
Bilkerken missing with knees to the body.
Budgen looks like he'd prefer to be striking at range right now.
Budgen working hard to break the clinch.
Bilkerken prevents Budgen from breaking the clinch.
Bilkerken landing knees to the body.
Bilkerken is trying to wear down his opponent with knees to the body.
Bilkerken utilising his Muay Thai to score with a knee to the body.
Bilkerken has Budgen pressed against the cage, preventing Budgen from circling away and getting back to striking at range.
Budgen pushes off an throws an elbow but Bilkerken leans to the side and avoids it. We're back to clinching against the cage.
Wooooo! Give it up for these two warriors! They are putting on a show!
The crowd are going absolutely nuts as the round comes to an end - what a fantastic round of action!
Bilkerken lands a knee to the body.
Bilkerken unloads a knee to the mid-section. Budgen lets out a prehistoric sounding urrrrgh.
Budgen is trying to push Bilkerken away but Bilkerken has him pressed against the cage, so he's going nowhere.
Bilkerken putting his Muay Thai to good use. He has Budgen in a tight clinch and is doing some damage with knees to the body.
And that's the end of the fight!
Hano Bilkerken showed his dominance in that final round.
Well I reckon that's a shut out for Bilkerken, winning every round. Will the judges agree? They are the ones who matter, even if they are often depressingly incompetent. Over to the ring announcer for the scorecards.
Ladies and gentlemen, after 3 rounds of action, we go to the scorecards for a decision.
Judge Radbod Blank scores the fight 30:27
Judge Saam Ante scores the fight 30:27
Judge Paulsen Ambrosius scores the fight 30:27
In favor of your winner, by unanimous decision... Hano Bilkerken!
Hano Bilkerken took to the mic after the fight and begged the organizational hierarchy for a shot at the title.
|
|
|
|
|
|
|
|
|
|
|
|
|
|
|
|
|
|
|
|
|
|
|
| S |
C
A |
G |
S |
C
B |
G |
|
S |
C |
G |
|
energy
A | B |
|
hype
A | B |
|
pop
A | B |
|
mgr
A | B |
|
FIGHT
RATING
83% |
|
|
|
|
|
|

