|
|
PBP Commentary |
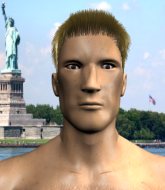
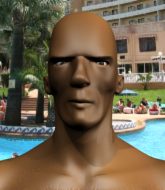
Coming up we have a lightweight MMA rules bout between Artie Dundee (ranked 0 p4p, 0 weight class) and First Helpa (ranked 0 p4p, 0 weight class). Artie Dundee is staring across the cage at his opponent, tweaking his nipples... Tweaking his own nipples that is.
 |
|
 |
| 177 cm
18
165 lbs
3 - 1 - 0 |
|
177 cm
18
164 lbs
3 - 1 - 0 |
BJJ Blue Belt
Counter striker
Good chin |
|
Good wrestler
Basic striking
Granite chin |
|
| |
|
Ladies and gentlemen. This fight is 5 rounds, in the lightweight division.
Introducing the fighter to my left, fighting out of the red corner.
With a record of
3 - 1 - 0, fighting out of Rio de Janeiro, Artie Dundee!
And introducing the fighter to my right, fighting out of the blue corner.
With a record of
3 - 1 - 0, fighting out of Rio de Janeiro, First Helpa!
The judges for this bout are Alexandre Firmino, Paulo Santos and Emerson Jorge.

The bell rings for round one and we are underway!
Helpa shoots in and drives through. Dundee sprawls well.
Helpa tries for a takedown but Dundee circles away easily
and Dundee counters with a nice jab to the body that keeps Helpa thinking.

Dundee closes the distance and clinches.

Dundee tightens his grip and picks Helpa up, before dumping him to the ground. Helpa manages to land in guard.
The referee must be thinking about standing these guys back up.
Helpa controls Dundee momentarily but Dundee frees himself.
Dundee throws a big right hand that misses.
Helpa looking to sweep here. No luck so far.
Dundee trying to control the position from guard on top but Helpa is wriggling around, looking for whatever he can.
Helpa trying to strike off his back.
Helpa looking to control the pace of the fight rather than finish it.
Dundee throws an elbow that misses. Helpa uses the momentum to reverse the position. He's now in Dundee's guard. Nice move by Helpa!

That's one minute gone in the round.
Helpa is stalling in the full guard.
Helpa loading up with the ground and pound but he's missing more than he's landing in this flurry.
Dundee has his hands on Helpa's head, controlling the position.
Dundee has momentary wrist control but Helpa slips an elbow through the middle.

That's two minutes gone in the round.
Dundee is working an open guard here, looking to improve his position. No doubt that will leave him open to counters but at least he's being more offensive.
Helpa looking to sit in guard and control but Dundee gets the butterfly guard and sweeps. He's now in the guard on the top.
Dundee throwing strikes but missing.
Helpa is working an open guard here, looking to improve his position. No doubt that will leave him open to counters but at least he's being more offensive.
Helpa has momentary wrist control but Dundee slips an elbow through the middle.
Helpa utilising some decent striking defenses from the guard, preventing the ground and pound.
Helpa utilising some decent striking defenses from the guard, preventing the ground and pound.

That's three minutes gone in the round.
Dundee lands a couple of elbows.
Helpa is working an open guard here, looking to improve his position. No doubt that will leave him open to counters but at least he's being more offensive.
The ref warns both fighters not to hold the cage as they work up against the meshing.
Dundee throws a big elbow that misses.
Helpa avoiding any damage from the ground and pound.
Helpa wants to stand and escape but Dundee is having none of it.
Dundee postures up and lands some nice ground and pound.
Dundee trying to control but Helpa is working from the bottom.
Helpa working the defensive guard well to avoid strikes from Dundee.

That's four minutes gone in the round.
Helpa preventing the ground and pound from doing any damage.
Helpa keeping full guard, as Dundee tries to pass.
Helpa utilising some decent striking defenses from the guard, preventing the ground and pound.
Helpa wants to get back to his feet but Dundee is in a dominant position and won't allow it.
Helpa preventing the ground and pound from doing any damage.
Helpa keeping moving, preventing Dundee from controlling successfully.
Helpa avoiding any damage from the ground and pound.
As the round comes to an end the crowd are showing their appreciation for a great round of action.
Helpa utilising some decent striking defenses from the guard, preventing the ground and pound.
We get told so often about how wrestlers don't like to be on their backs. Let's see if Helpa can do anything to dispel that myth.
Fantastic stuff here - a very entertaining period of action, which has drawn cheers from the crowd.
Helpa wants to stand and escape but Dundee is having none of it.
Helpa working the defensive guard well to avoid strikes from Dundee.
And thats the end of the round the fighters go back to their corners.
Artie Dundee dominated that round.
The minute break is over - no more time for sponges and pep talks - back to the action!

Helpa misses with a takedown attempt - Dundee sprawls well and throws a nice strike on the way out which just misses.
A lazy left from Dundee finds it's target.
Helpa shoots in for a takedown but Dundee shows good takedown defense.
Helpa tries for a takedown but Dundee circles away easily
and Dundee connects with a straight left hand counter down the middle.
Artie Dundee has stuffed three takedown attempts in the round now. That's going to take a lot out of First Helpa.
Dundee lands with a two punch combination before moving back out of range.

Helpa drives through with a takedown into Dundee's guard. Let's see what he can do from the top position.
Dundee trying to control the position.
Dundee is avoiding any damage by keeping wrist control.
That's one minute gone in the round.
Helpa wants to control from the top but Dundee keeps moving.
Dundee seems keen to control Helpa's posture.
We may be looking at a referee standup if the pace doesn't pick up soon.

The ref stands the fighters back up because Artie Dundee just wasn't active enough.
Helpa shoots in for a takedown - he's clinched up with Dundee but Dundee pushes him off and we're back to square one.
Dundee leaves Helpa with his face pressed against the mat as he sprawls beautifully, defending against a solid takedown attempt.
Dundee looks frustrated there after his takedown attempt is stuffed easily.
That's two minutes gone in the round.
Dundee getting the better of the striking in that exchange.
Dundee keeps the fight standing with a nice sprawl.
Helpa shoots in for a double leg but Dundee sprawls well. That's going to sap some energy.
Helpa shoots for a double leg takedown but Dundee sprawls well. He's pushed Helpa's face into the mat and manages to get back to his feet relatively easily.
Helpa with a lazy takedown attempt
and Dundee counters with a nice jab to the body that keeps Helpa thinking.
Helpa with a poor takedown
and Dundee counters with a quick right hand to the jaw.
First Helpa seems to be the more aggressive standup fighter in this bout.
Helpa is breathing heavily.
Helpa shoots and misses
and Dundee makes him pay by landing a thudding low kick.
That's three minutes gone in the round.
Dundee shoots in but Helpa avoids the takedown attempt easily.
Helpa tries for a takedown but Dundee sees it coming a mile off and avoids it easily.
Dundee digs a good hook to Helpa's body.
Helpa stuffs the takedown attempt from Dundee. Dundee gets slowly back to his feet.
Helpa tries to score a power double leg takedown but Dundee sees that one coming and sprawls well. That will dishearten Helpa somewhat.
Dundee lands with a shot to the body.
That's four minutes gone in the round.
Helpa shoots and misses
and Dundee counters with a takedown into full mount! That could mean trouble for Helpa!
Dundee looking to control but Helpa is working nicely, looking to advance position himself.
Dundee scoring with strikes but Helpa is staying in there.
Dundee looking to control but Helpa is working nicely, looking to advance position himself.
We've seen a great period of action over the last minute or so - credit to both fighters for going all out!
The crowd growing excited in anticipation of a finish here! Right on cue, Dundee cracks his opponent with a massive right hand that draws loud cheers!
Dundee has been looking to land a fair amount of strikes on the ground. He might be looking to soften his opponent up in order to work for a submission.
As the round comes to an end the crowd are showing their appreciation for a great round of action.
Dundee looking to finish Helpa with some ground and pound. This is bad for Helpa!
Helpa is desperately trying to improve his position but Dundee has a good base and remains in mount.
Dundee trying to control but Helpa is having none of it.
And thats the end of the round the fighters go back to their corners.
Artie Dundee dominated that second round.
That's time! Dundee's corner gives him a slap on the ass as he gets ready to fight.

Dundee cracks Helpa with a nice right hand that draws applause from the crowd.
Dundee gets taken down but at least he's managed to land in guard.
Helpa won't allow Dundee to sweep him here.
Helpa looking to sit in guard and control but Dundee gets the butterfly guard and sweeps. He's now in the guard on the top.
Dundee won't allow Helpa to get back to his feet.
That's one minute gone in the round.
Dundee preventing the sweep.
Helpa trying to control the position.
A big thud reverberates around the arena there as Dundee accidentally thumps the mat. Hopefully he's not broken his hand.
Helpa keeping moving, preventing Dundee from controlling successfully.
Dundee trying to land body shots but he keeps hitting the mat.
A big thud reverberates around the arena there as Dundee accidentally thumps the mat. Hopefully he's not broken his hand.
Helpa working a defensive guard here.
If this pace continues, the referee will definitely step in and force a standup.
Dundee wants to control from the top but Helpa keeps moving.
Helpa tries to land a sweep but no joy.
That's two minutes gone in the round.

The referee decides to stand the fighters back up.
Dundee scores a takedown into full mount!
Dundee punching from mount but Helpa doing a good job of avoiding damage.
Dundee misses with a head shot.
Helpa can't escape the position.
The referee warns Helpa that he has to improve his position here as he takes two more clean shots to the head.
Fantastic stuff here - a very entertaining period of action, which has drawn cheers from the crowd.
Dundee content just to control the position here.
Helpa sneaks a leg under to get to half guard.
Helpa won't allow Dundee to pass to mount.
That's three minutes gone in the round.
Dundee sitting in half guard, looking to land shots. Helpa defending well though.
Dundee missing with some ground and pound from the half guard.
Dundee not throwing his punches with enough precision this time.
Dundee thumps the canvas. Not on purpose obviously - he just missed Helpa's head.
Artie Dundee overall seems to be getting the better of the ground position in the fight so far.
Both fighters are breathing heavily.
Dundee throwing punches and elbows but they're not doing any damage.
Dundee wants to take a breather but Helpa is having none of it.
Helpa wants to get back to full guard.
Dundee wants to take a breather but Helpa is having none of it.
Helpa wants to improve his position but Dundee is controlling well.
Dundee wants to control but Helpa is keeping him busy.
That's four minutes gone in the round.
Dundee trying to mount his opponent but Helpa defends it.
Dundee wants to control but Helpa is keeping him busy.
Helpa trying to control from the bottom.
The fighters are pressed up against the cage, both looking to find a bit of space to work.
It looks like we're going to have a standup here. Neither fighter is doing enough on the ground.
Helpa closes the distance and after a bit of a stuggle, scores a takedown into Dundee's guard.
Helpa looking to sit in guard and control but Dundee gets the butterfly guard and sweeps. He's now in the guard on the top.
Wooooo! Give it up for these two warriors! They are putting on a show!
Dundee in full guard, throwing the ground and pound. No damage this time.
As the round comes to an end the crowd are showing their appreciation for a great round of action.
Dundee stops Helpa from standing up.
And thats the end of the round the fighters go back to their corners.
Artie Dundee clearly takes that round.
That's the end of the round. The referee orders the cornermen out of the cage so we can get back down to business.

Dundee is trying hard to land a takedown here. Helpa sprawls well and keeps this one on the feet.
Helpa with a lazy takedown attempt
and Dundee counters with a lovely straight right hand!
Dundee scores with a hook.
Helpa takes a jab right on the nose. That must have hurt but he shrugs his shoulders and looks to return the favor.
Helpa shoots in for a double leg but Dundee sprawls well. That's going to sap some energy.
Helpa with a lazy takedown attempt
and he gets countered with a snapping leg kick.
Artie Dundee has stuffed three takedown attempts in the round now. That's going to take a lot out of First Helpa.
Helpa fails with the takedown
and Dundee counters with a quick right hand to the jaw.
Artie Dundee is winning the standup battle so far.
Helpa is absolutely dripping with sweat - he looks exhausted.
No luck with that takedown attempt from Helpa.
Dundee is looking to clinch but Helpa is avoiding it.
That's one minute gone in the round.
Helpa tries for a takedown but Dundee circles away easily
and Dundee connects with a straight left hand counter down the middle.
Helpa tries for a takedown but Dundee circles away easily
and Dundee connects with a straight left hand counter down the middle.
Donk. Dundee catches Helpa right on the button with a cross.
Dundee lands a nice looking body shot.
Helpa misses with a takedown
and Dundee counters with a nice jab to the body that keeps Helpa thinking.
That's two minutes gone in the round.
Helpa with a lazy takedown attempt
and Dundee counters with a straight right hand.
Helpa tries for a takedown but Dundee circles away easily
and Dundee makes him pay by landing a nice hook to the body before moving out of range.
Dundee forces Helpa back against the cage and clinches.
Helpa tries for a takedown. No joy.
Dundee scores with a nice hook to the head.
Dundee stalling here - the referee won't stand for too much of that.
Helpa is trying to drag Dundee to the mat but Dundee just about manages to keep his footing. He used the cage to his advantage there.
That's three minutes gone in the round.

Dundee breaks the clinch.
Left hook, right uppercut from Dundee.
Dundee drives through with a really nice takedown into side control.
Helpa managing to avoid any damage from the strikes thrown by Dundee.
Dundee misses with a strike but at least he's keeping busy, looking to cause some damage - that will still help him when it comes to the judges scorecards.
Dundee moving around in side mount but really he's just happy to control for now.
The strikes coming from Dundee are missing the target in this wave of attacks.
That's four minutes gone in the round.
Helpa is not content to let Dundee control the position.
Helpa tries to improve position but can't.
Dundee postures up a little and throws a couple of hammerfists but they don't connect properly.
Dundee wants to lay and pray for a moment but Helpa keeps working.
The crowd applaud the fighters efforts here as the round comes to an end.
Helpa tries to buck Dundee off but Dundee is having none of it.
Dundee throwing shots but missing, from side control.
And thats the end of the round the fighters go back to their corners.
Artie Dundee had his way with First Helpa in that round.
That's the end of the round. The referee orders the cornermen out of the cage so we can get back down to business. This is the final round!

Horrible takedown by Helpa or perhaps it was just good defense by Dundee which made him look bad.
Helpa closes the distance and gets a double leg, slamming Dundee to the mat! Dundee manages to get full guard.
Helpa working some ground and pound from guard but it's not doing any damage.
Dundee will have to put a bit more behind his punches if he's going to do any damage from this position.
Dundee lands a beautiful switch and he's in full mount! That could spell trouble for Helpa!
Dundee scoring with some good ground and pound from mount here. Will he manage to finish Helpa?
Dundee raining down hammerfists from mount.
That's one minute gone in the round.
Helpa taking shots to the head.
Dundee with the ground and pound from mount.
Helpa is wobbling all over the place through exhaustion. Will he make it to the final bell?
Dundee is still in mount, landing shots to his trapped opponent. Helpa can't stay in a position like this for much longer.
Dundee pausing momentarily but resumes with a couple of decent strikes that do a bit of damage.
Dundee tries to control but Helpa wriggling away.
Dundee dominating with strikes here.
This has been an exciting period of action!
Dundee trying to control but he's not successful this time.
Dundee lands an elbow that was bordering on illegal but the referee lets it go with a warning.
Helpa is working to get back to half guard.
Dundee is really dominating this fight. Is there anything that Helpa can do to turn this around?
That's two minutes gone in the round.
The referee warns Helpa that he has to improve his position here as he takes two more clean shots to the head.
A nice elbow there by Dundee.
Dundee looking to control but Helpa is working nicely, looking to advance position himself.
Dundee pausing momentarily but resumes with a couple of decent strikes that do a bit of damage.
Dundee thowing shots but they're missing.
Dundee cracks Helpa with a nasty head shot there - the crowd let out an audible gasp there, as the noise reverberated around the arena.
Helpa's corner are shouting for him to stand up but that's bad cornering - how is he meant to stand up when he's mounted? He should be looking to improve his position on the ground before trying to stand back up.
Dundee pausing momentarily but resumes with a couple of decent strikes that do a bit of damage.
That's three minutes gone in the round.
Dundee throwing shots from mount but they're not landing.
Helpa really doesn't want to stay on the ground with Dundee. If he can't get it back to his feet, it's only a matter of time before he'll be tapping out.
Dundee avoids the attempt from Helpa to control.
Helpa is trying to avoid being dragged into an even worse position than he's already in but Dundee is staying active.
Helpa is not a happy chappy
he wants out of there.
Helpa is in a horrible position here, under a barrage of strikes, he's managing to avoid any damage.
Dundee scoring with strikes but Helpa is staying in there.
Dundee misses with a head shot.
Dundee tucks in and makes sure he doesn't lose the dominant position.
Artie Dundee is fighting for a decision here - he's started to take the cautious approach.
Dundee avoids the attempt from Helpa to control.
That's four minutes gone in the round.
Helpa is squirming around, avoiding Dundee's attempts to control the action.
Dundee thowing shots but they're missing.
Dundee prevents Helpa from getting the reversal.
The crowd are going absolutely nuts as the round comes to an end - what a fantastic round of action!
Dundee breaks from Helpa's wrist control and lands an elbow.
And that's the end of the fight!
Artie Dundee showed his dominance in that final round.
Well Dundee has outscored his opponent in every aspect of the fight today. Only a scarily incompetent judge or two will keep him from a well deserved win... Over to the ring announcer for the scorecards.
Ladies and gentlemen, after 5 rounds of action, we go to the scorecards for a decision.
Judge Alexandre Firmino scores the fight 50:45
Judge Paulo Santos scores the fight 50:45
Judge Emerson Jorge scores the fight 50:45
In favor of your winner, by unanimous decision... Artie Dundee!
Artie Dundee seemed lost for words in his post fight interview but he remembered to thank his fans and directed everyone to his website.
|
|
|
|
|
|
|
|
|
|
|
|
|
|
|
|
|
|
|
|
|
|
|
| S |
C
A |
G |
S |
C
B |
G |
|
S |
C |
G |
|
energy
A | B |
|
hype
A | B |
|
pop
A | B |
|
mgr
A | B |
|
FIGHT
RATING
76% |
|
|
|
|
|
|

