|
|
PBP Commentary |
Coming up we have a bantamweight MMA rules bout between Jonathan Hawkins (ranked 0 p4p, 0 weight class) and Gabriel Stark (ranked 0 p4p, 0 weight class). Both fighters will be looking to make this an exciting fight for the fans, I'm sure!
 |
|
 |
| 165 cm
30
142 lbs
15 - 6 - 0 |
|
165 cm
24
144 lbs
9 - 3 - 0 |
Great wrestler
Excellent boxer
Cardio machine |
|
Powerful takedowns
Decent boxing
Good gas tank |
|
| |
|
Ladies and gentlemen. This fight is 2 rounds, in the bantamweight division.
Introducing the fighter to my left, fighting out of the red corner.
With a record of
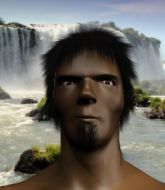
15 - 6 - 0, fighting out of Tokyo, Jonathan Hawkins!
And introducing the fighter to my right, fighting out of the blue corner.
With a record of
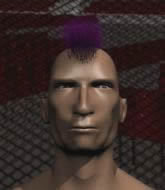
9 - 3 - 0, fighting out of Tokyo, Gabriel Stark!
The judges for this bout are Ren Mimura, Yukihiro Yamamoto and Shigeki Sano.

The bell rings for round one and we are underway!
Stark looks to land a right hand but Hawkins moved out of range.
Stark takes a shot to the body in his stride.
Stark throws a looping overhand right but Hawkins ducks down to avoid it.
Stark has his takedown stuffed
and Hawkins counters with a lovely shot to the body.
Stark shoots in but Hawkins avoids the takedown attempt easily.
Hawkins slips a jab from Stark.
Stark takes one on the chin but keeps coming.

It looks like Gabriel Stark has been cut.
Stark leaves Hawkins with his face pressed against the mat as he sprawls beautifully, defending against a solid takedown attempt.
Hawkins slips a jab from Stark.
Hawkins displays some good footwork, moving neatly out of range as Stark throws out the jab.
Stark misses with a hook. Hawkins ducked under it nicely.
Hawkins cracks Stark with an open hand slap.
Hawkins keeping his hands up high there, blocking the jab from Stark.
Stark stuffs the takedown attempt from Hawkins. Hawkins gets slowly back to his feet.

That's one minute gone in the round.
Stark moves away from the strike by Hawkins.
Hawkins misses the shot to the body.
Stark avoids the body shot from Hawkins.
Stark misses with a looping right.
Stark tries to land with a swinging hook to the body but Hawkins was well out of range. Poor timing from Stark.
Hawkins lands a powerful looking uppercut that connected with his opponent's jaw.
Stark misses with a hook.
Stark doesn't succeed with the takedown
and Stark takes a counter punch right on the button for his troubles.
Jonathan Hawkins has stuffed three takedown attempts in the round now. That's going to take a lot out of Gabriel Stark.
Stark missing with a left hand there. Hawkins was out of range so wasted energy throwing that one.
Stark will have to do better than that with his takedown attempts.
Stark pushing out the jab but it's not landing.

Hawkins shoots in and gets a takedown into Stark's guard.

That's two minutes gone in the round.
The referee must be thinking about standing these guys back up.
Hawkins throwing strikes from guard but Stark blocks nicely.
Hawkins tries to free his leg and advance position but Stark is retaining full guard.
Hawkins is working hard here to advance position.
Hawkins controlling from the top position.
This has been an exciting period of action!
Hawkins postures up.
Stark lands a beautiful switch and he's in full mount! That could spell trouble for Hawkins!
Hawkins is trying to reverse the position but instead Stark has taken his back - oops!
Both fighters really going for it on the ground here!

Stark is working really hard to secure the rear naked choke. Hawkins defends successfully for a significant amount of time. Both fighters are looking very determined.
Stark controlling well, preventing Hawkins from escaping the position.

That's three minutes gone in the round.
Hawkins rolls and manages to get back to half guard. Nicely done.
Hawkins won't allow Stark to pass to mount.
Stark is trying to control. Hawkins wants to improve his position but can't escape this time.
Hawkins wants to improve his position but Stark is controlling well.
Hawkins has no desire to be mounted, so is trying to control. Stark is working away from the top position though.
Hawkins tries to get to full guard but Stark has control of the leg.
Stark is taking a breather. Hawkins says something to him but it's hard to make out. Perhaps he's telling him to get on with it and actually do something.

That's four minutes gone in the round.
Hawkins is looking to regain full guard. Not this time though.
The fighters are pressed up against the cage, both looking to find a bit of space to work.
Stark is trying to control the action in half guard but Hawkins is working away on the bottom, looking perhaps to get back to full guard.

Neither fighter is doing enough for the referee's liking and he's decided to stand them back up.
Stark throws a jab when Hawkins was well out of range.
Hawkins lands with an overhand left.
A looping hook to the body misses from Stark. Hawkins does a little dance to reset his feet.
Stark misses the shot to the body.
Hawkins with a lazy takedown attempt
and Stark counters with a nice uppercut.
A jab from Stark misses.
Stark shakes his hands off, looking to compose himself, but takes a jab to the jaw whilst he does it.
Wooooo! Give it up for these two warriors! They are putting on a show!
Stark misses with a looping left.
Hawkins throws a looping left and ducks down for a takedown. He's got his arms around Stark's waist but Stark gets an underhook and avoids the takedown by throwing Hawkins off to one side.
Stark takes a shot to the eye socket. That's gotta hurt.

That's five minutes gone in the round.
A big left from Stark misses.
Stark gets his takedown attempt stuffed easily
and Hawkins counters with a left to the body.
Hawkins looks to land a right hand but Stark moved out of range.
Hawkins throws a hard body shot but it just misses.
The fighters circling - Hawkins throws out the jab but it was never going to land.
Hawkins darts in and lands a nice takedown into half guard.
Stark looking to work for a kimura from the bottom.
Hawkins throws a strike but Stark avoids it easily and moves to full guard.
Stark looking to sweep here. No luck so far.

That's six minutes gone in the round.
Hawkins slips nicely into half guard.
Hawkins thumps the canvas. Not on purpose obviously - he just missed Stark's head.
Stark wants to get back to full guard.
Stark looking to work for a kimura from the bottom.
Stark gets back to full guard.
This has been an exciting period of action!
Stark is working the butterfly guard. He manages to land a nice scissor sweep and is now in half guard on the top. Nice move.
Stark content to control rather than advance.
Stark is looking to advance position but Hawkins won't allow it.

That's seven minutes gone in the round.
Hawkins trying to control from the bottom.
Hawkins wants to get back to full guard.
Stark trying to control from half guard but Hawkins is working away.
Stark prevents Hawkins from improving his position.
The ref warns both fighters not to hold the cage as they work up against the meshing.
Stark is trying for a kimura here. Hawkins looks like he's in a lot of pain... and he's tapping out! Stark wins by kimura!
Ladies and gentlemen, after 8:58 of round 1, we have a winner by way of Submission (Kimura). Gabriel Stark!
A very excited looking Gabriel Stark made sure he remembered to thank all the fans both in the arena and on the internet. He said all the coolest people spend all day on MMA websites, which got a big reaction.
|
|
|
|
|
|
|
|
|
|
|
|
|
|
|
|
|
|
|
|
|
|
|
| S |
C
A |
G |
S |
C
B |
G |
|
S |
C |
G |
|
energy
A | B |
|
hype
A | B |
|
pop
A | B |
|
mgr
A | B |
|
FIGHT
RATING
42% |
|
|
|
|
|
|

