|
|
PBP Commentary |
Coming up we have a light heavyweight MMA rules bout between Ai Za (ranked 0 p4p, 0 weight class) and Tomura Krakakos (ranked 0 p4p, 0 weight class). Krakakos is bouncing up and down as he enters the arena, backed by Cannabis. Tomura Krakakos will no doubt be trying to keep this one on the feet, where he has a distinct advantage.
 |
|
 |
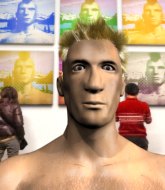
| 181 cm
22
210 lbs
9 - 1 - 0 |
|
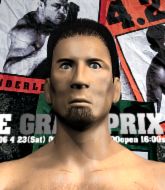
192 cm
29
220 lbs
14 - 4 - 0 |
Abu Dhabi Champ
Solid boxing
Insanely flexible |
|
Good wrestler
Good low kicks
Granite chin |
|
| |
|
Ladies and gentlemen. This fight is 5 rounds, for the light heavyweight championship of the world!
Introducing the champion to my left, fighting out of the red corner.
With a record of
9 - 1 - 0, fighting out of Tokyo, Ai Za!
And introducing the challenger to my right, fighting out of the blue corner.
With a record of
14 - 4 - 0, fighting out of Tokyo, Tomura Krakakos!
The judges for this bout are Shigeki Sano, Sosuke Kotani and Hirohito Nitta.

The bell rings for round one and we are underway!
Za throws a hard body shot but it just misses.
A bone on bone clash there as Za blocks the leg kick.
Za throws a hook to the body but it doesn't connect.
Za misses with a straight right.
Za throws out a token jab with nothing on it.
Za throws a jab but it's blocked by Krakakos.
Krakakos lands a jab.

It looks like Ai Za has been cut.
Za shoots in looking for a double leg takedown. Krakakos defends it nicely.
Krakakos throws a big shot that misses.
Za ducks under an overhand right and circles away with a smile on his face.
Za swings for the body but Krakakos moves out of range.
Za misses with a wild body shot.
Krakakos lands with a right hand.
Donk. Krakakos catches Za right on the button with a cross.
We've seen a great period of action over the last minute or so - credit to both fighters for going all out!
Za blocks a low kick nicely.
Za looks for a takedown here. Will he get it? Krakakos is fending him off so far but Za persists. Nope, Krakakos circles away and we're back to standing.

That's one minute gone in the round.
Krakakos throws a body punch but Za moves out of range.
Krakakos throws a right and a left that Za avoids nicely.
Krakakos keeping a good distance there, avoiding the body shot.
Krakakos lands a nice shot that snaps Za's head back.
Za doesn't react quick enough there as he takes a shot to the body.
Krakakos lands a really nice looking cross but Za seems unphased.
Za darts in and out, connecting with a jab.
Krakakos uses good footwork to get in and out, landing a nice hook.
A punch combination from Krakakos misses.

Za bobs and weaves into range and then changes levels and scores with a nice takedown into side control.
This has been an exciting period of action!
The referee must be thinking about standing these guys back up.
Sloppy strikes there by Za.

Za is looking to finish here, going for an Americana. Krakakos knows the correct defense though, so he's OK.
Krakakos is trying to get back to half guard.

That's two minutes gone in the round.
Za tries for a kimura. Not really close to a finish though.
Za in side control, throwing shots but Krakakos defends.
Krakakos is trying to get back to half guard.
Za trying to control the action but Krakakos is working from the bottom.
Za working the ground and pound.
Za throws a strike aimed at the side of Krakakos's head but Krakakos avoids it well.
Krakakos is positioning himself to get back to half guard.
Krakakos is persisting with the attempt to improve his position.
Krakakos really doesn't want to stay on the ground with Za. If he can't get it back to his feet, it's only a matter of time before he'll be tapping out.

That's three minutes gone in the round.
Za creates some space and throws a big elbow, but Krakakos sees it coming and moves his head just enough to avoid the strike.
Za throwing strikes but missing, from side control.
Za throws a strike aimed at the side of Krakakos's head but Krakakos avoids it well.
Krakakos tries to work a leg under to get back to half guard but Za wriggles his own leg back out and remains in side control.
Krakakos dodges the ground and pound from Za.
Za working the ground and pound but Krakakos is defending the strikes.
Za wants to lay and pray for a moment but Krakakos keeps working.
Za cracks Krakakos with an elbow. That is naaassty.
Za looking for an arm triangle but it's way too loose to do anything.
Za postures up a little and throws a couple of hammerfists but they don't connect properly.

That's four minutes gone in the round.
Za thinks about going for a far side armbar but bails out and retains the dominant position instead.
Za trying to control the position but Krakakos is working away.
Za throws an elbow but Krakakos slips to the side and avoids it well.
The fans in attendance giving it up for the two fighters, who have really let it all hang out in the last minute or so!
An elbow from Za crashes against the mat.
The fighters are pressed up against the cage, both looking to find a bit of space to work.
Za tries for a kimura. Not really close to a finish though.
Za is trying to land an Americana. He has the arm isolated but Krakakos is keeping cool and he's avoided the danger for now.
The crowd are going absolutely nuts as the round comes to an end - what a fantastic round of action!
Za is trying to land an Americana. He has the arm isolated but Krakakos is keeping cool and he's avoided the danger for now.
And thats the end of the round the fighters go back to their corners.
That was a close round but I would say that Ai Za will probably get the nod.
The cut man is working on Ai Za's cut.
That's the end of the interval. I'm sure that seemed a lot quicker than a minute for our two fighters! Back to the action.

A swing and a miss from Krakakos.
Za moves forwards but Krakakos connects with a nice, crisp jab.
Krakakos throws a chopping leg kick but Za manages to avoid taking any serious damage.
Krakakos throws a head kick that misses and slips in the process. He scrambles back to his feet and the fighters circle.
Za is looking to wear down Krakakos with body shots, infact he's throwing more body shots than head shots at the moment.
Za shoots in but no luck this time.
Za checks a low kick from Krakakos.
Krakakos misses with a half-hearted attempt at a head kick.
Krakakos looks to score with a jab to the body but Za is just out of range.
Krakakos connects with a crisp jab.
Krakakos is using his reach advantage to land shots from outside his opponent's range.
Krakakos throws a leg kick that misses.
Like a baseball bat into the meat of his leg there - nice leg kick by Krakakos.
Za shoots in for a takedown. "I don't think so" says Krakakos as he avoids it easily.
Krakakos scores with a sloppy right hand. Za should have avoided that one.
Fantastic stuff here - a very entertaining period of action, which has drawn cheers from the crowd.
Krakakos misses with a right hand
and Za counters with a nice uppercut.
Za takes one on the chin but seems OK.
Ai Za's cut is getting worse.
Krakakos has used his reach advantage pretty well so far tonight.
That's one minute gone in the round.
Za misses with an uppercut
and Krakakos counters with a lovely straight right hand!
Krakakos is looking to take this fight into the clinch.
Krakakos throws a hard body shot but it just misses.
Krakakos takes one on the chin but keeps coming.
Za misses with a hook.
Za avoids the body shot from Krakakos.
Krakakos doesn't manage to clinch there - Za circles away.
Krakakos uses decent footwork to sidestep a right hand from Za.
Tomura Krakakos seems to be getting the better of the standup.
Krakakos ducks under a wild hook from Za.
Za changes levels and drives through with a really nice takedown into side control. Krakakos looks really pissed at himself for not defending that better.
Za throws a strike aimed at the side of Krakakos's head but Krakakos avoids it well.
Krakakos taking a bit of punishment here - Za scoring with strikes.
This has been an exciting period of action!
Krakakos struggling a bit here.
Za is looking to take a break and control but Krakakos is keeping him honest, looking to work from the bottom.
That's two minutes gone in the round.
Za working away.
Krakakos isn't going anywhere.
Za working hard here to secure a kimura but he's not really in the right position for it.
Krakakos wants to escape from the position here - easier said than done!
Za lands an elbow.
Za lands a knee to the body and follows it up with some ground and pound to the head. That will wear Krakakos down.
That's three minutes gone in the round.
Za thinks about going for a far side armbar but bails out and retains the dominant position instead.
Za is looking for a kimura. He might have it! No, Krakakos has escaped the position, nice work there.
Krakakos regains half guard.
Za is trying to work for a kimura. This could be trouble! No, Krakakos has managed to free his arm - good work.
Za not landing any meaningful shots this time.
Krakakos wants to control but Za is keeping busy.
Za trying to control from half guard but Krakakos is working away.
Krakakos manages to get to full guard.
That's four minutes gone in the round.
Za is just sitting in guard, looking to avoid any submissions.
Krakakos utilising some decent striking defenses from the guard, preventing the ground and pound.
Krakakos working the defensive guard well to avoid strikes from Za.
Krakakos is trying to keep Za in close.
Za trying to pass the guard but can't manage it just yet.
The crowd are going absolutely nuts as the round comes to an end - what a fantastic round of action!
Za throwing shots from guard but he's hitting more mat than opponent.
Za thinks about going for a leg but decides against it, in order to maintain the position.
The crowd are loving this. Great action here.
Krakakos looking for a sweep. Not yet Krakakos, not yet.
And thats the end of the round the fighters go back to their corners.
That was a close second round but I would say that Ai Za will probably get the nod.
The cut man is working on Ai Za's cut.
The referee calls time. The cornermen exit stage left and we're back to business.

Krakakos throws a big shot that misses.
Krakakos fakes a jab and then connects with a hook.
Krakakos ducks under an overhand right and circles away with a smile on his face.
Nice defenses there by Za.
Krakakos fakes a jab and then connects with a hook.
Krakakos connects with a solid leg kick.
Good standup being displayed there by Krakakos as he connects with a hook.
Krakakos scores with a slapping inside leg kick.
We've seen a great period of action over the last minute or so - credit to both fighters for going all out!
Krakakos throws a hook to the body but it doesn't connect.
Za swings wildly with a right hand that was never going to find it's target.
Za steps to the side to avoid the strikes from Krakakos.
Krakakos ducks under a wild hook from Za.
Krakakos's jab looks to have found its range, popping Za under the eye.
Ai Za's cut is bleeding quite badly. He's got to try and protect it.
Krakakos paws at his opponent with the jab and then lunges in with a straight, right on the button.
Tomura Krakakos seems to be the more aggressive standup fighter in this bout.
Krakakos connects with a lovely right hand, straight down the pipe.
Za shoots in with a takedown attempt and he has Krakakos pinned against the cage. Krakakos gets the underhooks and manages to circle away.
That's one minute gone in the round.
Nice sprawl there from Krakakos as Za shoots in.
Za moves his head to the side to avoid a jab but walks straight into a cross.
Krakakos takes a swing at Za's ribcage but misses.
Krakakos is the aggressor but that punch slipped nicely by Za.
A cross from Krakakos lands.
Za misses with a straight right.
Krakakos tries to land with a swinging hook to the body but Za was well out of range. Poor timing from Krakakos.
Za thows a body shot but no joy.
Krakakos looks to land a combination but Za avoids it well.
Krakakos dips to his left and cracks Za with an uppercut!
Za closes the distance and after a bit of a stuggle, scores a takedown into Krakakos's guard.
Krakakos wants to sweep but no luck.
Ai Za overall seems to be getting the better of the ground position in the fight so far.
Za trying to control but Krakakos is working from the bottom.
Za has been looking to land a fair amount of strikes on the ground. He might be looking to soften his opponent up in order to work for a submission.
That's two minutes gone in the round.
The fans in attendance giving it up for the two fighters, who have really let it all hang out in the last minute or so!
Za tries to free his leg and advance position but Krakakos is retaining full guard.
The ref warns both fighters not to hold the cage as they work up against the meshing.
Krakakos seems keen to control rather than go for a submission, at least for now.
Krakakos lands a beautiful switch and he's in full mount! That could spell trouble for Za!
Krakakos tries to control but Za wriggling away.
Za bucks up and manages to get a nice reversal! He's in guard on the top - nicely done!
That's three minutes gone in the round.
Krakakos looking to control.
Za lands a couple of elbows.
Za looking to sit in guard and control but Krakakos gets the butterfly guard and sweeps. He's now in the guard on the top.
Za trying to control the position.
Za looking for submissions off his back, moving his hips, looking for an opening.
Za throwing his legs up looking for a triangle.
Krakakos is looking to stand up but Za won't let him.
That's four minutes gone in the round.
Krakakos postures up.
Za might be looking to lock onto one of his opponent's long limbs for a submission, whilst we're on the ground.
Za has a closed guard, preventing Krakakos from standing up.
Za is trying to control the position from the bottom.
Krakakos wants to pass the guard but Za is keeping the position.
Za is trying to control the position from the bottom.
The crowd are going absolutely nuts as the round comes to an end - what a fantastic round of action!
Krakakos wants to get up but he can't break Za's closed guard. He needs to be careful trying to break the legs open, as he's open to submissions here.
And thats the end of the round the fighters go back to their corners.
Tomura Krakakos really dominated that round.
The cut man is working on Ai Za's cut.
The referee calls time. The cornermen exit stage left and we're back to business.

Za shoots in for a takedown from distance. He catches Krakakos napping and manages to drive through into side control!
You can see the frustration on Krakakos's face as Za controls the position.
We get told so often about how wrestlers don't like to be on their backs. Let's see if Krakakos can do anything to dispel that myth.
Krakakos is not content to let Za control the position.

Krakakos sneaks out the side door and pushes Za away - he's back to his feet. The crowd show their appreciation for the escape.
Krakakos throws a body punch but Za moves out of range.
Za shoots in for a takedown. "I don't think so" says Krakakos as he avoids it easily.
Za fails with a takedown attempt from distance.
Krakakos looks to score with a jab to the body but Za is just out of range.
A jab from Krakakos misses.
Krakakos throws an overhand right that lands on Za's shoulder, as Za tries to avoid the shot.
Krakakos lands with a shot to the body.
Krakakos fails to land with the punch combination there - jab, cross, hook, miss, miss, miss.
Krakakos tries a head kick but it misses.
That's one minute gone in the round.
Krakakos stuffs a takedown. It's all about dictating where the fight takes place and Krakakos wants it to stay on the feet.
That's three failed takedown attempts in the round for Ai Za. That's going to take a lot out of him.
Za fails with a takedown attempt from distance.
Za lands with a nice low kick. That'll leave a bruise.
Za shoots in for a takedown but Krakakos shows good takedown defense there and keeps this one on the feet.
It's got to the stage where if one of these guys blows hard enough, the other might fall over.
Krakakos moves into range and lands a nice leg kick.
Za shoots in for a takedown and gets it. Let's see what he's got on the mat.
Za throwing strikes but missing.
Za thinks about going for a leg but decides against it, in order to maintain the position.
Krakakos wants to stand and escape but Za is having none of it.
Za thinks about going for a leg but decides against it, in order to maintain the position.
Krakakos is working from a closed guard but he's struggling to control his opponent.
That's two minutes gone in the round.
Krakakos manages to land a sweep and now he's in mount on top!
Za is desperately trying to improve his position but Krakakos has a good base and remains in mount.
This is a great period of action - very entertaining stuff!
Za tries to hold on but Krakakos pushes him away.
Za keeping his composure momentarily, calmly looking to get back to half guard.
Krakakos content just to control the position here.
That's three minutes gone in the round.
Za wants to control but Krakakos is having none of it.
Krakakos can't quite control the action as he would like just now, as Za is looking to escape.
Za can't escape the position.
Za throws a strike but has given up his back in the process.
What can Za do to escape this position? He's going to have to figure it out pretty quick if he wants to stay in the fight!
That's four minutes gone in the round.
Za manages to reverse the position and now he's in Krakakos's guard. Nice work there by Za.
Krakakos working a defensive guard here.

The ref stands the fighters back up. Tomura Krakakos was stalling too much, according to the referee.
Za misses with a takedown attempt - Krakakos sprawls well and throws a nice strike on the way out which just misses.
Krakakos lands with a cross.
Za throws a predictable looking body shot
and Krakakos counters with a thumping low kick.
Za slips a straight right by Krakakos.
As the round comes to an end the crowd are showing their appreciation for a great round of action.
Krakakos scores with a jab to the jaw of his opponent.
This has been an exciting period of action!
Krakakos stuffs the takedown.
Za steps to the side to avoid the strikes from Krakakos.
Krakakos fakes a couple of low kicks, before throwing one on the third attempt. It connects and Za has to reset his feet before getting ready to engage.
And thats the end of the round the fighters go back to their corners.
Tomura Krakakos dominated that fourth round.
The cut man is working on Ai Za's cut.
The referee calls time. The cornermen exit stage left and we're back to business. So, we enter the final round. Let's see if either fighter can bring us a finish, or whether we're going to the judges scorecards.

Krakakos lands a lovely overhand right.
Krakakos uses some good footwork to avoid the body shot by Za.
Krakakos connects with a single shot there.
A left and a right from Krakakos both land. Nice combination.
Za dodges the punch combination from Krakakos.
Za throws a hook but Krakakos avoids it easily.
Za misses with a body shot. Nice footwork from Krakakos.
Za looks like he's developed a pretty tasty lump over his left eye. He'll need to avoid taking much more damage to that.
Za slips under a jab from Krakakos.
Za moving in and out of range nicely, whilst landing the scoring shot.
Za throws a right and a left that Krakakos avoids nicely.
Krakakos closes the distance and lands a one-two.
The fans in attendance giving it up for the two fighters, who have really let it all hang out in the last minute or so!
Za moves out of range of the strikes.
Krakakos takes a big uppercut there. He seems a bit wobbly but no, he's OK.
Krakakos slips under a jab.
That's one minute gone in the round.
Za shoots in looking for a single leg takedown. Krakakos is trying to defend but Za finishes it well and ends up in half guard. Let's see if he can advance position further.
Za frees up his trapped foot and advances to mount.
Za looking to control but Krakakos is working nicely, looking to advance position himself.
Krakakos can't escape the position.
Za is in full mount, looking to secure a guillotine but Krakakos is surviving well by controlling Za's body position as best he can.
Krakakos tries to buck Za off but he can't manage it.
Krakakos tries to reverse the position but Za maintains control.
That's two minutes gone in the round.
Za tries to control but Krakakos wriggling away.
Krakakos wants to hold on but Za pushes him away.
Za thowing shots but they're missing.
Za sitting in mount, just looking to control for the moment.
Za pausing momentarily but resumes with a couple of decent strikes that do a bit of damage.
Wooooo! Give it up for these two warriors! They are putting on a show!
Krakakos is writhing around trying to get back to his feet.
Za lands a heavy elbow.
Za working the ground and pound effectively.
That's three minutes gone in the round.
Za misses with a series of strikes from mount. He'll no doubt be working on his ground and pound when he gets back to the gym.
Krakakos can't escape the position.
Krakakos is wobbling all over the place through exhaustion. Will he make it to the final bell?
Za punching from mount but Krakakos doing a good job of avoiding damage.
Za is looking to secure an arm. He's managed it! He's pivoting for an armbar - that looks tight! But Krakakos has managed to get out of it and now he's in a dominant position. Nice work from Krakakos!
Za is looking for a guillotine. You can't force these things though and Krakakos defends well.
Za looking for a sweep. Not yet Za, not yet.
That's four minutes gone in the round.
Za is trying to keep Krakakos in close.
Za working from the bottom, still in full guard. He's managed to get a loose triangle. Krakakos doesn't seem to be doing much to defend here, obviously he feels comfortable in the position. Krakakos manages to throw the legs off his shoulder and he's back into guard - no problem.
Za wants to sweep but no luck.
Krakakos is looking to stand up but Za won't let him.
Za trying to control the position.
Za keeping moving, preventing Krakakos from controlling successfully.
Krakakos must be cautious of submissions here, given that his opponent has the superior Jiu Jitsu.
The crowd are going absolutely nuts as the round comes to an end - what a fantastic round of action!
Krakakos looking to pass the guard.
This has been an exciting period of action!
Za has managed to work for a loose triangle. I think Krakakos should be able to defend this one pretty easily though. Oh, Za has tightened it up now! Krakakos should have reacted faster there - he's in big trouble and yes, he's tapped out! This one is all over!
Ladies and gentlemen, after 4:58 of round 5, we have a winner by way of Submission (Triangle). Ai Za!
Ai Za retains his light heavyweight title!
An out of breath and clearly excited Ai Za thanked Rebel Pride Clothing. Everything in STOCK $5 for their help and support (and free stuff they sent him).
|
|
|
|
|
|
|
|
|
|
|
|
|
|
|
|
|
|
|
|
|
|
|
| S |
C
A |
G |
S |
C
B |
G |
|
S |
C |
G |
|
energy
A | B |
|
hype
A | B |
|
pop
A | B |
|
mgr
A | B |
|
FIGHT
RATING
100% |
|
|
|
|
|
|

